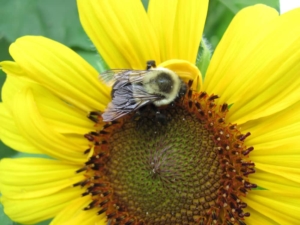
Those pesky critters that buzz by, causing us to dance and flap our arms when we are outside, are far more than a mere annoyance. We don’t give these tiny powerhouses the credit they are due.
Native pollinators such as bees, butterflies, flies, moths, beetles, and bats are essential for human survival but their populations are in a serious decline. Our fuel, food, drugs, and fiber are directly and indirectly taken from plants that depend on pollinators for their existence. Some have estimated that one out of every three to four mouthfuls of food we eat results from the actions of pollinators. Pollinated crops contribute an estimated $20 billion to our economy each year. Native pollinators control the healthy function of our natural ecosystem. The documented decline of native pollinators, as well as that of the introduced European honeybee, concerns the scientific community. This decline results from the fragmentation and destruction of native habitats which has reduced the food sources for many native pollinators. The traditional corridors of nectar- and pollen-rich plant sources have been destroyed by development and changes in land use. Isolated habitats are further degraded by non-native and invasive species. Misuse of pesticides and the introduction of non-native pollinators have contributed to the extinction of many of our native species.
The bright side of this issue is that we can help our native essential pollinator populations by choosing to plant nectar- and pollen-rich vegetation species that are native to a specific area that will provide nutrition and cover. Remember to include plants that provide food for the larval stage and also to provide a water source. The flowering plants that are native to your area have co-evolved along with their pollinators to provide the perfect combination of petal shapes, fragrances, and colors for their mutual benefit. Make sure to plant a variety of native plant species of mostly perennials to ensure an appropriate and dependable supply of nectar and pollen for the bees, butterflies, and other pollinators throughout the spring, summer and fall. Select nectar-rich species with clusters of brightly colored tubular florets and plant them in groupings rather than as individual plants. Avoid cultivars of plants grown mainly to produce larger flowers as these often do not have the pollen or nectar that the pollinators require. Bees are attracted to purple, blue, and yellow flowers and hummingbirds prefer red and orange flowers. Try to include night-blooming varieties to attract bats and nocturnal moths. Use pesticides sparingly or not at all. Have patience, most perennials will take one or two seasons, with good care, to bloom. Read more here>https://bbbseed.com/pollinators/about-pollinators/
Thoughtful plantings, whether in pots and containers or backyard gardens and a conservative, integrated pest management system, can create and establish a stable ecosystem that is pollinator-friendly.
Vermiculture is more than just a funny word, it is the process of using worms to decompose food waste. The worms turn the waste into nutrient-rich material that will ensure healthy & happy plant growth. It is nature’s way of recycling! This method is a sustainable way to save energy, water, landfills and it reduces the need for synthetic fertilizers. You can feel good about not throwing your kitchen scraps down the kitchen disposal or contributing to the over-crowding of our landfills. You can even have a worm bin indoors without any odor or mess!
How to Get Started on Your Indoor Worm Bin…
You Will Need:
Cardboard (Optional) – Can be used to cover bedding to lock in moisture Rubbermaid or Wooden Container with Lid – Recycled containers work great, just make sure that they have never been exposed to chemicals. A 1’x2’x2’ bin can hold kitchen waste from families of 2 people. A 1’x2’x3’ bin can hold kitchen waste from families of 4 to 6 people. You don’t want a very deep bin because worms feed in the top layers of bedding. Bedding (Newspaper) -Black ink on newspapers is made of Carbon and oils and is not toxic to worms. Colored ink should not be used. Yard Waste (Optional) -Decaying leaves from your yard makes a great composting material to add to your worm bin. A handful of Soil – Provides the grit that worms need to break down food in their gizzards because they don’t have teeth. Red Wiggler Worms – Number of worms depends on your daily food waste. One pound of worms can eat ~3.5 lbs. of waste per week. Moisture – To wet down your bedding & worms also need moisture in order to breathe.
Step by Step Instructions:
Step 1:
Use a drill or hammer & nail to poke 1/8-1/4” air holes in your bin 1 inch apart. You want some holes on the bottom for drainage, on the lid of the bin and along the top of the four sides. Make sure to raise the bin on bricks or wooden blocks with a tray underneath to catch the excess liquid that can be used as a liquid fertilizer for your plants.
Step 2:
Shred newspaper (black & white ONLY) into 1-inch strips. Moisten strips and squeeze out excess water. The newspaper should not be soggy, just damp. Fill ¾ of the bin with moist shredded newspaper, decaying leaf litter (optional) and a handful of dirt and then mix it all together. You want the bedding to be fluffy not packed down. Let bin sit for a day before you add your worms.
Step 3:
Separate your vermiculture worms from the packing material that they came in. Scatter them in your bin. Feed them slowly at first so they can acclimate to their new environment and to monitor the rate at which they break down waste.
Step 4:
Feed your worms foods that they love and avoid the foods that they dislike (listed below). Don’t forget to harvest your compost every couple of months because your worms will continue to break down their bedding material.
Step 5:
After you have fed your worms for 3-6 months you will see some worm compost/castings on the bottom of your bin. It will be very dark in color and extremely rich in nutrients. You can harvest what is there or you can wait until your bin is really full. Worm castings are toxic to worms, so if you have mostly compost and not a lot of food or bedding left in your bin, then it’s time to harvest. Whatever method you choose, the key to harvesting is to separate your worms from the compost. Your worms will not survive if you put them in your garden with the compost.
To harvest your compost, you have a couple of different options:
Your worms will be in the top 1/3 of your bin. You can remove the top 1/3 of worms, bedding & food and set that aside. Once you remove the compost from the bottom of your bin, then you can put your worms and remaining bedding/food back into the bin, add fresh bedding and resume feeding and maintaining your bin.
If you have a larger bin, then you can push all of the material in your bin to one side and add new material to the empty half of the bin. After a month or so, when it appears that the worms have moved over to the new side, then you can harvest the compost from the other side.
Spread the contents of your worm bin out on a plastic sheet/table cloth in the sun or under a bright light. Your worms will start moving down into the compost to get away from the light. About every 20 minutes you can scoop up the top layer of compost and the worms will move down again. Repeat this method for a couple of hours until you are left with a wiggly pile of worms that have been separated from the compost. Return the worms to their bin with fresh bedding immediately.
*You can’t save all of the worms, but using one of the three methods listed above will help to ensure that you save the majority of them!*
Here is an instructable with more information and photos:
https://bbbseed.com/wp-content/uploads/2024/08/BBB-Seed-Logo-2024.png00Mike Wadehttps://bbbseed.com/wp-content/uploads/2024/08/BBB-Seed-Logo-2024.pngMike Wade2019-01-01 09:28:532021-02-09 10:36:27Worms in my Kitchen?
Many of us have tried our hands at the new Victory Gardens and are getting back to our roots in our community’s Grow Local movements. With the flow of garden produce increasing each minute, we have donated excess to the local Community Food Share programs and, we are beginning to be mildly panicked at the thought of all of that fresh produce going to waste solely because we can’t use it fast enough.
With our neighbors slamming their doors when they see us heading their way with an armload of our best organically grown zucchinis we find ourselves wishing the bounty could be spread out over the year and last well beyond the late summer flush. More and more people are turning to home food preservation as a way to keep the bounty of their hard-earned, organic, heirloom, non-genetically modified gardens coming.
Now is the time to start your research, before the tidal wave of tomatoes sweeps you away. The number of food preservation methods is exciting and a bit daunting. Drying foods is one of the oldest methods of preserving foods. Also, canning, freezing, pickling, curing and smoking, and fermenting are ways to keep your pantry full during the winter.
What could be more fulfilling than pulling out a sparkling jar of homemade salsa when the snowflakes are flying to bring back warm memories of those beautiful heirloom tomatoes growing on the vine? CSU Extension has a couple of great publications on how to dry vegetables and fruits with all that you need to know about nutritional values, methods and safety precautions.
Also in the extension’s Nutrition, Health and Food Safety publications, are fact sheets on smoking and curing meats and making pickles and sauerkraut and preserving without sugar or salt for special diets. Check out the one on safe practices for community gardens for tips on ensuring safe food for all gardeners.
With all of our efforts to ensure that we each have gotten the most nutritious value from our fresh produce, it would be prudent to search for the newest scientific research into home food preservation methods. We want to eat healthy fruits and vegetables even when they are not in season. The USDA encourages us to use safe canning methods. Scientific developments have changed recommendations over time. Always use up-to-date methods and do not just rely on the practices of past generations. A great place to start is by exploring the National Center for Home Food Preservation website from the University of Georgia.
Publications and resources are available at the center’s website with useful tips for proper preservation techniques. Also, not to be missed is an awesome, free, online self-study course called;
Preserving Food at Home: A Self-Study
Principles of Home CanningIf you are new to canning you should definitely have this publication at hand.
Preserving homegrown food can be an economical and fulfilling way to enjoy quality, nutritional food from your garden all year long. So when your heirloom tomatoes, squash, onions, peppers, beans, garlic, beets, and turnips cover every surface in your home and garage and the refrigerator is brimming with more fragile produce, you will be fortified with the knowledge necessary to safely preserve the bounty for the time when the snowflakes will inevitably fly.
We may request cookies to be set on your device. We use cookies to let us know when you visit our websites, how you interact with us, to enrich your user experience, and to customize your relationship with our website.
Click on the different category headings to find out more. You can also change some of your preferences. Note that blocking some types of cookies may impact your experience on our websites and the services we are able to offer.
Essential Website Cookies
These cookies are strictly necessary to provide you with services available through our website and to use some of its features.
Because these cookies are strictly necessary to deliver the website, refusing them will have impact how our site functions. You always can block or delete cookies by changing your browser settings and force blocking all cookies on this website. But this will always prompt you to accept/refuse cookies when revisiting our site.
We fully respect if you want to refuse cookies but to avoid asking you again and again kindly allow us to store a cookie for that. You are free to opt out any time or opt in for other cookies to get a better experience. If you refuse cookies we will remove all set cookies in our domain.
We provide you with a list of stored cookies on your computer in our domain so you can check what we stored. Due to security reasons we are not able to show or modify cookies from other domains. You can check these in your browser security settings.
Google Analytics Cookies
These cookies collect information that is used either in aggregate form to help us understand how our website is being used or how effective our marketing campaigns are, or to help us customize our website and application for you in order to enhance your experience.
If you do not want that we track your visit to our site you can disable tracking in your browser here:
Other external services
We also use different external services like Google Webfonts, Google Maps, and external Video providers. Since these providers may collect personal data like your IP address we allow you to block them here. Please be aware that this might heavily reduce the functionality and appearance of our site. Changes will take effect once you reload the page.
Google Webfont Settings:
Google Map Settings:
Google reCaptcha Settings:
Vimeo and Youtube video embeds:
Other cookies
The following cookies are also needed - You can choose if you want to allow them:
Privacy Policy
You can read about our cookies and privacy settings in detail on our Privacy Policy Page.