How to Share Your Plant Starts for Profit

Plant Starts

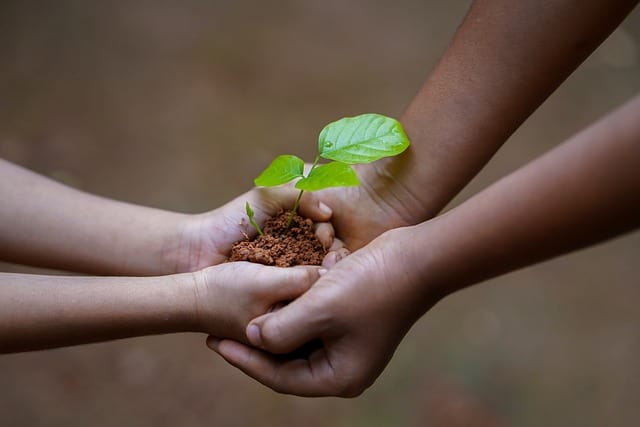
Image by Shameer Pk from Pixabay

by Sandy Swegel

Sharing plants is a simple joy in life. Sharing plants and making money, well that’s even better. Read on to learn how to share your plant starts for profit.

My happy group of gardening buddies first got to know each other because of our great avarice for more seeds. We had all joined a local gardening email list so we could talk more about plants and gardening, but the more we spoke with each other, the more seeds and plants we wanted. Every time someone mentioned a new variety of tomatoes or annual flowers or ground cover, we had to have one of those.

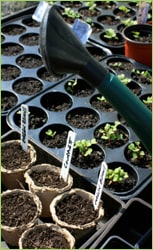
The first year, we decided to meet in person and share seed packets. Armed with dozens of recycled envelopes, we doled out tiny seeds to each other, taking home three Cherokee purple tomato seeds or six cosmos seeds. This quickly became confusing and chaotic and required so many tags in our seed trays. So the next year we decided to become more economical. We’d each buy a packet of seeds and grow out all the plants…and then swap our plant starts. We definitely got more plants than we would have grown on our own and we each had unusual varieties you can’t buy in stores.

But the third year of our avarice proved to be the year we figured out that we could get as many seeds as we wanted…and they practically paid for themselves.  All we had to do was start our seeds and sell 2-month-old plant starts to each other and to the other greedy gardeners who envied our ever more diverse gardens. We learned that anyone can sell healthy organic heirloom tomato starts, especially if you have pictures of last year’s garden.

You can try your own mini plant exchange and sale. We price our seedlings cheap ($1 or $2 at most). I can afford all the heirloom tomato plants I want if I just sell three seedlings for $1 from each seed packet. Throw in some herbs and flowers and soon the plants barely fit in the car. Our little group now has a giant plant sale every May where everyone brings their plants to sell to each other, but thanks to free advertising on Craigslist and neighborhood electric poles, we also sell our humble little plants to the public.

Avarice never ends, of course, and now we have to grow more plants so we can make money so we can afford backyard greenhouses. Last year our small group of about 12 home gardeners sold some $4000 worth of plants that they started in closets and on top of refrigerators just two months before. Not enough to get rich, but enough to buy more seeds, build hoop houses and season extenders, and have a load of precious organic sheep manure delivered to our gardens.

So enjoy your seed shopping and think about swapping some of the plants you start with others. We learned that while there is no end to avarice among gardeners, there is also no end to generosity. It is a great joy to have an abundance of little plants to share with friends and strangers.

Saving Seeds

Saving Seeds from Heirloom VegetablesSaving seeds from heirloom vegetables.

What are “heirloom” vegetables? An heirloom vegetable is a non-hybrid, open-pollinated variety that has been passed down from generation to generation and, in some cases, can be traced back hundreds of years.  These seed lines have been carefully selected to maintain uniformity and consistency for germination.

Heirloom seeds become ‘heirloom’ because they exhibit exceptional traits desired by the gardener.  Often this means the plants are more colorful, flavorful, and unique, or have great germination and vigor.  Often the traits are location-dependent.  Meaning, seeds planted in one garden will not produce in the same manner in another location.  We encourage you to try heirloom seeds, see which have the qualities for your area to become your favorites and make them into your own very special seed line.  Seed saving from heirloom vegetables is easy and fun.

Gardeners have found that as seeds are selected and saved over many years, production is increased and the quality is improved, creating plants that will produce best for that locale and will resist diseases and pests of that locale.  Contributing to genetic diversity strengthens the ecosystem. Historically farmers and local gardeners have created and sustained this rich genetic heritage by learning to save their own seeds from varieties that perform best in their own mini-ecosystems.  The current trend toward mono-crops where only one seed type is used to produce a crop worldwide is eliminating the ability to be able to find genetic variations that will withstand emerging pathogens and climate changes.

Planting your crop:

Start with good Heirloom Seed varieties.  Keep in mind that to allow the plants to produce seed and to allow the seed to fully mature, you will have to allow for a longer growing season.  This can be done by starting plants indoors and arranging for protection from frost in the late season. You will grow some for food or flower harvest and some for seed production.  Fully mature seeds will be viable (able to germinate) and produce vigorous plants.  You may want to do some research on the different flower types for proper pollination techniques and plant with row/species separation in mind, to prevent cross-pollination.

You also may look into caging procedures to isolate species that are in flower at the same time.  By caging different plants on alternate days, you can take advantage of the pollinators to do the work without cross-pollinating your crop.  Cage one plant or group on one day and early the next day, before the bees wake, transfer your cage to a different plant or group.  Some crops are biennial and do not produce seed until the next year, so you will need to determine whether you should leave the roots in the ground over the winter or dig and store them.

There are many publications with detailed information on seed-saving and growing techniques for each species.  “Seed to Seed” by Suzanne Ashworth, 2002 by Seed Savers Exchange, Inc. is a good way to get started. Also, check out these easy instructions for seed saving, written by the International Seed Saving Institute, a non-profit established to teach seed saving.
Why save seeds:

When you grow crops using your own saved seeds from your best plants for next year’s crops, the seeds begin to adapt to the growing conditions (temperature, moisture levels, pests, diseases, and so forth) that exist in your garden.  This adaptation makes your garden stronger over time.  Seeds that are used to grow crops year after year have the opportunity to adapt to incremental climate changes.  As global temperatures change, these plants will have a better chance at survival and productivity.  A single plant from a single seed can produce dozens or hundreds of seeds, increasing your seed stock exponentially.  Sharing and exchanging seeds with other gardeners, community gardens or seed libraries helps to increase the diversity of everyone’s collections.

Harvesting and collecting seeds:

When saving seeds from heirloom vegetables, look for favorable characteristics such as; freeze and cold tolerance, heat tolerance, adaptability, winter hardiness, early maturation, vigor (strong germination, and growth), flavor, color, size, texture, etc. Also, look for desirable traits such as; vine or plant type, seed type, and specific disease resistance.  Plan to be ready to harvest the seed as they mature.

– Collecting dry seed:

It’s easy to save seeds from plants that produce pods, husks, and other dry casings such as peas, beans, and flowers.  The technique is called “dry processing” and is faster than collecting seed from fleshy, pulpy fruits such as tomatoes and cucumbers.  Seeds that are dry-processed can be allowed to dry right on the plants unless there is wet weather in the forecast.  Seeds often fall where they may, naturally, little by little.  Often the pods will pop open when you are not around to collect the seed and it will be lost.  Allow the seed pods to remain on the plant in the ground for as long as possible.  Usually, the seed will not continue to mature after the pods are cut from the plant. To collect the seeds easily as the seeds begin to mature, secure paper bags over the seed heads and attach them to the stems of the plants.  As they mature they will drop into the bags.

Separating the seeds from the chaff (dried pods and stems) is called threshing.  Commercial threshing is done by multitasking machines that can harvest, thresh, and winnow the seeds all at once.  For the home gardener, a bag, pillowcase, or small sack is all that’s necessary.  Put the seeds into the bag, secure the ends, and roll it around, lightly crushing and breaking up the pods a bit.  Be gentle so you don’t damage the seeds, but just loosen the chaff.  For tinier seeds, you can just put them on a board and crush them with your fingers.

Then you will need to winnow the chaff from the seeds.  Place the seeds in a bowl and gently blow on them to remove the lighter-weight chaff.  Swirl the seeds around and continue blowing gently until most of the chaff is removed.  Another option is to use a screen or sifter where the holes are smaller than the chaff to simply sift them apart.

– Collecting seeds from pulpy fruits:

Pick the best, most ripe (even to the point of over-ripe) tomato, pepper, cucumber, etc.  Choosing an over-ripe veggie will ensure the seed has fully developed.  If you wait for a frost or freeze before you pick the fruit or veggie, most of the seed will not be developed enough to be viable next year.

Cut open the fruit and scoop out the seeds or for small fruits like cherry tomatoes, simply squeeze the seeds out into a glass jar.   Add a little water and label the jar with the seed variety.  The seeds usually are surrounded by a gel that inhibits germination.   Leave for two to five days to begin fermenting. This will break down the seed coat while killing off many of the harmful bacteria and fungi lurking on the seeds.  Swirl the contents in the jar every day.

When the pulp floats to the top, the seeds are ready for cleaning.  Most of the seeds will have sunk to the bottom.  Carefully skim off the pulp then tip the liquid and seeds into a strainer. Wash the seeds under running water, using the back of a wooden spoon to carefully remove any remaining material stuck to the seeds.  Spread the seeds onto a paper towel to remove most of the water, then transfer them to a non-stick surface such as a dinner plate. Dry the seeds in a warm place out of direct sunlight. It will take two to three weeks for the seeds to completely dry out.

Make sure you label the seeds with their name and the date they were collected immediately after you have finished harvesting each variety.  Excellent record-keeping is your best friend when it comes to seed-saving.  It’s amazing how easy it is to mix up seed varieties!

How long do seeds last?

If you keep your seeds in a cool dry place, your seeds can last for years.  These things are seed killers: excess moisture, excess heat, light, and rodents.  Some seeds last easily for years. Others only last one year before the germination rate goes down.

Here is a chart from the Chicago Botanic Gardens on longevity in vegetable seeds as well as one from Iowa State University extension.

Seeds that have passed their prime for producing viable plants can be used to scatter as a cover crop, for bird seed, for eating, or for cooking (as in herb seeds).

Plant Your Cool Season Vegetables Now

Know Which Crops to Plant and When

by Heather Stone

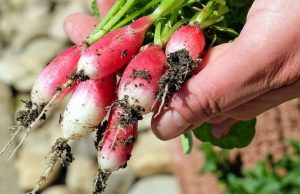
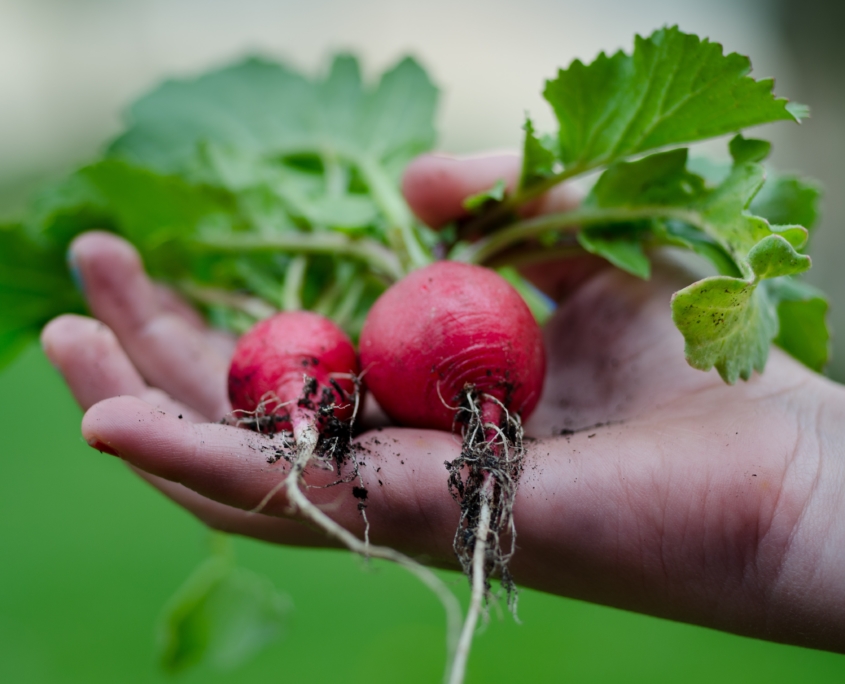
Photo of a hand holding two red radishes.

Photo courtesy of pexels – skitterphoto 9301 (1)

Mid- August to Mid- September is the prime time to start planning and planting your fall vegetable garden and your cool season vegetables. Even though it’s still hot outside, the nights are getting cooler and the days shorter. Now is the time to get those quick-growing, cool-season vegetables in the ground. For bountiful late-season harvests here are a few guidelines to follow.

-Know which crops to plant and when. Here’s a list of our favorite cool-season vegetables and their days to maturity.

  • Kale should be planted 85 – 90 days before the first frost. The leaves can handle a few light touches of frost and become sweeter each time.
  • Carrots can be planted 80-85 days before frost.  They can be harvested when young and tender.  Even after the cold temperatures shrivel the tops, they can be dug, sweet and juicy, from the ground throughout the fall.
  • Beets can do double duty with green tops for salads and tasty roots as well.  Plant seeds about 65-70 days before frost, depending on the type you choose.
  • Leafy greens such as spinach and leaf lettuces, arugula, mustard greens and Swiss chard all do best in the cooler temperatures of fall. Plant seeds about 50-60 days before frost depending on the type of green chosen. These can be harvested when young and immature for delicious baby greens.

    Photo of leafy green seedlings.

    Photo courtesy of pexels by kaboompics 5809

  • Radishes are always great to spice up salads. These are fast-growing and can be planted 30-35 days before the first frost. Pull them when young and tender.


-Keep moist. The garden will dry out more quickly in the warm days of late summer than it did in the spring. Keep a close eye on new plantings to make sure those seeds or seedlings stay well-watered. A light covering of grass clippings or straw can serve as mulch, helping to retain moisture. Using a light row cover over newly planted areas can also help retain moisture, provide shade and protect against light frosts further down the road.

Fertilize once a week with an organic fertilizer with nitrogen and enjoy delicious salads and veggies all fall long.

Four Tips for Growing Your Best Watermelons

Gardening Tips

by Heather Stone

Picture of a just-cut red watermelon

Photo courtesy of pixabay

If you have space, make room for a hill or two of watermelons in your garden. They are easy to grow and like any fruit and vegetable, they just taste better when they are plucked straight from the garden. Besides, nothing says summer quite like a juicy slice of watermelon.


Here are a few tips for successfully growing watermelon.


    1. Choose the right variety for your climate

Most watermelons need 80-95 days to ripen, but some varieties require even longer. Choose one that works for your area. You can get a head start by starting seeds indoors about three weeks before your last frost date or by purchasing established plants. Plant outside when all chances of frost have passed and the soil temperatures are in the 70’s.


  1. Give them room to roam

Watermelons need lots of room to ramble. It is not uncommon for vines to reach up to 20 feet in length. The vines don’t like to be regularly moved so pick a spot where you can let them roam freely.


  1. Know when to water

Keep plants moist when starting off and until fruits begin to form. Watermelons are fairly deep-rooted plants, so in some climates, you might not need a lot of extra moisture except during extended dry periods. When watering, water at the roots and try to avoid getting the leaves wet. This helps to keep down on the spread of fungal diseases. Once the fruit has begun to set, experts say to hold off on the water to concentrate the sugars in the fruit, giving you a sweeter melon.


  1. Know when to harvest

    Tips for growing watermelon.

    Photo courtesy of pixabay

It’s not always easy to know when your watermelon is ripe. To start, check the “days to harvest” of your variety and begin to check for maturity when plants have reached that age. The color of the bottom spot where the melon sits on the ground will turn from white to yellow as the melon matures. Also, watch for the rind to turn from a bright, slick appearance to a more dulled look. The skin or rind should be tough enough that a thumbnail won’t pierce the skin. After picking, chill for best flavor.


Cucumber Growing Guide

Tips for Successfully Growing Cucumbers

by Heather Stone

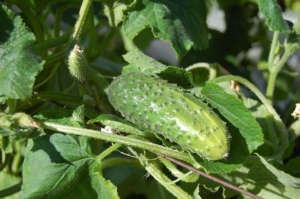
Boston cucumber on the vine. Planting cucumbers.

photo courtesy of pixabay

Once the warm weather hits it’s time to start thinking about planting cucumbers. Nothing beats a fresh cucumber straight from the vine! Cucumbers are fairly easy to grow and are an excellent choice for the new gardener.


Cucumber growing guide:

Cucumbers are very frost tender so don’t plant seed or transplant starts until two weeks after your last frost date or when soil temperatures reach at least 70 degrees Fahrenheit.

Your soil should be well-drained and fertile. Work 1-2” of compost into the top 4-6” of your soil before planting.

Pick an area of your garden that receives at least 6 hours of sunlight. If days regularly reach temperatures of 90 degrees or more provide some afternoon shade.

Plant seeds in groups of 4-6, 1/2” below the soil surface in rows or hills 3’ apart. Most cucumber seeds germinate in 4-7 days. Providing a trellis for the plants to climb frees up garden space and improves airflow around the plants reducing fungal and bacterial diseases. Trellising also keeps the fruits off the ground away from moisture and critters and makes them easier to harvest.

Cucumbers are themselves 95% water so moisture is of key importance when growing cucumbers.  Cucumbers need at least 1” of water a week.  If plants inadequate moisture the fruit will often develop a bitter taste. To help retain moisture and keep the weeds down place mulch around your plants.


Harvesting

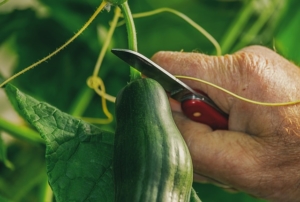
Cutting a cucumber off the vine. Cucumber growing guide.

photo courtesy of pixabay.

Pick cucumbers when they have reached their mature length, depending on the variety, and before they begin to turn yellow. Cut or gently twist the fruit from the vine using two hands so as not to damage the plant. When the weather gets warm, check plants daily for ripe cucumbers. Pick often so plants continue to produce. Pick fruits in the early morning for the best flavor and texture. Cucumbers will keep for 7-14 days in the refrigerator.


Varieties

If you are thinking of planting cucumbers, we carry four varieties of cucumber seeds here at BBB Seed. Each is excellent and deserves a place in the vegetable garden.


Spacemaster 80

Spacemaster 80 is an excellent compact cucumber variety. At only 18-24 inches this short but hardy cucumber is a great choice for the small garden or for growing in a container. The dark green fruits reach 7-9 inches in length, have great flavor and are never bitter. A heavy yielder this cucumber is also resistant to mildew, scab and cucumber mosaic virus.


Boston Pickling

Boston Pickling cucumbers bear small, blocky fruits with firm flesh and tender skin that are ideal for making all types of pickles. This long-standing variety, first available in the 1800s is also great used as a slicing cucumber when allowed to reach full size.


Marketmore 76

Marketmore 76 is one of the finest slicing varieties on the market. A standard for the home garden. These vigorous plants produce 8” dark green, delicious fruits.


Suyo Long

An heirloom variety from northern China, Suyo Long grows to an amazing 10-18” long. They are almost seedless, burp-less and incredibly heat resistant. They are great for slicing and fresh eating.


Okra Is Not As Yucky As Some Might Think

History of Okra and Okra Recipes

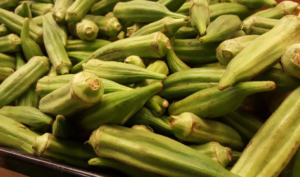
By Engrid WinslowA pile of green Okra pods.

If you grew up in the South, as I did, you loved okra as an essential ingredient in gumbo. If you didn’t then you might think it is “slimy” but okay if coated in batter and deep-fried. Well, you have been treating this amazing vegetable all wrong. First of all, the plants are really pretty and the flowers are fabulous, looking a lot like a hibiscus bloom, and can be grown as a 3-4 foot tall annual flower.  Try our Clemson Spineless Okra Recipes!

Okra probably originated somewhere around Ethiopia and was cultivated by the ancient Egyptians around the 12th century B.C. Its cultivation spread throughout North Africa, Arabia and the Middle East. The seed pods were eaten cooked, and the seeds were toasted and ground and used as a coffee substitute.

The plant spread around the shores of the Mediterranean Sea and eastward and was introduced to the Americas by ships plying the Atlantic slave trade in the mid-1600s when its presence was recorded in Brazil. It was further documented in Suriname in 1686. Okra may have been introduced to southeastern North America from Africa in the early 18th century. By 1748, it was being grown as far north as Philadelphia. Thomas Jefferson noted it was well established in Virginia by 1781.

It’s best to grow okra yourself if you can (or purchase them directly from a farmer) to ensure that the pods are fresh, tender and not overly large. Okra pods are best when harvested at 1-2 inches. Any larger than that and they are fibrous and not so tasty. The plants are easy to grow in most climates as long as they are planted after the danger of frost is past. They are prolific, grow quickly, and several plants can produce a handful or two of the pods nearly every day.

Store them in the vegetable bin of your refrigerator for up to 4 days until you have enough to prepare one of these great okra recipes. Okra is especially adept at soaking up surrounding flavors, making great for Indian and Asian dishes. Give okra a second chance and you might just be surprised.

One of the best ways to cook okra is to toss the pods with a little olive oil, salt and pepper and spread on a rimmed baking sheet. Roast at 400 degrees for 12- 15 minutes, shaking pan half-way through until the pods are lightly browned on the edges.

Pan-Fried Clemson Spineless Okra with Indian Spices

(Serves 4 as a side dish)

25-30 medium-sized okra pods, sliced                     5 TBL butter

¼ tsp ground ginger                                                        ¼ tsp cumin

¼ tsp ground coriander                                                 salt and pepper to taste

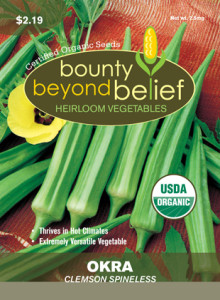
Melt the butter in a skillet, Add okra and spices and sauté until okra is soft, 15-20 minutes. Season with salt and pepper before serving.Organic Clemson Spineless Okra


Picadilly Clemson Spineless Okra

 (Serves 4-6 as a side dish)

2 Qt. fresh okra, chopped                                            1 medium onion, chopped

1 red bell pepper, chopped                                         1 1 lb. can of crushed or chopped tomatoes

¼ tsp sugar                                                                         ¼ tsp olive oil

Salt and black pepper to taste

Sauté the onion and bell pepper in the olive oil for 4-5 minutes on medium heat, stirring frequently until softened. Add the tomatoes, okra, sugar, salt and pepper and cook, covered, over low heat for 45 minutes. Stir occasionally. Check and correct seasoning before serving. May be frozen.

What is your favorite tomato?

Heirloom Vegetable Seeds

by Heather StoneTomato, Cherokee Purple

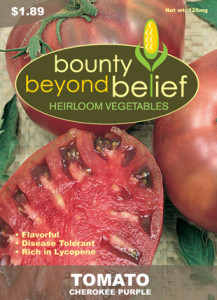
What’s your favorite tomato? All true tomato lovers and growers have a few tomato varieties that they just couldn’t imagine not growing and always recommend to their friends and fellow gardeners. One popular heirloom tomato variety that continues to be a favorite among many and consistently wins taste tests across the country is the Cherokee Purple tomato.

Cherokee Purple tomato is a beefsteak style tomato whose skin is a dusky rose-red color. When sliced its interior is an even darker red. The flavor is described as a “balance of sweet, acid and savory with a hint of smoke.” Cherokee Purple is best eaten fresh on sandwiches or in salads.

With a name like “Cherokee Purple,” there has to be a story there somewhere. Craig LeHoullier, a grower of heirloom tomatoes, connoisseur and author of the book Epic Tomatoes is who we can thank for bringing this delicious tomato to the masses. In 1990, Craig received a package from John D. Green of Sevierville, Tennessee containing seeds of an unnamed purple tomato.

John explained that his neighbor had shared the seeds with him and that her family had been passing along the seeds since the late 1800s when they were originally received from Cherokee Native Americans. Craig grew the seeds in his 1991 garden and gave this beauty the name Cherokee Purple. Next, Craig passed the seeds on to the folks at Southern Exposure Seed Exchange. They loved the taste of this tomato and first listed the seed in their catalog in 1993 and its popularity has continued to grow since.

Want to try this delicious variety in your garden this year? Grab some Cherokee Purple seeds today, they might just become your new favorite tomato!

Don’t Pass On Peas

Tips for Successfully Growing Peas

by Heather Stone

Green Sugar Snap peas on the vine.

Image by Reginal from Pixabay

Plant Green Peas for one of the first crops in the spring. As soon as you can stick your finger into the soil you can plant peas. Whether you plant shelling, snap or snow peas this early crop loves the cool weather of spring, producing tender pods that are hard to resist.  More often than not, they are eaten straight off the vine right there in the garden, very few making it to the kitchen. Every year I always wish I would have planted more.

Planting green peas should happen as soon as the soil can be worked, about 4-6 weeks before your average last frost date. For best germination, soil temperatures should be around 50 degrees F. Do be cautious of excess moisture. You don’t want your seeds sitting in wet soil.

Before planting, soak your seeds overnight. This will help speed germination. Plant seeds about 1” deep and 2-3” apart in well-loosened soil in a sunny spot in your garden. Peas will also do well in part shade. Give your peas a trellis, as most peas need something to climb on. Keep the area moist until the seeds germinate, on average between 7-14 days.

Green Peas are an easy crop to grow. Keep the plants moist, especially once they start producing. When they reach 8-12” tall mulch your vines well to keep the soil cool and help retain moisture. Peas grow best in temperatures below 70 degrees F, so plant your seeds early. Once temperatures reach 80 degrees the vines tend to stop producing.  

When the peas begin to ripen, harvest daily and be sure to use two hands to pick. Use one hand to hold the vine and the other to pick the peas. This way you will avoid damaging the tender vines. For the crispiest peas, pick in the morning after the dew has dried. Peas will last about 5 days in the refrigerator (if they make it there) and any extra freeze well.

Like all legumes, peas fix nitrogen in the soil that other plants can use. When your peas are done for the season, remove the vines but leave the roots in the ground. Plant a nitrogen-loving plant in the area that can benefit from the extra nitrogen in the soil.

Don’t wait! Get out in the garden and plant some peas today! Try one of our tried and true varieties such as Sugar Ann, Oregon Sugar Pod or Green Arrow.

Packet of Oregon Sugar Pod Pea seeds. Pea, Sugar Ann Pea, Green Arrow


Go Beyond Iceberg Lettuce

Different Types of Lettuce and How to Use Them

By Engrid Winslow

There are many different types of lettuce and perhaps you were wondering how to use these various types. Here’s a general description of some different lettuce varieties which will take you beyond the traditional iceberg lettuce followed by a quick tutorial on growing them.

Lettuce, Organic Bibb, Speckles Lettuce, Summer Bibb

  • Butterhead

    /Buttercrunch/Bibb/Boston – Any of the “B” lettuces form loose heads of large, softly ruffled leaves that range in color from bright yellow-green to magenta-tipped emerald. They have a slight crunch when you bite in, followed by a melt-in-your-mouth silkiness. The leaves are buttery and slightly sweet. They are perfect for use in sandwiches or salads and the largest outer leaves are great as a wrap for various fillings because of their pliability.


  • Romaine

    forms a long, straight head of crisp leaves with a prominent center stem. They come in the familiar crisp, tall, green heads to shorter and fluffier versions that range from dark red to lime green with red speckles. They can be harvested when young for a tender and delicate salad. They have a mild crunch from the center stem when mature and are the classic lettuce for a traditional Caesar salad since it’s a perfect contrast to the creamy, cheesy dressing. It can also be used as a scoop for dips and holds up on a burger.

Picture of the Tri-color Romaine lettuce package. Lettuce, Organic Romaine, Freckles Lettuce, Dark Green Romaine


  • Oakleaf

    lettuce has unusually shaped leaves that form a loose cluster with tender, crunchy stems. The flavors can range from sweet when young to slightly bitter if left longer to mature. They come in gorgeous colors of green but the dark red is a version high in anthocyanin

with a powerful punch of antioxidants. They are great in salads and when mixed with other lettuce types or on a sandwich.


  • With loose bunches of leaves connected at the base, the loose-leaf lettuces are known as bunching or cutting lettuces. They are typically mild, savory to sweet and crisp-tender. They are generally more heat-tolerant and some, such as Black Seeded Simpson, are slower to bolt than other types of lettuces.

Front of the Red Deer Tongue Lettuce seed packet.

Lettuce, Organic Leaf, Tango


Lettuce, Black Seeded Simpson


One of the best ways to use these lettuces is to combine them with other greens, such as arugula or baby kale in a salad and, lucky you, we have two blends that will do that for you.
Picture of a packet of Gourmet Salad Lettuce seeds.Picture of a packet of Heirloom Lettuce Blend seeds.

All lettuce varieties are very easily started from seed, both indoors and out in your vegetable beds. They take about one week to germinate, depending on temperatures. If starting indoors, be sure the seeds stay moist by spraying them gently from a spray bottle or bottom-watering until they germinate and the seedlings are strong enough to handle overhead watering. A plastic dome over the tray really helps with this.

The seeds are tiny and should be planted with a very light (no more than ¼ inch) layer of soil.  If planted outdoors in cooler temperatures and cold soil they may take longer to germinate. Thin the seedlings to 3 inches apart and pull every other one for early salads leaving the rest (now 6” apart) to reach full size. Successive sowings every 3 weeks in short rows provide these tasty plants throughout the season. All lettuces will bolt and then become bitter in the heat and long days of summer, but you can delay this by mulching to keep the soil cool.

So go beyond iceberg lettuce and let us know how you like these other varieties!

FIVE REASONS TO RELISH THE RADISH

Different Types of Radishes and How to Use Them

By Engrid Winslow

  1. There are two primary types of radish – one hails from Asia (the most common ones are daikon which is large and white) but there is also the large sweet and remarkably pink Watermelon Radish.Photo of Watermelon Radish packet.

Watermelon radishes are delicious raw and can be substituted for a cracker in crudités and they also make a crunchy addition to stir-fries. They are often used in Chinese cuisines with fish dishes because it adds sweetness and counteracts fishy tastes.

2. Radishes are very easy to grow and can be sown in the garden as soon as the ground can be worked. Cover the seeds with about 2 inches of soil and thin them out once they sprout. They germinate quickly and all at once so, to keep them from getting overly large and fibrous, they should be sown multiple times throughout the season.  They grow well in cooler temperatures which makes them a good spring and fall crop. One that is delicious cooked or raw is Cherry Bell.

Front of the Cherry Belle Radish seed packet.


3. Do you want a taste of France in your radish? French Breakfast Radish is an heirloom variety dating back to the 1800s. It gets its name from a popular and delicious breakfast enjoyed throughout France. Want to give it a try? Just thinly slice the radishes lengthwise, grab a hunk of baguette and smear it with some sweet butter, top with radish slices and a sprinkle of salt. Close your eyes, take a bite and then say “Ooh, La, La!”Relish the radish with this french breakfast type.


4. The White Icicle radish resembles small Japanese daikon but is sweet and tender. It is another heirloom variety that is easy to grow but is very versatile because it can tolerate warmer temperatures and grow well into summer weather.

Relish the radish with this White Icicle Radish.


Relish the radish in this recipe:

APPLE RADISH SALADRelish the radish with the Carnival Radish Blend.

2 Granny Smith Apples

1 bunch sliced or julienned White Icicle radishes

Dressing:

Juice from one orange (lemon is also good here)

2 tsp honey

1 tsp Dijon mustard

1 tsp fresh thyme leaves

¼ cup olive oil

Salt and ground black pepper to taste


5. Want to really add some color to your fish or other tacos? Shred this colorful blend from the Carnival Blend radishes and pile it on with a squeeze of lime and some chipotle mayo. All radishes are good in slaw but this one gets bonus points for the interesting colors.


Or relish the radish in this version of a vegetarian radish taco where the radish is the star of the dish. This version is modified from superstar chef Anita Lo’s book Solo.

ROASTED AND PICKLED RADISH TACOS                

Serves 4

3-4 bunches of radishes washed (reserve the tops and 10 of the smallest radishes for later)

1/3 cup olive oil

4 smallish tomatillos, husk removed, cut in half

3-4 small jalapenos, cut lengthwise with stems and seeds removed

1 tsp cumin

One small onion, sliced thinly

3 garlic cloves, smashed (reserve 1 for later use)

6 Tbs cider vinegar

2/3 cup water, divided in half

¼ tsp cinnamon

Juice of one lime

1 Tbs chopped cilantro

8-12 corn or flour tortillas

¾ cup queso fresco, crumbled

Extra lime wedges for serving with tacos

Preheat oven to 400 degrees. Place all but the reserved radishes, their tops, the olive oil, the tomatillo and half the jalapeno in a bowl and toss with salt and pepper. Remove the tomatillo and jalapeno and place them on one side of a roasting pan. Add the cumin and cinnamon to the bowl of radishes and toss again. Place radish mixture (except for the tops) on the other side of the roasting pan. Bake until softened, about 12-15 minutes.

Make radish pickles: Cut the reserved radishes in thin rounds and place them in a bowl with the rest of the jalapenos and the onion. In a small sauté pan bring the vinegar, 1/3 cup water and two of the smashed garlic cloves to a boil and pour over radish rounds. Set aside to cool to room temperature and drain.

When the roasting vegetables are soft, remove the tomatillo and jalapeno and blend with an immersion blender. Add tops of radishes to roasting pan and roast until wilted. Place the remaining third garlic clove in with the tomatillo, cilantro, lime juice, 1/3 cup water and blend to make a salsa.

Serve roasted radishes in warm tortillas garnished with salsa, pickled radishes and queso fresco. Serve with lime wedg1es.

https://bbbseed.com/product-category/store/heirloom-vegetable-seeds/