Ruby-Throated Hummingbird

Ruby-Throated Hummingbird

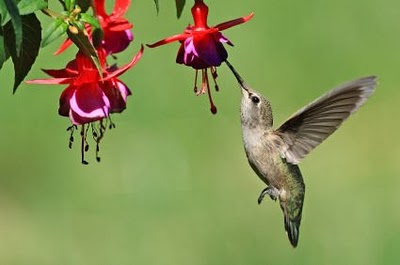
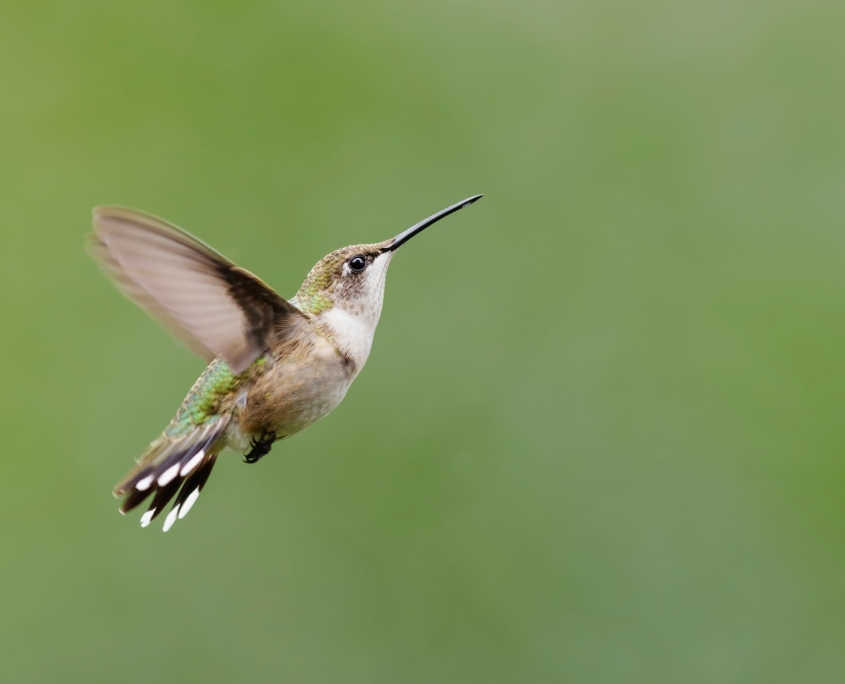
A female Ruby-throated Hummingbird in flight.

Photo courtesy of pixabay – skeeze


All About The Ruby-Throated Hummingbird

The Ruby-throated Hummingbird is one of the most commonly recognized hummingbirds in North America, especially in the eastern half of the country where they spend their summers. They are the only hummingbird to breed east of the Great Plains. Commonly found in open woods, forest edges, parks, gardens and yards, their familiar green and red plumage make them easy to identify.

Ruby-throated Hummingbirds are 3-3.75 inches in length and weigh around 10-13 ounces with a life span of about 4-6 years. These speedy little birds flap their wings 53 times per second, can hover in mid-air and fly upside down and backward. The males have a striking bright red or red-orange iridescent throat. The males’ upperparts and head are bright green. The female’s underparts are plain white and upperparts green, but they lack the brilliant red throat of the male.

Ruby-throated Hummingbirds feed mostly on nectar and insects. They are strongly attracted to red and orange flowers, like those of trumpet vine, red columbine, bee balm, scarlet sage and many Penstemon varieties. They happily feed from nectar feeders too.

Ruby-throated Hummingbirds are solitary birds that only come together to mate. The female builds her cup-shaped nest about 10-20 feet above ground in a well-camouflaged area of a shrub or tree.  Here she will commonly produce 1-2 broods of 2 white eggs per year. The incubation period is 10-16 days. The female, alone, will care for the young for 2-3 weeks before they are mature enough to leave the nest.

In early fall, the Ruby-throated Hummingbird will begin its migration to Mexico & Central America crossing over 500 miles of water in their nonstop journey across the Gulf of Mexico. They can become a little more aggressive near food sources in late summer as they begin preparing for the journey.

To attract more of these lovely birds to your yard keep a clean and full nectar feeder, plant more nectar-rich flowers in their favorite colors of orange and red, limit insecticide use and provide a water source such as a mister or shallow fountain for these birds to bathe and preen in.

Let us help you plant more nectar-rich hummingbird attracting flowers with our Wildflowers for Hummingbirds Mix.

What's Bugging Your Garden

What’s Bugging Your Garden


Less Toxic Pests Remedies

By Engrid Winslow

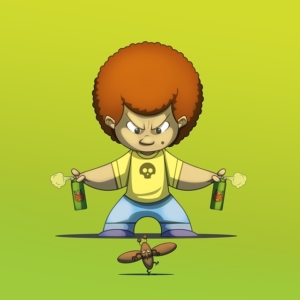
Getting rid of garden pests.

Image by André Santana from Pixabay

What’s bugging your garden? Mysterious holes in the leaves of your favorite rose? Earwigs buried deep in the leaves of your lettuce? Flea beetles mangling your perennials and vegetables? Most people are averse to creepy crawlies in their gardens but, please, BEFORE you reach for the chemicals to blast them into the stratosphere, consider that all of the insects are essential to having a healthy garden and planet. So here are a few suggestions for less toxic remedies of getting rid of garden pests to try in your garden.

Slugs – small saucers of beer tucked under leaves will attract them and they will fall in and drown. Slugs aren’t picky so don’t waste a craft brew on them – Coors works just fine.

Earwigs – There are a couple of things you can try for these and one is a small saucer of soy sauce with a little bit of vegetable oil and you’ll get the same results as with the slugs, above. You can also roll up several sheets of newspaper and get them fairly wet. Slide them under your plants in the evening and throw them away in the morning.

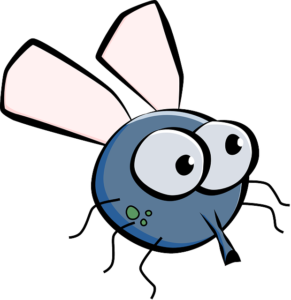
Aphids – These are a very weak, soft-bodied insect that feed on tender new foliage and buds. You can bet that if you have aphids, you will soon have a host of ladybugs feasting on them. If you can’t wait, then use soapy water with a few drops of oil and spray or dab on the foliage. You can also use garlic spray.

Cartoon drawing of an aphid.

Photo courtesy of pixabay.

Flea and other beetles – Diatomaceous earth is a mineral composed of the skeletal remains of tiny sea creatures. It has edges that are sharp and will pierce the bodies of beetles and cause them to dry out. It will harm beneficial insects and earthworms, so use sparingly. Also, don’t breathe it into your lungs.

Other insects – Use a lightweight row cover to protect young plants and the ones that are being chomped on the most.

There are other products available at most garden centers now that gardeners are more aware of the consequences of the use of most pesticides to insects, animals, fish and even people. Some of the best tools in your arsenal are: (1) creating biodiversity and selecting plants that attract pollinators and (2) nurturing the soil by using products such as compost and nettle teas. Recognize that most pests run their course if you are patient and wait for their predators to show up.

June Happenings in the Honeybee Hive

Watching Bees at Work

By Engrid Winslow

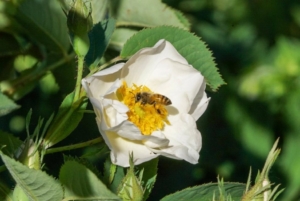
Honeybee on white rose.

This is the time of year when sources of honey and pollen are abundant and you can see the bees busily working in your flowerbeds.

It’s fun just to stand to the side and watch a beehive at this time of year as the bees fly in with full pollen bags and others leave to forage. The bees are not very defensive at this time of year but after the solstice, they start being more protective of honey stores. It’s an easy time for the colony and the beekeeper to enjoy the break from worrying about the colony having enough to eat. Inspections still must continue for the honeybee health,  to be sure that everything is going well with the colony.

The first thing the beekeeper checks for when opening to the colony is the presence of eggs, larvae, newly born bees (these are called nurse bees and their first task is to foster newly hatching bees), stores of pollen and honey and room for the Queen to lay more eggs. If there is no room there are several options, including splitting the hive and leaving the Queen in one hive while allowing the new colony to raise another queen or installing a new queen. Another option is to shift frames around a bit so that there are some empty frames closer to the brood nest. The beekeeper also checks the “pattern”, or density of the capped brood. A good queen will lay in a dense pattern with very few empty cells. “Spotty brood” could indicate a problem varying from a young queen trying to get the hang of brood laying to an older queen in decline.

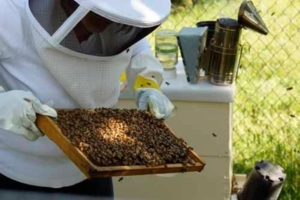
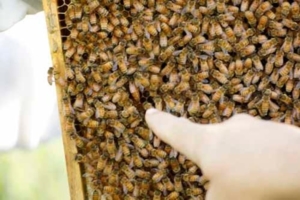
A photo of a beekeeper examining the hive.Another important task is to try and locate the queen. This can be tricky in large colonies of two deep boxes because the queen likes to run away and hide from the light into a deeper part of the colony. She can also be difficult to locate on a frame filled with hundreds of worker bees and drones. Here is a photoPhoto of a finger pointing at the queenbee among all the other bees.


Honey Source Wildflower Mix

Pollinator Seed Mixes

Our 5 Most Popular Pollinator Seed Mixes


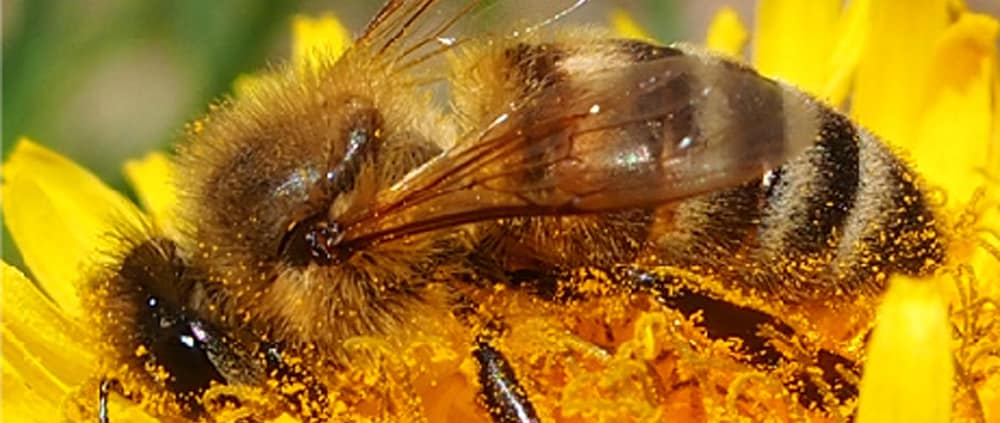
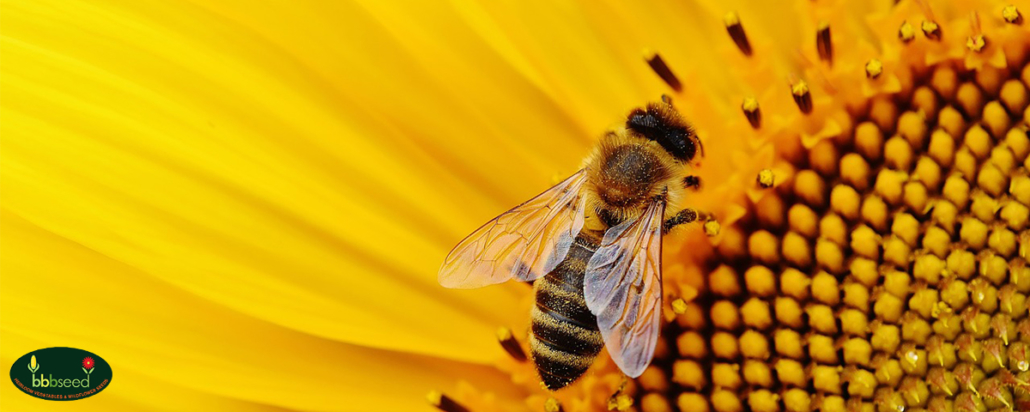
Honey Bee on yellow blossom.

Save the Pollinators

Pollinators are the magic ingredient that makes our natural world work. They fuel lifecycles of entire ecosystems and are found everywhere flowering plants are. Humans are also incredibly dependent on pollinators. Pollinators come in all shapes and sizes. Honeybees, native bees, bumblebees, butterflies, birds, bats, and other wild critters are all incredibly important pollinators!

Unfortunately, we are losing our pollinators at an alarming rate. Insect pollinators are being hit especially hard. Habitat loss, exposure to pesticides, lack of food, and diseases are all leading factors in the decline of these species. We should all be concerned. One-third of our food, from coffee to strawberries, are dependent on pollinators to produce. We need these animals just as much as they need us.

We take our favorite wildflower seeds and blend them into pollinator seed mixes specially formulated to help create habitat and forage for the pollinators in your backyard. We make sure to use fresh, high quality, open-pollinated, GMO-free seeds because you deserve to have a successful, healthy, and fun planting experience. Our mixes are all seed with none of the fillers that you might find in other mixes because we believe you should get what you’re paying for.

Click here if you have any questions about how to select your site, plant, or care for our wildflower mixes!

Here are our 5 most popular pollinator seed mixes:
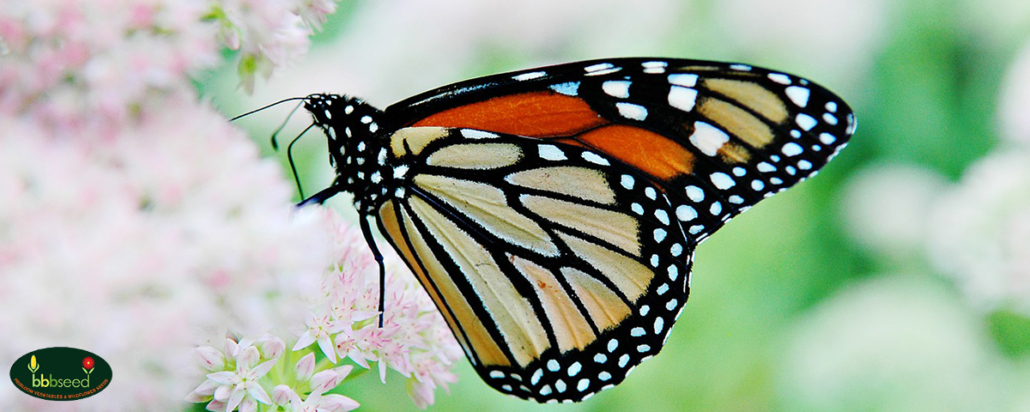
 

1.     Monarch Rescue Mix

Monarch butterfly on pink blossom.

Monarch Butterflies are some of the most wonderful and strange animals on Earth. Every year, they migrate between the high mountains of Mexico through most of North America. This migration takes four separate generations of butterflies to complete and covers a massive amount of territory. To complete this migration, the Monarchs need plenty of forage and nesting sites along the way.

However, habitat and forage loss has been devastating for the Monarch Butterfly. Milkweed plants are the only plants that Monarch Butterflies will lay their eggs on. These plants have been wiped out of large portions of the United States due to concerns about allergies and their designation as a “weed”. Habitat loss and pesticide use have also reduced the amount of good forage for Monarchs, weakening them too much to complete their journey.

This is why we created our Monarch Rescue Wildflower Mix. This mix of Milkweeds and wildflowers is a Monarch Butterfly booster shot. This mix is full of nutrition and habitat for the butterflies passing through your area. Make your garden a Monarch paradise with this mix.

Find it here.
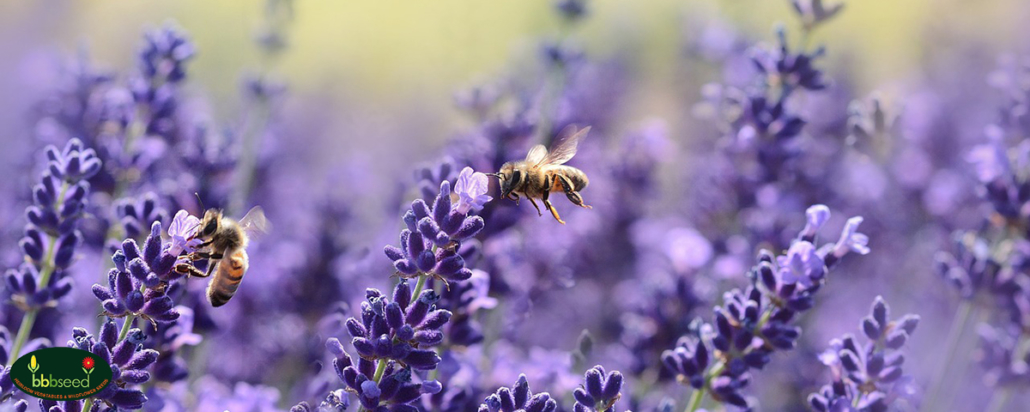
2.     Bee Rescue Mix

Honey bees on purple lavender blossoms.

Bees have had a rough time of late. The incredible loss of honey bees in recent years has been well documented and reported on. However, the crisis is much deeper than just honey bees. North America has over 4,000 species of native bees. Most native bees are solitary and are extremely effective pollinators. However, these little bees are little understood and are in even more danger than honey bees because they don’t have beekeepers watching out for them!

This colorful combination of wildflowers will provide nectar and pollen for full season support of native and introduced bee species.  Our “Bee Rescue” Wildflower mix has been designed to include the absolute best species to support the health and vitality for a wide range of native pollinators as well and the honey bee. This is one of our best selling pollinator seed mixes! These are the flowers that attract the most pollinators and will do well over the most growing zones.

Get our Bee Rescue Wildflower Mix here!
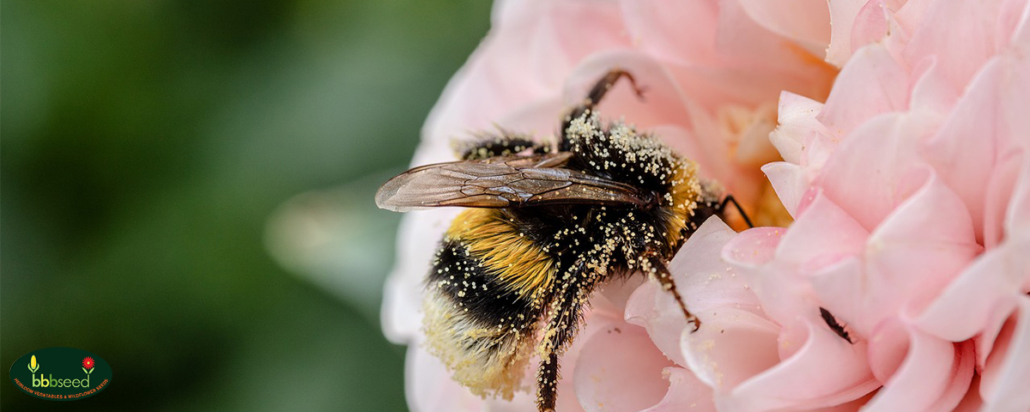
3.     Bumblebee Bonanza Mix

A pollen covered bumblebee on a pink blossom.

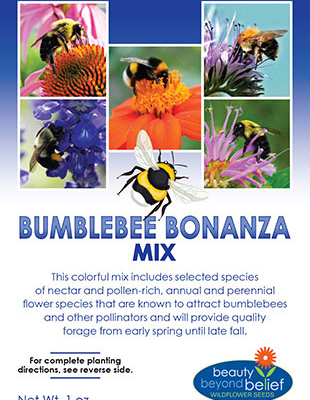
Bumblebee Bonanza Mix is a colorful mix that includes specially selected species of nectar and pollen-rich, annual and perennial flowers that are known to attract bumblebees and other pollinators and will provide quality forage from early spring until late fall.

This mixture of annuals and perennials is designed to provide early, mid and late season blooms to support the life cycle of the bumblebee as well as other pollinators. These flower species will do well in a variety of growing conditions and are recommended for a maintained, home-garden planting or commercial landscape.  The best time for planting this mix is in the early spring, early summer and late fall.

Buy the Bumblebee Bonanza Mix Here!
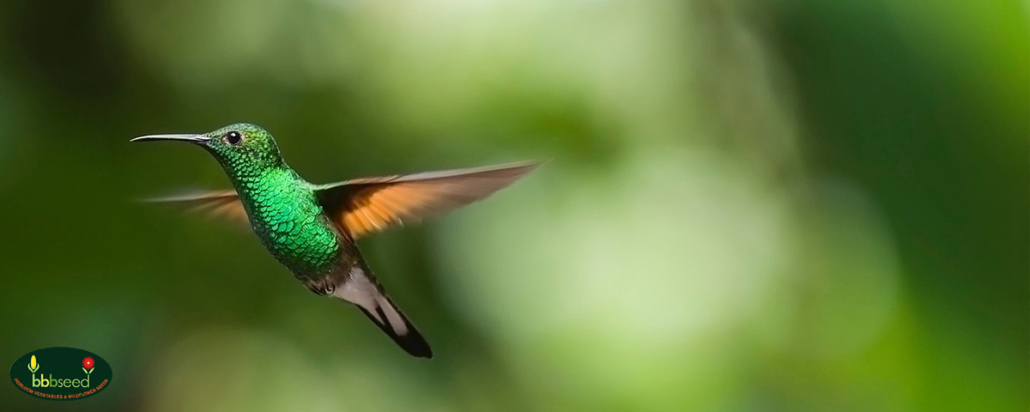
4.     Hummingbird Mix

Green hummingbird in flight.

This mix has been created with the vibrantly colored, nectar-rich species that hummingbirds love.  Consisting of mostly perennials, this mix will continue to provide support to hummingbirds and other important pollinators.  A few annuals are included to provide color the first year while the perennials become established and will bloom the second year.

Get it here and start enjoying your hummingbird garden!
 

5.     Honey Source Mix

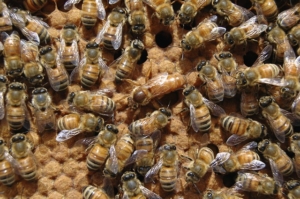
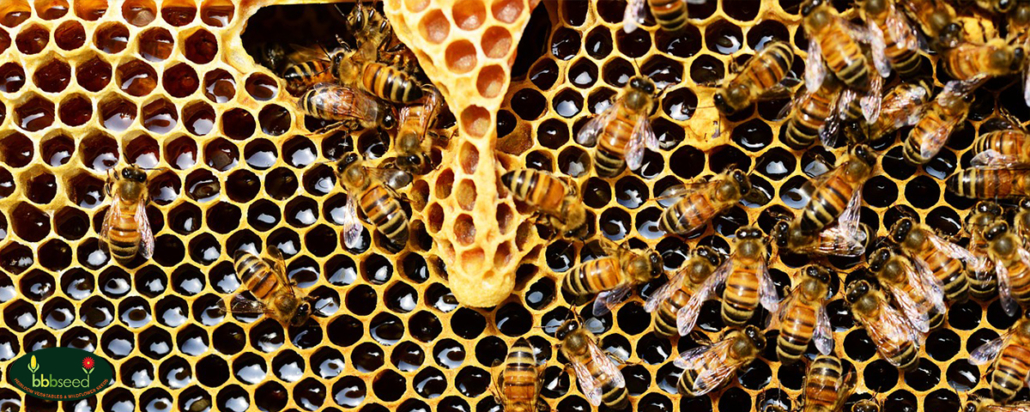
Honey bees on a honeycomb.

A long blooming mix of beautiful, nectar and pollen-rich annuals and perennials put together just for our Honey Bee friends.  Plant this mix to provide vital nutrition for the European Honey Bees.  These hard-working pollinators are necessary for our agricultural production and are a major contributor to our food supply.  Lack of native nectar and pollen sources between crop rotations can cause stress and starvation that contribute to colony collapse.

Our Honey Source Wildflower Mix can be found here!

One Last Thing

At BBB Seed, we are deeply committed to providing the highest quality grass, wildflower, and grass seeds to empower our customers to get out and grow! This list of our 5 most popular pollinator seed mixes is intended to be a useful resource for you to see what products our customers and we are enjoying right now!

We also are incredibly concerned about providing sustainable and environmentally conscious products to you. We source seeds that are non-genetically engineered, tested, and grown sustainably. We hope these products will help you enjoy nature and learn about this wonderful world in the garden. We strongly encourage you to visit our Pollinator Action Page or The Bee Conservancy to learn about the pollinators that make our natural world possible and learn more about what you can do to help them. Thank you!

Grow. Enjoy. Share…the beauty and the bounty!
 

Honey Do’s and Don’ts

Tips for Purchasing Honey

By Engrid WinslowHoney Source Wildflower Mix. Purchasing Honey

In order to produce 1 pound of honey, bees will visit approximately 2 million flowers. An average hive of bees must fly 55,000 miles to produce a pound of honey. One bee colony can produce 40 to 100 pounds of honey per year. The average foraging bee makes about 1/12 teaspoon of honey in its lifetime.

When you consider these facts, it is truly a miracle that honey is so well-known and widely used. The very first origins of keeping bees and honey is not known but there are drawings from early Egypt depicting the practice. Honey was called “The Tears of Re” (Re, also referred to as Ra, was the Egyptian Sun God).

Honey bee colonies tended by a beekeeper often produce more honey than they need to survive during the cold winter months when there are no blooms. A responsible beekeeper harvests only the extra which is produced in a “honey super”. These are smaller boxes on top of the two brood boxes separated from the hive by a “Queen Excluder”. No brood is raised there and the bees fill it up with excess honey.

Buyer beware if you are purchasing honey in large jugs at a steeply discounted price. Imported honey is often only a small percentage of honey and a large portion of it is actually sugar syrup. Buy from a local beekeeper, if at all possible. If you don’t know one, check out Farmer’s Markets, fruit stands, small locally owned grocery stores or cheese shops. You can also look for a local beekeepers association and contact them.

Always purchase unrefined honey which has not been heated over 100 degrees and is filtered through a fine-mesh strainer. All honey will crystallize over time, some much sooner than others. How you treat the crystalized honey is up to you, but to retain the beneficial properties, warming the container in hot water is the best way to go. Creamed honey is honey that has been pre-crystalized using a starter with controlled, very-fine crystals. Most beekeepers who produce honey to sell are familiar with how to produce creamed honey.

Honey has been used for centuries as a throat-soother for coughs and colds and to treat topical injuries, particularly burns and scrapes. It has also been used to treat animals suffering from “road rash” and in patients with foot problems caused by diabetes or those who suffer from ulcers. There is also strong evidence that honey taken at bedtime regulates blood sugar and causes more restful sleep.

Many believe (yours truly included), although there is no medical evidence, that a spoonful of unrefined honey daily will cure, or at least minimize seasonal allergy symptoms. The more local the honey is, the better because the honey contains small amounts of pollen from your particular area. Honey from Boston may not be as beneficial for someone who lives in Los Angeles.

Bees generally forage in a 2-mile radius but may go up to 5 miles to reach pollen and nectar sources. You can help your local honeybee population by not using pesticides and by planting flowers for pollinators such as our Honey Source or Bee Rescue mixes.

Most honey produced by a local beekeeper will be wildflower honey, meaning a mixture of whatever is in bloom.  Varietal honeys such as orange blossom or lavender require that many acres of those crops must be grown near the beehives and the honey supers pulled off the hives when the bloom season is over.

It is a lot of fun to try purchasing honey of varietal kinds of honey and notice their smells and flavors. The honey from my hives tastes different every year but is always delicious. Last year I noticed an apple flavor in it which makes sense because I live in an area with many apple and crabapples nearby.

If you want to know more about honey, check out these past blog posts: www.bbbseed.com/april-happenings-in-the-honeybee-hive/, www.bbbseed.com/whats-happening-in-the-honeybee-hive-as-winter-starts-to-close-in, www.bbbseed.com/20532-2/, and www.bbbseed.com/product/honey-source-mix/


Why Are Native Plants Important?

Wildflower Seeds

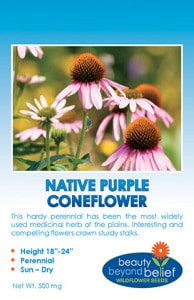
by Engrid WinslowNative Purple Coneflower seed packet.

Honey bees are not native to the United States but were imported in the 1600s by colonists from Europe. Already here when honey bees arrived were 50 species of bumblebees and over 4,400 species of native bees. Bumblebees are especially efficient at buzz pollination. (Check out this blog for more information on bumblebees: www.bbbseed.com/its-bumblebee-bonanza-time). Native bees specialize in pollinating native species of plants – including food – while honey bees are best described as generalists. . Native bees do not have pollen bags on their legs but are often covered with a lot of bushy hairs on their bodies which gather and distribute pollen in the most excellent way. Also, native bees (bumblebees are the exception) live only about 6 weeks and their lives coincide with the bloom time of certain plants that they are specialists in pollinating. They are extremely docile and non-aggressive with some of them having a stinger that doesn’t even penetrate the skin.  Their sting also contains a different type of toxin which will not cause anaphylaxis in people who are allergic to honey bee stings.

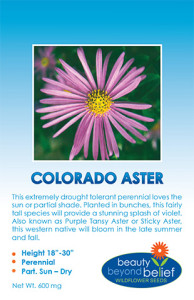
The label for the Colorado Tansy Aster seed packet. Native plants.

Alkali bees are essential for pollinating alfalfa. Alfalfa is a member of the pea family and the flowers have a lower lip which will snap closed and whack honeybees on the butt but Alkali bees have figured out how to get in and out of the flowers quickly and efficiently. Sunflower bees hatch late in the season to coincide with the bloom of sunflowers as do Long Horned bees which love asters as well as sunflowers. Mason bees are also commonly referred to as ‘orchard bees’ because they are so good at pollinating apples and stone fruits such as cherries. Sunflower bees hatch late in the season to coincide with the bloom of sunflowers as do Long Horned bees which love asters as well as sunflowers.  The tiny Mining bees which nest in bare spots in lawns are the first to wake up and pollinate maples and willows which bloom in spring.


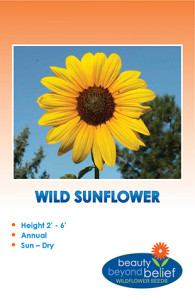
Wild Sunflower. Native plants


How do you know if a plant is a native? Well, if it’s a color (like bluish hybrid tea roses) or shape (lots of petals on the rose) that is unusual it is most likely a hybrid. Look for old-thyme classics like native roses (rosa woodsii or rosa glauca https://en.wikipedia.org/wiki/Rosa_woodsii) to support the natives in your garden.

Also remember to plant such natives as liatris, asters, sunflowers, penstemons, rabbitbrush and native bee plant. Anything with tubular flowers is always a good choice for the native bees and many of them bloom in should seasons when nothing else is available.


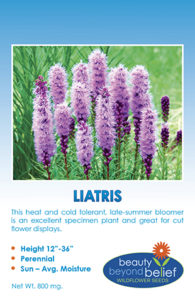
Liatris tag with photo of tall spikes of pink flowers. Native plants

April Happenings in the Honeybee Hive

Tips for Pollinators

By Engrid Winslow

Image of a queen bee in a hive.

Image by Matthew Greger from Pixabay


Beginning in March, as the days lengthen and temperatures begin to warm (at least some of the time!) the bees are starting to raise brood again. April means the delivery of packages and nucs and towards the end of the month established overwintered honeybee hive begins to think of swarming. This is a very busy time for beekeepers and bees. With the vagaries of winter, some early pollen sources may not materialize and all good stewards of the bees will put sugar water and pollen patties in their hives. Pollen is critical in raising healthy brood and March is the time when the colonies are running out of the nectar and pollen they stored in the fall for surviving all winter. Losing a honeybee hive in the early spring can be caused by starvation although all factors such as mite loads, insecticidal poisoning and other issues should also be considered and evaluated.

As spring creeps ever closer, the most abundant sources of pollen and nectar are available during this time. Brood rearing continues in earnest and beekeepers must watch carefully for signs of swarming. Many beekeepers are eager to add to their hives by capturing swarms and add their names to lists with local and state beekeepers associations. (The swarm hotline number in Colorado if you spot a swarm is 1-844-spy- bees, 1-844-779-2337). Classic signs of swarming include large numbers of bees “bearding” or gathering on the outside of the hive. It’s getting crowded in the hive.

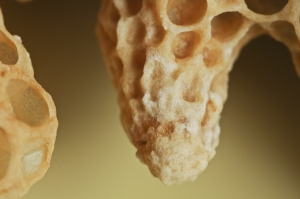
A cell holding the larva of a queen bee. Honeybee hive in winter.

Image by Franz Schmid from Pixabay

Inside a honeybee hive that is beginning to swarm a new Queen is being raised. Queen larvae form in a peanut-shaped cell that is much larger than the cell used to raise worker bees and drones.  They are usually on the bottom or sticking off the side of a frame. Once the Queen cells form, the bees are already committed to swarming and half of the colony (mostly newly hatched workers who can help the most with producing wax for the honeycomb at the new location) will leave with the older Queen. The new queen is left behind but must leave the hive to fly into the “drone zone” for mating, return to the hive and begin laying eggs. Beekeepers can prevent swarming by “splitting” their hives. This involves removing a few frames with capped brood and plenty of “nurse bees” to take care of the newly hatched brood into a new hive body. Some of the honey stores and pollen should also be placed in the new hive. Some beekeepers move a capped queen cell with a larva inside to the new hive and others purchase a mated queen from a beekeeper in the queen-rearing business.

For more information about swarming check out these past blogs: www.bbbseed.com/honey-bee-swarms/ and www.bbbseed.com/19613-2/.

IT’S BUMBLEBEE BONANZA TIME

Bumblebee Conservation

By: Engrid Winslow

Bumblebees pollinate many of our food crops and garden flowers which means the conservation of the species is vital to our ecology. Some species of Bumblebees are true American natives and are most commonly found in northern climates and higher elevations. Nearly all of the estimated 250 species live in the Northern Hemisphere although there are a few species that pollinate flowers in tropical rainforests in warmer climates. They are social insects that form colonies of around 50 bees with one Queen although only the Queen survives the winter. They commonly build their nest in the ground or in crevices of rocks and are quite good at hiding their entrance.

They are capable of flying (and pollinating) at cooler temperatures and lower light conditions than other bees which makes them important pollinators for plants growing in higher elevations and colder climates that are beyond the reach of other bees. Their plump, fuzzy bodies are a welcome sight that spring is on its way at last. It’s usually the super-sized Queen out and about in early spring as she starts to build a nest and raise brood.

Bumblebees are peaceful insects and will only sting when they feel cornered or when their hive is disturbed. When a bumblebee stings, it injects a venom but unlike a honeybee sting, the bumblebee sting has no barbs. This means that a bumblebee can pull back its sting without the sting detaching from its abdomen and can sting several times. Only female bumblebees (queens and workers) have a sting; male bumblebees (drones) do not. Justin O. Schmidt, author of The Sting of the Wild and the creator of The Schmidt Pain Index rates a bumblebee’s sting at a 2 on the index which starts at 0 and ends at 4. https://en.wikipedia.org/wiki/Schmidt_sting_pain_index.com.

Here at BBB, we specialize in pollinator mixes and our newest one is designed with bumblebee conservation in mind. It is our mission to help you provide nectar and pollen because “the more flowers a garden can offer throughout the year, the greater the number of bees and other pollinating insects it will attract and support.”

Bumblebee Bonanza includes Siberian Wallflower, Rocket Larkspur, Balsam, Yellow Lupine, Arroyo Lupine, Purple Coneflower, Dahlia-flowered Zinnia Mix, Dwarf Mixed Cosmos, Gayfeather, Rocky Mountain Penstemon, Blue Sage, Northern Lights Snapdragon, Purple Prairie Clover, Lacy Phacelia and Beebalm.

Bumblebees are unique because their long tongues can reach the nectar in flowers that other bees avoid, such as penstemons, lupines, larkspur and snapdragons. They collect large amounts of pollen because they have so many hairs covering their little bodies and thrive on daisy-type flowers such as Zinnias, wallflower, cosmos and coneflower. There is a wealth of information available about bumblebees and what you can do to help them. Some of our favorites are info@thebeeswaggle.com and https://xerces.org/bumblebees/.

Remember that the use of synthetic insecticides, particularly the ones that contain neonicotinoids are harmful to all bees. Please avoid using them in your garden, lawns and talk to your neighbors and friends about the perils of using these chemicals.  Neonicotinoids are sold under many different  names such as:

  • Acetamiprid
  • Clothianidin
  • Dinotefuran
  • Imidacloprid
  • Nitenpyram
  • Thiacloprid
  • Thiamethoxam

Let’s all do our part for bumblebee conservation!

Name that Seedling

Wildflower Seeds

by Sandy Swegel

Everything’s greening up in your garden and there are so many interesting baby plants.  Can you recognize what’s a friend or a foe?  Here are some clues to help you identify little seedlings that may be coming up in your garden right now!


  1. I’m a weed, but I’m a nutritious and yummy green for salads or saute. Wait too long, and I may grow to four feet tall.
  2. I’m volunteering in your herb garden.  I look a lot like other herbs, flowers and weeds, but crush a leaf and smell it…and you’ll know exactly who I am.
  3. Did you plant your cool-season vegetable seeds recently? I’m always up the fastest!
  4. I don’t mind cold and snow.  A lot of people plant me on St., Patrick’s Day.
  5. Don’t I look healthy!  Let me grow and I’ll be in your garden FOREVER.
  6. Did you plant annual wildflowers last year?  I may have a hard time making a commitment, but I’ll be back every year.
  7. Nobody remembers planting me, but I love to grow in surprising places.  I may be all green now, but come back in a week and I’ll be jumping to see you.


Answer key to seedling clues

  1. lambs quarter
  2. cilantro
  3. radish
  4. pea
  5. bindweed
  6. bachelor’s button
  7. johnny jump up

Worms in my Kitchen?

Composting Indoors

by Cheryl Soldati Clark

What is Vermiculture?

Vermiculture is more than just a funny word, it is the process of using worms to decompose food waste.  The worms turn the waste into nutrient-rich material that will ensure healthy & happy plant growth. It is nature’s way of recycling! This method is a sustainable way to save energy, water, landfills and it reduces the need for synthetic fertilizers. You can feel good about not throwing your kitchen scraps down the kitchen disposal or contributing to the over-crowding of our landfills. You can even have a worm bin indoors without any odor or mess!

How to Get Started on Your Indoor Worm Bin…

You Will Need:

Cardboard (Optional) – Can be used to cover bedding to lock in moisture
Rubbermaid or Wooden Container with Lid – Recycled containers work great, just make sure that they have never been exposed to chemicals. A 1’x2’x2’ bin can hold kitchen waste from families of 2 people. A 1’x2’x3’ bin can hold kitchen waste from families of 4 to 6 people. You don’t want a very deep bin because worms feed in the top layers of bedding.
Bedding (Newspaper) -Black ink on newspapers is made of Carbon and oils and is not toxic to worms. Colored ink should not be used.
Yard Waste (Optional) -Decaying leaves from your yard makes a great composting material to add to your worm bin.
A handful of Soil – Provides the grit that worms need to break down food in their gizzards because they don’t have teeth.
Red Wiggler Worms – Number of worms depends on your daily food waste. One pound of worms can eat ~3.5 lbs. of waste per week.
Moisture – To wet down your bedding & worms also need moisture in order to breathe.

Step by Step Instructions:

Step 1:

Use a drill or hammer & nail to poke 1/8-1/4” air holes in your bin 1 inch apart. You want some holes on the bottom for drainage, on the lid of the bin and along the top of the four sides. Make sure to raise the bin on bricks or wooden blocks with a tray underneath to catch the excess liquid that can be used as a liquid fertilizer for your plants.

Step 2:

Shred newspaper (black & white ONLY) into 1-inch strips. Moisten strips and squeeze out excess water.  The newspaper should not be soggy, just damp. Fill ¾ of the bin with moist shredded newspaper, decaying leaf litter (optional) and a handful of dirt and then mix it all together. You want the bedding to be fluffy not packed down. Let bin sit for a day before you add your worms.

Step 3:

Separate your vermiculture worms from the packing material that they came in. Scatter them in your bin. Feed them slowly at first so they can acclimate to their new environment and to monitor the rate at which they break down waste.

Step 4:

Feed your worms foods that they love and avoid the foods that they dislike (listed below). Don’t forget to harvest your compost every couple of months because your worms will continue to break down their bedding material.

Step 5:

After you have fed your worms for 3-6 months you will see some worm compost/castings on the bottom of your bin. It will be very dark in color and extremely rich in nutrients. You can harvest what is there or you can wait until your bin is really full. Worm castings are toxic to worms, so if you have mostly compost and not a lot of food or bedding left in your bin, then it’s time to harvest. Whatever method you choose, the key to harvesting is to separate your worms from the compost. Your worms will not survive if you put them in your garden with the compost.

To harvest your compost, you have a couple of different options:

  1. Your worms will be in the top 1/3 of your bin. You can remove the top 1/3 of worms, bedding & food and set that aside. Once you remove the compost from the bottom of your bin, then you can put your worms and remaining bedding/food back into the bin, add fresh bedding and resume feeding and maintaining your bin.
  2. If you have a larger bin, then you can push all of the material in your bin to one side and add new material to the empty half of the bin. After a month or so, when it appears that the worms have moved over to the new side, then you can harvest the compost from the other side.
  3. Spread the contents of your worm bin out on a plastic sheet/table cloth in the sun or under a bright light. Your worms will start moving down into the compost to get away from the light. About every 20 minutes you can scoop up the top layer of compost and the worms will move down again. Repeat this method for a couple of hours until you are left with a wiggly pile of worms that have been separated from the compost. Return the worms to their bin with fresh bedding immediately.

*You can’t save all of the worms, but using one of the three methods listed above will help to ensure that you save the majority of them!*

Here is an instructable with more information and photos:

https://www.instructables.com/id/Multi-Layer-Vermiculture-Bin/