Monarch Butterfly Migration

Graphic stating, "Everything You Always Wanted to Know About Monarch Migration."

Butterfly Migration

by BBB Seed

Each fall, about this time in October, millions of Monarch butterflies begin the journey to their overwintering sites in Mexico and California. In the spring, the Monarch butterflies will then return to their breeding areas across America and as far as Eastern Canada. Four generations of monarch butterflies will be born and die by the time this journey is complete.

In February and March, the butterflies come out of hibernation and begin looking for a mate. These butterflies will then begin to migrate north and east looking for a place to lay their eggs. This begins the first generation. Eggs are laid on milkweed plants in March and April. These eggs will hatch into baby caterpillars that will then feed for about two weeks before beginning metamorphosis. After completing metamorphosis the monarch butterfly emerges and enjoys its short lifespan of about two to six weeks. Before dying the butterfly lays eggs for the second generation. This second generation is born in May and June and the third in July and August. Both of these generations will go through the same life cycle as the first generation. The fourth generation of Monarch butterflies is born in September and October and will go through the same process as the first three generations except for this generation of butterflies will live 6-8 months making the migration journey to the warmer climates of Mexico or California.

A mass of Monarch Butterflies.

photo courtesy of pixabya – skeeze

Monarch butterflies living east of the Rocky Mountains will overwinter in Mexico in oyamel fir trees. The Monarchs living west of the Rockies will overwinter in eucalyptus trees in and around Pacific Grove, California. It wasn’t until 1975 that we discovered these overwintering sites. The Monarch Butterfly Biosphere Reserve is a World Heritage Site that contains most of the overwintering sites for the eastern Monarch population.

Monarch butterflies migrate for two reasons. The first is because the butterflies can’t withstand the freezing temperatures in the northern and central continental climates during winter. Secondly, their larval food source (milkweed) does not grow in their overwintering sites.

In recent years researchers have found the Monarch population numbers to be declining. Some reasons may include the loss of milkweed species needed for larval development, unintended effects of pesticide use and the loss of habitat in overwintering sites in both Mexico and California. Creating more Monarch habitat could help the declining populations. Planting milkweed species and other nectar-producing plants is a great place to start.  Start by planting our Monarch Rescue Mix!

Photo of Monarch Butterflies on orange milkweed blossom.

photo courtesy of pixabay – balloonimals

Sources: https://www.monarch-butterfly.com/monarch-migration.html,

https://en.wikipedia.org/wiki/Monarch_Butterfly_Biosphere_Reservehttp://pollinator.org/

9 Great Halloween Crafts

What’s Happening in the Honeybee Hive as Winter Starts to Close In

Photo of an open shed on a foggy heath housing several honeybee hives.

Honeybees in Winter

by Engrid Winslow

This part 2 of a series on what happens in the honeybee hive in winter, what beekeepers do to manage their beehives and how you can also help to sustain honeybees and other pollinators.

Winter in a hive of honey bees is tough. Honey bees are the only bees who overwinter as a colony (more about the lifecycle of bumblebees and native bees will follow in later articles) which makes them much more vulnerable to the vagaries of winter weather. Here’s what is happening in the hive as fall changes into early winter.

Honey bees are amazingly resourceful at helping to winter-proofing their hives. They use a special substance called propyls to seal up all the cracks and crannies that could let in wind and moisture during the cold rainy months. Whenever the beekeeper checks on the hives (temperatures must be above 50 degrees and sunny) the bees do an admirable job of sealing everything back up again.

Honeybees are not warm-blooded and depend on clustering in order to combat the winter temperatures. The worker bees who are left in the honeybee hive in winter after the drones (male bees) have been evicted are all daughters of the Queen Bee and are devoted to protecting her and whatever small amounts of brood remain in the hive. As winter settles in, days darken and temperatures really drop, the Queen lays fewer and fewer eggs until stopping completely. The remaining cluster of bees is made of those who hatched late in the fall and these few daughters center around the Queen. They rotate from the center, where the Queen is protected from the elements to the outside of the bee cluster.  They create warmth in the cluster by unhinging their wings at the shoulder muscle and vibrating them (also referred to as “shivering”). No foraging takes place (well, after all, what flowers are blooming in the winter anyway?) and the hive is dependent on the stores of honey and pollen that has been stored from the summer. The bees on the outside of the cluster are usually able to feed off the pollen and honey which is stored on the outside of the frame around the brood. When temperatures are warm enough the bees will venture out for “cleansing flights” – yes, that’s a delicate name for what they need to do! But otherwise, they are “socked in” for the winter months.

Beekeepers will continue to supplement food for their hives, depending on temperatures, as they hope and pray the bees will survive to expand their colonies next spring and summer.  Check out this youtube video to hear the amazing sound created by the bees in this winter hive.


FALL IN LOVE WITH PUMPKINS

Pumpkin Recipes

By Engrid Winslow

Halloween scarecrow with pumpkins at his feet. Pumpkin recipes.

A happy Scarecrow with BBB Seed Pumpkins…Fall is in the air!

Yep, we can tell we are here in fall because THE place to be on the weekends is in the pumpkin patch! Here are a few of my favorite pumpkin recipes and a link to one for our furry companions who love to romp in falling leaves and go on walks with us in the crisp fall air!

Pumpkin Recipes


PUMPKIN APPLE BUTTER

Of the pumpkin recipes, this one makes a delicious combination of fall flavors into a creamy “butter” (which contains zero butter and is very low in sugar) which is delicious on toast, biscuits, and scones or packaged into a gift basket for friends and neighbors during the Holiday Season. The best pumpkins for making a butter or pie are the small sweet ones like Sugar Pie or Cinderella.

Makes about 4 ½ cups but can be doubled or tripled if you want more to share with friends and family

2 cups unsweetened applesauce (canned or homemade)

2 cups pureed pumpkin (canned or homemade – not pumpkin pie filling)

¼ cup apple cider

1/3 cup light brown sugar

3 TBL honey

1 tsp apple cider vinegar

¾ tsp ground cinnamon

½ tsp ground ginger

½ tsp sea salt

½ tsp grated fresh nutmeg

Heavy pinch of ground cloves

Combine all ingredients in a saucepan and bring to a simmer over medium heat, stirring often to make sure that sauce doesn’t scorch and sides of the saucepan stay clean until mixture is reduced by at least one third. It should also darken in color to a caramel brown with an orange tinge. Process using water bath canning, which will keep for about 6 months [www.freshpreserving.com/canning-101-getting-started.html] or place in the refrigerator to use within 2 months or freeze for up to 12 months.


PUMPKIN BOLOGNESE

Serves at least 4

When you replace tomato with pumpkin you create a delicious and meltingly mellow version of traditional Italian Bolognese. Use lots of black pepper to temper the richness of this sauce.

2 lbs pumpkin, unpeeled and cut into large wedges with seeds scraped out

Brush the pumpkins with olive oil and place them on a foil-lined sheet pan to roast at 400 degrees for about 30 minutes.  Let cool and then scrape flesh into a food processor and puree until smooth. Transfer to a saucepan and cook down at medium heat, stirring often until the pumpkin has reduced and is the thickness of tomato paste. This step will take about 20 minutes.

In a large Dutch oven heat 3 Tbl olive oil and add ½ lb ground pork and 1 lb ground beef over medium-high heat. Stir and break up chinks so that the meat is no longer pink. Just lightly brown it – we don’t want a crust on the meat. Remove and set aside. Add 1 cup finely chopped carrot, ½ cup finely chopped celery and 1/2 cup finely chopped onion to Dutch oven and season with 1 tsp salt and lots of fresh ground pepper. When the vegetables start to look like they are browning, reduce the heat to medium-low but keep cooking, stirring until they are fragrant and softened but not browned – about 10 more minutes.

Return meat to the pan and add 1 cup dry white wine and simmer until wine is reduced and almost completely gone – about 10 minutes. Fold in the pumpkin puree and 1 cup milk. Add more salt and pepper to taste and reduce heat to a low simmer for 45 minutes to one hour.

Serve with cooked Tagliatelle pasta and grated Parmigiano Romano

Pumpkin Dog Treats

And here’s a link to some amazing dog treats that my dogs have been enjoying for years:

positively.com/contributors/pumpkin-banana-dog-treats-grain-and-dairy-free

Giant pumpkins in an orchard.

BBB Seed BIG Max pumpkins!

Give Winter Squash Some Love

Winter Squash and How to Cook It

by Engrid WinslowPhoto of two golden butternut squash. Winter Squash

Now that the nip of fall is finally in the air it is time to celebrate the coming harvest of winter squash.  Winter squash varieties include the beloved Butternut as well as Sweet Dumpling, Delicata, Spaghetti, Hubbard, Long Island Cheese, Pumpkins and so many more varieties. The squash should be harvested before the first hard freeze but a light frost will actually sweeten the sugars in the squash fruit. The stems should be fairly dry and the fruit unblemished. If there are any squishy spots, just eat those right away but the others can be stored for up to six months.  The fruit should feel heavy and dense and your fingernail should not pierce the flesh when pressed against it. Cut the winter squash from the vine so that there is at least a 2” stem and then let them cure at room temperature for a week or two.  After they have cured they should be stored in a cool dry place such as a basement or garage where they will not freeze.


Winter Squashes are rich in fiber and vitamins and low in calories but they are also so hearty that they are great for meatless meals.  To my mind, the best way to eat most of them is roasted with olive oil, salt and pepper but let’s not forget pies and casseroles with warm winter spices like cinnamon and nutmeg.  The seeds can also be roasted for a delicious and nutritious snack.


Many years ago this recipe for Butternut Squash Risotto in Cooks Illustrated  Italian Favorites that I have tweaked and played with to come up with one of my most beloved recipes.  It gets the center starring role at least once a month during the winter season for its comforting warmth. It seems like a lot of work but this is one that is worth every minute.


BUTTERNUT SQUASH RISOTTO

                Serves 4-6

Adapted from Cooks Illustrated Italian Favorites 2009

 2 TBL olive oil

6 TBL butter

2 LB butternut squash, peeled, de-seeded and cut into ½” cubes which should yield 3-4 cups

  NOTE: Reserve seeds, fibers, peels and any extra bits of squash for use later

4 cups chicken stock

1 cup water

1-2 small onions, minced

2 cups Arborio (Carnaroli can be substituted)

1 ½ cups white wine such as Pinot Grigio that you will also drink with your dinner

1 cup grated Parmesano-Reggiano

2 cloves garlic, minced

2 TBL minced fresh sage leaves

¼ tsp grated nutmeg

Salt and pepper to taste


In a large non-stick skillet, sauté the squash over medium-high heat with olive oil until cubes are nicely browned.  Season with salt and pepper, remove from pan and set aside.  Add reserved squash peels, seeds, etc. to pan and cook, stirring to break up the fibers as much as possible until brown.  Place chicken stock and water in a saucepan with reserved, cooked bits of squash, bring to a low boil and reduce heat to a bare simmer.

Place 4 tablespoons of butter in the empty skillet over medium heat and let melt before adding onion, garlic and additional salt and pepper. Cook and stir often until onions are softened.  Add rice and stir until grains are a bit translucent around the edges (about 3-4 minutes).  Add white wine and cook, stirring until it is fully absorbed.  Add 3 cups of liquid (avoiding stems and other bits – Strain if desired but press the solids to get as much flavor from them as possible) and a half of the cubed squash to the pan. After the liquid is completely absorbed and the pan is nearly dry, continue adding liquid about 1/2 cup at a time, stirring constantly until liquid is absorbed before adding another ½ cup. Taste the rice for al dente and then stir in the rest of the squash, sage, nutmeg, parmesan and remaining 2 tablespoons of butter.  Add additional liquid if you prefer a looser risotto and sprinkle additional parmesan on the top.  Serve with the same white wine you used to cook your risotto.


You can add other things such as spinach, sweet peas and cooked chicken to this recipe if desired.

Honey Bee Swarms

HONEYBEE SWARMS: CAUSE FOR CONCERN?

Swarm of Honeybees on tree branch. Honeybee Swarms

Swarming is a large cluster of honeybees (tens of thousands!) hanging in a ball from a surface, and it begins in the spring.  It is the reproduction of honeybee colonies. “How,”  you ask?

The hive is considered a superorganism, which means all parts are uniquely necessary to the survival of the colony as a whole. Not a single honeybee can survive without the hive. The colony grows and eventually needs to split to reproduce more super organisms at additional nesting sites. This is where swarming comes in.

The “old queen” is programmed in her second year of ruling the hive, to prepare for swarming. This means she will leave, along with tens of thousands of her worker bees, including foragers and house bees alike. Some of the colony will be left behind with a virgin queen bee. The queen is very heavy whilst living in the hive fulfilling her egg-laying duties and is unable to fly. Thus, she must go on a diet when she knows it is time to swarm. The house bees cease to feed her and she stops laying eggs. Once she is slim and trim enough to take flight, all the bees gorge themselves on honey for the exhausting task ahead.

How does the hive decide to swarm?

Pheromones, otherwise known as chemical messages. Bees use many pheromones to communicate different messages throughout the colony. The queen releases pheromones from mandibular glands (adjacent to the jawline), which are passed to her worker bees through feeding. Her pheromone “cocktails” can instruct worker bees to collect food, create swarming cohesion, and prevent the maturation of eggs in other female worker bees. This form of communication unifies the colony’s survival tactics. One mode of survival is reproducing the hive, and this happens when the colony has become so large that some of the worker bees are not feeding the queen and thus not receiving her pheromones. Such a population believes there is no queen and begins raising a queen of their own. The existing queen must leave before the virgin queen emerges from her cup.

Meanwhile, the “old queen” is trimming down and sending out scouts to find a location to cluster. A cluster is a ball of bees hanging in strange places.  It could happen on a stroller, car, tree, house, pretty much any surface!  The cluster location isn’t far from the hive, and the swarm will only cluster as long as it takes to find a new nest, which is very brief. So, if you happen upon one, you are one lucky individual to be witnessing such an important part of a hive’s life cycle. Enjoy the view!

During the honeybee swarms cluster, some of the best foraging bees are sent out as scouts to find the next nesting site. Upon returning to the cluster, the scouts will do a waggle dance. The degree of enthusiasm the bee is waggling will encourage other scouts to verify the nesting site is indeed a good one. Finally, the entire swarm will leave together to begin building their new home.

What should you do if you see a swarm?

Please do not be afraid, but do show respect. Bees are not in the mood to attack at this very vulnerable moment in their life cycle. Stand back, give the honeybee swarms space, and watch and listen (the hum of a buzzing colony is music!).  If you are concerned, contact your local beekeeping association for a list of bee rescue contacts.  Do not spray or exterminate honeybees, or any bees for that matter, they are critical to our survival!  1 in 3 bites of the food we eat comes from bee pollination!

I hope you enjoyed learning something new today!   Thank you for joining the movement to save our bees!
Jessica


Mexican Sunflower, Pollinator Magnet!

Wildflower Seeds

by Heather Stone

Close up photo of an orange Mexican Sunflower blossom.

photo courtesy of pixabay – impradip

Mexican Sunflower, Tithonia rotundafolia is a must for the butterfly garden and is a favorite of our beloved monarch butterfly. This 4-6’ tall annual (perennial in USDA zones10-11) is covered in vibrant orange flowers the monarchs can’t resist. But it’s not only a favorite of monarch butterflies. Mexican Sunflower is also equally adored by many other butterfly species including painted ladies, fritillaries, eastern tiger swallowtails, giant swallowtails and more. Honeybees, bumblebees and hummingbirds flock to these nectar-rich flowers as well.

Mexican Sunflowers are easy to grow. Plant seeds indoors 1-2 months before your average last frost date or directly in the garden in late spring when the soil has warmed. Once germinated, these plants take off reaching heights of 4-6’ by 3-4’ wide so place them in the back of the border. Staking these tall plants helps to avoid any toppling over. The vibrant orange blooms appear mid-summer and last until the first frost. Deadheading every 2-3 days ensures continual bloom, equaling more visitors. Mexican sunflowers make great cut flowers too and are easy to grow in containers. Don’t leave this beauty out of your pollinator garden.

Mexican Sunflower blossom against blue sky.

photo courtesy of pixabay-4924546


Check out this cool video of Monarch butterflies enjoying the blossoms of Mexican Sunflower.

https://www.facebook.com/MonarchButterflyGarden/videos/895905987113736/


HIVE HAPPENINGS IN SEPTEMBER

Two beekeepers in bee suits inspecting a hive.

photo courtesy of pixabay – topp-digital-foto

All About Honeybees

By Engrid Winslow

Have you ever wondered what beekeepers actually do? Did you think that they just put hives in fields and then visit to collect honey every once in a while? Well in Hive Happenings, we are going to take you inside the duties of a beekeeper in the first of a series of articles explaining what the bees are up to and how a beekeeper helps them to survive and thrive.

Two jars of golden honey with a honey dipper.

photo courtesy of pixabay – fancycrave1

Honeybees are the only bees that overwinter as a colony and cold weather can be stressful enough that many colonies will not survive without some help from a beekeeper. Even with that help, a hive that is weak or doesn’t have enough food stored or suffers from a mite infestation will not make it through.  Each colony has worked very hard all spring and summer collecting honey and pollen to feed the new brood that the queen spends all day (and night!) laying. They are also storing extra honey and pollen to make it through the winter when there is very little forage (in most parts of the country).  Every colony needs 60-90 pounds of honey to survive the cold season. A responsible beekeeper only harvests whatever extra honey has been stored by the hive. Beekeepers watch their hives grow during the season and add “honey supers” on top of a two-deep hive colony with a “queen excluder” between the hive and the supers. Some hives will produce many of these supers that hold the excess honey – it varies by the colony and by the amount of forage available during the season. The excluder ensures that no brood is laid in the supers. In the early fall, beekeepers check to make sure that the honey stores are capped with wax and proceed to harvest the honey in a variety of ways ranging from using a “capping scratcher” with the frames set over a bucket to using electric or manual extracting machines.

Honey is a marvelous thing to have for personal use, to sell or to give to friends and family as gifts. The National Honey Board website has numerous recipes for all types of dishes using honey as an ingredient.  Check them out at National Honey Board.

There are many other duties for the beekeeper to take care of as the weather cools and, concurrently, the hive is also preparing itself for winter. The queen slows down her egg laying, drones are evicted from the hive and the colony shrinks to a size that can huddle together when it’s cold outside. I’ll share more of this information in my next blog about honeybees.

How To Can Fruit: A Beginners Guide

Poster for A beginners Guide to Canning Fruit.

Canning Fruit

by Sam Doll


Summer is the perfect time to enjoy fresh, local fruit. Whether it’s plump, Maine blueberries or sweet, Colorado peaches, every part of the country is offering up a local bounty of great unique fruits.

The only problem is that it is hard to make these harvests last! Maybe want to save a local treat for winter or you just have more than you know what to do with? Well, the best way to preserve your local fruit harvest is to can them!

Here is our beginners guide to canning fruit at home.

*Important Note*

Whenever you are canning, make sure to strictly follow a tested recipe from a trusted source. Canning is safe when done properly, but improperly canned food can harbor dangerous pathogens.

We recommend recipes from the following sources:

The National Center for Home Food Preservation

Ball/Kerr Food Preservation

Or your local extension office!

Also, if you are above 1,000 ft, make sure to adjust the processing time on your recipe for altitude!

Equipment

Water-Bath Canning Kit

Most fruits are naturally acidic foods, which means you should be able to process your canned fruit using a water-bath canning kit. For non-acidic foods, you will need to use a pressure canner, which can heat foods to higher temperatures than water-bath canners can.

*Processing is just the step of heating the jars for a certain period to kill off all dangerous bacteria.

A canning kit usually consists of the following

  • A large metal pot with a lid
  • A rack to keep the jars off the bottom of the pot and for lifting jars in and out of the bath.
  • A magnetic wand for retrieving lids and rings
  • A jar lifter
  • A canning funnel
  • A paddle to check fluid height and for removing bubbles

We recommend the Ball Enamel Water Bath Canning Kit

If you don’t want to use a kit, you can always assemble a makeshift water-bath canner out of your normal kitchenware. Just make sure that there is enough headspace to cover the jars with at least an inch of water and that you can place some sort of rack in the bottom of it to prevent the jars from touching and breaking from the direct heat.

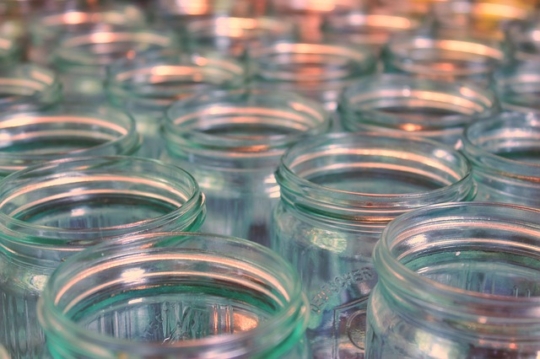
Canning Jars and Lids

Photo of many canning jars.

photo courtesy of Pixabay – Lolame

Equally important as the water-bath canner, having the proper containers is essential for successful home canning.

Make sure you are using clean, canning grade jars designed for home canning. These mason jars are sturdier and safer than commercial glass jars and their availability makes them easy to replace and get lids for.

While the lid rings can be reused, make sure only to use new canning lids when preserving food. Old lids will not seal properly and can lead to improperly processed food.

Choosing and Preparing your Fruit

As always, the best ingredients make the best, finished product. This is especially true when trying to preserve fruit. Fruit needs to be fresh and sturdy to keep their color and shape throughout the canning process.

Fresh, firm fruits will do best for canning. Don’t wait until the fruit is at peak ripeness, because the heat from the processing will soften them. If they are too soft to start with, your end product will be mushy.

Thoroughly and gently wash your fruit to remove any dirt and debris. Bacteria can hide and survive in dirt, so do your best to make sure that all your fruit is cleaned.

If you want to preserve your fruit peeled, you can either use a vegetable peeler for hardier fruits, like apples, or you can use the blanching method for stone fruit like peaches or even tomatoes.

Here is a handy guide for blanching and peeling stone fruit.
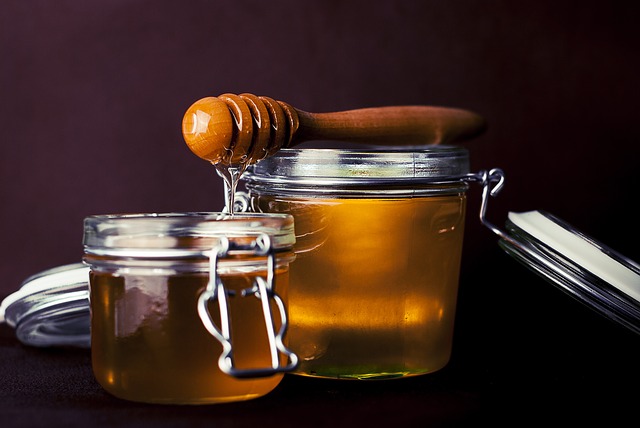
Canning Liquids

For the canning process to actually work its magic and properly preserve your food, there needs to be a liquid that can transfer the heat from the bath and sides of your jars to the food. There are a variety of different liquids that you can pack your fruit in: water, juices, and syrups are most common.

Water and juices are useful for hardier fruits that don’t need much to preserve the shape, color, and texture of the fruit. Apples, pears, and peaches can all be packed in water.

Syrups are more common and are a great way to preserve the fruits shape, color, and flavor. You can pack all fruit in syrups from very light to very heavy. However, heavier syrups are better for fruits that are tart or sour, while very light syrups do well for naturally very sweet fruits.

For specific syrup ratios and fruit recommendations, check out this guide by NCHFP

Packing

Packing is the step right before processing your fruit. Packing is, very simply, how you package your fruit into the jars.

Hot Packing

Hot packing is the more preferred method to pack your fruits when water-bath canning. It often involves heating the fruit to a boil in the packing liquid and then packing them into the clean jars before processing.

Some very juicy fruits can be heated without packing liquid to cook out their juices, and then packed into the jars with that fluid.

Since hot packed fruit have already been cooked, you do not have to worry about them shrinking during processing.

Cold or Raw Packing

Cold packing is when you tightly pack cold fruit into the jars and then pour the hot packing liquid over them before processing. This is not as recommended as hot packing since the fruit will shrink and release fluid during processing and it is not the most efficient use of jar space.

Processing

  1. After packing your jars, use a plastic spatula or paddle to remove any bubbles trapped in the fruit by sliding it down the sides of the jar. Check your headspace and, if necessary, add more packing fluid (headspace is dependent on the type of jar you have).
  2. Wipe the rim with a damp cloth to remove any debris or residue and ensure a clean seal.
  3. Gently screw on a new, clean lid and rim until it is finger tight. Do not over tighten!
  4. Bring the water bath to a simmer (~180° F) for hot packing or ~140° F for cold packing.
  5. Keeping the jars straight up and down, lift the jars and slowly lower them into the bath. A jar lifter can be helpful here, so you don’t burn yourself.
  6. Make sure there is at least an inch of water above the lids. If not, heat water to a boil and fill the bath to the proper level before moving on.
  7. Bring the bath to a full boil. Once the bath has reached a rolling boil, place the lid on the bath and start the processing timer according to your recipe.
  8. Once the timer has finished, remove the lid and turn the heat off. Wait 5 minutes before removing jars.
  9. Remove jars and place them on a towel or rack. Make sure to keep them upright. Wait for 12 to 24 hours before checking if the jars sealed properly. Do not touch the lids!
  10. After letting them sit, check the seal by pushing down lightly on the center of the lid. If it is firm and doesn’t move or “pop”, they should be ready to be cleaned and labeled.