Vegetable Seed Starting
tips_seedstarting2Starting your vegetables and herbs indoors from seed is easy and very rewarding. By starting indoors you give yourself a jump-start on the growing season and you will be ahead of the game when it is time to start planting outdoors! The back of your BBB seed packet will have the basic information you need to know to ensure you have successful germination.
Here are a few tips to remember to kick off your seed-starting efforts.

  1. Plastic pots are best for starting seeds as they retain moisture more easily compared to terra cotta or other clay pots. If you don’t have traditional seed-starting containers available from your local garden center you can use recycled yogurt cartons, salad containers, or any other plastic container you find in your recycle bin! You can also make your own wood seed starting trays or your own newspaper pots. No matter what type of container you use make sure it is clean and sterile.
  2. Proper drainage is essential. Make sure there are holes in the bottom of your seed starting container to allow for good drainage. If you are using a recycled plastic item you can drill or poke holes in the bottom by using a screwdriver or nail. Excessive moisture trapped in a pot can lead to damping off and other fungal diseases. Ew!
  3. Soilless seed starting mix. Really we mean it! If you want good germination start your seed in a soilless mix. The key is that when your seeds germinate and have at least their first set of true leaves you must transplant them to the next pot size up and into regular potting soil. Or, you need to start feeding them with a half-strength fertilizer.  The soilless mix is essentially sterile with minimal nutrition which is a perfect medium for your plants to germinate in. Less chance for contamination or other weird diseases to set in!
  4. Moisten your mix. Pour your soilless mix into a bowl. Moisten it with water so that it isn’t soaked, but is nicely damp. Fill your seed starting pot or tray up ¾ of the way full with your damp soilless mix. Gently press the seed into the soil approximately two (2) times the depth of the diameter of the seed. Then lightly cover your seed with more of the soilless mix. Gently press the soil to ensure good seed-to-soil contact.
  5. Identify each pot. Even if it is only 2 pots we highly recommend that you mark each pot with the name of the vegetable and the date planted. You can use wooden craft sticks, left-over popsicle sticks, or any other object that sticks up and beyond the soil that you can write on.
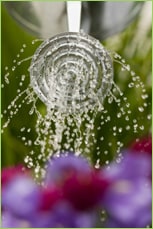
  6. tips_seedstarting4Water gently. We can’t tell you how many times we have washed away seeds and newly born seedlings by watering too hard! We recommend watering from the bottom by placing your seed starting container in a dish or basin filling it with water 2-3 inches and allowing the moisture to be drawn upward. If just the top has dried out use a spray bottle or a child’s watering can with small holes. And if you don’t have either, while pouring out the water (gently!) put your hand in between the water and the soil to break the fall of the water before it lands on the seeds or tender seedlings. Water daily and remember, gentle!
  7. Cover! Immediately cover your pot with a piece of saran wrap or a plastic bag to help retain the moisture. If you have a garden dome then place the lid on top.  Keeping your seed evenly moist until germination is essential.
  8. Temperature. Most seeds require temperatures of 65° to 75°F to germinate. The back of your BBB Seed packet will tell you the preferred germination temperature for your seed. Place your seed containers near an existing heater, on top of the stove (pilot lights can be very warm at night!) or use a space heater with the proper precautions to raise the ambient temperature as needed. Heating pads designed specifically for plant use can also be placed directly under the seed containers which will encourage germination.
  9. Good Light. Plants require at least 12 hours of daylight. If you are starting your seed where light is poor or during a time when there is less than 12 hours of light per day we recommend growing lights. If sowing your seed indoors, place your seed containers in a sunny, south-facing window and give the container a quarter turn each day to prevent the seedlings from overreaching toward the light and developing long and weak stems.
  10. Acclimate Your Seedlings. Before you transplant your seedlings outdoors they need to be hardened off or acclimated to direct sunlight and fluctuating temperatures. It is best to do this over a three-to-five-day period by placing them in direct sunlight during the morning only on the first day, then increasing their time outside by a few hours each day until they are strong enough to be transplanted. Don’t feel rushed. If unexpected weather or wind arises, keep them indoors. Nothing is more disappointing than spending all of your time growing your precious seedlings to then having something go wrong when you put them outside.

If you have any questions at all about how to start your BBB Seed please do not hesitate to email us at info@bbbseed.com. We look forward to answering any questions you might have!
Download our E-Book here:
CTA_BBBSeed

Please Pass The Peas

History of Green Peas and Recipes

By Engrid Winslow

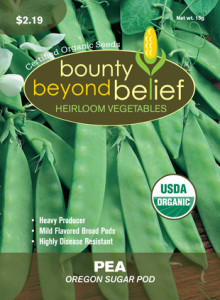
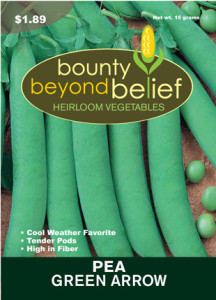
Organic Oregon Sugar Pod Pea Pea, Green Arrow

 “How luscious lies the pea within the pod” – Emily Dickson wrote. I think most of us would agree that fresh peas are a hallmark of early summer produce and have us saying “please pass the peas”. The origin of peas is shrouded in mystery as it is a food plant so ancient that the earliest preserved specimens date from 9750 BCE in Thailand. Peas are legumes and of the family Fabaceae and is the third largest of the flowering plant families.

The ancient Greeks and Romans grew peas and hot pea soup was peddled in the streets of Athens while fried peas were sold to spectators instead of popcorn at the Coliseum in Rome. They were popular in England in the middle ages and there were to primary varieties – one was a field pea to be fed to animals and the other was called the “greene pea” and appeared often at the dinner table. The pea arrived in the Americas with Christopher Columbus and was part of the early colonist’s kitchen gardens.

Green Peas are easy to grow and can be succession planted to extend the harvest, they are delicious additions to salads, soups and eaten alone. The varieties are many, including shelling peas and sweet sugar snaps as well as the snow pea used in Asian cooking. “All the essentials of life,” according to Winston Churchill, are only four: hot baths, cold champagne, old brandy and new peas.

Here are a couple of classic recipes to help you enjoy the bounty of fresh peas and to make your family say “please pass the peas!”


CORNUCOPIA SALAD

Serves 4 as a Vegetarian Main Course


1 bunch torn arugula

1 bunch torn butterhead lettuce

½ lb sugar snap peas, string removed

1 cup cooked black beans

1 cup diced buffalo mozzarella

16-20 halved cherry tomatoes

Kernels from 2 ears of cooked corn

½ cup diced red bell pepper


For Vinaigrette:

2 TBL red wine vinegar                                   1 TBL Dijon mustard

2 TBL balsamic vinegar                                   ½ tsp salt

2 TBL lime juice                                                 ½ tsp freshly ground black pepper

1 TBL lime zest                                                   2 TBL chopped roasted red bell pepper

¼ cup minced red onion                                                6 TBL olive oil

2 TBL chopped fresh basil                             6 TBL canola oil

1 TBL minced fresh parsley                          2 TBL water


ENGLISH PEAS WITH PROSCIUTTO AND POTATOES

Serves 3 or 4


½ lb new potatoes, scrubbed and cut into ½ inch dice

3 oz. chopped prosciutto, pancetta or bacon

2 lbs shelled fresh English peas

½ small onion, finely chopped

1 small handful of fresh mint leaves

Extra virgin olive oil

Salt and freshly ground pepper, to taste


Put potatoes in a medium pot with water to cover by one inch and one tablespoon of salt. Bring to a boil and simmer gently for 10-12 minutes until potatoes are tender. Drain.

Heat a small glug of olive oil in a large skillet over medium heat and add onion and prosciutto and a pinch of salt. Sauté until onion is soft and fragrant and prosciutto has rendered some fat and is turning crisp around the edges, about 5 minutes.

Add the peas and potatoes and season generously with salt and pepper. Add 2 tablespoons of water to help steam cook the peas for another 4-5 minutes until they are tender and the flavors have come together.

Toss in the fresh mint and drizzle with a bit more olive oil and additional salt and pepper to taste. Then pass the peas!


Nasturtiums!

Wildflower Seeds

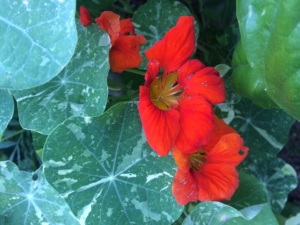
by Heather StonePhoto of red nasturtium blooms.

The bright, rich colors of nasturtium flowers make an impact along the edge of the border, in a pot or climbing a wall or trellis. Their gorgeous rounded leaves, much like a water lily, are a vibrant shade of green with a few varieties having variegated leaves. These easy to grow annuals deserve a place in any garden.


Growing Nasturtiums is easy from seed. Sow directly in the garden starting in late spring after all chances of frost have passed. If you want to get a head start you can plant seeds indoors 3-4 weeks before your last frost date. Plant the seeds ½- 1” deep and about 10” apart. Nasturtium seeds are large and germinate quickly (5-7 days) which makes them a great seed to plant with children. Nasturtiums can be grown in full sun or part shade. They prefer a leaner soil and do not need to be fertilized. Keep them watered during dry spells and remove spent blossoms to encourage prolonged blooming.


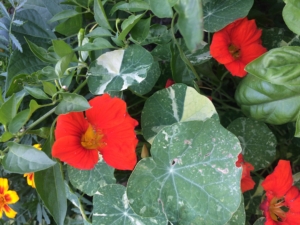
Flower colors range from orange to red to yellow, peach and even burgundy. Both the flowers and leaves of the nasturtium plant are edible. The flowers have a peppery flavor and make a bright addition to any salad. They are delicious stuffed with soft cheese or can be used to make an infused vinegar.

Photo of red nasturtium blooms.

Nasturtiums make great edging plants. I especially like to use them along the edges in my vegetable garden where they spill over the sides of my raised beds and attract the bumblebees. They are also great tucked into bare spots in the garden. The climbing varieties can share space with roses and clematis in the perennial garden or beans and cucumbers in the vegetable garden.


Bring these gorgeous and tasty flowers to your garden by planting our Alaska Mix Nasturtium

Bring More Sweet Smells Into Your Life

Find Your Favorite Fragrant Flowers

By Engrid Winslow

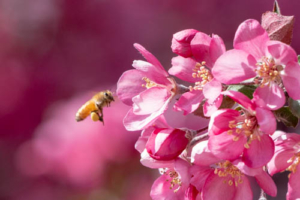
Fragrant flowers such as these crabapple blossoms bring sweet smells into your life.

Photo courtesy of Joe Winslow

Do gardeners love fragrance because they are gardeners or are they gardening because they enjoy fragrance? It’s sort of a “chicken and the egg” concept, but no gardener can deny that growing plants is a sensory experience. Whether it’s brushing against basil or tomatoes while harvesting or inhaling the smell of a rose, those of us who garden seek out sweet (even unusual) smelling plants. If you enjoy the spicy scent of marigolds or the heady aroma of peonies then you surely want to bring fragrant flowers and plants into your life.

Fragrance can bring back memories or promote relaxation. Lavender is the most well-known fragrance added to various products that help us relax and even fall asleep.  The best way to bring fragrant flowers into your garden is to plant them where the fragrance can be enjoyed when you are outdoors. Place them near walkways, front and back doors, benches and under bedroom windows so the smell can be appreciated. Also, consider the seasons when they bloom for year-round enjoyment.

Fragrance in flowers falls into 4 major categories: Floral, Fresh, Spicy and Woodsy are the primary scents. Floral smells are sweetly fragrant and include flowers such as stock, lilies, sweet pea, alyssum, lily of the valley and phlox. If you like spicy then be sure to include marigolds, sage and carnations. Fresh scents include lavender and mint while you can add the woodsy smell with rosemary and thyme.

There are public gardens, that were designed with fragrant flowers in mind and in honor of the blind, that are worth a visit if they are near you. If not, then just notice what you are smelling as you walk your neighborhood and garden centers. Sometimes a smell will surprise you, require investigation and then add to your home garden.

A Trio of Morning Glories to Welcome Spring

The Morning Glory

By Engrid Winslow

Morning Glories are one of the easiest annuals to start from seed. In some areas, they will re-seed from last year’s dropped seed and some varieties may even be perennial in mild climates. After an overnight soak in water, plant the seeds about 1/2 inch deep and then stand back and watch!

Best started in fertile soil with adequate moisture during germination and early growth, morning glories can produce vines up to 15 feet long and will clamber over gazebos, fences and trellises with their twining limbs. Some gardeners even grow them up a downspout and along a roofline or up into the limbs of a tall tree. They can be so vigorous as to choke out other plants nearby and can be vigorous re-seeders which grow best in average soil and full sun.

They are called “morning glory” because they bloom early in the day and the petals deflate and fall off in the evening. The Morning Glory was first cultivated in China for its medicinal uses, due to the laxative properties of its seeds. It was introduced to the Japanese in the 9th century, and they were the first to cultivate it as an ornamental flower. The Japanese have led the world in developing varieties and the colors range from blue and pink to red, purple, lavender, white and even brown. The flowers are attractive to hummingbirds, butterflies, and bees.

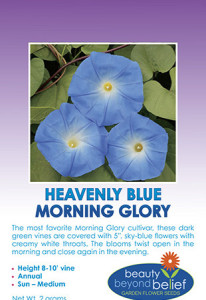
Tag for the Heavenly Blue Morning Glory seed packet.

Here is a trio of Morning Glories:

Heavenly Blue Morning Glory

(also called Clarke’s Heavenly Blue) blooms with 5-inch flowers all summer and is an heirloom variety dating back to the 1920s. It is a lovely blue with a white center. These are one of the most easily recognized and popular of all morning glory varieties and can be up to 12 feet long.  The foliage is an attractive heart shape.

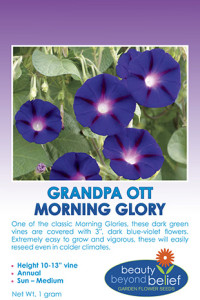
Grandpa Ott’s Morning Glory

bears velvety deep-purple flowers with red stars at their center. This self-sowing annual was originally grown by Grandpa Ott, a Bavarian immigrant, who lived on a 40-acre farm in St. Lucas, Iowa and was preserved by the family in conjunction with the Seed Savers Exchange. This one can climb to 15 feet tall if given support to grow on. Grandpa Ott’s grows very quickly, spreads easily and looks stunning. It will also adapt to part shade.

Tag for the Grandpa Ott's Morning Glory seed packet.

Moonflower

Although also called “morning glory” start to bloom in the late afternoon and close in the morning light. If the day is overcast or cool and cloudy they may stay open for a longer period. Moonflower is fragrant enough to perfume the air within 6 feet of the blossoms and loved by hummingbirds and night moths, including the large Sphinx Moth. The blooms are 5-6 inches across and the vines can grow up to 20 feet. They are native to tropical and subtropical regions of the New World, from northern Argentina north to Mexico and Florida.


Pollinator Seed Mixes

Our 5 Most Popular Pollinator Seed Mixes


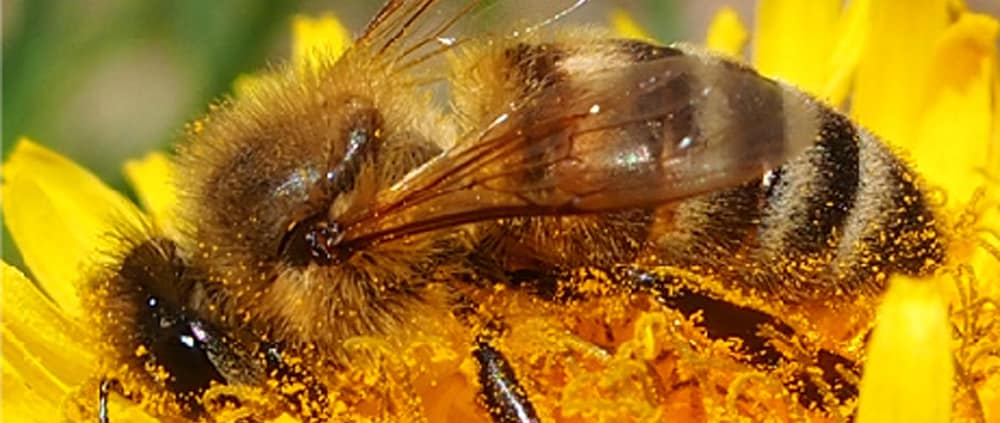
Honey Bee on yellow blossom.

Save the Pollinators

Pollinators are the magic ingredient that makes our natural world work. They fuel lifecycles of entire ecosystems and are found everywhere flowering plants are. Humans are also incredibly dependent on pollinators. Pollinators come in all shapes and sizes. Honeybees, native bees, bumblebees, butterflies, birds, bats, and other wild critters are all incredibly important pollinators!

Unfortunately, we are losing our pollinators at an alarming rate. Insect pollinators are being hit especially hard. Habitat loss, exposure to pesticides, lack of food, and diseases are all leading factors in the decline of these species. We should all be concerned. One-third of our food, from coffee to strawberries, are dependent on pollinators to produce. We need these animals just as much as they need us.

We take our favorite wildflower seeds and blend them into pollinator seed mixes specially formulated to help create habitat and forage for the pollinators in your backyard. We make sure to use fresh, high quality, open-pollinated, GMO-free seeds because you deserve to have a successful, healthy, and fun planting experience. Our mixes are all seed with none of the fillers that you might find in other mixes because we believe you should get what you’re paying for.

Click here if you have any questions about how to select your site, plant, or care for our wildflower mixes!

Here are our 5 most popular pollinator seed mixes:


1.     Monarch Rescue Mix

Monarch butterfly on pink blossom.

Monarch Butterflies are some of the most wonderful and strange animals on Earth. Every year, they migrate between the high mountains of Mexico through most of North America. This migration takes four separate generations of butterflies to complete and covers a massive amount of territory. To complete this migration, the Monarchs need plenty of forage and nesting sites along the way.

However, habitat and forage loss has been devastating for the Monarch Butterfly. Milkweed plants are the only plants that Monarch Butterflies will lay their eggs on. These plants have been wiped out of large portions of the United States due to concerns about allergies and their designation as a “weed”. Habitat loss and pesticide use have also reduced the amount of good forage for Monarchs, weakening them too much to complete their journey.

This is why we created our Monarch Rescue Wildflower Mix. This mix of Milkweeds and wildflowers is a Monarch Butterfly booster shot. This mix is full of nutrition and habitat for the butterflies passing through your area. Make your garden a Monarch paradise with this mix.

Find it here.

2.     Bee Rescue Mix

Honey bees on purple lavender blossoms.

Bees have had a rough time of late. The incredible loss of honey bees in recent years has been well documented and reported on. However, the crisis is much deeper than just honey bees. North America has over 4,000 species of native bees. Most native bees are solitary and are extremely effective pollinators. However, these little bees are little understood and are in even more danger than honey bees because they don’t have beekeepers watching out for them!

This colorful combination of wildflowers will provide nectar and pollen for full season support of native and introduced bee species.  Our “Bee Rescue” Wildflower mix has been designed to include the absolute best species to support the health and vitality for a wide range of native pollinators as well and the honey bee. This is one of our best selling pollinator seed mixes! These are the flowers that attract the most pollinators and will do well over the most growing zones.

Get our Bee Rescue Wildflower Mix here!

3.     Bumblebee Bonanza Mix

A pollen covered bumblebee on a pink blossom.

Bumblebee Bonanza Mix is a colorful mix that includes specially selected species of nectar and pollen-rich, annual and perennial flowers that are known to attract bumblebees and other pollinators and will provide quality forage from early spring until late fall.

This mixture of annuals and perennials is designed to provide early, mid and late season blooms to support the life cycle of the bumblebee as well as other pollinators. These flower species will do well in a variety of growing conditions and are recommended for a maintained, home-garden planting or commercial landscape.  The best time for planting this mix is in the early spring, early summer and late fall.

Buy the Bumblebee Bonanza Mix Here!

4.     Hummingbird Mix

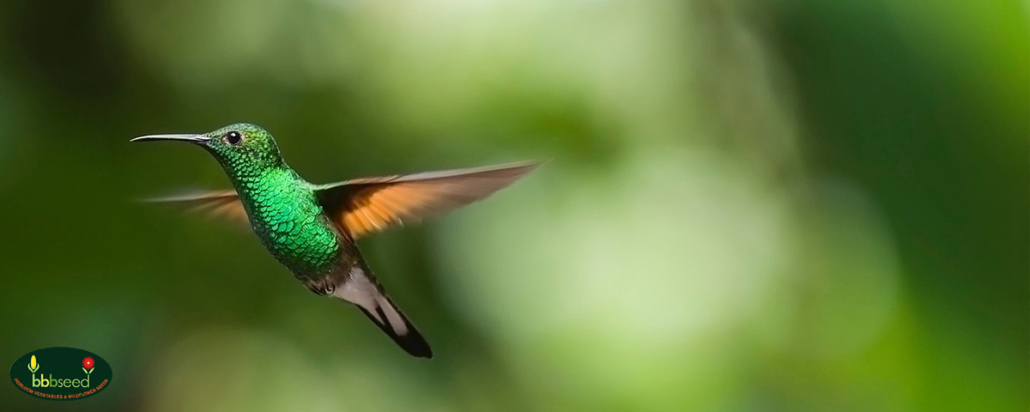
Green hummingbird in flight.

This mix has been created with the vibrantly colored, nectar-rich species that hummingbirds love.  Consisting of mostly perennials, this mix will continue to provide support to hummingbirds and other important pollinators.  A few annuals are included to provide color the first year while the perennials become established and will bloom the second year.

Get it here and start enjoying your hummingbird garden!


5.     Honey Source Mix

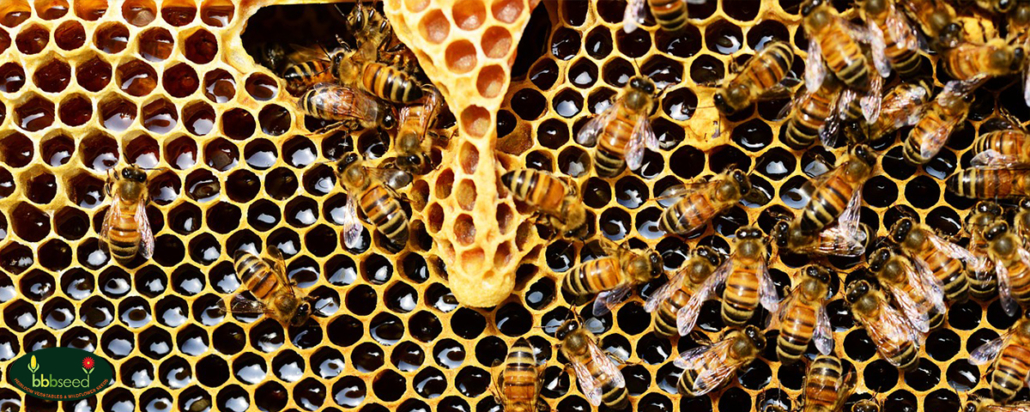
Honey bees on a honeycomb.

A long blooming mix of beautiful, nectar and pollen-rich annuals and perennials put together just for our Honey Bee friends.  Plant this mix to provide vital nutrition for the European Honey Bees.  These hard-working pollinators are necessary for our agricultural production and are a major contributor to our food supply.  Lack of native nectar and pollen sources between crop rotations can cause stress and starvation that contribute to colony collapse.

Our Honey Source Wildflower Mix can be found here!

One Last Thing

At BBB Seed, we are deeply committed to providing the highest quality grass, wildflower, and grass seeds to empower our customers to get out and grow! This list of our 5 most popular pollinator seed mixes is intended to be a useful resource for you to see what products our customers and we are enjoying right now!

We also are incredibly concerned about providing sustainable and environmentally conscious products to you. We source seeds that are non-genetically engineered, tested, and grown sustainably. We hope these products will help you enjoy nature and learn about this wonderful world in the garden. We strongly encourage you to visit our Pollinator Action Page or The Bee Conservancy to learn about the pollinators that make our natural world possible and learn more about what you can do to help them. Thank you!

Grow. Enjoy. Share…the beauty and the bounty!


DREAMING OF SPRING

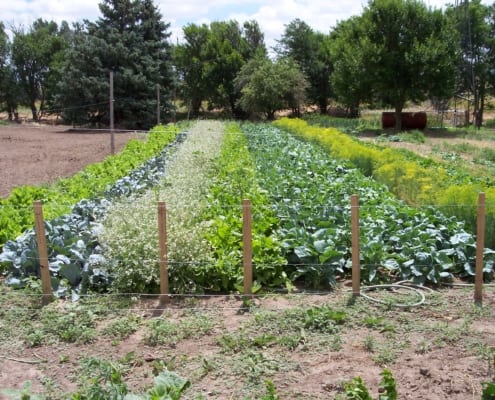
Plan your vegetable garden. Rows of Vegetables in a Garden.

Plan your vegetable garden!

By Engrid Winslow

Yes, it is still very cold and very dark but nothing fills the heart in the dead of winter than planning for spring. What should you be doing now that will keep those spirits up? Plan your vegetable garden and herb garden!

1. First of all, take a look at those vegetable and herb beds and decide what and how many varieties you want to plant next year. Do you want to start those peppers a bit earlier this year? Did you plant tomatoes there last year – rotate tomatoes every 3 years if at all possible to avoid depleted soil and issues with many diseases. What do you want to grow more of this year? Anything you want to try that’s new? What did you and your family really love? Want more tomatoes or basil for pesto or tomato sauce? [4 Tips For Keeping Your Basil Productive and Pesto Secrets] Were there any epic fails? Maybe it’s time to move on to buy those at your local Farmer’s Market and devote the precious real estate to something else.

2. Speaking of soil, this is a great time to start adding mushroom compost in a nice thick layer that can work its way into the soil during late winter freeze and thaw cycles and heavy periods of moisture. You can also cover the compost with a layer of seed-free straw that was grown organically.

3. Peruse the seed catalogs and websites. It is so fun to read those descriptions and they all sound wonderful but be aware of your space and climate when choosing seeds. Take stock of any seed that you saved from last year and organize and assess any leftover seed packets. Seed viability goes down over time. Onions, corn, parsnips, parsley and leeks should be refreshed every year, but tomatoes and lettuce can go 4-6 years and still germinate. Check out these charts if you have questions: https://hortnews.extension.iastate.edu/1999/4-2-1999/veggielife.html/

and http://ottawahort.org/wp-content/uploads/2017/02/Seed-Viability-Times.pdf/

4. Gather up your seed starting supplies and order more if needed. Dust off those grow lights, check the heat mats and make sure they still work and clean any seed starting containers that you plan to re-use with a weak bleach solution. Again, assess what worked and what didn’t in prior years. Did lettuce seeds that were direct-sown in the garden elude you? Try starting them indoors under a plastic dome which helps retain moisture until they are fully germinated.

5. Did friends and neighbors share anything they learned with you? Maybe it’s time to get everyone together for a Happy Hour, swap saved seeds and talk about their gardening experiences.

6. Review past blogs, books and articles that you might have saved for ideas, tips and new information. Here’s a good place to start: Care and Planting of Seedlings, Rules You Can’t Break, and Two Ways To Guarantee Your Seeds Grow

Decorating with Wildflowers

Wildflower Seeds

Summer is upon us and the wildflowers you planted are in full bloom and you have enough to spare, maybe, for a bouquet for your table!

Wildflowers are great candidates for cut flower arrangements.  Blooms can be freely cut without fear of ruining the manicured look of the typical flower bed and arrangements can be just as free and wild as the components.  Make a big multicolored arrangement with a relaxed informal design that will really light up your room and give the feel of walking through a meadow.  The components of your design will necessarily reflect the seasonal bloom times.  Try arranging flowers along with interesting textures of grasses, ferns or branches from bushes or trees.  Seed pods and even bird’s nests make great accents.  The small delicate size of most wildflowers allows for groupings of similar flowers together with open spaces.  Look for colors that complement each other and a variety of textures.


Favorite flowers for bouquets are Bachelor’s Buttons in shades of pink and blue, spikey Purple Coneflower, fluffy towers of lavender Lupine, tall stalks of blue Larkspur, and the striking yellows of Black-eyed Susan and Gloriosa Daisy.  Think about including the multicolored warm hues of the Firewheel Gaillardia, native annual Sunflowers, and Plains Coreopsis.  Tall stalks of the brilliant white Shasta Daisy, the fuzzy spikes of Liatris or tall stalks of ferny-leafed Cosmos add eye-catching interest. Poppies, although brilliantly tempting, don’t have a very long vase life.  Their delicate petals tend to fall off with just a touch. Use the bobbing, white clusters of annual Baby’s Breath to fill in the spaces and unite all components.  Lastly, add a few tall grass tassels reminiscent of meadows and forest glens.

When decorating with wildflowers, plan to cut your flowers for arranging in the morning hours.  This is when the plants have taken up the most water and are not in the work mode of photosynthesis.  Choose the freshest flowers, even choosing some that are just beginning to open up, to ensure that your arrangements will last as long as possible.  Take a clean bucket, filled with 6” or so of warm water, out to the wildflower patch and cut the stems as long as possible on an angle with very sharp scissors or knife.  This will ensure that the flower stem will be able to take up water and nutrients for the longest time possible.  Any vessel can serve as a vase or container for displaying your bouquet.  Be creative, even a basket will work with a smaller cup or bowl inside that can hold water.  Keep in mind the scent of your flowers.  Some of those beautiful flowers in the wild may have a very strong or unpleasant scent when in a closed room.  Wildflowers with milky sap, such as poppies, release the sap into the water and stop the water uptake of the other flowers.  The stems can be sealed shut by holding a lit match to the cut end of each stem until the stem turns black.

Even a ‘wild’ flower arrangement starts with some basic arranging steps.

First, start with the base layer.  This can be some general greenery or the flowers that will provide the bulk of the contents.  Make sure to remove all vegetation that will be below the water level which would rot and increase the bacteria in the water and decrease the life of the arrangement.

Next, add the other flower choices to your display, working with one flower species at a time, placing them at differing angles and directions. Add the larger focal flowers in odd numbers, such as 1 very tall central flower or 3 or 5 large eye-catchers.

Then, balance and fill holes with baby’s breath or greenery and last, add in odd numbers, the tall textural grasses or seed pods. Check the water level and add water daily with 1 tsp of household bleach per quart to inhibit bacteria growth.  You can revive wilted flowers by re-cutting the stem end and placing in hot water.

Create an arrangement for any room of the house or porch or even your favorite reading nook.  Remember to balance the size of the arrangement with the room and use, putting low arrangements on the dining table.  Don’t be afraid to bring the bounty of your own wildflower meadow into your home and feel free to upload a picture of your arrangement to our website!