Saving Seeds

Saving Seeds from Heirloom VegetablesSaving seeds from heirloom vegetables.

What are “heirloom” vegetables? An heirloom vegetable is a non-hybrid, open-pollinated variety that has been passed down from generation to generation and, in some cases, can be traced back hundreds of years.  These seed lines have been carefully selected to maintain uniformity and consistency for germination.

Heirloom seeds become ‘heirloom’ because they exhibit exceptional traits desired by the gardener.  Often this means the plants are more colorful, flavorful, and unique, or have great germination and vigor.  Often the traits are location-dependent.  Meaning, seeds planted in one garden will not produce in the same manner in another location.  We encourage you to try heirloom seeds, see which have the qualities for your area to become your favorites and make them into your own very special seed line.  Seed saving from heirloom vegetables is easy and fun.

Gardeners have found that as seeds are selected and saved over many years, production is increased and the quality is improved, creating plants that will produce best for that locale and will resist diseases and pests of that locale.  Contributing to genetic diversity strengthens the ecosystem. Historically farmers and local gardeners have created and sustained this rich genetic heritage by learning to save their own seeds from varieties that perform best in their own mini-ecosystems.  The current trend toward mono-crops where only one seed type is used to produce a crop worldwide is eliminating the ability to be able to find genetic variations that will withstand emerging pathogens and climate changes.

Planting your crop:

Start with good Heirloom Seed varieties.  Keep in mind that to allow the plants to produce seed and to allow the seed to fully mature, you will have to allow for a longer growing season.  This can be done by starting plants indoors and arranging for protection from frost in the late season. You will grow some for food or flower harvest and some for seed production.  Fully mature seeds will be viable (able to germinate) and produce vigorous plants.  You may want to do some research on the different flower types for proper pollination techniques and plant with row/species separation in mind, to prevent cross-pollination.

You also may look into caging procedures to isolate species that are in flower at the same time.  By caging different plants on alternate days, you can take advantage of the pollinators to do the work without cross-pollinating your crop.  Cage one plant or group on one day and early the next day, before the bees wake, transfer your cage to a different plant or group.  Some crops are biennial and do not produce seed until the next year, so you will need to determine whether you should leave the roots in the ground over the winter or dig and store them.

There are many publications with detailed information on seed-saving and growing techniques for each species.  “Seed to Seed” by Suzanne Ashworth, 2002 by Seed Savers Exchange, Inc. is a good way to get started. Also, check out these easy instructions for seed saving, written by the International Seed Saving Institute, a non-profit established to teach seed saving.
Why save seeds:

When you grow crops using your own saved seeds from your best plants for next year’s crops, the seeds begin to adapt to the growing conditions (temperature, moisture levels, pests, diseases, and so forth) that exist in your garden.  This adaptation makes your garden stronger over time.  Seeds that are used to grow crops year after year have the opportunity to adapt to incremental climate changes.  As global temperatures change, these plants will have a better chance at survival and productivity.  A single plant from a single seed can produce dozens or hundreds of seeds, increasing your seed stock exponentially.  Sharing and exchanging seeds with other gardeners, community gardens or seed libraries helps to increase the diversity of everyone’s collections.

Harvesting and collecting seeds:

When saving seeds from heirloom vegetables, look for favorable characteristics such as; freeze and cold tolerance, heat tolerance, adaptability, winter hardiness, early maturation, vigor (strong germination, and growth), flavor, color, size, texture, etc. Also, look for desirable traits such as; vine or plant type, seed type, and specific disease resistance.  Plan to be ready to harvest the seed as they mature.

– Collecting dry seed:

It’s easy to save seeds from plants that produce pods, husks, and other dry casings such as peas, beans, and flowers.  The technique is called “dry processing” and is faster than collecting seed from fleshy, pulpy fruits such as tomatoes and cucumbers.  Seeds that are dry-processed can be allowed to dry right on the plants unless there is wet weather in the forecast.  Seeds often fall where they may, naturally, little by little.  Often the pods will pop open when you are not around to collect the seed and it will be lost.  Allow the seed pods to remain on the plant in the ground for as long as possible.  Usually, the seed will not continue to mature after the pods are cut from the plant. To collect the seeds easily as the seeds begin to mature, secure paper bags over the seed heads and attach them to the stems of the plants.  As they mature they will drop into the bags.

Separating the seeds from the chaff (dried pods and stems) is called threshing.  Commercial threshing is done by multitasking machines that can harvest, thresh, and winnow the seeds all at once.  For the home gardener, a bag, pillowcase, or small sack is all that’s necessary.  Put the seeds into the bag, secure the ends, and roll it around, lightly crushing and breaking up the pods a bit.  Be gentle so you don’t damage the seeds, but just loosen the chaff.  For tinier seeds, you can just put them on a board and crush them with your fingers.

Then you will need to winnow the chaff from the seeds.  Place the seeds in a bowl and gently blow on them to remove the lighter-weight chaff.  Swirl the seeds around and continue blowing gently until most of the chaff is removed.  Another option is to use a screen or sifter where the holes are smaller than the chaff to simply sift them apart.

– Collecting seeds from pulpy fruits:

Pick the best, most ripe (even to the point of over-ripe) tomato, pepper, cucumber, etc.  Choosing an over-ripe veggie will ensure the seed has fully developed.  If you wait for a frost or freeze before you pick the fruit or veggie, most of the seed will not be developed enough to be viable next year.

Cut open the fruit and scoop out the seeds or for small fruits like cherry tomatoes, simply squeeze the seeds out into a glass jar.   Add a little water and label the jar with the seed variety.  The seeds usually are surrounded by a gel that inhibits germination.   Leave for two to five days to begin fermenting. This will break down the seed coat while killing off many of the harmful bacteria and fungi lurking on the seeds.  Swirl the contents in the jar every day.

When the pulp floats to the top, the seeds are ready for cleaning.  Most of the seeds will have sunk to the bottom.  Carefully skim off the pulp then tip the liquid and seeds into a strainer. Wash the seeds under running water, using the back of a wooden spoon to carefully remove any remaining material stuck to the seeds.  Spread the seeds onto a paper towel to remove most of the water, then transfer them to a non-stick surface such as a dinner plate. Dry the seeds in a warm place out of direct sunlight. It will take two to three weeks for the seeds to completely dry out.

Make sure you label the seeds with their name and the date they were collected immediately after you have finished harvesting each variety.  Excellent record-keeping is your best friend when it comes to seed-saving.  It’s amazing how easy it is to mix up seed varieties!

How long do seeds last?

If you keep your seeds in a cool dry place, your seeds can last for years.  These things are seed killers: excess moisture, excess heat, light, and rodents.  Some seeds last easily for years. Others only last one year before the germination rate goes down.

Here is a chart from the Chicago Botanic Gardens on longevity in vegetable seeds as well as one from Iowa State University extension.

Seeds that have passed their prime for producing viable plants can be used to scatter as a cover crop, for bird seed, for eating, or for cooking (as in herb seeds).

5 Easy Tips for Successfully Planting Grass Seed

Five easy tips for successfully planting grass seed.


by Sam Doll

Now that fall is nearly upon us, it’s time to start thinking about planting grass seed! Don’t know what you are doing? Don’t worry. We are here to help.

Here are our 5 tips for successfully planting grass seed this season:


1.      The Season Matters

While some warm-weather grasses, like bermudagrass, should be planted in early summer, most grasses need mild weather to successfully germinate and survive. Freezes and harsh heat can kill off your baby grass before it has a chance to become established. Late Spring and early Fall, when the soil temperature is between 50 to 80 degrees, is the best time to plant most grass seeds.

2.      Find the Right Seed

Find the grass that will suit your lifestyle and location. Some mixes, like our Green Manure and Cool Season Cover Crop, are great for restoring the soil nutrients in your soil. Some, like our Colorado Supreme Turf Grass Mix, are better for heavy foot traffic. Native and drought-tolerant grasses are great for creating a sustainable and low-maintenance landscape. Make sure to consider your soil type, climate, amount of sun, and intended use when picking a grass mix.

We have a wide variety of grass mixes that will suit all your needs.

3.      Prepare Your Soil

Once you’ve chosen your site, use a shovel or a sod cutter to remove the existing plants and grass from the area. Remove any debris and rocks you see, till the soil, and fill in any low spots. You want your soil to be broken into pebble-sized particles.

Rake the site to even out the soil and remove small debris. Be careful when bringing in new topsoil to make sure it doesn’t contain unwanted weed seeds.

Optional: You can send a soil sample to your local extension office to have it tested to see if you need any soil amendments. You can find extension offices near you with the help of this tool from GardeningKnowHow.com.

As for pH, you generally want to keep the soil between 6.0 and 7.0.

4.      Seed and Fertilize

Once your site is prepped, it’s time for planting your grass seed! Using a drop spreader or a broadcast spreader, spread half the seed lengthwise over your site, then use the other half and spread crosswise over your site.  A recommended seeding rate will be listed on the seed tag.

Feeding with starter (weak) fertilizer the same day as you spread seed will provide proper nutrients for early growth and establishment. Make sure the site stays moist, but not soggy, through germination.

5.      Maintenance

Different mixes require different maintenance. Generally, once grass reaches 5-6 inches (for turf type), it is recommended to cut it to encourage even growth. Water and fertilize as needed.


We hope these tips will make planting grass seed a breeze for you! If you still have questions or need any other advice, please don’t hesitate to contact us.


Don’t Pass On Peas

Tips for Successfully Growing Peas

by Heather Stone

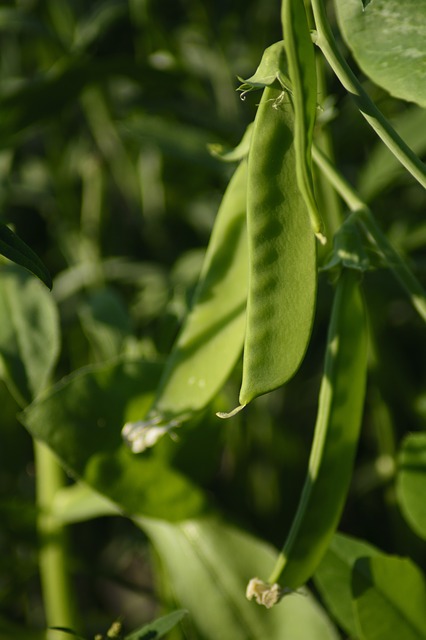
Green Sugar Snap peas on the vine.

Image by Reginal from Pixabay

Plant Green Peas for one of the first crops in the spring. As soon as you can stick your finger into the soil you can plant peas. Whether you plant shelling, snap or snow peas this early crop loves the cool weather of spring, producing tender pods that are hard to resist.  More often than not, they are eaten straight off the vine right there in the garden, very few making it to the kitchen. Every year I always wish I would have planted more.

Planting green peas should happen as soon as the soil can be worked, about 4-6 weeks before your average last frost date. For best germination, soil temperatures should be around 50 degrees F. Do be cautious of excess moisture. You don’t want your seeds sitting in wet soil.

Before planting, soak your seeds overnight. This will help speed germination. Plant seeds about 1” deep and 2-3” apart in well-loosened soil in a sunny spot in your garden. Peas will also do well in part shade. Give your peas a trellis, as most peas need something to climb on. Keep the area moist until the seeds germinate, on average between 7-14 days.

Green Peas are an easy crop to grow. Keep the plants moist, especially once they start producing. When they reach 8-12” tall mulch your vines well to keep the soil cool and help retain moisture. Peas grow best in temperatures below 70 degrees F, so plant your seeds early. Once temperatures reach 80 degrees the vines tend to stop producing.  

When the peas begin to ripen, harvest daily and be sure to use two hands to pick. Use one hand to hold the vine and the other to pick the peas. This way you will avoid damaging the tender vines. For the crispiest peas, pick in the morning after the dew has dried. Peas will last about 5 days in the refrigerator (if they make it there) and any extra freeze well.

Like all legumes, peas fix nitrogen in the soil that other plants can use. When your peas are done for the season, remove the vines but leave the roots in the ground. Plant a nitrogen-loving plant in the area that can benefit from the extra nitrogen in the soil.

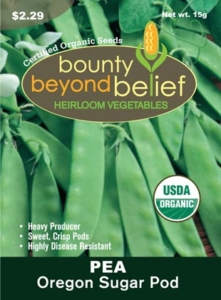
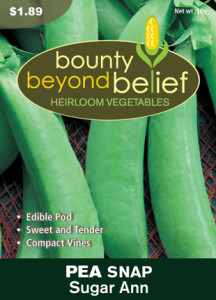
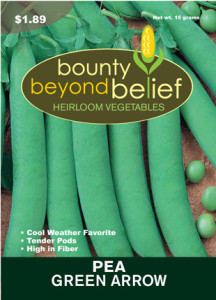
Don’t wait! Get out in the garden and plant some peas today! Try one of our tried and true varieties such as Sugar Ann, Oregon Sugar Pod or Green Arrow.

Packet of Oregon Sugar Pod Pea seeds. Pea, Sugar Ann Pea, Green Arrow


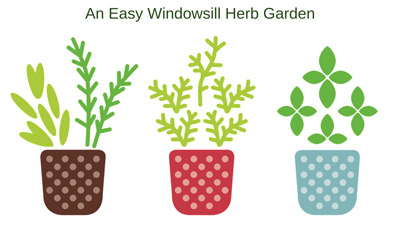
AN EASY WINDOWSILL HERB GARDEN

Graphic of herbs in pots.

photo courtesy of pixabay

At Home Gardening Tips

by Heather Stone

Are you are itching to get your hands in the dirt, but outside the ground is covered in snow? Well, a windowsill herb garden might be just the thing to get you through until spring finally arrives. Every kitchen and every cook deserves fresh herbs. They will help liven up not only your cooking but your gardening spirit too. Check out our herb collections here and here!


To get started make sure you have a sunny windowsill that gets at least 6 hours of sunlight. If you get less than that you will want to provide some additional lightening or your herbs will struggle.

Photo of basil growing in a pot on the windowsill.

photo courtesy of pixabay

Next, purchase some small starter plants from your local nursery or garden center or try starting your herbs from seed. Starting from seed may take a little longer, but it’s less expensive. When choosing plants or seeds pick herbs you know you like to cook with. Some great herbs for containers include thyme, basil, cilantro, parsley, chives, oregano, dill, sage, mint and savory.


Whether you are purchasing plants or starting from seed you will need containers and quality, lightweight potting mix. If you are starting with plants make sure your container(s) have a drainage hole(s) and are roughly 6-10” in diameter. Start by adding some potting mix to the bottom of your container. Next, place your plant in the pot and gently fill in and around it with more potting mix, leaving around an inch of room at the top for watering. Gently press the soil down and water well. Most herbs don’t like their soil too wet so make sure to test your new herb plants for water by sticking your finger an inch or two below the soil surface. If you find the soil is dry, it’s time to water. Fertilize your new herb garden once a month with a ½ strength liquid fertilizer. Be sure to give your plants some time to get established before you start harvesting.

Photo of Cilantro sprigs in a cup.

photo courtesy of pixabay

If you are starting from seed, you can plant in smaller containers to start and pot up as your plants get bigger. Fill your containers with a damp potting mix. Sprinkle 4-6 seeds on top of the surface. Gently press them in and cover lightly with more potting mix. Cover with a plastic bag or plastic wrap and place them in a warm, sunny windowsill making sure the soil surface stays moist. Once your seeds start to sprout, remove the plastic. Keep your new sprouts watered whenever the soil surface feels dry and watch them grow.


Here are some herbs that are easy to start from seed:


Basil

The dried version is no comparison to fresh basil. With so many uses and so many varieties to choose from basil is an easy choice for the indoor herb garden.


Cilantro

Cilantro is easy to start from seed and germinates in 7-14 days. Use the fresh leaves in salads, sauces and to garnish a wide array of dishes.


Parsley

Parsley is both productive and attractive when container-grown. It takes a bit longer to germinate, 12-28 days, but it’s worth the wait. Harvest leaves as you need them once the plant is growing strong.


Chives

Chives are another plant easily grown in a pot. The slender grass-like leaves are delicious and make an excellent flavoring in soups, stews, dips and salads. Sprouting in just 10-14 days you will have fresh chives in no time.


Name that Seedling

Wildflower Seeds

by Sandy Swegel

Everything’s greening up in your garden and there are so many interesting baby plants.  Can you recognize what’s a friend or a foe?  Here are some clues to help you identify little seedlings that may be coming up in your garden right now!


  1. I’m a weed, but I’m a nutritious and yummy green for salads or saute. Wait too long, and I may grow to four feet tall.
  2. I’m volunteering in your herb garden.  I look a lot like other herbs, flowers and weeds, but crush a leaf and smell it…and you’ll know exactly who I am.
  3. Did you plant your cool-season vegetable seeds recently? I’m always up the fastest!
  4. I don’t mind cold and snow.  A lot of people plant me on St., Patrick’s Day.
  5. Don’t I look healthy!  Let me grow and I’ll be in your garden FOREVER.
  6. Did you plant annual wildflowers last year?  I may have a hard time making a commitment, but I’ll be back every year.
  7. Nobody remembers planting me, but I love to grow in surprising places.  I may be all green now, but come back in a week and I’ll be jumping to see you.


Answer key to seedling clues

  1. lambs quarter
  2. cilantro
  3. radish
  4. pea
  5. bindweed
  6. bachelor’s button
  7. johnny jump up

DREAMING OF SPRING

Plan your vegetable garden. Rows of Vegetables in a Garden.

Plan your vegetable garden!

By Engrid Winslow

Yes, it is still very cold and very dark but nothing fills the heart in the dead of winter than planning for spring. What should you be doing now that will keep those spirits up? Plan your vegetable garden and herb garden!

1. First of all, take a look at those vegetable and herb beds and decide what and how many varieties you want to plant next year. Do you want to start those peppers a bit earlier this year? Did you plant tomatoes there last year – rotate tomatoes every 3 years if at all possible to avoid depleted soil and issues with many diseases. What do you want to grow more of this year? Anything you want to try that’s new? What did you and your family really love? Want more tomatoes or basil for pesto or tomato sauce? [4 Tips For Keeping Your Basil Productive and Pesto Secrets] Were there any epic fails? Maybe it’s time to move on to buy those at your local Farmer’s Market and devote the precious real estate to something else.

2. Speaking of soil, this is a great time to start adding mushroom compost in a nice thick layer that can work its way into the soil during late winter freeze and thaw cycles and heavy periods of moisture. You can also cover the compost with a layer of seed-free straw that was grown organically.

3. Peruse the seed catalogs and websites. It is so fun to read those descriptions and they all sound wonderful but be aware of your space and climate when choosing seeds. Take stock of any seed that you saved from last year and organize and assess any leftover seed packets. Seed viability goes down over time. Onions, corn, parsnips, parsley and leeks should be refreshed every year, but tomatoes and lettuce can go 4-6 years and still germinate. Check out these charts if you have questions: https://hortnews.extension.iastate.edu/1999/4-2-1999/veggielife.html/

and http://ottawahort.org/wp-content/uploads/2017/02/Seed-Viability-Times.pdf/

4. Gather up your seed starting supplies and order more if needed. Dust off those grow lights, check the heat mats and make sure they still work and clean any seed starting containers that you plan to re-use with a weak bleach solution. Again, assess what worked and what didn’t in prior years. Did lettuce seeds that were direct-sown in the garden elude you? Try starting them indoors under a plastic dome which helps retain moisture until they are fully germinated.

5. Did friends and neighbors share anything they learned with you? Maybe it’s time to get everyone together for a Happy Hour, swap saved seeds and talk about their gardening experiences.

6. Review past blogs, books and articles that you might have saved for ideas, tips and new information. Here’s a good place to start: Care and Planting of Seedlings, Rules You Can’t Break, and Two Ways To Guarantee Your Seeds Grow

Care and Planting of Seedlings

Guide to Seedlings

by Engrid WinslowArugula seedlings.

If you purchased seedlings such as vegetables or annual herbs and flowers there are a few things that you have to keep in mind for the care and planting of seedlings. They are way too tender to be planted outside unless they are “hardened off” and if they came from a nursery or greenhouse that has definitely not happened yet. Here are some guidelines to follow:

• Place them in a spot indoors where they can get at least ten hours of sun or use grow lights to keep them healthy.
• Move them outdoors gradually so they are exposed to sun and wind over a week to ten days (This is what is known as hardening off).
• Start slowly when temperatures are above 60 degrees and only leave them in the sun for 1-2 hours. Then move them into the shade if the temperatures continue to be mild enough.
• Increase the amount of sunshine each day and gradually expose them to more sun in 2-hour increments each day.
• Be aware of the last frost date in your area. Don’t plant until after that date and be prepared to cover them if the weather gets cold and snowy.
• Don’t forget to check your seedlings at least once a day for signs of wilting and water them well. Small pots with new seedlings can get dry very quickly.

How to Get Rid of Weeds

Tips for Weeding

by Sandy Swegel

That’s the question I hear most often in Spring.

The question comes most often from my friends who are very smart and successful in busy lives.  Their garden is one aspect of their beautiful complicated lives but it’s always a challenge because it’s not easy to make nature conform to what you want with one big weekend cleanup.

So there was an animated discussion about the best digging tools and homemade vinegar solutions. Everyone wants to protect the earth and the bees but frankly feel they have failed when the same weeds overwhelm their garden every season.  You know the weeds I mean, the ones that have grown very tall when you walk into your yard in late June and see that they just went to seed, making thousands of new baby weeds.

At some point, someone asks me what my tool is as a professional gardener.  My friends never find my answers very entertaining, so they usually return to a discussion of their latest internet surefire natural weed killer.  Nevertheless, here is my answer from years of experience of dealing with weeds.


The best tool is diligence.  Weeds have a strong will to live and procreate.  You have to be vigilant for them and keep after them.

After setting a firm determination about what weeds are permissible and which aren’t, then here are some techniques.

Get them when they are little.

Right now in your gardens, there are thousands of tiny weed seedlings you could control with one stroke of your hand hoe.  Off with their heads:  tiny seedlings don’t survive if they loose their leaves. Learn what young weeds look like.  Bindweed babies are cute little heart shapes.


Learn to love them. 

Dandelions are the best example of a “weed” you can learn to love.  In moderation of course.

They are very cute…children love them.  They are one of the first foods of hungry bees each Spring.  You will have more time and less frustration in your garden if you don’t have to eradicate all the dandelions.


If you do decide to get rid of perennial weeds…be smart and determined.  Don’t just hack it up in frustration every Spring and let it grow and strengthen the rest of the year.  You can’t get nasty perennials all at once….but you can wear it down and weaken it.  I have a sharp hori-hori knife and dig out at least four inches of root.  If the weed reappears, I recognize it and dig a little deeper the next time.  Soon it will exhaust itself and give up.


Finally, have a cup of tea.

Or at least get the electric kettle out.  Boiling water or hotter steam does an excellent job in rocks and walkways,  especially when weeds are young. And it is very satisfying.


Photocredits

https://weedecology.css.cornell.edu/weed/weed.php?id=6

http://www.blikk.hu/eletmod/tippek/elleptek-a-kertjet-a-gazok-igy-szabadulhat-meg-toluk/f38r539


How to Pick a Pea

Heirloom Vegetable Tips

By: Sandy Swegel

How to pick a pea to grow, that is.

There are so many varieties of peas to choose from….which one shall we grow? Here are three peas with very good reasons to grow them.

For snow peas, the generally accepted superior variety is “Oregon Sugar Pod II.” Research trials have documented that Oregon Sugar Pod producers twice as many snow peas as other cultivars. And there’s a cool reason for that: Oregon Sugar Pods split and produce two peas at every growth node while other snow peas produce just one. And the “II” in Oregon Sugar Pod II? That refers to the fact that this evolution of the pea is disease resistant. So you get lots of peas and no powdery mildew.

Despite the obvious perfection of the Oregon Sugar Pod II, I also like to grow the Dwarf Grey Sugar. They taste about the same to me and I get lots of peas from the Dwarf Grey Sugar, but the real reason to have them is that they have purple flowers. All the other peas have white flowers. More Purple Flowers Please.

Finally, the third pea I’m enamored of is Sugar Ann…an heirloom edible Pod pea. No shucking or shelling…you eat the whole thing…pod and all. They are delicious steamed or sautéed but we rarely eat them that way. Any pea lover will attest: peas taste best fresh picked, while you’re still standing in the garden.

Do you want a secret to more peas in less space? Plant your peas (or thin) a little further apart—4 inches between plants. Research in Oklahoma showed those plants branch more and produce 23% more peas than plants 2 inches apart.

Whatever variety you choose…start them soon. All peas stop producing when the temperatures get up above 75 degrees.

Photo credit:

www.rodalesorganiclife.com/garden/snowpeas
theenchantedtree.blogspot.com/search?q=Pea
www.thekitchn.com/5-ways-to-eat-sugar-snap-peas-144936