Tag Archive for: Seeds

Seed Starting in July

How To Know What to Plant This Month

by Sandy Swegel

As a gardener, I’m always surprised by the veggie seed sales in July.  I know from a marketing point of view the prime seed-buying season has past and companies have to move product still in inventory.  But from a gardening perspective, it doesn’t make much sense to give 50% discounts in July because a gardener should be starting lots of seeds now.  It’s the perfect time to start seeds!  Of course, I always think it’s the perfect time to start seeds.

How to know what to plant in July?  Stand in the garden and look around.

What do you not have enough of?  I don’t know why I thought ten chard plants would be enough when I love to eat the red-stemmed chard.  There’s barely enough to eat for this week much less into the Fall.  And kale?  I didn’t know last Spring that I’d get into juicing this summer….I’ve gone through all my kale and spinach.  And carrots add so much sweetness to juice I clearly need more.

What do you want to can? More beans, please.  More cucumbers.  Beets for pickling.

What do you want growing in Fall? Broccoli is so good in Fall.  Our CSAs are starting their broccolis now for Fall sales.

Typical plantings in July:

Beans Carrots Cucumbers Beets Kale Spinach Chard Scallions

You can try some of the atypical plantings too.  I’ve seen research from Iowa that says you can still plant corn up to the fourth of July and get a reasonable crop.

It’s probably too late for squash or tomatoes to grow from seed….but those seeds store for many years, so if there are varieties you know you’ll want to plant next year, it’s fine to buy the seeds now.

While you’re in the veggie garden, this is also a good time to plant perennial herbs and flowers that will last for years and bring pollinators.  This is also a great time to seed annuals that reseed themselves.  Cosmos and marigolds are good examples.

The biggest challenge to seed starting in July is making sure the seedbed stays moist during germination.  A sprinkler set with a timer to run just a short while every day helps.  Or my personal favorite and much written about helper:  row cover.  Put your seeds down. Water thoroughly. Lay some row cover over the seeded area with rocks to hold the row cover down.  That will give you some extra needed protection from the hot July sun.

Tomatoes: What to do When There are Problems in Paradise

Tomato Problem Solving

by Sandy Swegel

OK so only gardeners think of their tomato gardens as paradise, but what a grand time of year this is.  In some places, tomato growers are boasting about having ripe tomatoes before the 4th of July. Here in Colorado after a long cool spring, we’re just happy to see them thrive in the heat.  But with tomato plants comes the anxiety over pests and diseases.  Aphids are having a banner year and everyone is fearful of the psyllids that fly up from Mexico or the early blights/late blights, middle of season blights.

A friend with a bunch of kids compares growing tomatoes with having kids.  Parents are so worried about the first-born—you call the doctor at every sniffle. You watch the kid constantly, fearful that impending disaster awaits around every corner.  My baby sister wails that when you’re the last kid you have to practically be on fire to get mom’s attention.

As the first born, I am greatly amused by this.  But this is no way to grow tomatoes. You’ll go crazy if you try to treat or prevent every affliction.  If you can remember last year’s garden, you’ll remember similarly panicking over tomato problems at the beginning of the year.  But by September, you had to see the tomato plant in distress from the neighbor’s house two yards over before you thought, “Gee, maybe I should check that plant, the next time I am pulling buckets of tomatoes off of it.”

Most of the time your tomatoes survive the diseases and pests that come at them.  Your job is not hypervigilance, but simply creating the best environment to make them strong.

• Good Air Flow.

Air circulation is one of any plants best defenses against disease and pests. Space your plants so they aren’t all crowding one another so that if one tomato does have a problem, it doesn’t instantly spread to everyone else.  The market farmers here help air flow on larger plants by pulling the leaves off of the bottom six inches of plants so fungal spores don’t splash up on the plant.

• Adequate and Consistent Water.

Tomatoes thrive when they can count on their soil being evenly watered…and not going through dry as dust or swamp cycles.  Put a soaker hose on a timer if you have trouble remembering.

• Food.

As I’m sure you’ve heard before, tomatoes are heavy feeders.  If you planted in a big potting hole full of compost or manure and natural fertilizer, that might be enough. Otherwise, you’re going to have to do some feeding to get the big crop of tomatoes you want.

• Tolerance.

Most pests of tomatoes resolve themselves.  Flea beetles leave their shotgun holes all over the leaves, but the plant outgrows them.  Aphids fester, but in a pesticide-free garden, the ladybugs will usually show up a few days later. Or you can use the garden hose to spray them off. For more serious diseases like viruses, there’s not much you can do this season (just like antibiotics don’t treat colds.) You can pull the plant if it’s dying and start deciding where you’re going to rotate the tomatoes to next year.

• A little bitty bottle of Dr. Bronner’s.

Dr. Bronner’s is pure castile soap and available in little bottles for $2.  Mix a couple of drops with water in a spray bottle and that’s enough to treat most pests and fungal disease. Don’t overdo it.  And don’t go to the store to get all the chemicals to kill those pests that just end up killing your soil and you.

• Look at websites about tomato diseases.

If you have a healthy environment with air and food and water for your plants and you still see disease you worry about, go in and research it.  With any luck, the internet will suck you in and soon it will be dark and it’s too late to do anything today. By tomorrow you’ll forget and by next week your tomatoes will be pumping out tomatoes so you won’t worry anymore.

So just pretend tomatoes are your last kid. You love them just as much and you give them everything to grow healthy and happy and strong, but you don’t hover.  Relax and watch the miracle of tomatoes happen in the paradise of your garden.

Black Swallowtails

Protect Your Dill and Parsley

by Sandy Swegel

I’m very proud of my mama.  At 80+ and on oxygen 24 hours a day, she’s still making valiant efforts to keep her brain functioning.  She led a busy life, but now that’s she’s older and can’t get around easily without oxygen tanks, she is learning to observe what is in front of her.  Today she called me very proudly and announced that she had found five huge caterpillars on her dill plant in her tiny courtyard garden down in New Orleans.  She was never a gardener but at this point in life she loves watching butterflies through the window and had watched over the last few weeks wondering why the butterflies were all over the dill plant.  She called because she wanted to know what would happen next and what she should do or not do.

I pretty much said do nothing except maybe to make sure the cat kept the birds from eating those fat plump caterpillars.  And then I googled and found these great pictures of what’s going to happen.  She’s going to have to look around because the butterflies might make their home on some sticks or weeds or even under a tiny fountain.  She’s promised to take pictures…but photographer Bob Moul made a great website about what you should look for if black swallowtails are all over your dill, parsley or fennel. http://www.pbase.com/rcm1840/lifecycleofblsw  It only takes a few weeks from huge caterpillar to new butterfly!

Usually, it’s the very young and the old who have the wisdom to notice nature’s miracles like butterflies…but I’m going to check the dill and parsley too. If you don’t have time to stalk your dill plants, here’s an awesome time-lapse video of caterpillar to butterfly!  The first part of the video is all about frenzied eating.  http://www.youtube.com/watch?v=TrowLvvmmds

Going the Extra Mile for Pollinators

Saving the Pollinators

by Sandy Swegel

You know the basics for saving bees and other pollinators:

- Create a native plant wildflower habitat that provides season-long sources of pollen and nectar.

 – Provide a water source if a natural one is not available.

 – Stop your own use of pesticides that affect bees.

Just doing those three things will do a lot to invite pollinators to your yard and give them safe harbor.

This week, I’ll be posting about people and organizations who do even more…who go the extra mile for pollinators, sometimes with the simplest measures.

Winter Feeding Pollen Patties My neighbor Kathy has kept bees and for many years on a large suburban lot and like many beekeepers has endured the increased death of hives in recent years.  Going into this winter, she was very pessimistic about one of her hives that had almost no honey stores.  Since she had lost healthy hives in the past, she wasn’t too hopeful about a weak hive.  However, she found a new product for feeding bees in winter….rather than just putting out sugar water, she fed her bees Winter Pollen Patties. She used a product by Dadent and simply put the flat sheets of pollen substitute right on top of the bees.  When this Spring turned into a disaster for pollinators (multiple late freezes meant no spring blossoms on trees, a significant source of food for bees and other pollinators), Kathy continues to put the pollen patties in her hives.  Both hives are thriving the best she has seen in years.  And both hives are making babies.

It wasn’t a lot of work to go the extra mile of feeding bees in winter.  You have to learn to think about beekeeping from a bee’s perspective:  What does the bee need to eat?  The protein of pollen, not just sugar.  Just like humans can’t survive on soda.

Once you get your pollinator habitat growing, start thinking about what the next extra mile is you can do for pollinators in your garden.  Perhaps it’s nesting sites for wild bees. Perhaps it’s educating a neighbor about pesticides.  Let’s share our knowledge about what are the extra things that make a difference.

For more info on scientific methods for feeding bees in winter, check out “Scientific Beekeeping” http://scientificbeekeeping.com/fat-bees-part-2/

For a video on how to feed pollen patties:http://www.youtube.com/watch?v=cBZCL33fNHY

Honey Bees vs Native Bees

The Importance of Both Bees

by Becky Hansen

Bees are one of our agricultural industry’s most important resources and indeed one of our planet’s most important resources and the survival of the human race is in the hands of the pollinators. The pollinator issue is a hot topic these days, but, there is more to pollinating a crop than meets the eye.  There is great complexity in the relationship between the bees and the plants in an agricultural setting.  The needs of the plant species and the pollinators must match up pretty closely.  When it is all working together everybody benefits!  The farmer has successful crop yields and the bees are happy, healthy and well fed.  The flower structures, pollination method, pollen size and shape, nectar content are just some of the plant qualifications that a bee species looks for when ‘shopping’ for food and nectar.

Some bees such as the European Honey Bee (Apis mellifera) are polylectic which means that they will be able to find good food sources from many different plant species.  That is why a wildflower mix of several species is really great for the Honey Bee, as the time when nectar and pollen sources are available is lengthened.  Other bees are oligolectic, like the Alfalfa Leafcutter Bee (Megachile rotundata), that is very picky about the plant species that it chooses for its nourishment.  In fact, these bees primarily like alfalfa.  The Honey Bee has specialized pockets on its hind legs where it stores the pollen which it then takes back to the nest for food storage.  The Leafcutter Bee has special hairs on its front where it collects the pollen that is used and stored in the nest where the eggs are laid.  The honey bee is a social bee in that it lives in colonies with males and females with differentiated duties.  This allows for the nests to be collected and moved to various crop locations.  The leafcutter bee is a solitary bee in that, after mating, all females, individually, collect pollen and nectar and build their own nest for eggs and protection. But because they prefer to build their nests in close proximity to other leafcutter bees, they can be lured to man-made nests and can also be transported to other crop locations.

Both of these bee species are so different from each other but both are commercially used to pollinate different crops for just that reason.  They don’t compete with each other for the resources available. Take a bit of time to learn more about the pollinators in your pollinator gardens and look at the flowers that they most frequently go to for food.  Find out their ‘favorites’ so you can plant more of those.  All l those hardworking critters are “‘busy as bees” helping to ‘save the human race’ by making food and agriculture products for you and me.

Watch a movie on setting up a new Honey Beehive: http://youtu.be/tqjP3-6prwM Great learning video about the lifecycle of bees: http://youtu.be/sSk_ev1eZec Watch a Leafcutter Bee making a brood cell: http://youtu.be/EjsZ419lmMY

Making a Leafcutting bee house: http://youtu.be/chCu-pQxpB0

leafcutter bee photo: http://www.ars.usda.gov/images/docs/14415_14609/ALCB1.gif

Connecting with Wild Nature

Get Out and Take a Hike

by Sandy Swegel

Our gardens are grand places to be.  Assuming we don’t worry too much about weeds. Here are our favorite flowers to make us happy. And over there our favorite tomatoes are thinking about ripening.  We may cultivate some wildness by planting a pollinator meadow but for the most part, our own gardens are cultivated and maintained…a good thing.

But deep down, we human beings are also wild animals, yearning to connect with the Wild Nature of ancestral memory.  I went this week on a wildflower hike, just minutes from town, to be reminded of what plants looked like before they were tamed.  And maybe to feel like what humans felt before they were tamed.  I like to do a little nature hiking because unlike in my tended garden, in the wild I don’t know the name of every plant.  And I don’t think about how I have to pull the weeds when I’m walking in the wild. And plants don’t grow in shade or sun gardens but where happenstance put them — sometimes on the side of a boulder wall or the edge of a precipice.

I found this particular hike through meetup.com.  No matter where you live, if there are Meetups in your area, a search for “nature” meetup will provide you with some great opportunities to explore wildness near you.  Our meetup guide in Boulder, Lauren Kovsky, took us on a public trail and while she did the basics of any wildflower hike of naming flowers, she clearly had great fun teaching us to interact with nature by using all our senses.  We learned to identify the ponderosa pine trees by smelling their butterscotchy bark. We learned to look at shapes and feel textures of flowers to remember their names.  Mouse-ear chickweed did look like a bunch of mice in a circle looking up with ears perked.  Pussy toe ground covers felt soft just like cat toes.  After heeding admonitions never to eat wild plants without knowing exactly what the plant is, we formed strong memories of wild onions by biting the seeds and recognized the Earl Grey tea taste of wild bergamot. Mints reminded us of summer iced teas and wild mustard flowers felt hot and spicy on our tongues.

Lauren’s philosophy of why we were on this hike made good sense.  She told us that people often go off to far-away oceans or jungles to experience nature.  They swim with dolphins and feel one with the sea.  But then they return home and once again feel disconnected with the natural world.  She recommends finding little wild areas near your home and experiencing them with all of your senses. Learn how they taste and feel and smell. If you watch how the high water flows in Spring and feel how the harsh wind blows in January and taste the tiny wild raspberries in Summer, you will remember that you are part of nature and that no matter where you go, you are always connected.
Protect Yourself from Nature

Gardening Self Care

by Sandy Swegel

Being in the garden is lots of fun…the time with nature, the growing, even the weeding are all a joy to the gardener.  Less fun is how dirty we get and how irritating nature can be to our bodies, especially in the form of excess sun and pollen.  Here are someBotanical.GritSoap good old-fashioned tips to protect yourself from nature that will allow you to enjoy the time in the garden and still be able to be seen in polite company without dirt-encrusted nails and wheezing from allergies.

Protect your skin

with sunscreen of course.

Protect your fingernails.

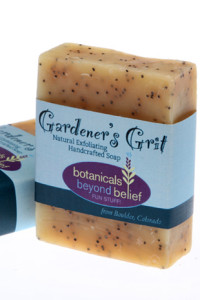
I’ve found the Gardeners Grit Soaps are a nice treat after gardening, helping to remove the dirt that seems to work its way right into my skin. But the best part of a bar of soap is to run your fingernails over it before you go in the garden. Soap under your nails (or in cracked skin) blocks the dirt from settling in and your hands are much easier to clean later.

Protect your nose.

Pollen is one of the most annoying aspects of spring.  Gardening is a lot less fun if you’re sneezing and wheezing.  A trick I learned from a holistic doctor is to put a dab of petroleum jelly just inside your nostrils.  The jelly catches lots of pollen and keeps it from being inhaled and getting into your nostrils and sinuses.

Protect your lungs.

Wear a face mask if you’re stirring up dust or pollen.  There are three times I am sure to wear a dust mask even if it looks funny.

  1. 1. Cutting the grass. I don’t want to breathe in those weed seed heads that get blown around by the mower.
  2. 2. Cleaning up old leaves and debris.  Molds and fungi get in old leaves that have been sitting around all winter. This is good for making leaf mold. Not so good in your nose and lungs.
  3. Spreading mulch. Mulches, especially wood mulches are full of dust and fungus.  When you’re doing something aerobic like spreading mulch, you often breathe with your mouth open and you’re just sucking the dust right into your lungs.

Protect your house.

You know to take off your muddy shoes so you don’t track dirt all over the house.  You need to be equally careful not to track pollen in.  The mud you’ve accumulated is visible, but pollen has also coated you and lodged in your hair and clothes. When you’re finished gardening, go directly to the shower and put your dirty clothes immediately into the laundry. If you’re bothered by allergies, be sure to wash your hair. Pollen in your hair and clothing is just waiting to fall on your pillow and bed where you can breathe it in all night.

Protect your immune system.

I just learned this tip this week.  Dehydration is the most important thing to protect your body from, especially if you have allergies.  A Danish medical study showed that dehydration greatly increases your bodies allergic response to pollen and to events like wasp stings.  Drink water before you go outside, while you’re working, and when you get back in. HYDRATE.

Nature is beautiful and inspiring, but also a bit wild and dangerous.  Be prepared.

First Frost: Is There Still Time?

Preparing Your Plants for the Coming Frost

by Sandy Swegel

Frost?  Are you crazy some might say? We’re finally hitting 90 degrees and the tomatoes are starting to grow. And you’re thinking about frost? But this isn’t about the last frost in the Spring…it’s about the first frost in the Fall.  Knowing when the first frost is, is how you know if you have enough time.  I’ve gotten behind in my planting and I really wanted winter squash this year.  Do I still have time to plant or has procrastination done me in this year? How about you? Do you still have time to plant the long-season crop you wanted?

There are two things we need to know: • What is the time to maturity of seeds you’re thinking of planting? • What is your area’s first frost average?

How Many Days to Maturity? The seeds I’m thinking about are the Hubbard Squash, a good meaty winter squash that’s perfect for baking.  The packet says it takes 105 – 115 days to mature and 5 – 12 days to germinate. So I’m going to assume the best case scenario….that I can use the heating pad to get the squash to germinate in just 2 days and then add 105 days till I get my first mature squash.  Delusional, I know.  Nevertheless, at the minimum, I need 107 days to make one winter squash. Today is June 3rd..  107 days from now is September 18th. (What? Summer Vacation will be over before I get squash?!)

When is First Frost? Now I check out my favorite, if obtuse, data chart from NOAA and find out there’s a 50% chance of 32 degrees occurring here in Boulder by October 8th.   There’s a 10% percent chance of freeze occurring by September 20 but I’m going to go the optimist’s route  (and keep the bed sheets ready in case I have to cover the entire plant one night) and say “YES!…I have time to get some winter squash ripe this year.”  Some years we have one night of frost and then weeks of warm weather.  I may not get many squashes that have time to ripen. I should have planted earlier. But still! For the dates for your area, here’s the chart:http://www.ncdc.noaa.gov/oa/climate/freezefrost/freezefrost.pdf

Wow, it is later than I think. Gardening is the greatest challenge to the procrastinator…Mother Nature just hates being rushed. Still, I’m relying on her benevolence to give me a strong productive plant and a warm fall so I can enjoy my favorite roasted winter squash this year.

Name Your Garden!

Gardens Name Themselves

by Sandy Swegel

A friend told me years ago that everything should have a name, even inanimate objects. She was helping me garden one year and within just a couple of weeks, everything we might ever have a need to refer to had a name. The big orange wheelbarrow, of course, was “Pumpkin.” The red bargain shovel was “Scarlet.” My little hand shovel was “Scout.” Soon my old truck had a name (Zohar) and it just went on and on from there. Her premise was, that if you’ve named something, you take better care of it. This must be true because I lost my good pruners that season, most likely because they were anonymous.

I love gardens. In the past few months, I’ve become so infatuated with making my garden look as amazing as humanly possible, and I’ve even managed to get my friends doing the same. Just the other day a friend of mine had new composite fencing installed by Ecomposite, whose fences are made from recycled plastic and wood. However, out of all of my friends, none of them have the passion for gardens that I do, to the point where I even have names for the gardens that I see.

Gardens just begged to be named. They even name themselves. The wild area with the chokecherries and wild roses is “The Thicket.” A client’s garden that is full of lavender and has the best mountain view in town is “The Anti-Depression Garden.” The part of the yard with two apple trees and a cherry is “The Orchard.” My names aren’t particularly clever sometimes, but they either convey the essence of the garden to me or they are a convenient way to talk to other people. Or most other people. A gardener who happened to be an engineer left me a message once asking me to weed in the “Ovate” garden. The what? I said. But ovate was very clearly the proper technical name for the shape of the bed.

You get the idea. You can name your garden after the plants that live there or the shape of the bed or the emotion the garden evokes. Garden writer Lauren Springer coined the phrase “hell strip” years ago to describe the space between the sidewalk and the street. Everyone knows what you mean when you say “The Hell Strip.” For years a favorite area at the Denver Botanic Gardens was the Red Garden…every plant, every foliage and bloom, was red.

Other gardens I’ve named are the grassy area in the back where I threw the wildflower/grass mixture, “The Meadow.” The small bed near the entry door to my house is “The Nursery” where I heel in all the plants I acquire but don’t know where to put them. My very friend Rosemarie’s garden beds are very practical and organized like the busy engineer and supermom she is. Her favorite bed though is a small strip we named “The Diva Garden” where she can plant outrageous purples and reds and those “OMG I have to have that plant” purchases to nurture her wild side.

I think the plants in the named beds do thrive better. Maybe it’s because once garden areas have a name, I have a relationship with them and take better care of them. I named my new pruners “Snippy” so I won’t lose them so fast this time. Now if only there were a way to link them to the ICloud so I could just hit the button “Find my Pruners” and they’d ring until I found them.

A Tip for Impatient Gardeners

Seed Starting Tips

by Sandy Swegel

Gardening can be frustrating for people who hate to wait.  It’s not easy to speed Mother Nature along, so on a fine warm day, we find ourselves at the garden centers spending a lot of money on bedding plants or transplants.  Seed lovers know that is not always a good use of money.  Sure, if you didn’t start long season plants like tomatoes, it makes sense to buy a plant because you want lots of tomatoes soon, but here are some crazy plant starts I saw for sale this weekend:

Lettuce starts. Once the weather is warmer lettuce seeds will be growing in two or three days from seed.

Chard and kale starts. One grower was selling weak-stemmed red chard starts for $3. Sure they were organic, but you could buy an entire bunch of organic kale for less than that.

Bean starts. Beans germinate so easily that they are a reliable seed for kids to germinate for science projects.

Cucumber plants.  Another seed that comes up so easily all on its own.

Zucchini. Another plant that germinates quickly and then grows a foot when your back is turned. It doesn’t need a head start.

Pre-sprout your seeds if you’re in a hurry. If you’ve soaked peas overnight before planting, you’re already half-way to pre-sprouting your seed.  Take any seed and soak it overnight in water.  Then pour the damp seeds onto a paper towel or coffee filter and put in a baggie or put a plastic lid over it.  As soon as you see the first white roots coming out, you can (gently) plant them in your garden.  This works great for slow germinators like carrots, or old seeds.  My neighbor pre-sprouts all the big seeds like corn, beans and cucumber. She wants an orderly garden without having to do a lot of thinning…so when she puts pre-sprouted seeds every three inches….she knows that exactly where plants will come up.  This saves time thinning too.

Pre-sprouting doesn’t save me from spending some money on garden center plants. Besides tomatoes, I sometimes buy a winter squash that takes a long time to grow to maturity.  And I can rarely resist buying some flowering plants in bloom.  Little yellow marigolds and hot pink dianthus in full bloom are making my garden a happy place.