Tomatoes: What to do When There are Problems in Paradise

Tomato Problem Solving

by Sandy Swegel

OK so only gardeners think of their tomato gardens as paradise, but what a grand time of year this is.  In some places, tomato growers are boasting about having ripe tomatoes before the 4th of July. Here in Colorado after a long cool spring, we’re just happy to see them thrive in the heat.  But with tomato plants comes the anxiety over pests and diseases.  Aphids are having a banner year and everyone is fearful of the psyllids that fly up from Mexico or the early blights/late blights, middle of season blights.

A friend with a bunch of kids compares growing tomatoes with having kids.  Parents are so worried about the first-born—you call the doctor at every sniffle. You watch the kid constantly, fearful that impending disaster awaits around every corner.  My baby sister wails that when you’re the last kid you have to practically be on fire to get mom’s attention.

As the first born, I am greatly amused by this.  But this is no way to grow tomatoes. You’ll go crazy if you try to treat or prevent every affliction.  If you can remember last year’s garden, you’ll remember similarly panicking over tomato problems at the beginning of the year.  But by September, you had to see the tomato plant in distress from the neighbor’s house two yards over before you thought, “Gee, maybe I should check that plant, the next time I am pulling buckets of tomatoes off of it.”

Most of the time your tomatoes survive the diseases and pests that come at them.  Your job is not hypervigilance, but simply creating the best environment to make them strong.

• Good Air Flow.

Air circulation is one of any plants best defenses against disease and pests. Space your plants so they aren’t all crowding one another so that if one tomato does have a problem, it doesn’t instantly spread to everyone else.  The market farmers here help air flow on larger plants by pulling the leaves off of the bottom six inches of plants so fungal spores don’t splash up on the plant.

• Adequate and Consistent Water.

Tomatoes thrive when they can count on their soil being evenly watered…and not going through dry as dust or swamp cycles.  Put a soaker hose on a timer if you have trouble remembering.

• Food.

As I’m sure you’ve heard before, tomatoes are heavy feeders.  If you planted in a big potting hole full of compost or manure and natural fertilizer, that might be enough. Otherwise, you’re going to have to do some feeding to get the big crop of tomatoes you want.

• Tolerance.

Most pests of tomatoes resolve themselves.  Flea beetles leave their shotgun holes all over the leaves, but the plant outgrows them.  Aphids fester, but in a pesticide-free garden, the ladybugs will usually show up a few days later. Or you can use the garden hose to spray them off. For more serious diseases like viruses, there’s not much you can do this season (just like antibiotics don’t treat colds.) You can pull the plant if it’s dying and start deciding where you’re going to rotate the tomatoes to next year.

• A little bitty bottle of Dr. Bronner’s.

Dr. Bronner’s is pure castile soap and available in little bottles for $2.  Mix a couple of drops with water in a spray bottle and that’s enough to treat most pests and fungal disease. Don’t overdo it.  And don’t go to the store to get all the chemicals to kill those pests that just end up killing your soil and you.

• Look at websites about tomato diseases.

If you have a healthy environment with air and food and water for your plants and you still see disease you worry about, go in and research it.  With any luck, the internet will suck you in and soon it will be dark and it’s too late to do anything today. By tomorrow you’ll forget and by next week your tomatoes will be pumping out tomatoes so you won’t worry anymore.

So just pretend tomatoes are your last kid. You love them just as much and you give them everything to grow healthy and happy and strong, but you don’t hover.  Relax and watch the miracle of tomatoes happen in the paradise of your garden.

Protect Yourself from Nature

Gardening Self Care

by Sandy Swegel

Being in the garden is lots of fun…the time with nature, the growing, even the weeding are all a joy to the gardener.  Less fun is how dirty we get and how irritating nature can be to our bodies, especially in the form of excess sun and pollen.  Here are someBotanical.GritSoap 
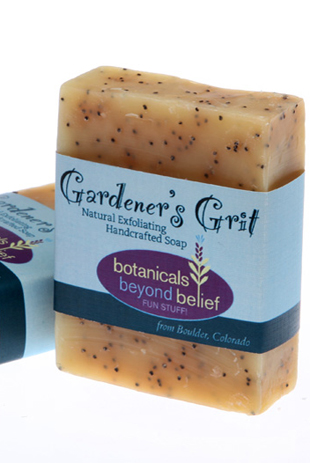
good old-fashioned tips to protect yourself from nature that will allow you to enjoy the time in the garden and still be able to be seen in polite company without dirt-encrusted nails and wheezing from allergies.

Protect your skin

with sunscreen of course.

Protect your fingernails.

I’ve found the Gardeners Grit Soaps are a nice treat after gardening, helping to remove the dirt that seems to work its way right into my skin. But the best part of a bar of soap is to run your fingernails over it before you go in the garden. Soap under your nails (or in cracked skin) blocks the dirt from settling in and your hands are much easier to clean later.

Protect your nose.

Pollen is one of the most annoying aspects of spring.  Gardening is a lot less fun if you’re sneezing and wheezing.  A trick I learned from a holistic doctor is to put a dab of petroleum jelly just inside your nostrils.  The jelly catches lots of pollen and keeps it from being inhaled and getting into your nostrils and sinuses.

Protect your lungs.

Wear a face mask if you’re stirring up dust or pollen.  There are three times I am sure to wear a dust mask even if it looks funny.

  1. 1. Cutting the grass. I don’t want to breathe in those weed seed heads that get blown around by the mower.
  2. 2. Cleaning up old leaves and debris.  Molds and fungi get in old leaves that have been sitting around all winter. This is good for making leaf mold. Not so good in your nose and lungs.
  3. Spreading mulch. Mulches, especially wood mulches are full of dust and fungus.  When you’re doing something aerobic like spreading mulch, you often breathe with your mouth open and you’re just sucking the dust right into your lungs.

Protect your house.

You know to take off your muddy shoes so you don’t track dirt all over the house.  You need to be equally careful not to track pollen in.  The mud you’ve accumulated is visible, but pollen has also coated you and lodged in your hair and clothes. When you’re finished gardening, go directly to the shower and put your dirty clothes immediately into the laundry. If you’re bothered by allergies, be sure to wash your hair. Pollen in your hair and clothing is just waiting to fall on your pillow and bed where you can breathe it in all night.

Protect your immune system.

I just learned this tip this week.  Dehydration is the most important thing to protect your body from, especially if you have allergies.  A Danish medical study showed that dehydration greatly increases your bodies allergic response to pollen and to events like wasp stings.  Drink water before you go outside, while you’re working, and when you get back in. HYDRATE.

Nature is beautiful and inspiring, but also a bit wild and dangerous.  Be prepared.

Less is More!

Give Your Current Plants The Love They Deserves

by Sandy Swegel

One of my favorite things to do is spend other people’s money.  Or better said, to go shopping with them and encourage them to buy the cool things they want to buy.  I always covet plants and yet I know I don’t have the time or space to buy as many as I want, so it is fun to live vicariously through others. “Yes that Japanese maple would look beautiful by your front door.”  “You just have to get this hand forged trellis, wooden ones are so dinky and break after awhile.” etc.

I’ll still encourage people to buy quality garden structures or funky garden art, but I’ve slowed down on encouraging them to buy lots of plants.  It was writing last week about biointensive gardening that reminded me. One of the themes of John Jeavons’ book is to create one garden bed and create it well (double dug, good soil amendments). Better to have one bed producing a lot of food than three beds barely eking out enough for dinner.

Plants need attention to establish, at least if you live in a difficult climate like Colorado.  You can’t just plant a bunch of plants and ignore them.  I know, I’ve accidentally killed a lot of plants that way.  You just end up guilty at the waste or feel like a failure as a gardener. So slow down before you buy out the garden center or plant out hundreds of seedlings. Just because it’s inexpensive to grow from seed doesn’t mean your work growing and planting isn’t valuable. We’ll leave for another day, and a bottle of scotch, the esoteric discussion of the karmic implications of killing plants.

How to Practice Less is More Focus on one section of your garden for new plantings Decide to spiff up just one area this year with new plants. I encouraged my friend to focus on the entry bed for now and later get plants for the rest of the yard. Many gardeners have “nursery” beds for new plants where they let them grow the first year.  They can remember to take care of the babies in the nursery.

Pick a learning theme of the year. I kept twenty new plants alive and thriving the year I made an herb bed and planted twenty different herbs just to learn how they grew. (FYI it’s easy to grow lots of ginger and one tansy plant is enough for the rest of your life.) Another year I focused on containers and planted containers of annuals each of one color in a matching pot.  So cute.  The focus on one kind of plant helped me be a better gardener.

Repetition I love one plant of every kind, but a designer friend showed me how cluttered and unattractive that can be.  Pick a few plants and repeat them and your garden will look professionally designed.  For example, in a perennial bed, plant one kind of grass as a “bones” of the bed and plant a few native flowers around the base of each grass.

So enjoy the season and the new plants…but make “Less is More” your mantra. Unless of course you have a full staff like Martha Stewart does.

A Tip for Impatient Gardeners

Seed Starting Tips

by Sandy Swegel

Gardening can be frustrating for people who hate to wait.  It’s not easy to speed Mother Nature along, so on a fine warm day, we find ourselves at the garden centers spending a lot of money on bedding plants or transplants.  Seed lovers know that is not always a good use of money.  Sure, if you didn’t start long season plants like tomatoes, it makes sense to buy a plant because you want lots of tomatoes soon, but here are some crazy plant starts I saw for sale this weekend:

Lettuce starts. Once the weather is warmer lettuce seeds will be growing in two or three days from seed.

Chard and kale starts. One grower was selling weak-stemmed red chard starts for $3. Sure they were organic, but you could buy an entire bunch of organic kale for less than that.

Bean starts. Beans germinate so easily that they are a reliable seed for kids to germinate for science projects.

Cucumber plants.  Another seed that comes up so easily all on its own.

Zucchini. Another plant that germinates quickly and then grows a foot when your back is turned. It doesn’t need a head start.

Pre-sprout your seeds if you’re in a hurry. If you’ve soaked peas overnight before planting, you’re already half-way to pre-sprouting your seed.  Take any seed and soak it overnight in water.  Then pour the damp seeds onto a paper towel or coffee filter and put in a baggie or put a plastic lid over it.  As soon as you see the first white roots coming out, you can (gently) plant them in your garden.  This works great for slow germinators like carrots, or old seeds.  My neighbor pre-sprouts all the big seeds like corn, beans and cucumber. She wants an orderly garden without having to do a lot of thinning…so when she puts pre-sprouted seeds every three inches….she knows that exactly where plants will come up.  This saves time thinning too.

Pre-sprouting doesn’t save me from spending some money on garden center plants. Besides tomatoes, I sometimes buy a winter squash that takes a long time to grow to maturity.  And I can rarely resist buying some flowering plants in bloom.  Little yellow marigolds and hot pink dianthus in full bloom are making my garden a happy place.

How to Transplant your Veggie Starts

Avoiding Plant Transplant Trauma

by Sandy Swegel

You’ve done all the work of getting little seedlings started.  Maybe you’ve already hardened them off.  Now, planting them in your garden has a few tricks that can make a big difference in how many vegetables you get to eat.

“Breakfast-Lunch-Dinner” was one of the things I learned from a “mature” gardener who took pity on me when he saw the pitifully few tomatoes I had in my first garden.  This was something taught by the great biointensive gardener, Alan Chadwick. His idea was that if you raised little seedlings in nice light soil with fertilizer, like most of our seedling mixes, and then put it into hard not too fertile garden soil, the plants did poorly.  Instead, he advocated starting seeds in a flat with a good planting mixture, “Breakfast.”  Then he transplanted into a second flat of fresh soil for “Lunch.” Finally, he treated his plants to “Dinner”  when he put them in his loamy, fertile intensive beds.  The plants got over their transplant trauma because they were so happy about all the yummy things in their new home.

Transplanting your veggie starts like this actually stimulates new growth.  So before you plant your loved and coddled transplants, make sure the soil in their new home has compost and fertilizer and the soil has been loosened up so little roots can find their way.  And make big holes. No fair hurrying up to get the plant in the ground and just carving out a spot only as big as the pot you’re planting. You can see in the photos how big vegetable roots can be…you need to make sure that the whole root zone has good soil with nutrients.

Lots of food and minerals in well-composted soil will make your vegetables give you bountiful food!

For more info on “biointensive” gardens, I recommend the garden bible I use every year: “How to Grow More Vegetables” by John Jeavons.  His techniques really work.

Armies of Cutworms are on the March!

How to Control These Pests

In Colorado and the high plains, pest specialists say it’s going to be a banner year for cutworms and their adult form, miller moths.  Most nongardeners think miller moths are a nuisance because they fly in every open door and window on summer evenings, hovering around all your lights.  Gardeners, however, know cutworms as the horrid creatures that spend their late Spring nights decapitating your young garden plants. They especially like broccolis and cauliflowers but are happy to eat through the stem of your young tomato plants and peas too.

The easiest way to control cutworms is to pick them up and throw them out to birds to eat or dispose of them in some way.  These larvae are quite large and light colored so they are easy to see if you happen to be crawling through your garden.  They are most fond of overwintering under broadleaf weeds in your garden….so weeding your garden thoroughly in Fall is a good deterrent.

If you’ve had problems with cutworms in the past, you may want to grow broccoli and cauliflowers indoors to transplant rather than direct seed in the garden.  When it’s time to plant out into the garden, a  small collar around the stem of the plant is all it takes.  Saving all those empty toilet rolls is the most common collar, although plastic collars cut from water bottles or yogurt containers are also popular. Simple Dixie cups with the bottom cut out works well. Why do collars work? The cutworm doesn’t just start eating at one end of the stem and eat through…it wraps itself around the stem and then chews.  All you have to do is keep it from wrapping around the stem and your plant is safe.

If, alas, you go out and find some plants decapitated, take a moment to look through the top inch or so of soil around the plant.  You should find a nice fat cutworm resting from its big meal.  Pick it out so that at least that cutworm won’t be a threat to the neighboring plants.

A video from Oklahoma on controlling cutworms: http://www.youtube.com/watch?v=v1T3wUp1AwE

Extension Slide Series http://tealeafgardens.wordpress.com/2013/04/03/a-toilet-roll-in-the-garden/

Garden Journals – A Compromise

Keep Record of Your Garden

There’s nothing like April 15th, Tax Day, to remind us how much we wish we kept better records. I have matching boxes of good intentions. A box of receipts thrown together from the year with barely decipherable notes that need to be turned into reliable tax deductions. And a box of empty seed packets that I intended to turn into a nice scrapbook with dates of germination, bloom and pictures of blooming flowers.

April 15th is the day to make the best of good intentions and turn all those scraps of paper into a tax return.  Today also happens to be an unexpected snow day so I can put some efforts into making a garden journal.

If you are an organized person who can follow through with a journal, there are few things more inspiring than a scrapbook of data and beauty and I encourage you to go ahead.  But if you are the sort of person like me who has lovely abandoned journals with four pages of writing, I encourage you to find shortcuts.  My digital camera has made it possible to keep a garden journal.

How to keep a virtual garden photo journal Take pictures of all the plants and projects and designs that interest you.  Make sure your camera’s internal day and time is set to the current time.  That’s all the upfront work you have to do.  When you are inside on a cold or snowy day, you can use your computer’s picture organizing software to do the rest.  I do a search for pictures to take in April.  The computer picks all the Aprils out of my photo files and I can see the date the dandelions covered the field next door, or when the wildflowers bloomed.  Wondering what to add to the perennial beds?  I pull up files from July and can see where there might be holes.  In Fall when I want to put more bulbs in, I pull up the April and May photos to see where the tulips bloomed so I don’t slice through them trying to plant more bulbs.  If you are ambitious, you can tag your photos with plant or location names so you can do more focused searches.

Take your pictures to the next level. Now, this is radical for people like me with thousands of files of great photos.  Print some of them out! A friend of mine puts them in a scrapbook she keeps on a table where she serves ice tea to guests. Like so many gardeners, she is always apologizing for her beautiful garden not looking as good as she’d like.  We share tea and look at pictures of flowers that bloomed last month or will bloom in the Fall. We’re amazed at pictures of the garden when it was bare dirt or the children were little.  Photos are easy and happy to wait in your computer till you search out the beauties and wisdom of the past.

Keep a record of your garden and the natural world around you. The pictures don’t have to be great…they just have to be enough of a record so that your memory fills in the details.

3 Superfast Ways to Weed this Spring!

How to Quickly Handle Weeds

1. Off with their heads.  Most of us spend our time nurturing seedlings….but weed seedlings are a very different species.  With the first warm spells of spring, hundreds of thousands of weed seeds germinate.  I sharpen my hand-held hoe (a scuffle hoe works too…any sharp edge) and one swift run along the ground kills hundreds of baby weed seeds.

2. Invite them to Tea.  I take my fancy cordless electric tea kettle that heats water very quickly and automatically shuts off.  I slowly pour boiling water over very young weeds (not more than first true leaves) and they die instantly. This is especially good in patio and sidewalk cracks.  Boiling water kills big weeds too but takes much more boiling water.

3. Weed-whack em.  My trusty weed whacker doesn’t kill weeds for good, but it is very effective at making them disappear.  You do have to wear safety glasses for this use.  I take the weed-whacker to the garden of giant weeds and whack the weeds directly to the ground.  A little soil and debris can fly up, hence the need for safety glasses.  After raking up all the weed debris, the job of weeding doesn’t seem so impossible even though I know weeds lurk below the surface.

Extra hint:  Are you left-handed?  Some of the best garden tools in the world are Japanese and sold by Hida Tool in Berkeley or online.  They have left-handed versions of many tools. http://www.hidatool.com/shop/shop.html

Want to really learn about weeds?  “The Manual of Weeds” from 1914 is online at Chest of Books http://chestofbooks.com/flora-plants/weeds/Manual-Of-Weeds/index.html proving how long gardeners have been fighting weeds!

Front Yard Vegetable Gardens

Heirloom Vegetable Seeds

I’m fortunate to know lots of gardeners.  They are a quiet bunch for the most part and sometimes rather eccentric.  But they are on the forefront of an environmental movement that is making a big difference in our community: turning front yards into vegetable gardens!  It begins as the gardener runs out of room in the backyard to make more garden beds, and starts looking wistfully out the front window at the expanse of green lawn. Going from backyard to front yard is like going to a different country.  The vegetables out back are grown organically with manures and compost. There are honey bees and birds and butterflies attracted to the flowers growing among the vegetables.  The front lawn is a pristine deep green thanks to synthetic fertilizers and weed killers but lacks the vitality and delight of the backyard.

For most people turning the front yard into a vegetable garden takes some negotiating with a significant other who likes the lawn, but the idea of not having to mow week after week often tilts the balance.

So what happens when you turn your front yard into a vegetable garden? In the beginning, neighbors eye you suspiciously, worried you’re going to lower property values.  By mid-June, as you’re starting to get some good produce and butterflies are flitting about, people are a bit curious and start to walk by on your side of the street.  A neighbor kid on a bike asks “Whatcha doin’?” when you’re out shoveling compost onto the new beds.  By mid-summer, tomatoes are coming in strong, and the guy next door is hanging out watching you build a vertical wood structure to handle the squash that wants to grow out into the street.  Finally, come Fall and pumpkin season (hey look, Halloween decorations are already growing right in the yard) you realize you know the names of some of your neighbors. And you’re going to have to plant a bigger garden next year to plan for sharing the bounty with your new friends.

It is a lot of work converting a front yard into a vegetable garden.  There can be serious digging involved. You have to change your practices from lawn management to building safe and healthy soil. You have to keep things tidy and attractive. The rewards of front yard vegetable gardens are many. More food, more space to garden, more people who understand the relationship between food and the environment, and best of all, sharing late summer produce with friends and kindred spirits right in your own front yard!

Tools of the Trade: Row Cover

Try This Secret of Success

Every pursuit has tools that make it easier to be successful. Ask any gardener and they’ll pull out their own favorite tool with a wry grin and and a long story about why you have to have this tool

Row Cover is one of my own top secrets of success. I use it in all seasons at all different times of the growing season.  Also known as frost cloth, it is a light-weight white fabric that looks just like interfacing. Row cover’s great attribute is that it creates a protective barrier between the seed, plant or soil against the ravages of sun, wind and cold. It’s also handy for protecting against insects like flea beetles. Here’s how I use it throughout the seasons:

Spring Right now, row cover is in the garden over areas that I’ve seeded that I want to help germinate.  The row cover protects the germinating seeds and seedling from getting too dry because the gardener forgets to water often enough.  It also is a physical barrier that protects against harsh sun, wind or hungry birds.  Temperature under the row cover is a few degrees warmer which is enough to speed up germination.

Any Season When you are transplanting, row cover can be the secret tool that enables your plants to survive transplanting.  I use it when I transplanting out seedlings I’ve grown indoors, or plants from the nursery, or even perennials I’m moving in my own yard.  Keeping leaves from desiccating from sun or wind is the keep to successful transplanting.

Mid Summer Lettuce lovers keep their greens from bolting too soon by covering them with row cover.  In Spring the row cover kept heat in…now, it keeps the hot summer sun out and lowers the temperature around the plants.  Lettuce stays sweeter longer.  Eventually, lettuce still bolts, but about the time that happens, it’s time to reseed the garden for fall greens.  Row covers then keep the seeds moist enough to grow.

Fall So often a frost comes one early fall night that kills lots of your warm season plants.  It’s a shame because there are often another two or three weeks of good growing time for tomatoes or other tender vegetables.  Five degrees of protection under row cover means your tomatoes survive a light frost.

Winter If you have a greenhouse, row cover inside the greenhouse and give you an extra zone’s warmth. I visited an unheated greenhouse in snowy Colorado this week that had lettuce planted last Fall and now being harvested for fresh greens.

When to take row cover off  The one-time row cover isn’t helpful is when your plants need to be pollinated. Bees and moths and butterflies need to be able to fly from flower to flower gather nectar and pollinating the plants.  Lettuces and greens don’t need the pollinators, but strawberries and peas and anything else that flowers and sets fruit does. Once you start to see flowers, you need to pull the row cover aside.

Keeping the row cover on OK, if you’re in a windy area that’s the biggest challenge. Big farming operations dig a trench alongside their beds, put the row cover in and then fill in the trench with soil to hold the row cover down.  Home gardeners can place a few rocks strategically placed or even a heavy piece of lumber.

more info:

http://tinyurl.com/b28755y

http://tinyurl.com/bh983my