Hummingbird Love

Gardening Tips

By Sandy Swegel

We, humans, are crazy in love with hummingbirds. I received so many emails and messages about hummingbirds this week, I have to pass on the things I’m learning.

Spring migration is happening all over the US and there are hundreds of citizen scientists who report their sightings. You can check your area to see if Ruby-throated hummingbirds have arrived. http://www.hummingbirds.net/map.html  This week they are showing up in Canada and at higher elevations. Hummingbirds showed up in Colorado about three weeks ago.

I learned we should keep an eye out for hummingbird nests. They are so tiny. The eggs are the size of jellybeans. The Denver Post newspaper had a whole article on how to recognize the nests so you don’t hurt the eggs when you are doing spring pruning.

Most hummingbird lovers find one feeder isn’t nearly enough. You should have more than one feeder so the birds don’t have to fight over it. Or a big feeder with multiple feeding stations. Some people go totally crazy and fill their yard with feeders. Sugar water isn’t the only food hummingbirds rely on in spring. They eat lots of nectar from flowers, pollen, bugs including mosquitoes, and even tree sap. But their metabolism is so high, they need to eat constantly.

The most important thing I learned about hummingbirds this week is that you have to wash out the feeders and change the water every few days. Old sugar-water grows mold which can kill the hummingbirds. Our neighborhood feeders get drained pretty quickly…but it’s still a good idea to rinse the feeder with vinegar water before refilling.

The most fun hummingbird thing I did this week was watching YouTube videos on hummingbird babies. Cuteness overload. I have quite a few flowers planted that hummingbirds like, but now I see that I need some feeders outside the window by the breakfast table!

The oddest thing I did for hummingbirds this week is to buy a new garden hat. My old hat was a bright orange-pink color, and hummingbirds would dive bomb my head thinking I guess that I was a big flower. I have a more subdued lavender hat now…and so far I’m safe.

I recommend highly putting up a few feeders yourself so you can enjoy the show!

Photo credits

Photo credit: http://www.thedenverchannel.com/news/local-news/hummingbirds-have-arrived-in-colorado-check-your-trees-and-shrubs-before-trimming

http://voices.nationalgeographic.com/2014/05/16/animals-nests-weird-animal-questions-science-birds/

Mexican Hat Plant … Ole’

Wildflower Seeds

by Sandy Swegel

What’s your favorite wildflower? When I ask that of people in Colorado, I often get answers like Columbine, a delightful airy flower found in the mountains. But when I go into people’s gardens and see what they actually grow, I often find the wonderful yellow and red Ratiba columnifera that some call Mexican Hat plant or Prairie Coneflower.

Anyone who has driven in the prairie has seen massive fields of these red and yellow flowers growing among the grasses.  This one to two-foot-high wildflower is perennial and sometimes doesn’t bloom until its second year. But once it starts blooming, it gives color and repeats blooms from midsummer to Fall. It does need some cold stratification for good germination. Everything else about the wildly hot-colored plant is easy. It grows in terrible soil. It will tolerate drought. Deer don’t like it. Ratiba likes sun but handles quite a bit of shade. It looks great mixed with grasses or in a summer garden with Black-eyed Susans and Purple Coneflower.

If just being cute and a sturdy plant isn’t enough, Ratiba is also an important food for native bees.

The only problem I have with this plant is getting the Mexican Hat Song out of my head!


http://www.bromeleighad.com/2013/08/prairie-coneflower-naturally-dyed-yarn.html?m=1

Aphids Q&A

Gardening TipsImage by <a href="https://pixabay.com/users/mabelamber-1377835/?utm_source=link-attribution&utm_medium=referral&utm_campaign=image&utm_content=4243855">👀 Mabel Amber, who will one day</a> from <a href="https://pixabay.com/?utm_source=link-attribution&utm_medium=referral&utm_campaign=image&utm_content=4243855">Pixabay</a>

By Sandy Swegel

We got a great question from a customer this week about controlling aphids. Her frustration resonates with most of us who garden.


Q. Aphids are terrible, tiny creatures and I fight them every year. I’ve been looking for the best ways to make sure they don’t screw with my garden this time. I thought I had a good way; planting garlic around the plants. “Aphids don’t like garlic,” one link said.  “Aphids love garlic leaves, said another one. Soap mixture, Neem oil, rubbing alcohol mixed with soap and water, importing good bugs that love to eat the aphids. I refuse to use chemicals that poison everything, it makes growing organic pretty pointless. Does anyone have any SURE FIRE, tried, and true methods?

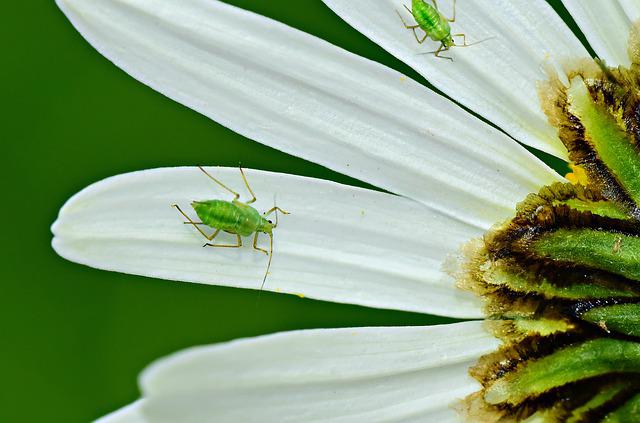
A. The key to reducing aphids in your garden is to understand their lifestyle. Controlling them is like cleaning the house. You can’t just clean a house full of people once and expect the house to still be clean a week later if you didn’t keep picking up stuff all week. When you use any treatment you might kill most of the adult aphids that day. But the ones you missed or who were eggs that wouldn’t hatch for another day, are still eating and reproducing. Reproduction is the key to aphid success. They reproduce both sexually and asexually. They lay eggs to survive the winter. And they have live births in warm weather. Each one can create up to 100 new aphids per month.


My best sure-fire, tried and true method (or as close to that as one can get) is this:

Accept that you are going to have some aphids. To kill them all, even if possible, means you would also kill all the beneficial insect pollinators and you don’t want to do this.


Understand how aphids die. Warning: graphic content ahead.
It is super easy to kill aphids, which is why plain water spray works great. Aphids feed by attaching to the plant with their mouths. When you spray water on the aphids, the force of the water tears the aphid off the plant. The head and mouthparts stay attached to the plant, instantly killing the aphid. Even just brushing off all the aphids on a leaf with your finger decapitates and kills all those aphids. That’s why you don’t have to poison them…if you can just mechanically remove them.

Be vigilant (every few days) about checking for aphids.
New aphids are hatching in leaf litter or being birthed by the aphids who were hiding out in the weeds next door. You have to spray the aphids every time you see them in large numbers. Each aphid can have dozens of generations…They are baby-making machines. You have to keep after them at least until you see you are no longer getting infestations.

Be careful not to eliminate beneficial insects.  There’s yet another reason not to try to kill off aphids outside, even with “safe” organic treatments like soapy water. If you kill the aphids, the aphid-eating wasps, another of those native beneficial insects, won’t have anything to eat and they’ll leave your garden.  They are eaten by so many beneficial insects that it’s rather amazing that we see any at all. Yet there are so many on our plants at times.

This week I’m seeing thousands of them on the new growth of roses. And while my first instinct is to kill them in some way, I have finally learned to just watch them. I know what I am seeing is a mini-population explosion that will usually be followed in a week or so by mini-population explosions of predators that eat aphids. If we try to kill off the aphids which are at the bottom of the beneficial insect food chain, then the beneficials will fly away to another garden.

I knew about many of the predators of aphids like ladybugs and lacewings, but I learned yesterday that tiny native aphid-eating wasps eat a LOT of them. In addition to wasps that just eat the aphids, there are parasitic wasps that lay their eggs inside of them. When the eggs hatch the tiny larvae eat their way out of the aphid. A bit gory, but effective in guaranteeing enough food for baby wasps.

So I challenge you to a two-week experiment. Let the aphids be when they show up and just watch the plants for a few days. See who shows up to dine on them. Some possibilities include wasps, both large and small, hoverflies, ladybugs, and lacewings. It will be a fascinating discovery of how many small beings live in your garden, there to help you keep everything in balance.
Nature does provide a natural balance if you have a healthy garden that supports beneficial insects. If you are aggressively treating aphids with garlic or neem sprays, you are also killing all the other insects that eat aphids.

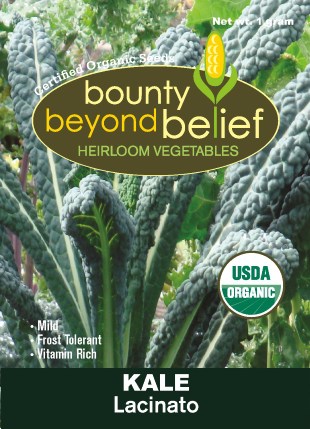
Alter the conditions in your garden that reduce the number of aphids.Fighting Aphids on Organic Lacinato Kale
Don’t over-fertilize. Aphids love nitrogen. You will get a little aphid bloom every time you add nitrogen to your plants. Reduce the nitrogen and you don’t have so many of them.

Encourage earthworms and use earthworm castings. Earthworms produce an enzyme chitinase to help digest their food. Aphids are repelled by chitinase. Unfortunately, the chitinase doesn’t last long enough to be the only deterrent.

Encourage good environmental conditions like airflow and temperature. This works really well indoors. In my greenhouse, I can reduce aphids by keeping a fan going and shading the plants from the really hot afternoon sun. They are often in greater numbers on plants that are stressed.

Finally, if you do want to use “organic” sprays, simple soapy water works well. (1 teaspoon per gallon). Some people use the kitchen spray with garlic and Tabasco sauce. I think the science is not clear on neem. It definitely works but it works by disrupting insects’ hormonal systems and I’m not convinced it doesn’t adversely affect beneficial insects. Some studies say Neem only kills sucking insects. I would try gentler methods first before turning to Neem.

More about gardening and aphid control

More about interactions between predators of aphids


Photo credits:
https://en.wikipedia.org/wiki/Aphid


Six Reasons to Grow Borage

Borage Gardening Tips

by Sandy Swegel

  1. Bees love borage

Bees absolutely cover the plant when it is in bloom.  And bloom lasts a long time and repeats throughout the season.  Bees and other pollinators seem to prefer it to other nearby plants.  Must be extra tasty or sweet.

  1. Borage is super easy to grow

My neighbor lets her’s grow along her alleyway against chain link fence.  No water, no fertilizing….just run off from the grass and a bit of shade.  When the plants go to seed, she throws the seed heads a little further down the fence line.  Even in our arid climate, that’s hospitable enough for borage to grow.  No deadheading or fussing…just lots of plants. It’s is supposed to be an annual, but it acts like a perennial….plants grow back in the same place every year.

  1. Birds love borage

Borage makes a lot of flowers and seed heads.  In the Fall, the birds were hanging out on the sunflower heads nearby and I didn’t notice them in the borage.  But this Spring morning, about eight of those little birds that chatter so much in spring were digging and rooting in the borage patch.  Bird food in February is a good thing!


  1. Borage is edible for humans

The young greens can be added to mixed salads or steamed. (Older leaves are too hairy and not so yummy.)  The little flowers are adorable in salads. Pastry chefs candy the flowers for decorating desserts.

  1. Borage is medicinal. It has long been a medicinal herb for skin diseases, melancholy, diabetes and heart conditions. Borage oil is an important anti-inflammatory.
  2. And the number one reason to grow borage: They’re Blue!!!!!

OK, that’s the real reason I grow borage.  Blue flowers make me so happy and the blue of borage is one of the most amazing blues in the plant kingdom.


Photo Credits:

http://medicinalherbinfo.org

http://shop.gourmetsweetbotanicals.com/

http://kiwimana.co.nz/borage-good-for-bees/

Planting Wildflowers

Grow a Wildflower Meadow!

by Sandy Swegel

This blog post is for anyone who wants to grow wildflowers.  It is especially dedicated to BBB Seeds’ friends at the Rockies Audubon Society who have an awesome program called Habitat Heroes that encourages “wildscaping” your garden with native plants that attract pollinators and birds and support wildlife even in an urban area.

  • Deciding What and Where to Grow

Look at the site where you want to grow a wildflower meadow or patch.  An ideal site would have sun and good drainage and not too many weeds. Nature seldom provides what we consider ideal. So the next step is choosing the right mix of wildflowers.  We help by providing mixes for unique conditions such as sites that are dry or sites that shady.

  • Prepare the Soil

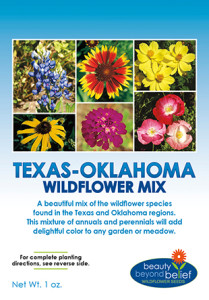
TX-OK-1oz

Some don’ts:

  • Don’t deep till!

That’s the number one rule….unless you are planning a year ahead of time.  There are enormous numbers of weed seeds in any soil and tilling up the soil brings up all those weed seeds to the light and they start to grow.  You do have to deal with weeds and you will lightly till/scratch in a shallowly.  But this is time to leave the tiller in the garage.

  • Don’t use weed killer

Especially don’t use the weed killers for your lawn or those with pre-emergents that stop new seeds from germinating. Those will have long-lasting effects that will thwart your wildflower growing efforts.

  • Weeds:

You will have to deal with weeds especially if you have an area that is pretty barren of other vegetation.  People have good success with putting down black fabric or cardboard weeks ahead of time to suffocate the weeds.  For big hunkin’ weeds like dock, it’s good to get the shovel out. You can’t get all the weeds, but after you put your seeds out, you won’t be doing any weed-pulling for a while because you’ll accidentally pull the new wildflowers or disturb their young roots. Replacing weeds with wildflowers will be an ongoing process.

  • Scratch and Rake

You do need to break the soil and rake it smooth, but not more than 2-3 inches deep.  You want little crevices for the seeds to slip into so they have a cozy home.  I’ve had the best success by loosening that top couple inches of soil and waiting a couple of weeks for all the weeds to germinate. I then scratch up those weeds, rake again, and then put the wildflower seed out.

  • How Much To Plant

One ounce of seed (a small packet) plants about 100-150 square feet.  (eg 10 feet by 15 feet.)  Follow this rule of thumb.  Planting more than this makes the plants choke each other out.  Planting less gives weeds free run.

Expert Tip:  Mix some sand with the wildflower seed to make it easier to spread the tiny wildflower seeds evenly.  About four parts sand to one part seed.


  • When to Plant

If you live someplace mild and humid, you can plant almost anytime.  The rest of us either plant in the Spring (about one month before last frost date) or Fall.

  • Water

That’s the biggest challenge for many.  If you aren’t living in the above mentioned mild and humid area, you need to be sure the wildflowers get enough water.  One gardening buddy said her secret was to go out and seed the night before a big snowstorm and let the melting snow help.  I personally use row cover over the area to keep water from evaporating.  I also use a soft rain nozzle to hand water over everything.

Our website has a Resources Section with more detailed instructions on seeding wildflowers. https://bbbseed.com/wildflower-grass-tips/


That’s really it.

Pick an appropriate wildflower mix.

Get rid of the huge weeds and prepare the top couple inches of soil.

Plant.

Water.

Wait for Nature to do What She Does Best: Create beauty for you and food for all the wild creatures.


Before and After Pictures are some of my favorite things.  The Habitat Heroes program has awesome before and after pictures that will inspire you:

Photo Credit:

http://rockies.audubon.org/get-involved/habitat-hero-winners

A Parking lot median at the West View Rec Center in Westminster, CO, before and after

02.15.16 'Planting Wildflowers' WestViewRecCenter

02.15.16 'Planting Wildflowers' WestViewRecCenter2


Leafcutter Bees

Excellent Pollinators

by Sandy Swegel

There’s a native bee (especially in the Western US) that you’ll rarely recognize flying around, but almost everyone can tell when the bee has been in their garden. Leaves, especially of roses, have perfect little half-moons cut on the edges. The cuts are better circles than most of us can draw. In most years there aren’t overwhelming numbers of cutter bees so they don’t really threaten the plants.


Leafcutter bees don’t eat the leaves. They take them to make nests for their babies. Unlike honey bees which live in hives, leaf cutters are solitary bees, and the leaves are used to make long tubular cigar-looking nests. Each bee egg gets its own little room, complete with a gob of saliva, some pollen and some nectar for when the larvae grow in the Spring.

Some people think leafcutter bees are pests and want to exterminate them. Others want to attract them to their gardens because they are excellent pollinators. I’m on the side of letting them happily live in my rose garden and cut their perfect little half moons. They are gentle bees and rarely sting. Cute and good for pollination.


Photo Credit and Info:
http://www.ext.colostate.edu/pubs/insect/05576.html
http://www.missouribotanicalgarden.org/gardens-gardening/your-garden/help-for-the-home-gardener/advice-tips-resources/pests-and-problems/insects/bees/leaf-cutter-bees.aspx
http://swampthings.blogspot.com/2012/05/leaf-cutter-bee-nest.html
http://rachel-the-gardener.blogspot.com/2011/08/leaf-cutter-bees.html

Carrot Love

Heirloom Vegetable Seeds

By Sandy Swegel


I was noticing very happy pollinators this week: honey bees and native bees, tiny flies, lacewings.

And the air was abuzz with hummingbirds and their look-a-likes sphinx moth. Noticing that pollinators were all around is the first step. Then I looked for where they were gathered….because that meant I had somehow (accidentally) created a habitat that they loved.

The best habitat of the day was a patch of carrots abandoned last year in the back of the garden which had entirely gone to seed. There were dozens of different kinds of happy flying beneficials on it. It was at a slightly wet end of the row so that helped. I’ll never pull the last carrot again. What I didn’t know until this week is that carrot flowers are pale pink. Very sweet in a big patch.


I like to leave carrots in the ground in winter. I eat them until the ground freezes because they get sweeter and sweeter each day. Then I’m happy for them to get frozen solid because many of them turn to mush and by the time I dig them in early spring, there are writhing masses of earthworms feast. But the carrots that don’t turn to mush, make beautiful flowers their second year.

There was another surprise areas abuzz yesterday. I headed out to a patch of fallen lambs ear that looked spent. From a distance, the flowers were all brown. Lambs ear are beautiful and drought tolerant, but they will seed everywhere. I was about to pull out fifty or so plants that barely had any flowers left…but the bees had a strong opinion that they wanted the last of those flowers. So one more week for the lamb’s ears. I know they’ll drop seeds. But the bees had the final say. Everything for our bee overlords.


Photo Credits:

blog.growingwithscience.com/wp-content/uploads/2010/10/carrot-flower-pollinators.jpg
www.craftsy.com/blog/2015/07/texture-plants/

It’s Time to Divide Iris

Wildflower Seeds

by Sandy Swegel

Bearded Iris meet many of my criteria for a flower garden.  Their flowers are big and colorful.  They are sturdy and withstand hail. Here in Colorado they are virtually disease free.

One of the best and the worst things about iris is that they reproduce like crazy.  Especially in rainy years like we’ve had the last couple of years.  You can ignore the massive clump of green blades, but if you want more flowers, you have to divide iris every few years.

A few facts:

July to September is iris dividing season. After bloom but give the roots some time to reestablish.

The roots of iris are called rhizomes…big clunky and ginger-like.  Photosynthesis occurs in the rhizome.  If the rhizome doesn’t get some light, the plant rarely blooms.

The fan (the leaves) that bloomed this year will never bloom again. So you can cut it off and throw it away.  Two buds on either side of this fan will send up their own leaves and bloom next year.   Those are what you’ll be replanting.

Giving away iris is like giving away zucchini in August. Some gardeners are thrilled but others run when they see you coming.

The two most important things to remember when replanting iris:

Good drainage.  Iris will handle drought and bad soil, but standing water rots them.

The rhizome needs to be slightly above soil level.

Now iris come in many colors and there are definitely fads.  This year no one can give away purple iris.  They’ve somehow become commonplace.  But I  brought a huge clump of white iris to a garden meeting and grown women were fighting over single rhizomes.  Go figure.  Fortunately, before digging from the mixed iris bed, we had used a permanent marker to write on the leaves the color of the flower.

It’s a bit of work but there is one awesome secret about iris that means you have to grow them.  They smell just like their color.  Purple iris smell like grape snowballs.  Yellow iris smell exactly as you’d think yellow should smell.  Apricot iris have a delicate sweet aroma. What a delight to plant a walkway with irises.


Photo credit txmg.org/elpaso/event/farmers-market-series-2014-07-26/

Art by Nancy Baker www.hear2heal.com/bearded-ladies-limited-edition-fine-art-iris-garden-nancy-baker-p-756.html

It’s Caterpillar Time!

Beneficial Insects

by Sandy Swegel

Protect our friends. So many butterflies in our area have laid their eggs and their baby caterpillars are getting big and fat and chewing up plants. Be sure you know who your friends are before you squash any of them! You’ll love having the butterflies.

Swallowtail caterpillars
I found these this week, not on the dozens of dill plants I planted for them but on a leftover parsley from last year. Next year, more parsley.

Monarch caterpillars
Also yellow stripey…they look a little more serious. I’m watching for these now. Quite a few eggs on the milkweed plants I let take over part of the back garden…so I’m hoping

Painted lady caterpillar
I almost never see these although I see lots of the butterflies. Skinny little black prickly caterpillars. Their host is the Malva family like thistles or hollyhocks.

Cabbage looper
Well, this is one you’re probably seeing a lot of right now. Cute little white moths fluttering everywhere. Bright green little loopers inching along devouring your cabbages. If you want cabbages, you have to treat these as pests.


Photocredit:
lagbchbutterflies.weebly.com
www.monarch-butterfly.com
wildones.org

The Honey Bee Colony

How to Handle These Valuable Pollinators

It’s the stuff of Hollywood movies and spine-chilling stories — a swarm of bees attacking everything in their path. Mad, ruthless, and vicious buzzing creatures covering whatever strikes their fancy (usually a person) until they succumb to the deadly stings! This is how a swarm of bees behaves, right?
Well, not exactly.

First of all, let’s discuss what a honey bee swarm is and exactly why they’re swarming. A swarm is an entire colony of bees looking for a place to start up housekeeping. It includes a queen and up to 30,000 of her pals, the worker bees and drones. They do this without any anger, aggression, nor any plans to sting people.

Usually, a young queen is born into a honey bee colony and she takes the place of the old queen (no one said life as a queen was easy). The old queen sees the writing on the wall and starts packing for greener pastures. Don’t worry, she has some loyal subjects — she ends up taking about half of that colony with her to hang around a new castle.

The entourage is led by the queen bee and her pheromones — which has them following her beyond all reason. When the queen finds a comfy bush or tree branch, the swarm will settle there, as well. Ultimately what they’re looking for is an unoccupied cavity in which to call home. This is the time when a savvy beekeeper will place a beehive below the swarm to attract them. If the colony approves (and by “the colony”, I mean the Queen) then someone just got themselves a brand new hive, pollination team, and honey processing plant!

Let’s back up a bit. There’s a thick, black, buzzing cloud going through your yard and you’re supposed to believe that these guys don’t have your name at the top of their tiny, bee hit-list, right? That’s exactly right. And the reason that they don’t have stinging on their mind is that honey bees typically defend two things: their young (in the hive) and their honey (also in the hive).

They tend to get irked when you mess with these things — as well they should. In the honeybee’s defense, if you’re going to go into a hive and take either of those things, well…that actually makes you the aggressor.

That said, personally, I wouldn’t gr

ab a broom and start flailing it around trying to swat at the swarm. I mean that probably falls under the definition of provocation, am I right?

If you find that a swarm of honeybees has landed at your home, garage, or porch and you not only don’t believe a word I’ve written here, but are getting ready to sue me because these bees are certainly going to kill you in your sleep…all I ask is that instead of taking matters into your own hands, please contact a local beekeeper to have them gently removed. Honey bees are one of our most valuable pollinators and they’re having a terrible time staying in existence.

Trivial Note: I’m not a honey beekeeper. Although, I am a Western Blue Mason Beekeeper, which isn’t of any importance to this article at all. I only mention it for the record.