10 Reasons Why You Should Prune Trees and Shrubs

Tree & Shrub Pruning Tips

by Chris McLaughlin

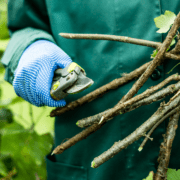
Not sure about pruning your plants? We’ve compiled 10 reasons why you should prune trees and shrubs in your yard or garden to help maintain their long-term health.

Practicing simple techniques, using the right tools, along with proper timing for each plant species is the key to effective pruning and most require very little pruning in order to achieve the gardener’s goal. But before taking sharp tools to your plants, you should understand exactly what those goals are and why you’re pruning them in the first place.

Remember that every cut made will alter the plant’s shape and growth. In fact, the list below addresses the many reasons that any tree or shrub should be pruned in the yard or garden. If you are interested in having your trees or bushes trimmed, remember that you can use a service like TreeSurgeon.Care to help.

Here are ten great reasons to prune trees (including fruiting) and shrubs:


Reason #1: Vigor

Pruning a growing shoot stimulates new growth production. So if you’re looking for some vigorous new growth on a shrub, prune it hard (a lot). Consider this type of pruning when you have a shrub that has a weak section of growth; such as the back. In fact, when you “pinch” back new growth with your fingers on any plant, you’re actually pruning.

Reason #2: Shape

Plants that have grown out of balance with either the yard or their own growing pattern (such as stray and awkward branches) can be reshaped by pruning.

Reason #3: Restrict a Plant’s Size

This can be especially important if you live in an area with restricted space. Gardeners living in urban and suburban areas almost always have to prune trees and shrubs to keep them from out-growing the yard, garden, or container. Root-pruning is another technique that can help restrict the size of plants in containers.

Reason #4: Let in More Light

If you have an extremely shady yard or you’d like to have more sun reaching the area under a tree for plants or lawn, careful pruning can let in a little extra sunshine.

Reason #5: Health and Structural Soundness

Any diseased, injured, dying, or dead branches should be removed for the health of the tree. Branches that rub together should be removed to eliminate potential damage to a main branch. Much of maintaining structural soundness in a tree is about careful pruning practices such as not “topping” trees. Topping can make the tree weak and susceptible to pests. It’s also associated with the slow death even if it takes years for the tree to actually die.

Reason #6: Create Special Effects

Most often, pruning for special effects is seen in formal-type gardens. They often take the shape of boxwood topiary or an apple tree that’s been trained as an espalier. Pollarding or coppicing pruning techniques may be used, as well.

Reason #7: Encourage Flowering and Fruit

Pruning can coax growth spurs (produces the flowers and the fruit) to form on the branches. Strong flower buds are also encouraged to form due to pruning. Fruit trees can be lightly pruned in the summer which will provide better air circulation around the fruit. This results in less trouble with fruit diseases and the fruit ripens faster.

Reason #8: Protect People and Property

Prune trees that have been planted near homes, sheds, play structures, and other buildings as they propose a potential threat to human safety if heavy branches break off or the tree falls. They can also interfere with telephone or power lines. Proper pruning can keep people, pets, and property safe.

Reason #9: Keep Evergreens Proportionate

Pruning will keep boundary hedges under control. Evergreens benefit from light pruning as it keeps their foliage dense, and therefore, attractive.

Reason #10: Improve Appearance

Many gardeners’ top priority when pruning their plants is about their appearance in the yard or garden. Removing dead, unwanted branches, as well as suckers creates a pleasing shape and leaves plants looking neat and tidy. Many lovely blooming shrubs such the Butterfly Bush (Buddleia spp.) are capable of spectacular blossom displays due to good pruning techniques.

Usually pruning is about working with a plant’s natural growth pattern as it’s developing, as well as maintaining mature tree and shrub species. One of the few exceptions is when it’s used to create effects such as espalier. In general, a successful pruning job will leave your healthy, beautifully-shaped fruit trees or shrubs looking like they haven’t been touched at all.

Ready to get pruning in your garden? Check out our list of must-have gardening tools!

The Windy Garden

Building a Wind Resistant Garden

By: Sandy Swegel

This could be a perfectly beautiful early Spring. We’ve had a week of warm sunny weather that is waking up the daffodils and tulips. Birds are flitting about and energetically singing out mating calls. It’s a joyful break from dark winter days. But then there’s the wind. Chinook winds. Or as they were called the year I lived in the Alps, “scheiss foen.” Everyone understood if the foen had arrived that you could be in a foul mood because of the irritability and headaches from the air pressure changes these mountain-made winds caused.

Wind can have devastating effects on a garden. Sure the strong winds can break stems and tree branches, but the greatest stressors comes from the drying effects of the winds. Plants close their stomata (leaf pores) to reduce water loss, but that slows the plants’ ability to grow. The winds desiccate the plant tissue and dry out the top inches of the soil meaning the plants need more water. Even plants under snow cover can get very drought stressed because the winds evaporate the snow before it can melt.

If it’s going to be a windy season, I make a few mental changes in my garden plans. Here’s things to consider if you have a windy garden:

Use more drought tolerant plants.
Increase your watering after the winds die down.
Grow shorter plants.
Grow plants like lavender with thinner leaves that won’t desiccate so easily.
Plant some tall ornamental grasses through the flower garden. They look beautiful in the wind and provide some wind break protection.
Plant evergreens as windbreaks.
Consider a garden wall.

And take an aspirin for your sinus headache.


Photocredits:

http://clarenbridgegardencentre.ie/
Top Tips for Windy Gardens
http://www.pc.gc.ca/pn-np/ab/waterton/ne/ne-galerie-gallery-2.aspx?a=1&photo=%7Bdfae32e8-4d1e-47e4-a909-08c9ea68dd13%7D

Drought again?!

Gardening Tips

by Sandy Swegel

Unseasonably warm weather means I finally had time to get some more bulbs planted this week.  It has been warm and sunny this fall but I didn’t fully realize how drought had snuck up on us until I went to dig the deep holes for the daffodils.  In decent garden soil that has had regular if modest irrigation all year, the soil below six inches was dry dry dry.  Pulverized dirt dry.  During times of drought, the soil all over dries down.  The water table recedes and deep-rooted trees and grasses have used up whatever water is available.  We can keep irrigating with an inch of water a week on the surface, but it’s not possible to water enough to keep the soil moist deep in the ground if there’s no natural rainfall.

Drought really snuck up on lots of the US this year.  Except for poor southern California, most of the country started the year with good water.  Now significant parts of the plains and southeast (as well as southern California which started the year dry) are experiencing moderate to severe drought.  See the drought monitor for your area.  http://droughtmonitor.unl.edu  In my area, we went from an awesome spring to virtually no rain since July.

So what’s happening in your garden now?  Here’s what happens in moderate drought:

Soil with clay in it turns hard and cracks open.  (The clay shrinks when it dries out.)

Soil critters go into self-preservation mode.   During times of drought, they have varying survival techniques from as simple as laying eggs for the next generation once conditions improve.  Earthworms go into a hibernation-like state called estivation.  Balled up little earthworms are what I found in my garden bed when I was planting bulbs.

What can you do besides pray for rain or snow or freeze?

Give your trees and shrubs a good long slow-watering now.  Trees need 10 gallons of water per inch of trunk diameter once a month.  If your irrigation is still turn on, you can run it longer than usual.  Or put a light sprinkler on for several hours.  Here’s a great fact-sheet on ways to water trees during drought.   http://www.colostate.edu/Dept/CoopExt/4dmg/Trees/caring.htm

Otherwise, leave the soil alone.  Digging in too dry soil ruins soil texture just like digging in too wet soil.  The soil I had dug for the daffodils was like dust when I filled the holes back in.

Pay attention to rain or snow this month.  If you aren’t getting significant precipitation, water the trees and shrubs once a month even if the ground is frozen.

And pray for rain.

Apples

All About Apples

by Sandy Swegel

Two things I learned about apples this year.

Reduce codling moths in your trees.

A few years ago, I started following the advice of a local organic farmer to pick up the bad apples under my apple trees. I’ve always left them there to compost in place or waited until they were all down to pick them up. My delicious McIntosh apple tree had lots of codling moths which left unappealing frass in the apples as well as the occasional worm. The tree was too tall to spray clay and I didn’t want to use anything toxic. So I did start religiously picking up the apples as they fell. Now, some five years later, I’ve noticed that while codling moths still attack the apples, they are MUCH fewer in number affecting maybe only 10-20% of the apples. What a difference sanitation made.


Bake awesomely easy gluten-free Apple Crisp

The second thing I learned came from the new “problem” of what to do with so many apples. If you pick up the apples soon after they fall from the tree, then you notice the apples are in pretty good shape if you cut out the bad parts right away. So now I had a surplus of apples. The freezer was full of sauce and still, the apples came. Fortunately, I gave the apples to a baker friend who made a gluten-free apple crisp that was better than anything I had ever had. And that’s when she taught me a professional secret. You have to bake the apples first before you put the crisp topping on. When you just layer apple pieces in a pan and sprinkle with your crisp mixture, you can end up with apples that are too crunchy and/or a burnt crisp top.

So here’s the basic recipe:

Cut up apples into pan. Bake until mostly soft.

Crisp topping:
Oats, cinnamon, nuts (almond meal, tiny pecan pieces) Optional: butter, brown sugar.
Sprinkle topping on baked apples. Put the pan back in the oven until the crisp is browned and crispy. Twice-baked apples melt in your mouth (without lots of extra sugar) and the topping is crispy delicious. The perfect foil for vanilla ice cream.

So now I spend more time working to clean up apples…..but am rewarded with more apple crisp!

Photos:

http://utahpests.usu.edu/ipm/htm/fruits/fruit-insect-disease/apple-pear-control03
http://allrecipes.com/recipe/229088/apple-crisp-with-oat-topping/

A Little Dirt Won’t Hurt

Leave a bit of dirt to shelter native bees!

by The Bees Waggle

Last week I wrote about the importance of adding forage (flowers) to your yard.  Shelter is another provision can easily met for various species of bees.  Keeping native bees is very simple, just add a few things to your yard, and sit back and watch the changes occur!

70% of native bees nest underground, and the others nest in plant material, whether it be hollowed out stems or dead wood.

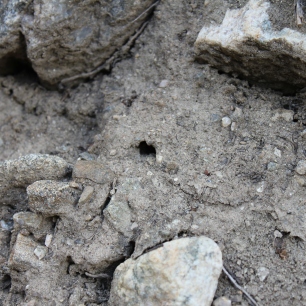
Ground nesting bees will look for bare patches of soil or sand, and begin digging tunnels.  These tunnels will then soon be filled with many egg cells developing into adult bees destined to emerge the following spring.  It is ideal they are able to find nesting sites near food, as most native bees do not travel far from home to collect nectar and pollen (most only fly between 200-1500ft to forage).

Providing shelter for these ground-burrowing bees is simple! Just leave soil bare; under bushes, trees, and other plants.  Skip the mulch and watch residents occupy those spaces.


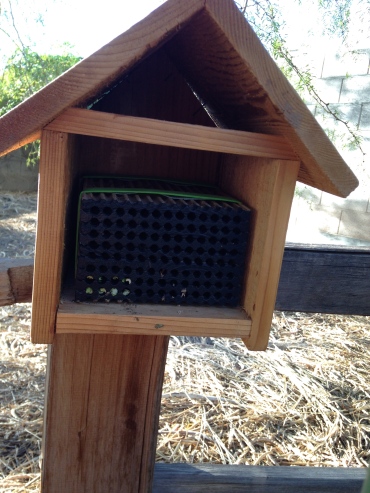
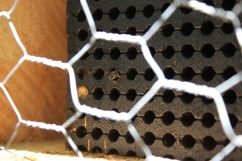
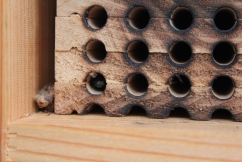
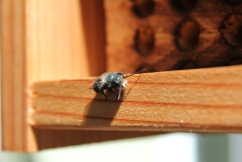
Twig-nesting bees nest is in hollowed out stems or deserted holes.  Easy ways to provide shelter for these bees is to have a bee house with reeds or wooden trays/blocks with appropriate sized holes for them to nest in.  You can also leave stems which are naturally hollow until the following summer, to ensure any nesters emerge before you remove the dead plant material from your landscape.


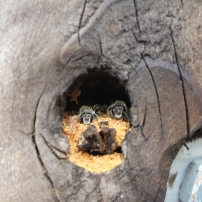
Other bees will nest in dead wood, by carving nesting holes into it, and using sawdust to partition individual egg cells from each other.  So placing logs in your garden, near flowers would be wonderful for these bees.


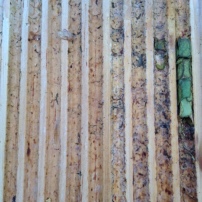
Some additional provisions include mud, sand, and leaves.  Many bees will love a pile of dirt, as they will use mud to create partitions between egg cells, such as is displayed in the image below. Other burrowing bees may prefer a sand supply to partition egg cells, which would also look very similar to the image below.

1610758_orig


Others might use half-moon shaped pieces of leaves or pedals from surrounding lilac bushes, peonies, or rose bushes to form egg cells as seen below.  Not to worry, your flowering plants will be okay despite the missing pieces of leaves; these bees only take exactly what they need, and this never equates to a destroyed plant.


Adding shelter for native bees doesn’t commit you to any more beekeeping activity than you already do.  Providing shelter is an essential part of sustaining, and even boosting, native bee populations. Once you have taken the steps to add forage and shelter, you can sit in your yard and enjoy the activity of these interesting species from spring to fall! 

Cheers to an essential movement to save our bees!

Jess

Fall Pruning: Don’t Do It

Why Not to Fall Prune

by Sandy Swegel

September is the time of year I like to tell you to quit working. I want you to leave some leaves and debris on the beds to give ladybugs and lacewings a place to overwinter. I want you to have seed heads for birds to eat. And I want you to enjoy the “winter interest” of an abundant garden of grasses and flowers frozen in place.

Another big don’t do it is Fall Pruning, especially for those of us in colder climates. It is so tempting to tidy up the garden by doing the pruning you didn’t get around to in the Spring, but for most plants, it’s better to wait until they are dormant or just emerging next Spring. Studies have shown than Fall Pruning can reduce winter hardiness in plants. If you cut the plants now, they are going to put their energy into vigorously regrowing instead of just settling into dormancy.

What Not to Prune Now
Spring Bloomers. If you prune lilacs or azaleas or forsythia now, you’ll be cutting off flowers buds that have already set for next year.

Rose Canes. I know the rose garden can look unruly and untidy in winter. But winter always kills back the canes at least a little. Better to have the canes die back from five feet high than from one foot high.

Trees. The National Arbor Day Foundation advises specifically against fall pruning: “Because decay fungi spread their spores profusely in the fall and healing of wounds seems to be slower in fall on cuts, this is a good time to leave your pruning tools in storage.”

Winter will be here soon enough. Some nice warmish winter day once the trees are dormant, you can get out and prune.

Sure, if a limb is dead or broken you can cut it . . . but only into the dead wood for now.


Photocredits
https://www.pinterest.com/pin/254594185160021955/
http://www.denverpost.com/ci_23047059/tight-spaces-or-dry-places-shrubs-become-garden

Good Bones

Winter Garden Treasures

by Sandy Swegel

Oh, Look. More Snow in the forecast.

I’m trying to be a grateful gardener. Really, I am. I watch the weekend forecast for yet more snow and utter to myself, “Oh, it’s good. We need the moisture.” I squint to see if daffodil shoots can push their way through old hard ice and console myself, “Snow is so good. It insulates the plants and protects them from howling subarctic winds.” But after weeks of cold, I’m running out of gardening reasons to love the snow.

Then I remembered Winter Bones. There’s that old adage that the secret to a good garden is good bones. From a design standpoint, that means the basic structure of the garden. The trees and paths and arbors. It’s hard to see the bones during the summer with all the foliage, but looking at the winter garden is like viewing an X-Ray of your garden. The foliage and flowers are gone and now you can see the skeleton of your garden.

Want to strengthen your garden’s bones? Take an inventory now of what you see as you walk in the apparently barren yard. Walk around your neighborhood and see what gardens are enticing even though it is winter.


Here’s what Winter Bones I like to see in the garden. Which ones do you have? Which ones can you add in this year?

Trees that make archways over paths.
Judicious pruning of trees you already have can make lovely walkways. Prune branches up so that branches along a path are at least 7 feet high. You can walk under them but not hit your head.

Thin Your Trees.
Apple and Plum trees can get quite dense without regular pruning. They block the sun from getting to the garden beds underneath and they produce less fruit. While these trees are still dormant, cut out some of those water shoots and old broken branches so you can see the structure of the tree now.

Grow interesting Bark
Paperbark trees are my favorite trees in winter. Their peeling, colorful bark called out to be touched and admired. Paperbark maples are great as are the Paperbark Birches which survive better in arid Colorado. The white bark of aspens and birches are great in summer and winter. In warmer places, sycamores and crepe myrtles and eucalyptus are exquisite bark

Grow tall shrubs
Twig dogwoods (red and yellow) stand out now. Pruning out a third of the old branches each year gives a beautiful shape and vivid color. Nine-barks in winter show off their great peeling bark.

Strategically place grasses
Clumps of grasses placed on corners or edges of beds or even as a mini hedge help create “rooms” in your garden, Grasses grow just in one season, so if you have a new garden and are impatient for structure, grasses provide it in one season.

Photo credits:
www.davesgarden.com

T

Native grass seed

Heirloom vegetables

Wildflower Mixes


Why I Love Ice and Freezing Rain in April

Benefits of Freezing Rain

by Sandy Swegel


Last week was just beautiful and a bit unseasonably warm for Colorado.  Everybody started gardening and doing spring cleanups and setting out Wall of Waters for their tomatoes.

Then yesterday was a cold drizzling rain that turned to snow and then ice as temperatures dropped.

And I’m really happy about that.

The reality is that we’re in Zone 5 and our last frost date isn’t until May 15th.  So we are due for more cold freezing temperatures.  For gardeners, spring freezes are heartbreaking because it kills the blossoms on the fruit trees….which means no fruit. Last year a late freeze meant we had virtually no apples, peaches or cherries.  Very sad.

So yesterday’s forecast for temps in the 20s could wipe out our fruit again this year.

That’s where freezing rain saves us. 

First, the rain gets everything wet.  Then the rain starts freezing around the little flower buds on the fruit trees.  More cold rain falls and makes a bigger ice crystal around each bud.  Soon the buds are entirely encased in ice.  That means that while the air temperature may have gone to 23 degrees last night there are good chance buds protected in 32-degree ice crystals were safe and will live to bear fruit.  The insulating effects of freezing water are well known in the orchard industry where citrus growers set off sprinklers over the fruit trees when the impending freeze is coming.

Others may curse the ice-slicked streets and frozen windshields today after enjoying 70 sunny days last week.  But I’m delighted.  I see hope for a bumper apple crop.


Photo credit:  http://blogs.woodtv.com/files/2012/03/ice-on-peach-blossoms.jpg


Make your own Apple Picker

DIY Gardening Tools

by Sandy Swegel

My beautiful orange apple picker came to a sad end last year under the wheels of a pick-up truck that smooshed it beyond recognition. We sadly have very few apples this year because of late frosts so more than ever I need a picker to reach the apples that are there.  My orange apple picker was very pretty, but its tiny basket area was a little frustrating. I could only pick a few apples before maneuvering the entire 12-foot pole down through the tree, take out 5 apples and wind it back up the tree.  The other problem was that sometimes the apples didn’t want to leave the tree and tugging threw other good apples to the ground, bruising them. So I started thinking about hacking my apple picker.

Well, in a digital world in which “apple” no longer means fruit from a tree, you can’t just google “hack my apple picker.” A search for DIY fruit pickers turns up lots of makeshift basket contraptions with water bottles which while clever and free, didn’t change the small basket problem.  I finally thought to look at what the commercial pickers do (besides bringing in big “cherry picker equipment” or precarious ladders.)  Somehow I couldn’t imagine teams of migrant workers with little orange baskets.

The answer is razor blades!  Rather than having a picker with wire fingers, razor blades at the end of your catching device slice the stems quickly.

So here are two possibilities for getting a better apple picker:  A DIY instructable with razor blades inside a narrow PVC pipe.  And the picker the pros use.  The DIY picker doesn’t include a bag….you have to catch the apples…so maybe you can think of a way to add a bag.  Look at the professional picker with its big sack as a model.

Apple picker: http://www.instructables.com/id/PVC-FRUIT-PICKER/

Berry pickerhttp://www.instructables.com/id/BERRY-PICKER/

Clip-n-pick fruit picker: http://frostproof.com/clip-n-pick-telescoping-fruit-picker-complete/

The Versatile Dwarf Conifer

Why You Need Conifer Trees

by Chris McLaughlin

Conifer trees are easy to recognize with their evergreen, needle-type leaves and the cones on their branches.

 In my opinion conifers offer some solid, reliable backbone to any yard — not to mention they’re handsome. I don’t know about you, but aside from the useful plants, I enjoy a little handsome in my yard, too. Standard conifers get big, like 50 or 70 feet tall, big. There’s a lot of us that can’t offer a proper home to such a monster, handsome or not.

Enter the dwarf conifers. You can fit a ton of these versatile mini-versions into a small landscape as they have a compact growth habit, which makes them container friendly, too. By using grafting techniques or rooted cuttings, dwarf conifers are reproduced asexually. By the way, when they’re grafted, it’s not onto dwarfed rootstock; they’re cultivars originating from mutations or seedling selections.

Unlike other plants that are grafted onto a smaller plant’s roots or “dwarf rootstock”, dwarf conifers or dwarf evergreens are simply tree or shrub varieties that are extremely slow-growing. In other words, they haven’t been bred to stop growing at a certain height. According to conifer nurseries, a regular hemlock will grow to reach 25′-30′ tall in 20 years time. While its dwarf hemlock cousin will reach 2′ in that same amount of time.
“Witches brooms” are another way to get a dwarf conifer. These mini conifers usually start as a bud that can be found anywhere on a regular conifer tree. Sometimes a bud’s genes will mutate and produce a clump of growth that’s dwarfed. They’re harvested from the parent plant and more plants are propagated from the brooms — creating more dwarf specimens.

Dwarf conifers bring year-round interest to the landscape and many perform seasonal color changes. Keep your eye out for variegated varieties and those in various shades of green, orange, blue, yellow, and lavender. Some also have patterned or bi-colored leaves, as well. Inside this conifer class are the yews and junipers that produce berries instead of cones. Also, along with the pines are firs, spruces, redwoods, cedars, cypresses, junipers, yews, and hemlock. Word of warning; cypresses do lose their leaves come fall.

Dwarf conifers come in many shapes and forms (just in case you can only picture a Christmas tree):

• Prostrate: These are plants that hug the ground like a carpet (and stay that way).

• Globose: These have a rounded, globe shape to them.

• Narrow upright: These plants grow taller than they do wide.

• Pendulous: These plants grow upright with branches that hang down or have a downward curving leader and require staking. Or they can have strictly descending branches from a central leader.

• Spreading: While these are upright, they grow wider than they do tall.

• Broad upright: These are all of the plants that grow upright but aren’t in the globose, narrow upright, or pendulous categories. Generally, these grow broader than they do tall.

• Irregular: These guys grow erratically without a pattern.

• Culturally altered: This means that someone made their own shape(s) with some pruning shears. Think topiary shapes.

Dwarf conifers are one of my favorite plant group of all time. If you’re interested in making them yours, check out The American Conifer Society’s website.