It snowed yesterday. It’s going to snow again today. This makes me so happy because it means I get a vacation from work. My gardening business is a lot like a teacher’s schedule. Work like crazy most of the year then I get a wonderful interlude to catch up on the rest of my life. Working in the garden may come to an end during Colorado winters, but eating usually continues and we continue to make lots of food scraps that any gardener would hate to waste.
When I lived on acreage, I did all my food composting by sending it through the chickens. The backyard chickens loved food scraps and eagerly ran around when I brought the compost bucket. Even if it was just onion scraps and things they didn’t like to eat, they relished scratching it around and mixing it with the coop bedding and poop. Spring compost in the making.
Without chickens, there are still ways that you can compost in winter and capture your kitchen scraps:
1. Use your regular compost bin
I empty mine to about ¼ full of compost in progress with lots of worms. I fill it all the way to the top with dry leaves and sort of hollow out the center. The leaves don’t freeze solid and all winter I drop the scraps down the middle of the leaves. The leaves provide some insulation and the food scraps and leaves at the bottom of the pile are warmed enough by the earth that a tiny bit of composting keeps happening even when temps get well below freezing. The earthworms are slow but still keep working and reproducing.
2. Compost in a protected sunny spot
Keep a plastic (black if possible) bin against the house on a sunny side. I started with the bin half full of partially finished compost that hopefully has some worms already busy in it. The center, next to the ground, will stay unfrozen so the worms will stay alive. The compost probably won’t process much over the winter except on sunny days. You may need to secure it against raccoons or other varmints.
3. Make a trench
This takes a bit of planning before the cold weather arrives, but produces amazing results and saves time and labor. Dig a long trench right in the garden…about a foot deep and a foot wide. Leave the soil heaped right next to the trench with a rake nearby. I left the excavated dirt on the side of the trench. Every time the indoor compost bin was full, I just took it out to the garden and dumped it into the trench. If things weren’t too frozen, I pulled some of the excavated dirt on top of the food scraps. If there was snow on the ground, I just put the scraps on top, and eventually, it fell into the trench.
This process attracts all the worms to the trench. Some composting takes place in the Fall but most decomposition happens in early Spring. By early May, when it’s time to plant tomatoes, the compost is broken down enough that I can transplant my tomatoes directly into the filled trench that is crawling with decomposers and happy earthworms. If it was a very cold winter and the compost isn’t finished, just plant right next to the trench. Some people like to compost in trenches all year. They set up a three-year rotating system where they compost one year, plant the next and use the area as a walkway the third year. Pretty clever!
4. Make a windrow
John, the Worm Man, Anderson in northern Colorado keeps his worms happy all winter by setting up short windrows of compost, food scraps, and worms. He throws old carpet or tarps over the top. Periodically, he lifts the carpet and puts new scraps on top of the piles. The worms slow down in winter but keep working and reproducing. For small households, just make a pile on the ground and cover it with a tarp. The tarp keeps moisture and some heat in. Just slip the food under the tarp. Worms show up. This doesn’t work so well if you have raccoon or mice and rat issues.
https://bbbseed.com/wp-content/uploads/2026/01/47710_BBB_Logo_HiRes_Transparent_1023-01-removebg-preview.png00Sandy Swegelhttps://bbbseed.com/wp-content/uploads/2026/01/47710_BBB_Logo_HiRes_Transparent_1023-01-removebg-preview.pngSandy Swegel2022-10-28 03:57:142025-06-23 14:54:414 Ways to Compost in Winter
Here are some June garden chores to keep your veggies and flowers going strong.
Photo courtesy of pixabay
Cage or trellis any vining vegetables such as cucumbers, beans and tomatoes. By training these vegetables to grow up you are saving precious garden space and keeping the fruit off of the ground and away from critters. Click here for trellis ideas!
Continue watering your vegetable and perennial beds. Try to keep water close to the roots and off of leaves. Checked potted plants often, they tend to dry out faster.
Keep up with the weeds! This can start to feel like a never-ending battle at this time of year, but keeping the weeds under control means more nutrients, water and sunlight for your vegetables and flowers.
Mulch around vegetables to help conserve water.
Side dress with compost for a mid-season boost.
photo courtesy of pixabay
Begin replacing cool season crops that have begun to wind done or have bolted from heat.
Plant successive crops of summer greens like collards, kale, chard and lettuce (Protect them from hot afternoon sun).
Transplant any remaining warm season vegetable starts.
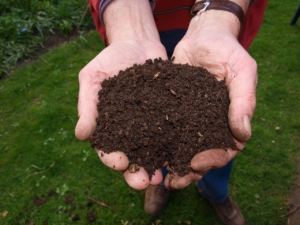
Composting seems like ‘all the rage’ right now! Taking some of your food and paper waste out of the landfill is a great way to reduce your waste, take care of the environment, and create an excellent supplement for your (or a lucky neighbor’s) garden! We’ll show you three ways to compost that will work with your lifestyle.
No matter where or how you are composting, there are some basic guidelines to be aware of.
First off, if you are composting at home, you want to avoid any animal products like meat and dairy (eggshells are fine). These products can create unwanted odors and attract pests like raccoons!
You also want to be aware of how much brown and green material that is going into your compost. Brown material is any dry, carbon-rich material. This includes shredded paper, dried leaves, or old plant material. Green material is nitrogen-rich material like food scraps, eggshells, grass clippings, and coffee grounds.
When composting you want to include equal amounts of brown and green materials. If you are using an outdoor composting system, you’ll want to alternate layering brown and green materials, usually starting with brown.
Finally, you can’t let the compost just sit. Mix it and water it to keep the microbes happy and healthy. Mixing it incorporates oxygen and watering cools the pile and prevents it from drying out.
Indoors
You may have been reading this and thinking, “I have an apartment, I can’t compost!”. Composting inside can be difficult, but it’s not impossible!
The simplest solution is to find a neighbor, community garden, or farmer who would love to add your food scraps to their compost pile. Just store your scraps in a plastic bin with a lid and run over to the pile every few days.
If you don’t have a friend with a compost pile, you can still do it yourself. Many people have found great success in vermiculture, or “worm farming”! Vermiculture is a quick, odorless composting method that is great for those without access to a yard.
Have a little outdoor space, but don’t want to devote half your yard to composting? There are specialized composting bins that can handle all your household waste, speed up the composting time, and stay out of sight.
One of the fastest methods of the three ways to compost is to use a tumbler. Tumblers are plastic drums that can be rotated to mix the compost easily without getting your hands dirty. They are contained and inconspicuous. We recommend double-chambered rotating compost bins like this, which can turn scraps to finished compost in as little as two weeks.
There are also plastic compost bins. These bins are open at the top and bottom. You usually add fresh material to the top and wait for finished compost to be scooped out of the bottom. These bins require little work, just the occasional watering, but can take a while longer than the rotating drum. We recommend this classic Soil Saver from All Green.
These composters are great and beginner-friendly, but they have limited capacity. They can handle an average household’s compost, at most, and that doesn’t include yard waste like grass clippings. If you want something that can handle a larger amount of compost, you’ll have to pursue more traditional methods.
https://bbbseed.com/wp-content/uploads/2026/01/47710_BBB_Logo_HiRes_Transparent_1023-01-removebg-preview.png00Sam Dollhttps://bbbseed.com/wp-content/uploads/2026/01/47710_BBB_Logo_HiRes_Transparent_1023-01-removebg-preview.pngSam Doll2019-03-06 16:25:132025-06-23 15:01:43Three Ways to Compost that Will Fit Your Lifestyle
Vermiculture is more than just a funny word, it is the process of using worms to decompose food waste. The worms turn the waste into nutrient-rich material that will ensure healthy & happy plant growth. It is nature’s way of recycling! This method is a sustainable way to save energy, water, landfills and it reduces the need for synthetic fertilizers. You can feel good about not throwing your kitchen scraps down the kitchen disposal or contributing to the over-crowding of our landfills. You can even have a worm bin indoors without any odor or mess!
How to Get Started on Your Indoor Worm Bin…
You Will Need:
Cardboard (Optional) – Can be used to cover bedding to lock in moisture Rubbermaid or Wooden Container with Lid – Recycled containers work great, just make sure that they have never been exposed to chemicals. A 1’x2’x2’ bin can hold kitchen waste from families of 2 people. A 1’x2’x3’ bin can hold kitchen waste from families of 4 to 6 people. You don’t want a very deep bin because worms feed in the top layers of bedding. Bedding (Newspaper) -Black ink on newspapers is made of Carbon and oils and is not toxic to worms. Colored ink should not be used. Yard Waste (Optional) -Decaying leaves from your yard makes a great composting material to add to your worm bin. A handful of Soil – Provides the grit that worms need to break down food in their gizzards because they don’t have teeth. Red Wiggler Worms – Number of worms depends on your daily food waste. One pound of worms can eat ~3.5 lbs. of waste per week. Moisture – To wet down your bedding & worms also need moisture in order to breathe.
Step by Step Instructions:
Step 1:
Use a drill or hammer & nail to poke 1/8-1/4” air holes in your bin 1 inch apart. You want some holes on the bottom for drainage, on the lid of the bin and along the top of the four sides. Make sure to raise the bin on bricks or wooden blocks with a tray underneath to catch the excess liquid that can be used as a liquid fertilizer for your plants.
Step 2:
Shred newspaper (black & white ONLY) into 1-inch strips. Moisten strips and squeeze out excess water. The newspaper should not be soggy, just damp. Fill ¾ of the bin with moist shredded newspaper, decaying leaf litter (optional) and a handful of dirt and then mix it all together. You want the bedding to be fluffy not packed down. Let bin sit for a day before you add your worms.
Step 3:
Separate your vermiculture worms from the packing material that they came in. Scatter them in your bin. Feed them slowly at first so they can acclimate to their new environment and to monitor the rate at which they break down waste.
Step 4:
Feed your worms foods that they love and avoid the foods that they dislike (listed below). Don’t forget to harvest your compost every couple of months because your worms will continue to break down their bedding material.
Step 5:
After you have fed your worms for 3-6 months you will see some worm compost/castings on the bottom of your bin. It will be very dark in color and extremely rich in nutrients. You can harvest what is there or you can wait until your bin is really full. Worm castings are toxic to worms, so if you have mostly compost and not a lot of food or bedding left in your bin, then it’s time to harvest. Whatever method you choose, the key to harvesting is to separate your worms from the compost. Your worms will not survive if you put them in your garden with the compost.
To harvest your compost, you have a couple of different options:
Your worms will be in the top 1/3 of your bin. You can remove the top 1/3 of worms, bedding & food and set that aside. Once you remove the compost from the bottom of your bin, then you can put your worms and remaining bedding/food back into the bin, add fresh bedding and resume feeding and maintaining your bin.
If you have a larger bin, then you can push all of the material in your bin to one side and add new material to the empty half of the bin. After a month or so, when it appears that the worms have moved over to the new side, then you can harvest the compost from the other side.
Spread the contents of your worm bin out on a plastic sheet/table cloth in the sun or under a bright light. Your worms will start moving down into the compost to get away from the light. About every 20 minutes you can scoop up the top layer of compost and the worms will move down again. Repeat this method for a couple of hours until you are left with a wiggly pile of worms that have been separated from the compost. Return the worms to their bin with fresh bedding immediately.
*You can’t save all of the worms, but using one of the three methods listed above will help to ensure that you save the majority of them!*
Here is an instructable with more information and photos:
https://bbbseed.com/wp-content/uploads/2026/01/47710_BBB_Logo_HiRes_Transparent_1023-01-removebg-preview.png00Mike Wadehttps://bbbseed.com/wp-content/uploads/2026/01/47710_BBB_Logo_HiRes_Transparent_1023-01-removebg-preview.pngMike Wade2019-01-01 09:28:532025-06-23 15:01:28Worms in my Kitchen?
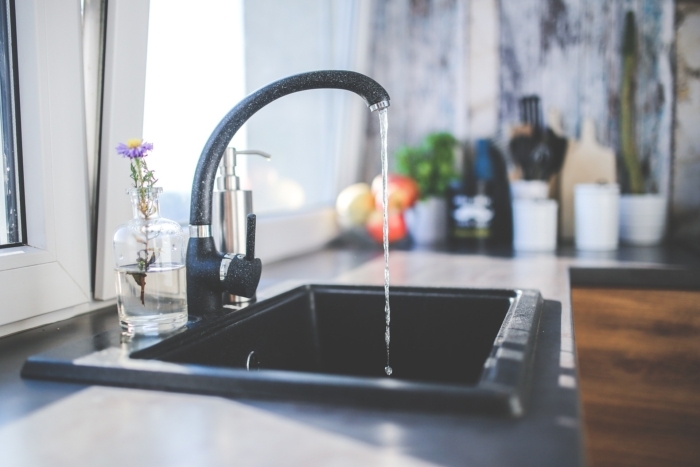
No matter where you live reducing your water use is important. Water is a finite resource and we are using more of it than ever. Did you know that the average American uses 88 gallons of water a day at home? In comparison, Europeans use about half that and in sub –Saharan Africa persons average only 2-5 gallons a day. Now most of us aren’t likely to get our water usage to that level, there are many ways we can reduce our water consumption in the home.
When it comes to saving water, the little things do really add up. Here is a list of 12 easy things you can do in your home to reduce your water consumption and lower your water bill.
1. Repair leaks. Drip, drip, drip. This is the sound of a precious resource being wasted. Fix those leaking toilets and showers! This can make a big difference. The average family can waste 180 gallons per week or 9,400 gallons of water annually from household leaks. Nationwide, these household leaks can waste almost 900 billion gallons of water in a year. Not sure if your toilet is leaking. Place 10-12 drops of food coloring in your tank, don’t flush. Check back in thirty minutes. If there is color in the bowl, you have a leak. 2. Install water saving fixtures like faucet aerators and low flow showerheads. These low cost and easy to install items can significantly reduce water volume. If you have a little more money to spend replacing your old toilet with a low –flow model can save 50-80 gallons of water a day. 3. Don’t use your toilet as a wastebasket. Whenever you flush that tissue or bit of trash down the toilet you’re wasting gallons of water. Put it in the trash instead. 4. Take short showers instead of baths. Turn off the water while you are soaping up. 5. How many gallons of water go down the drain while we wait for the shower to warm up? Collect that water in a large bucket and use it to flush the toilet or water plants. 6. Turn off the water to brush your teeth. The average faucet releases 2 gallons of water a minute. 7. Fill the sink to shave instead of letting the water run. 8. Only run your dishwasher when it’s full. 9. Fill a basin with water for rinsing your dishes. Use this water to water your plants or flush your toilet. 10. Limit the use of your garbage disposal. Try composting those food scraps instead! 11. Wash your fruit and veggies in a tub or bucket instead of rinsing under running water. This can save gallons of water from going down the drain. 12. Only run your washing machine when it’s full and skip the permanent press cycle. Most machines use 5 gallons of water for that extra rinse.
https://bbbseed.com/wp-content/uploads/2026/01/47710_BBB_Logo_HiRes_Transparent_1023-01-removebg-preview.png00Mike Wadehttps://bbbseed.com/wp-content/uploads/2026/01/47710_BBB_Logo_HiRes_Transparent_1023-01-removebg-preview.pngMike Wade2018-08-07 07:00:262025-06-23 15:00:5112 Easy Ways to Save Water Now
Fall leaves are Nature’s parting gift from the growing season to the gardener. Tree roots run deep and wide and have collected minerals and nutrients from deep in the soil. These are nutrients that then spent the summer high in the sky at treetop collecting sun rays and are now being placed abundantly at your feet.
If you’ve been gardening any length of time you know how valuable leaves are. They decompose beautifully in the compost bin when mixed in with the green matter. You can run them over with the mower to break them down and use them as mulch in all your garden beds. You can keep piles of them in a shady moist corner of the garden decomposing down into leaf mold which is a superior soil amendment.
The most important thing gardeners in my neighborhood do within Fall leaves is collect them. Our neighbor Barbara is the Queen of Fall Leaves and had taught us about how valuable leaves are to the gardener. She lives on a busy street and puts a big cardboard sign in front of her house every year that says “Bagged Leaves Wanted.” Pretty soon bags and bags of leaves start piling up, brought from strangers all over town who are happy to have a place to recycle their leaves. Barbara gets the first 1000 bags and about fifteen of us split the next 1000 bags of leaves.
So what do you do with 1000 bags of leaves?
Mulch the garden beds. Some of the leaves have already been chopped by blower vacs. These leaves easily go on perennial beds.
Mulch the garden paths. Big dried leaves that are slow to break down like oak leaves or pine needles go on the paths to keep the weeds down.
Put a layer over the vegetable garden. If you don’t till in the spring, a thick layer of leaves will block light and suppress weeds and keep in moisture. But wait, you say, the wind will blow the leaves away. That’s when you put the bagged leaves on top of the garden. It’s a place to store extra leaves and the weight of the bags keeps the loose leaves from blowing away. Moisture collects under the bags and earthworms come to feast there.
Till the molding leaves into the soil in Spring with the cover crop.
Insulate the cold frame or greenhouse with bags of leaves stacked around.
Line the troughs you dig for your potatoes next year with rotting leaves.
Make easy Leaf Mold. Stack the bags that look like they don’t have holes somewhere (as insulation or just as storage) and put the hose in to fill the bag about ¼ way with water. This makes speedy leaf mold.
Use as free litter for chickens and bunnies. If you have farm animals, dried leaves are perfect free litter for the bottom of the coop or cage. And the manure is already pre-mixed with carbon for composting.
Feed the Goats. The most fun thing to do with the leaves (aside from jumping in piles of them) is to feed the goats. Apparently, dry leaves are yummy like potato chips to goats and they come running to eat the crunchiest ones when I’m hauling the latest bag of leaves to the backyard.
Happy goats running with floppy ears flying is a highlight of my day.
https://bbbseed.com/wp-content/uploads/2026/01/47710_BBB_Logo_HiRes_Transparent_1023-01-removebg-preview.png00Sandy Swegelhttps://bbbseed.com/wp-content/uploads/2026/01/47710_BBB_Logo_HiRes_Transparent_1023-01-removebg-preview.pngSandy Swegel2014-10-31 09:22:592025-06-23 14:58:051000 bags of leaves and what to do with them
One of the problems with gardening is that you just can’t rush Mother Nature. If you don’t get those tomato seeds planted early enough, there’s just no way to trick the plants into growing overnight. Compost is the same…you can’t just mix everything up today and use the compost tomorrow. But there are things you can scavenge that you can add directly to your garden that help your garden a lot more than those sterile-looking bags of manure or compost they sell at the store. And they’re free!
1. Leaf Mold
Better even than regular compost for improving soil texture, leaf mold is what you end up with after a pile of leaves has rotted down to a dark earthy mix with only a few leaves still recognizable. This can take one or two years depending on how wet your climate is. You can find leaf mold that’s been breaking down for months or years anywhere leaves collect: where the wind blows them behind the garage or along the shady side of the fence. Your neighbor’s yard is a good place to find it, or along stream beds or in shady woods. Dig in to get the dark damp leaf mold next to the soil and leave the dry leaves for another year. Spread the leaf mold over your garden, at the bottom of planting holes, or along the trenches for your potatoes. This is pure gold for your garden.
2. Coffee grounds
Coffee shops are often willing to give you their used coffee grounds for free. Starbucks packages them up for you in empty large coffee bags. No need to do anything special with the grounds…just sprinkle them across your soil or at the base of plants. The plants like the boost from caffeine almost as much as you do.
3. Weed Tea
When I’m weeding, I keep two buckets with me…one for the green leaves (and roots) of weeds like dandelions, thistle, dock, lambsquarters and one for the seed heads or other garden debris I’m cleaning. All those long tap roots that are so hard to dig out have been pulling up minerals and micronutrients from deep in the soil. Once my bucket of green leaves is mostly full, I fill the rest with water and leave the bucket out to “steep.” After four days or longer, (ideally until it starts to smell bad), I use this nutrient rich water to water the garden. The leaves get thrown out or into the compost. Plants that get this water turn a nice dark green.
4. Grass Clippings
If you (or your neighbor) have a lawn (and you don’t use weed killer), the grass clippings are the perfect mulch for your garden. Layer the clippings thinly on the surface of the soil near your plants. Keep adding it every week and it will keep breaking down at the soil line into compost.
5. Newspaper
Most newspapers are printed now with soy ink and safe to use in the garden. Lay three or four sheets of newspaper over the soil in your walkways or between rows and cover with mulch. The newspaper helps block weeds from coming up, and reduces evaporation. Worms LOVE the taste of newspaper and will help break it down into rich soil.
https://bbbseed.com/wp-content/uploads/2026/01/47710_BBB_Logo_HiRes_Transparent_1023-01-removebg-preview.png00Sandy Swegelhttps://bbbseed.com/wp-content/uploads/2026/01/47710_BBB_Logo_HiRes_Transparent_1023-01-removebg-preview.pngSandy Swegel2013-05-17 10:57:192025-06-23 14:56:545 FREE Soil Amendments that you can Easily Find!
You need the right proportions of greens and browns to get the metabolic process going. Too much brown and nothing happens. Too much green and you either get slime or the greens just turn brown.
You need the right amount of water. Too little water (rainfall is not enough in Colorado to make compost) and everything is still whole and undigested a year later. Too much rainfall….in Louisiana we had to cover the compost to keep the rain out…and it’s just putrefying sludge.
Air is important too. I had a burly housemate who made a huge pile and stomped on everything to make it fit. Dry compressed leaves and debris were in pile two years later.
Weather conditions change how the pile works….my cold compost pile…you keep throwing things on top—quit working during last year’s drought pile. No rainfall most of the summer and frugal amounts of chlorinated water weren’t enough to keep the pile going. Everything just dried out including the worms.
So after so many failed piles and attempts to do things right, I have found two sure-fire ways to make great compost.
One. Eat your fruits and vegetables. Nothing keeps compost going better than little nests of your household food scraps put into the center of your pile every few days. Don’t scatter it all over…just a little metabolic engine of food decomposition at the center of the pile helps everything else compost. You can keep putting your weeds and debris on top…but just add food scraps to the middle when you have them. Variety seems to help. One year I thought I could keep the pile happy with all the zucchini bats….nope…the microbes and worms want variety—some banana peels and eggshells, maybe some moldy bread and coffee grounds.
Two. Use a good starter.
Never completely empty your compost….always leave some at the bottom of your pile to provide the microbes for the next batch. But if your pile still isn’t thriving, it might need some starter from somewhere else. Occasional shovels of soil from the garden helps, but sometimes our soil isn’t as rich in microbes as we’d like. Then you need a generous friend with a great compost pile. A bucket of good active moist compost from a living pile will inoculate your entire pile. It’s like making sourdough or yogurt….you need the starter. And somebody else’s compost is better than any dried up compost starter you buy in the store.
https://bbbseed.com/wp-content/uploads/2026/01/47710_BBB_Logo_HiRes_Transparent_1023-01-removebg-preview.png00Sandy Swegelhttps://bbbseed.com/wp-content/uploads/2026/01/47710_BBB_Logo_HiRes_Transparent_1023-01-removebg-preview.pngSandy Swegel2013-05-06 11:07:242025-06-23 14:56:39Two Secrets to Great Compost!
Get ready to collect some manna from heaven! Leaf mold is one of the best amendments a gardener can add to the garden. And it’s super easy to make and free: All you need is leaves and time. Create a leaf pile somewhere it won’t blow away but will get snowed and rained upon and break down gently in its own time. At the end of a year (or two if you live in a more arid place), you’ll have the treasure of broken down leaves, wet and almost compost-like.
Leaf mold is valuable in several ways. It is the result of the fungal breakdown, so in addition to adding organic matter to your garden, you’re also putting lots of beneficial fungi in the soil. It’s a good way to add valuable minerals to soil because tree roots are pulling nutrients from deep within the soil and depositing those nutrients in their leaves, which then get deposited in your garden.
There are two easy ways to get leaf mold. The absolute easiest is to live somewhere humid with lots of deciduous trees like North Carolina and just go out into the woods and find places the leaves have drifted over the years. Reach down under a soft squishy pile of leaves and you’ll find leaves from previous years broken down and moist and crumbly, often with earthworms happily working away.
If you don’t have your own woodland or if you live here in the arid plains of Colorado, the process needs a little helping along. In my neighborhood, a gardener on a busy street put up a sign in front of her house: “Bagged Leaves Wanted.” People hate to just throw leaves in the garbage, so in the spirit of recycling, they drop them off at her house all hours of the day and night. She takes the first 1000! or so bags for her garden and leaf mold pile and her goats (Apparently goats think dry leaves taste like potato chips.) The rest of us gardeners in the neighborhood take the next 1000 bags strangers drop off for us. They tidy their yards to get rid of leaves and we add all those leaves to our garden because we know they are manna from heaven!
https://bbbseed.com/wp-content/uploads/2026/01/47710_BBB_Logo_HiRes_Transparent_1023-01-removebg-preview.png00Sandy Swegelhttps://bbbseed.com/wp-content/uploads/2026/01/47710_BBB_Logo_HiRes_Transparent_1023-01-removebg-preview.pngSandy Swegel2012-10-01 21:34:072025-06-23 14:56:12Fall Leaves: They Aren’t Just Pretty

 Composting Basics