Walla Walla Sweet Onions…You know you want them

Heirloom Vegetable Seeds

by Sandy Swegel

It doesn’t take much effort to convince us we should grow Walla Walla sweet onions. Think about thick slices hot from the grill. Or cold on our hot cheeseburger. Dream of oven-roasted whole onions. Or be one of those brave people who bite into the Walla Walla like it’s an apple.

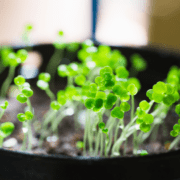
Onions are really easy to grow so when I heard the Walla Walla Sweet Onion seed had arrived at BBB Seed for the first time, I rushed over. There’s only one problem for me with Walla Walls….their growing season is 125 days…a little longer than I can count on in Colorado. So I start the seeds indoors in February and transplant the seedlings in April.


The most important rule of growing onions is you have to use fresh seed. After a year or so, germination rates drop down to “almost none” so you do need new seeds each year.

Onions grow happily in decent soil. They can handle hot sun and they’ve forgiven me letting the weeds get a little overrun. There’s not too much guesswork as to when they are ripe…their tops fall over. So you can grow onions off in a corner of your garden without too much extra effort. Although quite labor intensive for farmers, onions are pretty cheap at the grocery so we don’t grow them so much to save money as to capture the awesome flavor of fresh homegrown Walla Wallas.


For more pictures and recipes, go to the website of the annual Walla Walla festival!
OR go to the festival in June!


Photo Credits:
http://www.sweetonions.org/

http://www.wiveswithknives.net/2010/08/02/potato-walla-walla-onion-and-gruyere-galette/
http://savorthebest.com/roasted-sweet-baby-walla-walla-onions/

EZ Indoor Seed Starting

EZ Indoor Seed Starting Setup

Gardening Tips

Indoor Seed starting is really easy and cheap.  You get so many more plants by starting your own seeds.  My mantra in my seed starting classes is “Seeds Wanna Grow.”  You just have to give them a little help to mimic outdoor conditions.

All seed-starting setups are pretty simple, once you know the basics.  I just finished designing a new setup for myself this year because BBB Seed Head Honcho Mike added so many new varieties of seeds this year, that I need more space to try them all.

Design your own setup by remembering these basics.

Light

You need long hours of bright light.  I run the lights for at least 14 hours a day. I used a timer because I’m forgetful.  For seed starting, you don’t need special full-spectrum lights…simple fluorescents or LEDs will do.  The full-spectrum is needed for adult plants that you want to bloom.  I like the new T-5 fluorescents that use less energy, but my old shop lights worked great for many a year.

Warmth

Temps need to be in the 70-degree zone for most seeds to germinate quickly and evenly.  In the bookshelf setup I’ve used, the lights themselves made enough heat.  In my cold basement, I put a heat mat under the seed tray.

Soil and container


Seeds will germinate happily anywhere, but to develop their root system they need some kind of substrate.  I used new germinating soil to avoid fungal problems.  Containers can be anything. Last year’s pots, egg cartons, yogurt containers, etc.  It just needs to drain.

Water

Even watering is the key.  I water from the bottom by filling a container underneath my seed starting tray. Humidity helps.  The most important thing to avoid is the surface of the soil drying out during germination or early growth.  That is death to the new baby plants.

Air

I always have a fan near my seedlings.  You don’t often see air mentioned, but the gentle movement of the air reduces mold and stimulates growth.  You can get by without moving air, but I get sturdier plants and less disease.


Picture credits:

https://littlehouseontheurbanprairie.wordpress.com/category/seed-starting/

http://www.vegetablegardener.com/item/10376/diy-pvc-grow-light-stand

http://www.harvesttotable.com/2011/04/vegetable_seed_and_seedling_pr/


Best Heirloom Vegetable seed

Wildflower Seed Mixes

Grass and Wildflower Seed Mixes

Leafcutter Bees are Great Craftswomen!

All About Leafcutter Bees

by TheBeesWaggle


Any name with cutter in it seems frightening, but I am here to redeem these Leafcutter Bees of such a stigma by bringing understanding through education.

Leaf-cutter bees are another native species of bees found in most parts of North America. They are smaller than a honeybee, and have darker stripes paired with pastel yellow colored stripes across the abdomen.

The scientific name for this species is Megachilidae, and their name says it all, they do cut leaves for a purpose. They get their name from the way they use pieces of leaves to form egg cells which they then store in long, hollow cavities.  They use a glue-like substance from glands near their mouths to sew pieces of leaves together, which they have carved from leaves of lilacs and other broad-leafed plants. The shape is that of a half-moon, and the size of the piece they take is very consistent. They only take as much as they need, never destroying the plants from which they take the leaf fragments.

.Leafcutter Bees

Half-moon cuts on my lilac bush.

Leafcutter Bees

A row of beautifully crafted nesting cells from my leafcutter bee house.

Leafcutter bees are a solitary breed, like the mason bee. This translates into a more docile creature with nothing to defend but her life. So the only time she would sting would be to defend her life, and this is a rare occurrence, making her a very welcoming guest in your own yard!  I have spent many minutes peering into the nesting blocks while these busy bees fly in and out going about their nesting business.  I never once felt threatened by them, and in fact, felt ignored, entirely!  This is also true of the nature of mason bees.

However, unlike mason bees, leaf-cutter bees will do their own excavating of soft rotting wood, or holes in thick stemmed plants, and in any conveniently located crevice.  They also like having conveniently located nesting blocks with inviting holes as well, and we had success with them nesting in ours this summer! Nesting blocks need protection, so they must be paired with a nice house, and we have many options!

Like mason bees, leafcutter bees are very good pollinators compared to the honey bee.  One leaf-cutter bee can pollinate at least what 20, and even up to 40, honey bees can pollinate. Leaf-cutter bees do not have pollen carrying baskets on their hind legs, but they do carry lots of pollen via static cling created by the hairs on their abdomen. The way they visit flowers is much like the mason bees, diving into the pollen as they fly from flower to flower. This techniques sets them apart from honeybees and makes them very effective pollinators.

Finally, leaf-cutter bees do not make honey, but they cultivate quite the production of food sources through their fierce pollinating efforts, and it would be foolish not to recognize this talent useful to us as humans. Like the honeybee, leafcutter bees, along with all other species of bees, need our help!  Become a great host to these fascinating creatures, along with other species of pollinators, by setting up a complete habitat for them next Spring!

Leafcutter Bees

Grow Watercress Indoors

How to Grow Watercress Indoors

by Sandy Swegel

Watercress is another one of those unassuming, almost weedy, plants that is a superfood for humans. In the brassica family of heirloom vegetables, watercress (Nasturtium officianale) is rich in vitamins, minerals (especially calcium) and sulfides. It’s not just for watercress sandwiches and tea. It is a great addition to salads as either sprouts or leaves, excellent juiced or added to juices and makes a lovely pureed spring soup. And pretty yummy just for nibbling.

Watercress is a great plant to start at the beginning of the growing season, but you can also grow watercress indoors during winter. We’ll teach you how.


Sprouts

Watercress sprouts easily and you can grow it in a jar just like you do alfalfa seeds. Its spicy kick is great on sandwiches and salads.

Plants

Seeds are pretty easy to germinate. The biggest challenge to grow watercress indoors is that it needs to always be moist, especially during germination. You can accomplish this by starting the seeds in a small pot of clean potting mix and then setting the pot in a saucer of water. Misting is great or put a plastic cover over the seed mix if your air is dry. Someplace slightly warm like the top of the frig is a great germination spot. They don’t need light to germinate.


Once the seeds are growing, you just need to be sure the plants are moist with fresh water. Think about their ideal natural habitat in Europe: slow-moving creek edges in bright shade. Some people grow them in water tanks with aerators if you want to get fancy.

One secret to tasty watercress is to keep the growing plant cool and out of hot sun and to harvest it before it flowers. After flowering, the leaves become more bitter.


To grow watercress indoors in late winter is such a promise of Spring. But it doesn’t need to be an indoor plant. After your weather warms to above freezing, you can plant your watercress outside if you have a place that stays pretty moist. (Learn more about Zones and Frost Dates). If you have a pond or fountain the watercress is thrilled living in a pot in about an inch or two of water along the edge. I’ve seen it in a shade pot with impatiens and it was pretty happy.

And once you have nice succulent leaves, watercress, slivers of cold cucumber and butter on thin white bread is actually pretty awesome.


Not sure what heirloom vegetables are or why you should grow them? Read more from Gardening Know How.