Cabbage and Clover Husbandry

Cover Crop Seeds

by Sandy Swegel

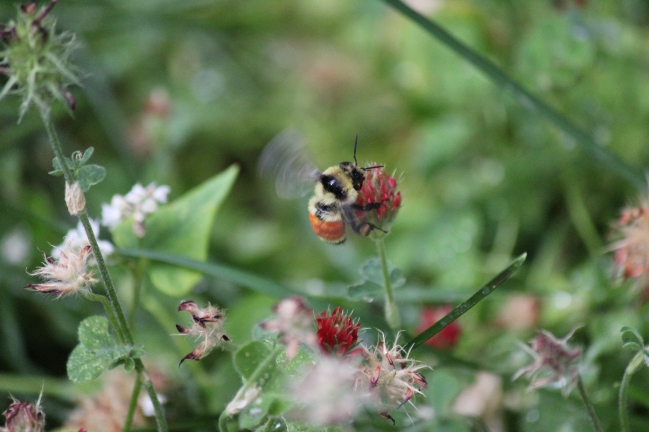
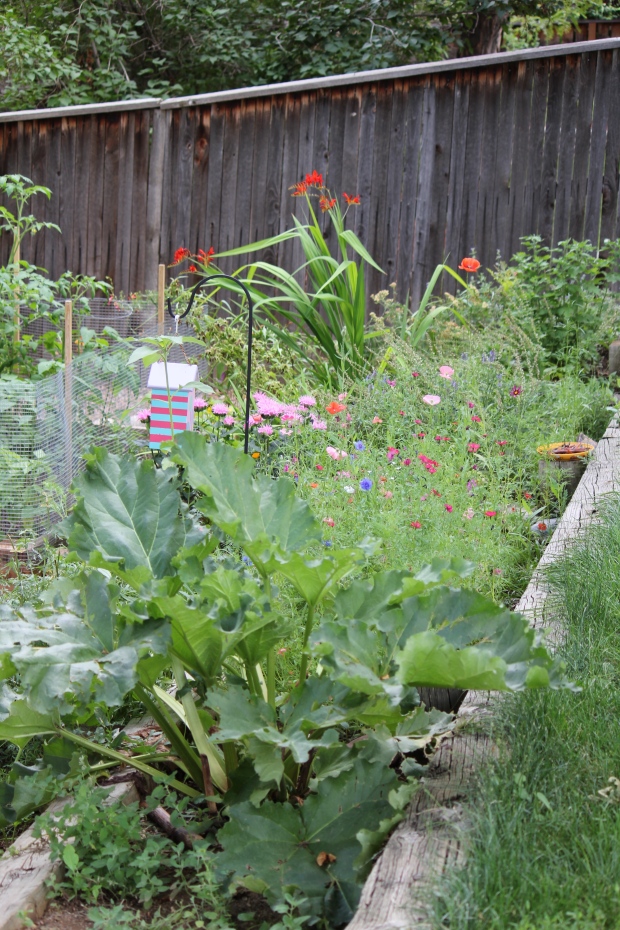
St Patrick’s Day is this week…a traditional day for planting peas. But you know that….so get ready to plant your peas. This year I’m thinking about Ireland and two plants usually associated with Ireland: cabbage and clover (not necessarily the four-leaf variety.) A little internet browsing led to an interesting connection to these two plants. One…they both like to grow in cool humidity like Spring and Fall. Cabbage is a cool season crop. Two… old country wisdom and modern science show that cabbage and clover are excellent companion crops.

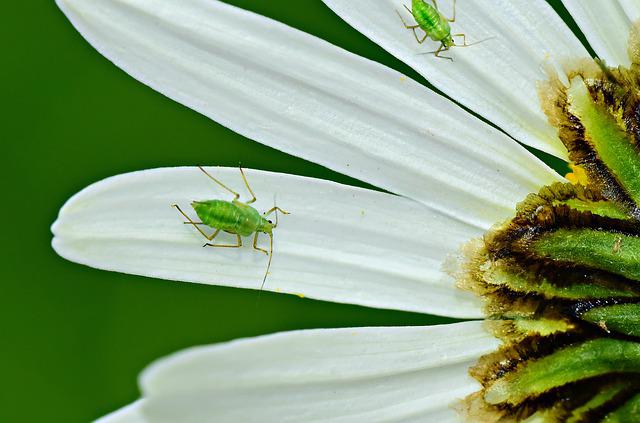
Books in England dating back to the 1700s recommend cabbage “Husbandry” the old word for farming. Cabbage was highly regarded because it lasted well as a stored food for winter and because cows and sheep that ate cabbage in the winter made sweeter milk than those that ate turnips. Standard practice in England in the olden days was to plant a clover cover crop and follow that with cabbage or potatoes. Turns out that cabbage that grows in clover or where clover had been grown and tilled under are larger and have significantly fewer pests included the cabbage looper. Cabbage moths are still the bane of cabbage growers. Modern no-till farmers have adopted this centuries-old wisdom to plant cabbage right into a field of clover.


Besides being good for cows and sheep, cabbage is healthy for us and a staple in many cuisines. I am particularly fond of the red cabbages because they are pretty! Here are a few tips to grow cabbage:

It’s a cool season crop.
That means you have to get it in early. Or plant it in mid-summer for fall harvest.

They do well from transplants.
Start seeds indoors or in a cold frame 8 weeks before last Spring frost. Then transplant it about 2-4 weeks before last Spring frost. Cabbage is a “heavy feeder” so you need good soil or extra fertilization and regular irrigation.

Watch out for pests.
Cutworms and cabbage loopers love cabbage too…but they are pretty easy to pick off if you stay after them. Little paper collars protect transplants from the cutworms. If you don’t like to pick off the worms, it is good organic control.

Cabbage makes great microgreens.

Cabbage germinates in about two days in your warm kitchen. Another superfood from the brassica family.


For more on the science of winter-sowing clover and cabbage and other brassicas
http://www.ctahr.hawaii.edu/oc/freepubs/pdf/IP-27.pdf
http://www.modernvictorygarden.com/apps/blog/show/2015631-in-praise-of-cabbages
http://microgardening.newearthmicrogreens.com/red-cabbage-microgreens-vitamins/
http://www.gardeningknowhow.com/edible/vegetables/cabbage/protecting-your-cabbages-from-cabbage-maggot-cabbageworm-and-cabbage-moth.htm

Why You HAVE to Grow Watermelon Radishes this Year

Heirloom Vegetable Seeds

Words barely do the watermelon radish justice.
Virant. Brilliant fuchsia. Magic.OrgRadishWatermelon_BBB

We just started carrying the watermelon radish seed this year and it is one of the first seed packets I snagged this Spring. I’m not a big radish eater although I like them eaten raw with breakfast eggs as is common in some Persian cooking. I’ve always liked to grow them because they germinate so fast. I’ve done the old trick of seeding them with carrot seed because the radishes mark where the row is while you wait a long time for the carrots to germinate.

Watermelon radishes are a game changer. Yeah, sure they are super nutritious, full of lutein and beta-carotene. Broccoli family. Good for hydration. Low in fat. Etc. etc. But they are stunningly beautiful and fun to eat.

These pictures are the reason I’m growing watermelon radish this year. Seed them and in only 50 days you can be having these great meals.


http://www.veggiefixation.com/2014/02/raw-watermelon-radish-ravioli.html

http://grist.org/food/whats-a-watermelon-radish-and-what-do-i-do-with-it/

http://www.cathyarkle.com/shepaused4thought/radish_tacos/

http://www.sunset.com/food-wine/kitchen-assistant/roasted-vegetables/roasted-vegetables_5

Aphids Q&A

Gardening TipsImage by <a href="https://pixabay.com/users/mabelamber-1377835/?utm_source=link-attribution&utm_medium=referral&utm_campaign=image&utm_content=4243855">???? Mabel Amber, who will one day</a> from <a href="https://pixabay.com/?utm_source=link-attribution&utm_medium=referral&utm_campaign=image&utm_content=4243855">Pixabay</a>

By Sandy Swegel

We got a great question from a customer this week about controlling aphids. Her frustration resonates with most of us who garden.


Q. Aphids are terrible, tiny creatures and I fight them every year. I’ve been looking for the best ways to make sure they don’t screw with my garden this time. I thought I had a good way; planting garlic around the plants. “Aphids don’t like garlic,” one link said.  “Aphids love garlic leaves, said another one. Soap mixture, Neem oil, rubbing alcohol mixed with soap and water, importing good bugs that love to eat the aphids. I refuse to use chemicals that poison everything, it makes growing organic pretty pointless. Does anyone have any SURE FIRE, tried, and true methods?

A. The key to reducing aphids in your garden is to understand their lifestyle. Controlling them is like cleaning the house. You can’t just clean a house full of people once and expect the house to still be clean a week later if you didn’t keep picking up stuff all week. When you use any treatment you might kill most of the adult aphids that day. But the ones you missed or who were eggs that wouldn’t hatch for another day, are still eating and reproducing. Reproduction is the key to aphid success. They reproduce both sexually and asexually. They lay eggs to survive the winter. And they have live births in warm weather. Each one can create up to 100 new aphids per month.


My best sure-fire, tried and true method (or as close to that as one can get) is this:

Accept that you are going to have some aphids. To kill them all, even if possible, means you would also kill all the beneficial insect pollinators and you don’t want to do this.


Understand how aphids die. Warning: graphic content ahead.
It is super easy to kill aphids, which is why plain water spray works great. Aphids feed by attaching to the plant with their mouths. When you spray water on the aphids, the force of the water tears the aphid off the plant. The head and mouthparts stay attached to the plant, instantly killing the aphid. Even just brushing off all the aphids on a leaf with your finger decapitates and kills all those aphids. That’s why you don’t have to poison them…if you can just mechanically remove them.

Be vigilant (every few days) about checking for aphids.
New aphids are hatching in leaf litter or being birthed by the aphids who were hiding out in the weeds next door. You have to spray the aphids every time you see them in large numbers. Each aphid can have dozens of generations…They are baby-making machines. You have to keep after them at least until you see you are no longer getting infestations.

Be careful not to eliminate beneficial insects.  There’s yet another reason not to try to kill off aphids outside, even with “safe” organic treatments like soapy water. If you kill the aphids, the aphid-eating wasps, another of those native beneficial insects, won’t have anything to eat and they’ll leave your garden.  They are eaten by so many beneficial insects that it’s rather amazing that we see any at all. Yet there are so many on our plants at times.

This week I’m seeing thousands of them on the new growth of roses. And while my first instinct is to kill them in some way, I have finally learned to just watch them. I know what I am seeing is a mini-population explosion that will usually be followed in a week or so by mini-population explosions of predators that eat aphids. If we try to kill off the aphids which are at the bottom of the beneficial insect food chain, then the beneficials will fly away to another garden.

I knew about many of the predators of aphids like ladybugs and lacewings, but I learned yesterday that tiny native aphid-eating wasps eat a LOT of them. In addition to wasps that just eat the aphids, there are parasitic wasps that lay their eggs inside of them. When the eggs hatch the tiny larvae eat their way out of the aphid. A bit gory, but effective in guaranteeing enough food for baby wasps.

So I challenge you to a two-week experiment. Let the aphids be when they show up and just watch the plants for a few days. See who shows up to dine on them. Some possibilities include wasps, both large and small, hoverflies, ladybugs, and lacewings. It will be a fascinating discovery of how many small beings live in your garden, there to help you keep everything in balance.
Nature does provide a natural balance if you have a healthy garden that supports beneficial insects. If you are aggressively treating aphids with garlic or neem sprays, you are also killing all the other insects that eat aphids.

Alter the conditions in your garden that reduce the number of aphids.Fighting Aphids on Organic Lacinato Kale

Don’t over-fertilize. Aphids love nitrogen. You will get a little aphid bloom every time you add nitrogen to your plants. Reduce the nitrogen and you don’t have so many of them.

Encourage earthworms and use earthworm castings. Earthworms produce an enzyme chitinase to help digest their food. Aphids are repelled by chitinase. Unfortunately, the chitinase doesn’t last long enough to be the only deterrent.

Encourage good environmental conditions like airflow and temperature. This works really well indoors. In my greenhouse, I can reduce aphids by keeping a fan going and shading the plants from the really hot afternoon sun. They are often in greater numbers on plants that are stressed.

Finally, if you do want to use “organic” sprays, simple soapy water works well. (1 teaspoon per gallon). Some people use the kitchen spray with garlic and Tabasco sauce. I think the science is not clear on neem. It definitely works but it works by disrupting insects’ hormonal systems and I’m not convinced it doesn’t adversely affect beneficial insects. Some studies say Neem only kills sucking insects. I would try gentler methods first before turning to Neem.

More about gardening and aphid control

More about interactions between predators of aphids


Photo credits:
https://en.wikipedia.org/wiki/Aphid


Jumpstart your Lettuce Garden

Heirloom Vegetable Seeds

Our new tricolor blend of romaine lettuces has me itching to get my salad garden started. I like Romaines because they are especially nutritious, comparable to kale. And I like this blend because it’s shiny and colorful. There’s a lovely gloss to the colorful Romaines that looks beautiful in the garden and on the plate. I want my food pretty!

OrgLettuceRoamaineTri_BBB

It’s pretty easy to get lettuce ready to eat earlier than your standard growing season. If you’re either busy or lazy (or both as I often am) there are some almost no work ways to get your salad growing.

Almost No Extra Work: Row Cover

Direct seed as usual into your garden. Put a layer of row cover loosely over the area. Secure with anchors or with heavy rocks which will also capture a tiny bit of extra heat. The row cover alone will speed germinate the seeds if you have a spell of warmer weather. The row cover then will protect it if the warm weather is followed by frigid temps.

A Little Bit of Extra Work: Pots

Want to have lettuce even sooner? My friend Cathy seeds her lettuce in lightweight pots and brings them inside at night or when the weather is extreme. It’s easy for her because she has a south-facing sliding glass door and moving the pots in means sliding open the door and moving the pots two feet in or out. She has the extra satisfaction of going to the Farmer’s Market in April where market farmers are selling similar pots for $25.

Invest Work for the Future: Cold Frames

Cold frames are an awesome way of having more of your own fresh food. They do take some time and money….but you will quickly make up that investment with what you save on fresh greens.

Work like a Farmer for Lots of Lettuce: Plugs

Growing your own lettuce plugs is one way to get a garden of lettuce without thinning or empty spots. Start your seeds under lights in plug trays that you can plant out when it’s a bit warmer. Very satisfying to have a full evenly-space plot of lettuce plants in the hour or so it will take you to plant out the entire plug tray (100-200 plants).

http://wcfcourier.com/lifestyles/home-and-garden/gardening/lettuce-plant-some-frilly-fun-veggie-can-be-grown-in/article_2a856188-c725-5af2-960d-9fd1d89f4896.html

http://thefoxplot.com/tag/beekeeping/

Gardens at Monticello

What We Gardeners Have in Common with Thomas Jefferson

by Sandy Swegel

This Presidents’ Day led me to researching about the gardens of the White House. I expected to write about the many “heirlooms” that Jefferson gathered and preserved for us. He grew 330 varieties of vegetables and 170 varieties of fruit! I found myself instead captivated by the gardening relationship he shared with his oldest granddaughter Ann. His letters to the teenager Ann have been preserved and give us great insight into these talented gardeners.

There isn’t much about gardening that has changed much since the early 19th century. These are some of the things we know we have in common with the third US President and his granddaughter Ann.

We all want more flowers.

Jefferson was famous for collecting seeds from distant lands in order to grow more varieties at home. He quickly saw the natural consequence of his love of variety — running out of garden space — for he writes Anne in 1806:

“I find that the limited number of our flower beds will too much restrain the variety of flowers in which we might wish to indulge, and therefore I have resumed an idea…of a winding walk surrounding the lawn before the house, with a narrow border of flowers on each side.”

We know how to care for young plants.

In this late winter time of year, we gardeners always start too many young plants too early to actually plant and then have to prepare for their movement from my sunny light shelf to the cold outdoors. Ann too reports how careful she was with the many treasures her grandfather sent her in the winter of 1806.

“The grass, fowls, and flowers arrived safely on Monday afternoon. I planted the former in a box of rich earth and covered it for a few nights until I thought it had taken root and then by degrees, for fear of rendering it too delicate, exposed it again. I shall plant Governor Lewis’s peas as soon as the danger of frost is over.”

We watch the weather

When Ann was only 12 years old, Jefferson in the White House relied on her to report on the weather and its effects on the garden. “How stands the fruit with you in the neighborhood and at Monticello, and particularly the peas, as they are what will be in season when I come home. The figs also, have they been hurt?

We are never finished.

After Jefferson retired to Monticello, he and Ann continued to design and redesign the gardens. Ann’s younger sister Ellen described the delight the garden gave the entire family.

. . . Then when the flowers were in bloom, and we were in ecstasies over the rich purple and crimson, or pure white, or delicate lilac, or pale yellow of the blossoms, how he would sympathize in our admiration, or discuss with my mother and elder sister new groupings and combinations and contrasts. Oh, these were happy moments for us and for him!”

Jefferson on Happiness
Jefferson planned many years for his retirement to Monticello. When at last he was able to retire to the gardens Ann had nurtured in his absence, he wrote:

“the total change of occupation from the house & writing-table to constant employment in the garden & farm has added wonderfully to my happiness. it is seldom & with great reluctance I ever take up a pen. I read some, but not much.”
Fortunately for us as a nation, most of his life was not spent in the garden, but he knew, as we do, how special and sacred our gardens are.
The story of Monticello with 330 varieties of vegetables and 170 of fruit is a grand story. You can find out more here: https://www.monticello.org/site/house-and-gardens/thomas-jeffersons-legacy-gardening-and-food

Photocredit
https://flowergardengirl.wordpress.com
http://www.marthastewart.com/945486/monticellos-vegetable-garden#933708
https://www.monticello.org

Six Reasons to Grow Borage

Borage Gardening Tips

by Sandy Swegel

  1. Bees love borage

Bees absolutely cover the plant when it is in bloom.  And bloom lasts a long time and repeats throughout the season.  Bees and other pollinators seem to prefer it to other nearby plants.  Must be extra tasty or sweet.

  1. Borage is super easy to grow

My neighbor lets her’s grow along her alleyway against chain link fence.  No water, no fertilizing….just run off from the grass and a bit of shade.  When the plants go to seed, she throws the seed heads a little further down the fence line.  Even in our arid climate, that’s hospitable enough for borage to grow.  No deadheading or fussing…just lots of plants. It’s is supposed to be an annual, but it acts like a perennial….plants grow back in the same place every year.

  1. Birds love borage

Borage makes a lot of flowers and seed heads.  In the Fall, the birds were hanging out on the sunflower heads nearby and I didn’t notice them in the borage.  But this Spring morning, about eight of those little birds that chatter so much in spring were digging and rooting in the borage patch.  Bird food in February is a good thing!


  1. Borage is edible for humans

The young greens can be added to mixed salads or steamed. (Older leaves are too hairy and not so yummy.)  The little flowers are adorable in salads. Pastry chefs candy the flowers for decorating desserts.

  1. Borage is medicinal. It has long been a medicinal herb for skin diseases, melancholy, diabetes and heart conditions. Borage oil is an important anti-inflammatory.
  2. And the number one reason to grow borage: They’re Blue!!!!!

OK, that’s the real reason I grow borage.  Blue flowers make me so happy and the blue of borage is one of the most amazing blues in the plant kingdom.


Photo Credits:

http://medicinalherbinfo.org

http://shop.gourmetsweetbotanicals.com/

http://kiwimana.co.nz/borage-good-for-bees/

A Little Dirt Won’t Hurt

Leave a bit of dirt to shelter native bees!

by The Bees Waggle

Last week I wrote about the importance of adding forage (flowers) to your yard.  Shelter is another provision can easily met for various species of bees.  Keeping native bees is very simple, just add a few things to your yard, and sit back and watch the changes occur!

70% of native bees nest underground, and the others nest in plant material, whether it be hollowed out stems or dead wood.

Ground nesting bees will look for bare patches of soil or sand, and begin digging tunnels.  These tunnels will then soon be filled with many egg cells developing into adult bees destined to emerge the following spring.  It is ideal they are able to find nesting sites near food, as most native bees do not travel far from home to collect nectar and pollen (most only fly between 200-1500ft to forage).

Providing shelter for these ground-burrowing bees is simple! Just leave soil bare; under bushes, trees, and other plants.  Skip the mulch and watch residents occupy those spaces.


Twig-nesting bees nest is in hollowed out stems or deserted holes.  Easy ways to provide shelter for these bees is to have a bee house with reeds or wooden trays/blocks with appropriate sized holes for them to nest in.  You can also leave stems which are naturally hollow until the following summer, to ensure any nesters emerge before you remove the dead plant material from your landscape.


Other bees will nest in dead wood, by carving nesting holes into it, and using sawdust to partition individual egg cells from each other.  So placing logs in your garden, near flowers would be wonderful for these bees.


Some additional provisions include mud, sand, and leaves.  Many bees will love a pile of dirt, as they will use mud to create partitions between egg cells, such as is displayed in the image below. Other burrowing bees may prefer a sand supply to partition egg cells, which would also look very similar to the image below.

1610758_orig


Others might use half-moon shaped pieces of leaves or pedals from surrounding lilac bushes, peonies, or rose bushes to form egg cells as seen below.  Not to worry, your flowering plants will be okay despite the missing pieces of leaves; these bees only take exactly what they need, and this never equates to a destroyed plant.


Adding shelter for native bees doesn’t commit you to any more beekeeping activity than you already do.  Providing shelter is an essential part of sustaining, and even boosting, native bee populations. Once you have taken the steps to add forage and shelter, you can sit in your yard and enjoy the activity of these interesting species from spring to fall! 

Cheers to an essential movement to save our bees!

Jess

Planting Wildflowers

Grow a Wildflower Meadow!

by Sandy Swegel

This blog post is for anyone who wants to grow wildflowers.  It is especially dedicated to BBB Seeds’ friends at the Rockies Audubon Society who have an awesome program called Habitat Heroes that encourages “wildscaping” your garden with native plants that attract pollinators and birds and support wildlife even in an urban area.

  • Deciding What and Where to Grow

Look at the site where you want to grow a wildflower meadow or patch.  An ideal site would have sun and good drainage and not too many weeds. Nature seldom provides what we consider ideal. So the next step is choosing the right mix of wildflowers.  We help by providing mixes for unique conditions such as sites that are dry or sites that shady.

  • Prepare the Soil

TX-OK-1oz

Some don’ts:

  • Don’t deep till!

That’s the number one rule….unless you are planning a year ahead of time.  There are enormous numbers of weed seeds in any soil and tilling up the soil brings up all those weed seeds to the light and they start to grow.  You do have to deal with weeds and you will lightly till/scratch in a shallowly.  But this is time to leave the tiller in the garage.

  • Don’t use weed killer

Especially don’t use the weed killers for your lawn or those with pre-emergents that stop new seeds from germinating. Those will have long-lasting effects that will thwart your wildflower growing efforts.

  • Weeds:

You will have to deal with weeds especially if you have an area that is pretty barren of other vegetation.  People have good success with putting down black fabric or cardboard weeks ahead of time to suffocate the weeds.  For big hunkin’ weeds like dock, it’s good to get the shovel out. You can’t get all the weeds, but after you put your seeds out, you won’t be doing any weed-pulling for a while because you’ll accidentally pull the new wildflowers or disturb their young roots. Replacing weeds with wildflowers will be an ongoing process.

  • Scratch and Rake

You do need to break the soil and rake it smooth, but not more than 2-3 inches deep.  You want little crevices for the seeds to slip into so they have a cozy home.  I’ve had the best success by loosening that top couple inches of soil and waiting a couple of weeks for all the weeds to germinate. I then scratch up those weeds, rake again, and then put the wildflower seed out.

  • How Much To Plant

One ounce of seed (a small packet) plants about 100-150 square feet.  (eg 10 feet by 15 feet.)  Follow this rule of thumb.  Planting more than this makes the plants choke each other out.  Planting less gives weeds free run.

Expert Tip:  Mix some sand with the wildflower seed to make it easier to spread the tiny wildflower seeds evenly.  About four parts sand to one part seed.


  • When to Plant

If you live someplace mild and humid, you can plant almost anytime.  The rest of us either plant in the Spring (about one month before last frost date) or Fall.

  • Water

That’s the biggest challenge for many.  If you aren’t living in the above mentioned mild and humid area, you need to be sure the wildflowers get enough water.  One gardening buddy said her secret was to go out and seed the night before a big snowstorm and let the melting snow help.  I personally use row cover over the area to keep water from evaporating.  I also use a soft rain nozzle to hand water over everything.

Our website has a Resources Section with more detailed instructions on seeding wildflowers. https://bbbseed.com/wildflower-grass-tips/


That’s really it.

Pick an appropriate wildflower mix.

Get rid of the huge weeds and prepare the top couple inches of soil.

Plant.

Water.

Wait for Nature to do What She Does Best: Create beauty for you and food for all the wild creatures.


Before and After Pictures are some of my favorite things.  The Habitat Heroes program has awesome before and after pictures that will inspire you:

Photo Credit:

http://rockies.audubon.org/get-involved/habitat-hero-winners

A Parking lot median at the West View Rec Center in Westminster, CO, before and after

02.15.16 'Planting Wildflowers' WestViewRecCenter

02.15.16 'Planting Wildflowers' WestViewRecCenter2


Spectacular Flower Arrangement

How to make your own Spectacular Flower Arrangement

by Sandy Swegel

Valentine’s Day is upon us and flowers are the highlight. A flower arrangement from a florist is magnificent but costly. You can pick up affordable flowers at the grocery and turn them into a work of art.

Here are some secrets florists use.

Start with foliage

Place your vase or container on the counter. The first step is to arrange foliage in the vase to create a foundation for your arrangement. By first filling the vase with greenery, you then have a structure to put the flowers in. Greens can be typical ferny foliage or leaves from houseplants or even small branches from trees.

Cut your stems
You want to give everything a fresh cut for two reasons. One, you want different heights of flowers and greens and you want a new cut to help the flowers and greens take up water. Florists use a very sharp knife and cut on an angle to maximize the cut stem area. Strip the leaves from the very bottom of the stems that will be submerged in water. Those will rot and cause your flowers to spoil sooner.

02.12.16 'arrange grocery store flowers'

Insert your big faced flowers
Now you put the dramatic flowers in. Give them enough space so they can be seen from different directions. (all the way around if the flowers are a centerpiece or facing mostly front and to the sides, if the arrangement will be against a wall) It helps a lot to just keep rotating the vase between flowers. You can criss-cross the stems to hold the flowers in place. Vary the height of the flowers by cutting stems taller or shorter.

Put in smaller flowers or filler flowers
Now you can mix in your other smaller flowers or wispy fillers like baby’s breath. Keep their height slightly lower than the bigger flowers…like the big flowers are rise above clouds. Let some of the smaller flowers and foliage spill low over the lip of the vase for a softer fuller effect.

Put a ribbon on it
If you’ve used a plain glass vase, wrap a pretty translucent ribbon around it and make a bow. This both hides the water and stems and gives a lovely finishing touch.

Now that you have a beautiful arrangement, keep maintaining it.

You can use floral conditioner or just give your flowers a fresh cut and fresh water after a few days or when the water looks cloudy. Toss out the wilty, slimy things and slightly rearrange if necessary. A good arrangement that isn’t allowed to rot will last well over a week. Even then, you can salvage the last sturdy flowers for a tiny bathroom vase.

Flower arranging is really easy and creative. It’s a skill Montessori schools teach to preschoolers!

Happy Valentine’s Day!


Photo Credit
http://www.realsimple.com/home-organizing/gardening/gardening-flowers/flower-arrangements
http://www.thehappierhomemaker.com/2015/01/how-to-arrange-grocery-store-flowers/

http://www.naturalbeachliving.com/wp-content/uploads/2014/01/toddler-flower-arraingement.jpg


Heirloom Vegetables

Wildflower Mixes

Grass and Wildflower Mixes

Bees Need Flowers

by TheBeesWaggle

IMG_1621

Clover depends on bee visits to reproduce seeds.

Why Bees Need Flowers

75% of all flowering plants rely on pollinators to produce seed and or fruit. Without insect-assisted pollination, many of the colors we enjoy in the natural landscape would disappear.

1/3 of the food humankind consumes has been produced by bee pollination specifically.  That is upwards of 70% of the produce , including, but not limited to apples, pears, berries, tomatoes, carrots, onions, and many more!

The Earth’s landscape is becoming less and less capable of sustaining the life of bees, which means there are less and less bees raised to adulthood.  Bee populations survive by raising young bees to adulthood.  The number of bees in the next generation depends on how many flowers bees can visit, and how much pollen they can bring back to the nest for their young. Simply put, bees need flowers.

Due to the green landscape, lacking flowers for bees, bees are forced to travel miles to find food.  These long distance trips sometimes leave bees exhausted and shorten their lifespan, which also lessens the nest’s potential for producing a healthy new generation of bees.  Honeybee populations are known to be struggling, but are not the only bees in need of more resources to survive; there are over 4000 native bee species in North America and Canada, and 20,000 native bee species worldwide. Some native bee populations are rapidly declining and nearing extinction. They are some of the best pollinators on the planet!  Farm fields and orchards located near wild areas (containing healthy forage and habitats for native bees) produce more fruit than their monoculture surrounded counterparts.

Monocultures are acres and acres of one crop with no other plant mixed in. These monocultures are like a desert to bees flying in search of pollen and nectar from flowers. Given the fact that wild areas help improve crop yields, there should be more floral landscapes mixed into farmland.  If not for bees, for aesthetics. Who wouldn’t want to see more flowers in a green landscape?

What is good for the native bee is also good for honeybees, butterflies, birds, and even bats! The point is to bring balance back to the landscape so we can coexist with the wild species we have pushed into smaller condensed areas by destroying habitats. It isn’t sustainable for them, and in the long run it will also destroy us.

Imagine 70% of the grocery store’s produce section empty!  Imagine creating meals short of things like tomatoes, garlic, onions, and so many more.  This is the reality that will become us if we don’t take action and begin bringing back pollinator habitats to all landscapes.

IMG_4558

This meal would only contain steak without bees.  That’s a sobering illustration! It could be “dressed up” with a glass of wine, right? Nope, wine doesn’t exist without bees either!

The simplest way to help pollinators is to add flowers to your own yard. Whether you swap out your entire front lawn for flowering plants or place a few pots out containing a variety of flowers, you are making an impact. The less distance a bee must travel to forage, the better.

IMG_1406

The flowers behind the rhubarb plant were grown from seed that same season, and produced beautiful blooms far into the bitter cold of Fall.

The flowering plants you plant shouldn’t contain pesticides, so look for organic seeds and plants.  When in doubt about whether a plant is organic or not, air on the side of caution, and don’t plant it. Pesticides weaken and kill bees and other pollinators.

Organic flower seeds are inexpensive and very successful at producing a bounty of beautiful flowers, which will likely return if you have a healthy bee population pollinating them all season. Planting a variety of flowering plants will attract all kinds of characters to your yard. You will enjoy seeing a variety of beautiful pollinators paying their respects to your floral buffet!


If you are really feeling zealous and want to invite bees to stay in your yard, you can provide a variety of nesting options.  Ground nesting bees like open soil, or piles of dirt to dig into and form nesting holes.  Wood nesting bees love tree stumps, and tree stumps are aesthetically pleasing amidst the garden.  Twig nesting bees like pithy plant material, containing hollowed out centers. They also like blocks with pre-drilled holes of different sizes (0.25-0.5″; 6″ deep) to choose from.  Bumblebees might like a nesting box built just for them containing wooly material, or even old bird’s nesting material.


We at The Bees Waggle value all of our followers, and look to you to reach more people and motivate them to simply plant more flowers! Together we can make a real impact on this problem.  We plan to remove all of our front lawn and replace it with flowering plants and places for our bees to nest. I am so looking forward to the photos and experiences this transformation will afford!

Cheers to joining the movement to save our bees!

the-bees-waggle-99-design