CONTAINER GARDENING

Growing a Garden in a Container


Planning ahead-container-plants
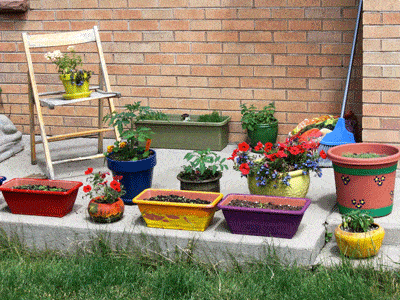
Take a moment to look at the locations where you want to place your containers.  Consider such things as sunlight (strength and time) and wind.  If you have pots with sun/heat-loving plants, arrange them to shade your pots with those plants that need less sun and heat.  Tall plants or plants that vine can be trellised to grow vertically and provide a natural barrier for tender plants.  Make sure to anchor trellises and containers with tall plants, to keep them from getting blown over.  If you plan to place your containers on a covered porch or balcony or any place that receives limited sunshine, you should select vegetables and flowers that don’t require as much.  Leafy greens, snap peas, Chinese mustards, and kale will do quite well in these conditions, but tomatoes, and peppers, probably not.
When growing your garden in containers rather than a garden plot, it is just as important to choose varieties that will be able to reach maturity in your growing season.  If you have a short growing season, check the maturity dates on the packages and plan to start some seedlings in the warmth of the indoors to get a jump on the growing season.

These varieties are not practical for container gardening due to their size or length of growing season (At the end is a list of vegetables/plants that will do well in containers.):

Watermelon and most cantaloupes (although there are some midget varieties that can do well)
Large Pumpkins and winter squash
Corn
Head cabbage (except as microgreens)
Mammoth sunflowers (except as sprouts or micro greens)
Beefsteak type tomatoes
Garlic bulbs/full sized Onions
Make sure to prepare your containers and pots properly, to give your veggies the best chance possible.  You will be surprised by how much those little seedlings will expand, and there is as much growth below the soil as there is above the soil, so don’t squeeze them into tiny containers.  Any type of vessel can be used, just keep in mind the size of the plants and the location.  Terra cotta pots are inexpensive but dry out more quickly than others, metal tends to get quite hot in the sun, and plastic is versatile and lightweight.

 ………………………………………………………………………………..

Getting started-

tips_seedstarting3
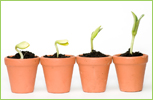
For Container Gardening, start your long-season varieties, indoors, in good quality starting soil or soilless mixture.  Seedlings should be kept consistently moist (not wet) and exposed to fairly strong light, sunlight, or florescent, for at least 10 – 12 hours each day as soon as sprouts appear.  This will keep them from getting leggy and looking for light.  Seedlings that are sown more closely together can show more vigor as their roots symbiotically help each other extract nutrients from the soil.  As the first true leaves appear, choose the strongest seedling starts that you will need for your containers and clip off the remaining which gives the strong ones some space to expand.  Transplant to pots and containers shortly after the first true leaves appear. When transplanting to your containers and pots, make sure to space the seedlings according to the package directions for each type of vegetable.

Here are some plants that do not like to be transplanted.  Instead, start them in individual moss starter cubes or use homemade newspaper pots or toilet paper tubes that can just be set into your containers at the appropriate spacing.
Beans                                      Squash                        Burnet
Chinese Cabbage                    Borage                        Chervil
Cucumbers                              Caraway                      Pumpkins
Melons                                    Coriander                     Dill
Root crops (except beets, turnips, and celeriac)
Make sure that your container has drainage holes in the bottom.   Place a couple of layers of newspaper in the bottom of the pot to keep soil from falling through the holes, then place a 1-inch layer of moss on top of the newspaper.  If you don’t have a source for sphagnum moss, coarse gravel will work.  Fill the container with good, rich pre-moistened, potting soil, leaving room at the top.  Pat it down firmly to fill in the spaces but do not pack hard.  Take your young transplants (holding by the leaves or root ball, not the tender stem)  or degradable seedling pots, one at a time, placing each on the top of the soil.  Spread out the roots, and sprinkle more pre-moistened soil over the roots, covering them completely.  Use enough soil to bring the level up to just under the first leaves for most seedlings.  Do not cover the crown on plants such as lettuce.  The plant’s first leaves should be at the level of the top of the container.  Pat the soil gently, firming it over the roots and young stems.
tips_seedstarting4Water your containers when the soil feels dry in the top few inches.  Continuously wet soil suffocates the roots and encourages bacteria and fungi to grow.  Usually, we water when we have time or are home, but watering when needed instead of on a schedule is usually best.  Avoid wetting the leaves as much as possible.  Try to use tepid water and if you are using chlorinated tap water, allow it to sit overnight exposed to air to dissipate the chlorine which can damage plants and kill beneficial soil bacteria.
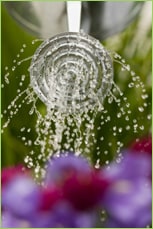
Fertilize with low doses of good quality organic fertilizer every 7-10 days.
Don’t be shy about removing plants that are past prime or are beginning to bolt.  Removing these will leave spaces where you can plant another round of short-season varieties and ones that prefer to mature in the cooler weather of fall.  Lettuces and other leafy greens are good for this, maybe another round of snap peas, beets or radishes, arugula, and bunching onions.  Mustards and kales and fennel love the cool days of fall
………………………………………………………………………………..
Design – Container Gardening can be beautiful
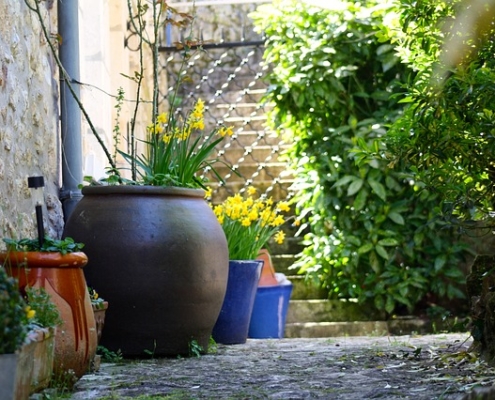
Create groupings with your pots and experiment with variations in height, by placing some containers on concrete blocks or other empty containers turned upside down. This adds visual appeal and at the same time maximizes the space available.  Groupings also help to make the job of watering a bit easier.  Pick a particularly spectacular container plant to be the visual focus and arrange other not-so-pretty container plants around.
Make your containers a bit more decorative by planting different varieties together in one pot.  Use the spaces under taller plants to place smaller herbs and leafy greens. Some vegetables live in harmony with one another, some are actually beneficial to each other and some hate each other.  Mix colors and textures and think about including edible flowers tucked in around the edges. See the article, Flavorful Flowers.  category-colorCheck each variety on our website to see if your combinations will work together.  Here are some examples:
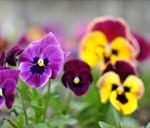
• Lettuce does well with beets, bush beans, pole beans, cabbage, carrots, cucumbers, onions, radishes, and strawberries.  You can also plant your lettuce at the base of young sunflowers for a little shade.
•Celery, dill, onions, and potatoes are great companion plants for cabbage. Planting clover with your cabbage will keep insects away and chamomile will improve the flavor. Cabbage does not like strawberries, tomatoes, peppers, eggplant, rue, grapes, or pole beans.
Cauliflower is compatible with basil, beans, dill, garlic, hyssop, lettuce, mint, onion, rosemary, sage, and thyme. It does not like grapes and rue.
•Plant your peas with bush beans, pole beans, carrots, celery, cucumber, eggplant, parsley,  radish, spinach, strawberry, sweet pepper, tomatoes and turnips. Keep your peas away from chives,  and onions.
Tomatoes grow well with asparagus, basil, beans, carrots, celery, chives, cucumber, garlic, head lettuce, marigold, mint, nasturtium, onion, parsley, peas, peppers and marigold. Basil will repel flies and mosquitoes from your tomato plants while also improving their growth and flavor. Beebalm, chives, and mint will improve the health and flavor of your tomatoes. Keep potatoes, fennel, dill, cabbage, and cauliflower away from your tomato plants.
………………………………………………………………………………..

VEGETABLES/PLANTS THAT DO WELL FOR CONTAINER GARDENING:

Beans (Pole and Bush types)

Direct sow into containers when night temperatures reach 60 degrees F, 6“ minimum soil depth, full sun, and harvest in mid-late summer, Provide a trellis or climbing structure
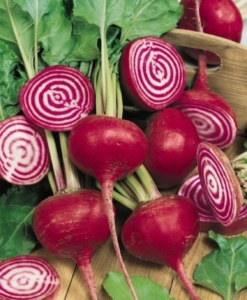
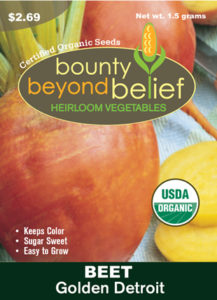
Beets – Direct sow into containers in early spring and late summer, 6” minimum soil depth, full sun to partial shade, harvest early summer and again in fall
Carrots (Nantes, Round, or Finger-type are best for containers) –  Direct sow into containers when night temperatures reach 60 degrees F, 8” minimum soil depth, full sun, harvest in summer through fall.
Cucumbers (vine or bush-types) –  Direct sow into containers when the day temperatures reach 70 degrees F or start indoors and transplant, 10” minimum soil depth, full sun, harvest in summer, Provide a trellis or climbing structure for vine-types.
Eggplant –  Start inside 8 weeks before temperatures usually reach 80 degrees F for your area, then transplant to your container, 10” minimum soil depth, full sun, and harvest late summer.
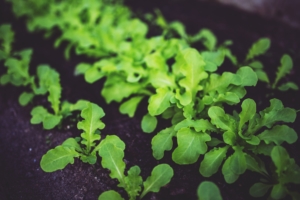
 Leafy Greens (Swiss chards, Collards, Kales, Mustards, Asian Greens, Pak Choy) –  Direct sow into containers when the nighttime temperatures are above freezing, or, start indoors 3-4 weeks before and transplant, 8” minimum soil depth, full sun to partial shade, harvest late spring through winter.
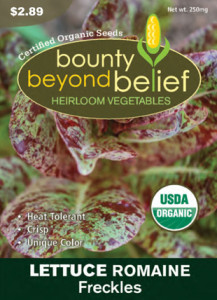
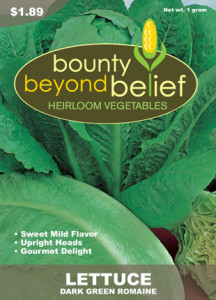
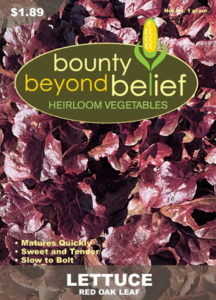
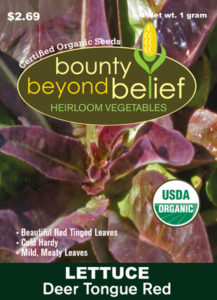
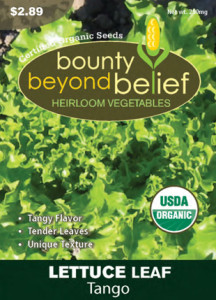
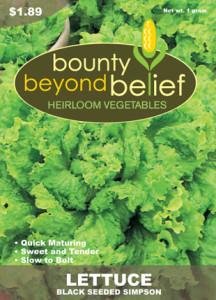
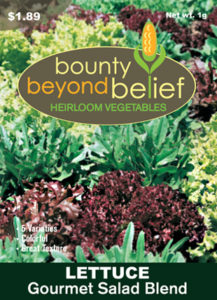
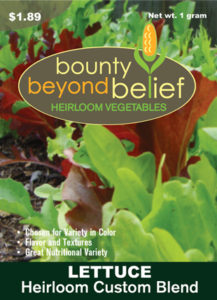
Lettuces and Salad greens –  Direct sow into containers after Spring’s last frost date, or start indoors 4 weeks before and transplant after hardening off when about 2 “ tall,  sow seed again in early fall, 6” minimum soil depth, full sun to partial shade, harvest spring through early summer and again in fall.
Onions, Garlic, Leeks – Direct sow into containers after Spring’s last frost date, 6” minimum soil depth for bunching onions and young (green) garlic, 8” for Leeks, full sun, harvest summer to fall.  Mounding soil up around the base of bunching onions and leeks will encourage long white stalks.  Grow garlic in containers to use the green shoots and any small bulb growth.
Peas –  Direct sow into containers when the soil is no longer frozen, Soaking the seeds overnight will speed up germination, use an inoculant (a beneficial bacteria that enables the roots to use the nitrogen pulled from the atmosphere and stored in nodules on the roots), especially when planting into containers with new potting soil.  8” minimum soil depth, full sun, harvest in late spring to early summer with secondary fall crops possible, Provide trellising for vine-types or cages to support bush-types.
Peppers –  Plant seeds indoors, keeping at 80 degrees F for about 2 weeks, starting 10 weeks before nighttime temperatures remain above 55 degrees and daytime temps reach at least 70 degrees.  Transplant into containers after hardening off, 8” minimum soil depth, full sun, and harvest in late summer.
Potatoes –  Plant disease-free seed potatoes in a large container (30” deep, 20” across) filled 1/3 full of potting soil,  5-6 “ apart, and cover with 2 inches of soil, When plants are about 6” tall cover the bottom half with potting soil,  continue doing this as the plant grows until reaching the top of the pot. Full sun, harvest summer to fall.
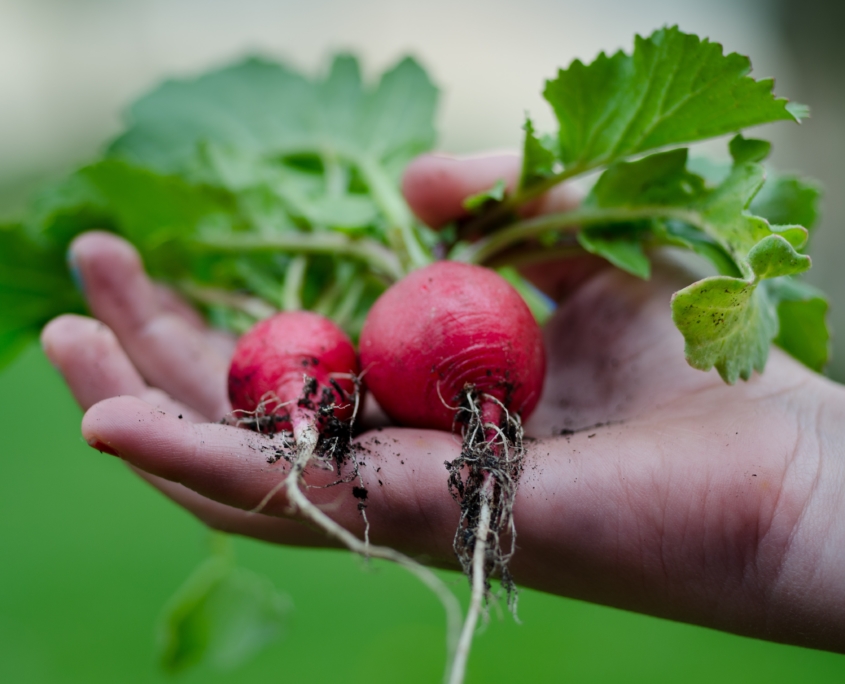
Radishes –  Direct sow into containers when the soil is no longer frozen and every other week till late spring, 4” minimum soil depth, full sun to light shade, harvest all spring and second harvest in fall.
Spinach –  Direct sow into containers when the soil is no longer frozen, replant first of August for fall, 6” minimum soil depth, full sun to partial shade, harvest in spring, early summer, and fall.
Squash (zucchini, yellow summer, yellow crookneck, patty pan, mini pumpkins) – Plant seeds indoors 2-3 weeks before the spring last frost date, transplant into sunny, warm containers, and cover with a row cover for several days, 10” minimum soil depth, full sun, harvest summer to early fall, pick when young and small, provide trellis and support for vines.
Tomatoes –  Plant seeds indoors keeping them at 75 degrees F for about 2 weeks, starting 6-8 weeks before Spring’s last frost date, transplant at least once to another larger pot when they have 3 sets of true leaves burying them up to the first set of true leaves, keep in good light, 12” minimum soil depth, full sun, harvest late summer and fall.
Herbs –   Herbs are mostly perfect plants for container gardens, being small and not fussy.

Plant Your Cool Season Vegetables Now

Know Which Crops to Plant and When

by Heather Stone

Photo of a hand holding two red radishes.

Photo courtesy of pexels – skitterphoto 9301 (1)

Mid- August to Mid- September is the prime time to start planning and planting your fall vegetable garden and your cool season vegetables. Even though it’s still hot outside, the nights are getting cooler and the days shorter. Now is the time to get those quick-growing, cool-season vegetables in the ground. For bountiful late-season harvests here are a few guidelines to follow.

-Know which crops to plant and when. Here’s a list of our favorite cool-season vegetables and their days to maturity.

  • Kale should be planted 85 – 90 days before the first frost. The leaves can handle a few light touches of frost and become sweeter each time.
  • Carrots can be planted 80-85 days before frost.  They can be harvested when young and tender.  Even after the cold temperatures shrivel the tops, they can be dug, sweet and juicy, from the ground throughout the fall.
  • Beets can do double duty with green tops for salads and tasty roots as well.  Plant seeds about 65-70 days before frost, depending on the type you choose.
  • Leafy greens such as spinach and leaf lettuces, arugula, mustard greens and Swiss chard all do best in the cooler temperatures of fall. Plant seeds about 50-60 days before frost depending on the type of green chosen. These can be harvested when young and immature for delicious baby greens.

    Photo of leafy green seedlings.

    Photo courtesy of pexels by kaboompics 5809

  • Radishes are always great to spice up salads. These are fast-growing and can be planted 30-35 days before the first frost. Pull them when young and tender.


-Keep moist. The garden will dry out more quickly in the warm days of late summer than it did in the spring. Keep a close eye on new plantings to make sure those seeds or seedlings stay well-watered. A light covering of grass clippings or straw can serve as mulch, helping to retain moisture. Using a light row cover over newly planted areas can also help retain moisture, provide shade and protect against light frosts further down the road.

Fertilize once a week with an organic fertilizer with nitrogen and enjoy delicious salads and veggies all fall long.

Go Beyond Iceberg Lettuce

Different Types of Lettuce and How to Use Them

By Engrid Winslow

There are many different types of lettuce and perhaps you were wondering how to use these various types. Here’s a general description of some different lettuce varieties which will take you beyond the traditional iceberg lettuce followed by a quick tutorial on growing them.

Lettuce, Organic Bibb, Speckles Lettuce, Summer Bibb

  • Butterhead

    /Buttercrunch/Bibb/Boston – Any of the “B” lettuces form loose heads of large, softly ruffled leaves that range in color from bright yellow-green to magenta-tipped emerald. They have a slight crunch when you bite in, followed by a melt-in-your-mouth silkiness. The leaves are buttery and slightly sweet. They are perfect for use in sandwiches or salads and the largest outer leaves are great as a wrap for various fillings because of their pliability.


  • Romaine

    forms a long, straight head of crisp leaves with a prominent center stem. They come in the familiar crisp, tall, green heads to shorter and fluffier versions that range from dark red to lime green with red speckles. They can be harvested when young for a tender and delicate salad. They have a mild crunch from the center stem when mature and are the classic lettuce for a traditional Caesar salad since it’s a perfect contrast to the creamy, cheesy dressing. It can also be used as a scoop for dips and holds up on a burger.

Picture of the Tri-color Romaine lettuce package. Lettuce, Organic Romaine, Freckles Lettuce, Dark Green Romaine


  • Oakleaf

    lettuce has unusually shaped leaves that form a loose cluster with tender, crunchy stems. The flavors can range from sweet when young to slightly bitter if left longer to mature. They come in gorgeous colors of green but the dark red is a version high in anthocyanin

with a powerful punch of antioxidants. They are great in salads and when mixed with other lettuce types or on a sandwich.


  • With loose bunches of leaves connected at the base, the loose-leaf lettuces are known as bunching or cutting lettuces. They are typically mild, savory to sweet and crisp-tender. They are generally more heat-tolerant and some, such as Black Seeded Simpson, are slower to bolt than other types of lettuces.

Front of the Red Deer Tongue Lettuce seed packet.

Lettuce, Organic Leaf, Tango


Lettuce, Black Seeded Simpson


One of the best ways to use these lettuces is to combine them with other greens, such as arugula or baby kale in a salad and, lucky you, we have two blends that will do that for you.
Picture of a packet of Gourmet Salad Lettuce seeds.Picture of a packet of Heirloom Lettuce Blend seeds.

All lettuce varieties are very easily started from seed, both indoors and out in your vegetable beds. They take about one week to germinate, depending on temperatures. If starting indoors, be sure the seeds stay moist by spraying them gently from a spray bottle or bottom-watering until they germinate and the seedlings are strong enough to handle overhead watering. A plastic dome over the tray really helps with this.

The seeds are tiny and should be planted with a very light (no more than ¼ inch) layer of soil.  If planted outdoors in cooler temperatures and cold soil they may take longer to germinate. Thin the seedlings to 3 inches apart and pull every other one for early salads leaving the rest (now 6” apart) to reach full size. Successive sowings every 3 weeks in short rows provide these tasty plants throughout the season. All lettuces will bolt and then become bitter in the heat and long days of summer, but you can delay this by mulching to keep the soil cool.

So go beyond iceberg lettuce and let us know how you like these other varieties!

TOP 10 VEGETABLES FOR PART SHADE

Gardening Tips

by Heather StoneShady Gardens Plants

Do you have a garden that gets more shade than sun, but you still want to grow vegetables? No problem! There are plenty of vegetables that will grow well with partial sun. We’ve put together a list for you of vegetables that perform well with 6 hours or less of direct sunlight. Read on to find out how to keep yourself in fresh veggies all season by making the most of your shady spots.


Partial Shade Plants

  1. Mesclun Greens (Needs 3 hours of sun)

Mesclun is simply a “mix” of various greens. All of them doing well with just a few hours of sunlight. They germinate quick and reach maturity in a matter of weeks. Try our Mesclun Mix– a great combo of arugula, mustard greens and Chinese cabbage.

  1. Arugula 3-4 hours

This delicious peppery green is one of the easy-to-grow vegetables for shade and loves the cool weather. Plant in early spring about 1 month before the last frost and continue sowing every 20-30 days until mid-summer. Grows well in containers. Try our Wild Arugula!

  1. Lettuce 3-4 hours

Lettuce is a cool-season green that isn’t a big fan of direct sun. The varieties are endless and so easy to grow in the ground or in containers. Plant in early spring and again every two weeks for a continuous supply of lettuce. Make sure to provide shade for the late spring and summer plantings.

  1. Spinach 3-4 hours

The nutrient-packed leaves of spinach love cool weather and protection from the full sun. Spinach is an easy to grow and productive crop that every garden should find a spot for. Like lettuce and arugula plant in early spring and sow successively every 2 weeks for a continuous supply of spinach. Try our Bloomsdale or Nobel Giant varieties.

  1. Kale 3-4 hours

A powerhouse of nutrition, kale is easy to grow in the ground or in containers. The young tender leaves of kale are great in salads. The mature leaves are excellent sauteed or added to soups and stews. Start in early spring and continue you to sow for fresh greens all season long.

  1. Swiss Chard 4-5 hours

Easy to grow from seed and looks fabulous all season long Swiss Chard’s beautiful leaves are great shady gardens plants that are easily planted in the perennial garden as well as the vegetable patch.

  1. Radish 4-5 hours

There’s nothing like a fresh spring radish. They are quick to germinate, fast to mature and come in a rainbow of colors. We carry 5 different varieties! No garden should be without radishes.

  1. Peas 4-5 hours

Other partial shade plants are Peas, in either the garden or the container. They are pretty quick to germinate and prefer cool weather. So get them in the ground early and you’ll have peas to snack on in early summer.

  1. Beets 4-5 hours

Beets can thrive along the shady edge of the garden. The roots might not get quite as big, but if you keep them well watered they will produce excellent tasting greens and sweet, tender roots.

  1. Bok Choy 4 hours

This cool-season vegetable germinates in a few days and can be eaten raw or cooked.  Bok Choy is an excellent addition to the part shade garden.


2018 is the Year of the Beet

Recipes for Beets

The National Garden Bureau has proclaimed 2018 as the year of the beet and you can enjoy them in so very many ways. Try some new recipes to enjoy this nutritious and underused vegetable this year.Photo of a bunch of Chioggia Beets showing the red and white circles inside.

  • Beets can be dried and made into chips, juiced, roasted, baked, pureed into soup, glazed, pickled or steamed,
  • Beet greens are delicious in salads, soups or sautéed.
  • Beets come in a range of colors, shapes and sizes and some have a sweet mild, rather than an earthy flavor.
  • Beets are full of fiber, vitamins A and C and have a higher iron content than most other vegetables.

Say farewell to kale and hello to beets this year.

Packet picture of Golden Detroit Beet seeds

Three Wild and Spicy reasons to grow Wild Arugula

Gardening Tips

by Sandy Swegel

Wild arugula is my favorite spring green of the week and this year it’s the first thing I’ve seeded out into the garden during our warm spell.

Similar to regular arugula, wild arugula has a “wilder” taste and thinner leaf.  It looks quite like a mustard weed when young if you aren’t familiar with it.  Definitely a cool season crop as once the temps get to 80 wild arugula can be quite bitter.

It is very easy to grow, as mustards often are, and can handle less than ideal soil and water.  (Watch out…low water makes it even spicier.). I like to plant it somewhere it can establish itself as a perennial that I can just pick a few leaves now and then to add some zest to dinner.  But a Spring garden patch is essential to get cups and cups of the greens to use in making pesto.


So here are my three favorite wild and spicy reasons to grow wild arugula.

SPRING SALADS

Arugula has a nutrient profile similar to other spring tonic herbs like dandelion and nettles, but I like the taste even better for salads or lightly steamed.

PESTO

Wild arugula pesto is an absolute favorite.  Make it with garlic, olive oil, walnuts and Parmesan or goat cheese and you have a fantastic sauce for fettuccine noodles, topping for pizza or spread for appetizers.

POLLINATORS

Naturally, foods that are favorites of pollinators are favorites of mine.  Once summer sets in, wild arugula bolts and sends up tall tiny spiky yellow flowers that pollinators love.  I’ve seen all kinds of bees and butterflies snacking on the wild arugula flowers from summer through late fall.  I also snack on them….I like the flavor of arugula flowers even better than the leaves.


Photo credits

https://www.dherbs.com/articles/featured-articles/wild-arugula-pesto/

http://honest-food.net/arugula-pesto-recipe-pasta/

Wild Arugula; Delicious Low-Water Beauty

Plants as Conversation Starters

All About Plants

by Sandy Swegel

One of the awkward parts of the holiday season is ending up at gatherings where you only know the person you came with and everyone else is a stranger. There’s always the option of getting a plate of food and finding a comfortable chair to sit in and people watch but it can be awkward. I recently had a great time at a party I was going where I didn’t know many people or have much in common with them and it was entirely thanks to plants. So I know you’re supposed to bring a small gift when you are invited to a dinner, but wine or even grocery store flowers can set you back $15- 20 and I’m frugal or cheap or broke, depending on my mindset that day. So I’ve taken to making my own flower arrangements from gathered natural items and thrift store vases. These can turn out quite creative and cute (I used ornamental cabbages as the center “flowers” recently.) or so unusual that my family says things like “What weird thing is that?”

So at this recent party, the hostess took my cabbage flower and evergreen arrangement politely said thank you and put it on an out-of-the-way table. I sat on a comfortable chair with a plate of food and stumbled over small talk. As my mind idly looked around the room I looked up at the ceiling and saw a stray ivy vine tacked up along the beams near the high ceiling. Its pot was on a narrow ledge about ten feet high and I blurted out without thinking, “Who gets up to water that pot?” The husband came over and said proudly, “That’s my job.” And together the two of them started an animated story about this little vine had grown over 40 feet long in just the past year and now was entwined across the ceiling like a spider web or halo over their living space. We had a great bonding conversation about the marvels of this ordinary little vine and its impact on their lives as they had to find new places to attach it every month. They appreciated that I noticed and admired it too.

The nice part of this brief encounter was later in the evening when the hostess stood by the little arrangement I brought and looked at anew and commented how beautiful the cabbage and juniper berries were.

It was a win-win-win situation. We came to appreciate each other in a new way because of how we each appreciated nature. And the ivy? Well, you know how vain plants are…it loved being the center of attention.


You can use plants as a conversation starter in your own home by having unusual plants like a string of pearls or bloomers most people aren’t familiar with like a clivia. At other people’s homes, you can just take a moment to remark on the plants that grow there. Turns out the plants we live with and manage to keep alive are important to us.

Photos:

http://carlaaston.com/designed/swap-holiday-decor-for-indoor-plants
https://www.pinterest.com/pin/41376890297731993/

Garden and Grow Flowers all Winter Long

Wildflower Seeds

by Sandy Swegel

For gardeners foolish enough to live where winter takes hold and the ground freezes, the time between first frost and last frost can be very long. Some gardeners are wise enough to welcome the break from the work of the garden and enjoy the natural flow of the seasons. Others like me start longing for a greenhouse or dream of living in warm tropical climates. I fantasize about building a mobile greenhouse I could drive down south to grow all winter and drive back to Colorado next Spring. I mourn the death of geraniums in beautiful pots and the brown frozen leaves of basil.

Before you lug dozens of plants into your living room where they mostly suffer until they succumb to low light and pests, make a plan for how to garden your indoor area.

If you have good indoor southern exposure…

Blooming plants like geranium, Hibiscus, Bougainvillea and Mandevilla will put on winter-long displays of flowers. Often by January, the dry air and lack of circulation will cause aphid explosions, and you’ll need to give the plants a quick shower or deal with the aphids in some other way before they get completely disgusting. Fragrant plants like rosemary will also thrive and even bloom if you keep them well-watered. Plants that didn’t need much water outdoors have different needs indoors and will probably need to be watered twice a week.


Low light windows…

Winter is the time to move cyclamen and African violets out of the direct winter sun to the north or east windows to keep them happy. Begonias also do well in lower light.
Cuttings of coleus bring in lots of foliage color. Coleus plants are so attractive in pots but expensive to buy. Simple jars of water will keep the coleus happy and grow roots so you have plants next Spring.

Herbs…

The rosemary is in the southern window. You can harvest the thyme from outdoors all winter as long as you can push aside leaves or snow. Tender herbs like basil and oregano are another story. I haven’t had much luck bringing them indoors…they bolt or get buggy. I have had great luck seeding narrow windowsill pots densely and enjoying the young leaves as microgreens.

Forcing bulbs…

Amaryllis are great to start now. Setting aside a few bulbs from Fall plantings can occupy your gardeners’ heart for weeks in January and February. Not all bulbs force so there is some experimentation here and some bulbs will need a cooling period in your frig or cold garage. But little daffodils inside in late January give great joy.


Forcing stems…

Make a mental note now of what spring flowering trees and shrubs there are in your yard or neighborhood. In late winter after a warm spell, you can see the new buds swell on woody stems. Cut those stems and bring them indoors.

Winter doesn’t have to be long and gray. You can garden inside all season long.

Photos:
http://www.hiddenvalleyhibiscus.com/forum/index.php?topic=144.0
http://picklesandcheeseblog.blogspot.com/2009/11/bright-red-geraniums-in-big-black-pots.html
Miss Priss the Bougainvillea, Good To Grow, Liza’s plants

Keep Your Lettuce Sweet

Heirloom Vegetable Seeds

by Sandy SwegelRows of Lettuce

It’s only the beginning of June, but hot days can already cause your lettuce to begin to turn bitter or bolt. But an attentive gardener can keep her lettuce sweet and tasty with a few easy tricks.

Lettuce generally turns bitter when it begins to mature or bolt. The most obvious environmental factors that cause bitterness are high heat and water stress. There are some studies that suggest long day length also speeds bolting. It’s a bit too much trouble to test this and create darkness for your lettuce but there’s a lot you can do to sweeten your lettuce.

Keep it cool.

Light row cover over the lettuce in the easiest way to cool it down. Just keep the sun from baking it. Alternatively next year you can plant the lettuce somewhere it gets shade in the hottest parts of the day.

Keep it well watered.

Sometimes we don’t notice how hot it is becoming and we don’t increase our watering to compensate. Make sure your lettuce is consistently well watered and doesn’t go through stressful too wet/too dry cycles.

Thin your lettuce.

Loose leaf lettuce can get bitter from being planted too densely and not thinned. This is probably just water and nutrient stress from overcrowding, but give those plants a little more room. By thinning as lettuce grows.

Pick it in the morning.

A cool night is often enough to sweeten lettuce so pick the lettuce in the cool of morning, not just before dinner. Bring a bucket of water with you to harvest and put the lettuce directly into the water after picking.


And if your lettuce is already bitter?

No need to eat it bitter or toss it into the compost pile. Wash and dry the lettuce and put it in a crisper in the refrigerator for at least a few hours and up to a couple of days. Lettuce is one of those plants that keeps growing even after it is cut so it will often respond to its new cool humid environment by “sweetening up.”

If your lettuce is still bitter? Send it to compost or toss it in with other vegetables when juicing. You’ll get the vitamins but not notice the bitterness amid the other strong vegetable tastes.

Photo credit:
http://phys.org/news/2015-11-lettuce-quality-conditions.html

Gardening to Save Your Life

Growing Food in Hard Times

by Sandy Swegel

My heart is breaking this week with the stories coming out of Venezuela of severe food shortages and 5000 ordinary people looting food warehouses on Wednesday because they and their families were starving. They are right to be desperate. At the end of April, the government announced it only had a 15-day inventory of food left. The president has suggested people should grow their own food and maybe keep some chickens. That’s not very likely in the ultra-urban capital city of 5.4 million people in Caracas.

Venezuela’s problems are mostly political and socioeconomic, exacerbated by the fact that they import most (65-80% depending on who is counting) of their food. Once an agricultural nation, they shifted most land to the easy money of oil production. Now as oil prices have dropped significantly, there’s no money left to pay to import food.


Which all led me to some serious questions.

Could I grow enough food to save my life if our groceries shelves went empty?

Do I know enough about growing food that I could teach desperate neighbors to grow their own food in small urban areas?

Assuming I couldn’t purchase seeds or fertilizer, could I really grow a zero import garden?

It is frustrating when there is news of famine and human beings starving in the world. Most of the time it’s political. Increasingly, climate change has brought on severe drought. We have all come to hate the evening news with the latest story of suffering in the world. What can we do?


We can educate ourselves more. We can learn to grow food really well. For me this year, I’m going to focus on learning more about growing high calorie and high protein foods. I’ve grown potatoes and onions a couple of times with mediocre production and figure it’s cheaper to buy those and use my garden for more kale. But a hungry community needs calories and needs protein.

My goals this year are to get better at growing potatoes and dry beans…foods for survival.

What can you learn this year in case one day you had to feed yourself and teach others?

If you need a place to start to learn, this book is a great way to start:

Gardening When It Counts: Growing Food in Hard Times

Photocredits
http://www.theatlantic.com/health/archive/2009/09/on-urban-farms-a-sense-of-place/26675/