If Plants Could Walk
Escaping the Weather
by Sandy Swegel
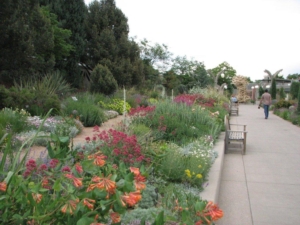
They’d run for their lives! This week anyway. Extreme weather conditions prevail here in Colorado and throughout the country. Here in Boulder, we’re enduring day after day of record-setting temps over 100. Plants are crisping just from the 4% humidity. And as we learned in our last severe drought in 2002, no matter how much city water you irrigate with, plants don’t do as well with irrigation as they do with natural water from rain. If plants could walk this week, they would mosey on over to the shade next to the irrigation ditch for respite.
While we bake in the heat, my sister took her annual vacation to Florida so she could sit on the beach in the middle of Tropical Storm Debby. Plants in some areas of the Gulf Coast desperately yearn for legs this week. If only they could walk they would get out of the downpour of hard pelting rain and lift their feet out of the bog and mire that soil has become with excessive rain. How’s a plant supposed to live when its roots are stuck in wet muck putrifying in the heat.
The happiest plants in dire weather can be the ones in containers with a doting human around. My neighbor nudges her containers on wheels into the shade when the western sun is too debilitating. Even her tomato loves the respite from the blazing sun. Unlike my spinach, hers isn’t bolting because now that summer is upon us, she moved her containers of greens under the apple trees where cooling misters cool the greens enough they don’t have to bolt yet…and the apples grow big with the bit of extra water from the misters. One pot of summer greens was fortunate and moved inside into the air conditioning in a sunroom so the family could enjoy sweet lettuce greens a little longer.
Alas, for plants without feet, all you can do is offer some respite from the weather. Shade cloth or row cover judiciously placed now might save some plants facing death from heat exhaustion. If that’s not possible, a judicious mid-day misting sometimes helps. The water mist may help the plant survive desiccation and it certainly helps perk up the gardener.
Plants that really need feet this week are the ones burning to death in the Colorado wildfires. There are eight major wildfires in Colorado and over half of the wild-fire fighting crews in the US are in Colorado now. We are so grateful to the men and women who come from near and far to battle out-of-control wildfires in 100-degree temps in heavy gear. Let it rain, let it rain, let it rain.