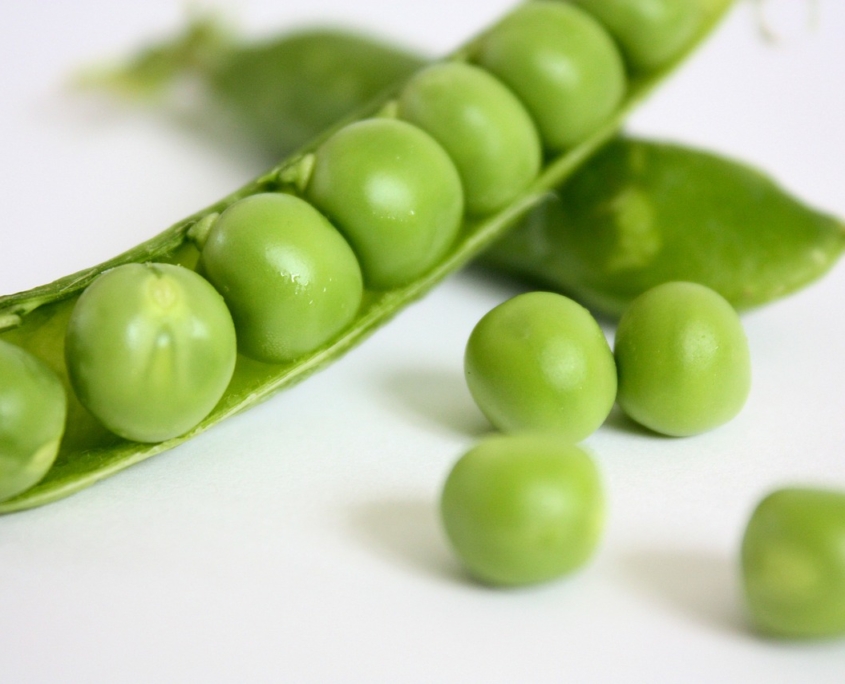
Please Pass The Peas

History of Green Peas and Recipes

By Engrid Winslow

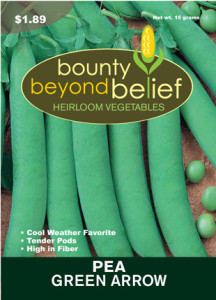
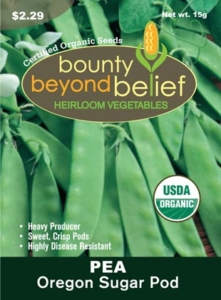
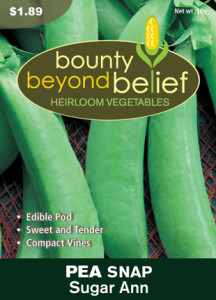
Organic Oregon Sugar Pod Pea Pea, Green Arrow

 “How luscious lies the pea within the pod” – Emily Dickson wrote. I think most of us would agree that fresh peas are a hallmark of early summer produce and have us saying “please pass the peas”. The origin of peas is shrouded in mystery as it is a food plant so ancient that the earliest preserved specimens date from 9750 BCE in Thailand. Peas are legumes and of the family Fabaceae and is the third largest of the flowering plant families.

The ancient Greeks and Romans grew peas and hot pea soup was peddled in the streets of Athens while fried peas were sold to spectators instead of popcorn at the Coliseum in Rome. They were popular in England in the middle ages and there were to primary varieties – one was a field pea to be fed to animals and the other was called the “greene pea” and appeared often at the dinner table. The pea arrived in the Americas with Christopher Columbus and was part of the early colonist’s kitchen gardens.

Green Peas are easy to grow and can be succession planted to extend the harvest, they are delicious additions to salads, soups and eaten alone. The varieties are many, including shelling peas and sweet sugar snaps as well as the snow pea used in Asian cooking. “All the essentials of life,” according to Winston Churchill, are only four: hot baths, cold champagne, old brandy and new peas.

Here are a couple of classic recipes to help you enjoy the bounty of fresh peas and to make your family say “please pass the peas!”


CORNUCOPIA SALAD

Serves 4 as a Vegetarian Main Course


1 bunch torn arugula

1 bunch torn butterhead lettuce

½ lb sugar snap peas, string removed

1 cup cooked black beans

1 cup diced buffalo mozzarella

16-20 halved cherry tomatoes

Kernels from 2 ears of cooked corn

½ cup diced red bell pepper


For Vinaigrette:

2 TBL red wine vinegar                                   1 TBL Dijon mustard

2 TBL balsamic vinegar                                   ½ tsp salt

2 TBL lime juice                                                 ½ tsp freshly ground black pepper

1 TBL lime zest                                                   2 TBL chopped roasted red bell pepper

¼ cup minced red onion                                                6 TBL olive oil

2 TBL chopped fresh basil                             6 TBL canola oil

1 TBL minced fresh parsley                          2 TBL water


ENGLISH PEAS WITH PROSCIUTTO AND POTATOES

Serves 3 or 4


½ lb new potatoes, scrubbed and cut into ½ inch dice

3 oz. chopped prosciutto, pancetta or bacon

2 lbs shelled fresh English peas

½ small onion, finely chopped

1 small handful of fresh mint leaves

Extra virgin olive oil

Salt and freshly ground pepper, to taste


Put potatoes in a medium pot with water to cover by one inch and one tablespoon of salt. Bring to a boil and simmer gently for 10-12 minutes until potatoes are tender. Drain.

Heat a small glug of olive oil in a large skillet over medium heat and add onion and prosciutto and a pinch of salt. Sauté until onion is soft and fragrant and prosciutto has rendered some fat and is turning crisp around the edges, about 5 minutes.

Add the peas and potatoes and season generously with salt and pepper. Add 2 tablespoons of water to help steam cook the peas for another 4-5 minutes until they are tender and the flavors have come together.

Toss in the fresh mint and drizzle with a bit more olive oil and additional salt and pepper to taste. Then pass the peas!


Don’t Pass On Peas

Tips for Successfully Growing Peas

by Heather Stone

Green Sugar Snap peas on the vine.

Image by Reginal from Pixabay

Plant Green Peas for one of the first crops in the spring. As soon as you can stick your finger into the soil you can plant peas. Whether you plant shelling, snap or snow peas this early crop loves the cool weather of spring, producing tender pods that are hard to resist.  More often than not, they are eaten straight off the vine right there in the garden, very few making it to the kitchen. Every year I always wish I would have planted more.

Planting green peas should happen as soon as the soil can be worked, about 4-6 weeks before your average last frost date. For best germination, soil temperatures should be around 50 degrees F. Do be cautious of excess moisture. You don’t want your seeds sitting in wet soil.

Before planting, soak your seeds overnight. This will help speed germination. Plant seeds about 1” deep and 2-3” apart in well-loosened soil in a sunny spot in your garden. Peas will also do well in part shade. Give your peas a trellis, as most peas need something to climb on. Keep the area moist until the seeds germinate, on average between 7-14 days.

Green Peas are an easy crop to grow. Keep the plants moist, especially once they start producing. When they reach 8-12” tall mulch your vines well to keep the soil cool and help retain moisture. Peas grow best in temperatures below 70 degrees F, so plant your seeds early. Once temperatures reach 80 degrees the vines tend to stop producing.  

When the peas begin to ripen, harvest daily and be sure to use two hands to pick. Use one hand to hold the vine and the other to pick the peas. This way you will avoid damaging the tender vines. For the crispiest peas, pick in the morning after the dew has dried. Peas will last about 5 days in the refrigerator (if they make it there) and any extra freeze well.

Like all legumes, peas fix nitrogen in the soil that other plants can use. When your peas are done for the season, remove the vines but leave the roots in the ground. Plant a nitrogen-loving plant in the area that can benefit from the extra nitrogen in the soil.

Don’t wait! Get out in the garden and plant some peas today! Try one of our tried and true varieties such as Sugar Ann, Oregon Sugar Pod or Green Arrow.

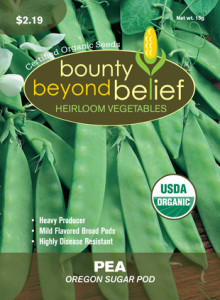
Packet of Oregon Sugar Pod Pea seeds. Pea, Sugar Ann Pea, Green Arrow


Guide to Pea Harvesting: When and How to Harvest Your Garden Grown Peas

Harvesting Peas

by Sam DollFat garden peas in the shell.

How do you know it’s “officially” summer? Is it when the pool opens back up or your neighbors start grilling? For me, it doesn’t REALLY feel like summer until I can walk into my garden and eat a sweet snap pea off the vine!

While those pea pods are pretty tasty from the start, how do you know when the perfect time to pick them is? What if you want shelled peas, peas for stir fry, or even microgreens? We’ll help you figure out how and when to harvest your peas here in our Guide to Pea Harvesting.

Garden Peas

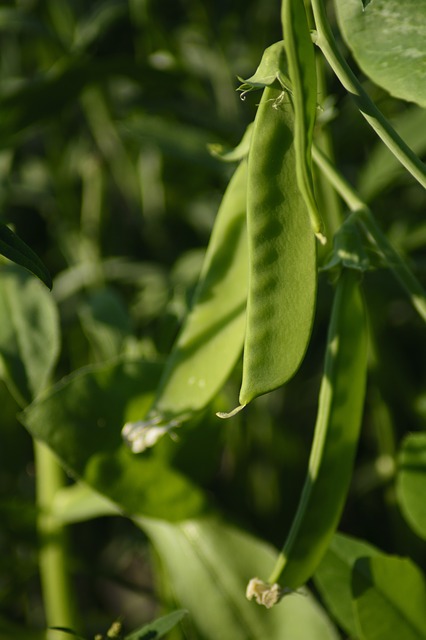
Garden peas, also known as English or sweet peas, are the classic pea, great for side dishes or soups. While this pea can be eaten whole when it is young and tender, it shines brightest when shelled.

When harvesting garden peas to be shelled, check for the pod to be bright green and rounded. It should be slightly shiny and have no visible bumps. If the pods have bumps from the peas getting too large, the peas may be over-ripe and could be too starchy or mealy in texture.

We recommend our Green Arrow variety of garden peas. They have a high yield (8-11 peas per pod) and are good tender as well.

Snow Peas

Snow peas are recognizable for having flat pods with very small peas inside. They are mild and sweet and are almost exclusively eaten whole. Great eaten fresh or in stir fry, snow peas can be some of the most delightful crops in your garden.

Since snow peas are meant to be eaten whole, it is better to err on the early side when harvesting. The peas should be small and a little loose in the pod. If they go too long, the pods will become fibrous and the crop will lose most of its sweetness.

Snow peas are also great for growing microgreens due to their quick germination. The shoots are sweet, crunchy and delicious. Harvest them when they are about 2″ long and use them as a garnish, add them to sandwiches, or mix them in salads and soups.

The Oregon Sugar Pod II (long name, great plant) is the perfect sugar pod for everything from microgreens to stir-fry.

Snap Peas

Snap peas, or sugar snap peas, have a plump, edible pod that makes for a classic summer snack. A cross between garden peas and snow peas, snap peas are best as a sweet, light snack but can also be shelled or lightly cooked.

Like snow peas, they can be harvested as early as you want to and as long as the pods are rounded and shiny. If they lose their shine or the pod begins to bulge where the peas are, they have gone too long to eat whole, but can still be shelled and enjoyed!

The Sugar Ann is our favorite variety of snap pea

Some Notes

The more you pick, the more you get. It is best to keep harvesting peas as long as possible so you can get the maximum yield for your hard work.

When harvesting, use two hands to pick: one to hold the plant and the other to harvest. Peas are delicate plants and rough harvesting can do more harm than good.

Peas fix nitrogen in the soil which makes them best buds with corn. You can also plant your peas with bush beans, pole beans, carrots, celery, chicory, cucumber, eggplant, parsley, early potato, radish, spinach, strawberry, sweet pepper, tomatoes and turnips. Keep your peas away from chives, grapes, late potatoes and onions.


SUMMER HARVEST

Favorite Summer Vegetables

by Engrid Winslow

At last, the bounty of your summer garden is at its peak and you can gather all of those glorious tomatoes, peppers, eggplants, corn, chard, kale, summer squash, onions and other vegetables to enjoy at their freshest and most flavorful. But, ahem, some of us may plant more than we can eat in a day. Well, whether that is planned excess or not, here are a few tricks for preserving that bounty using just your freezer and pantry.

Onions –

When the tops flop over onto the ground it’s time to pull them out and let them dry out in the sun or inside in a cool, dry location. Some onions, such as cippolini, are great storage onions but for the ones that aren’t…Ever tried onion jam? How about bacon and onion jam. You can refrigerate them and use them up quickly or pop a few jars into the freezer for a festive addition to a holiday cheese platter. Here are the links to two delicious recipes you can try:

http://www.cookingchanneltv.com/recipes/onion-jam https://cooking.nytimes.com/recipes/1015978-bacon-onion-jam.

You’re welcome.


Corn –

Shuck as much as you can and then flash boil for about 2 minutes. Let cool and then scrape off the kernels into a large bowl and scoop out two cups into a plastic bag or container for freezing. Add them to that turkey soup you make after Thanksgiving every year along with some of the frozen shell peas you harvested and froze in the spring.

Tomatoes –

This technique works best with cherry tomatoes and is a little bit of trouble but OMG are these delicious. Add them to pizza, pasta, soups, sandwiches or serve on grilled bread as a quick crostini. The flavor of these will make you want to plant even more tomatoes next year. Heat oven to 200 degrees. Arrange cherry tomatoes on a lined, rimmed baking sheet, cut side up. Drizzle with olive oil and add a sprinkle of salt and pepper. Let them “oven dry” for up to 2 ½ hours, checking frequently at the two-hour mark. You can also do this with large tomatoes which will yield a “saucier” result.


Zucchini –

Use small, tender-skinned, deep green ones. Shred and steam for 1-2 minutes. Freeze in desired quantities for adding to slaw, pasta, soups or your famous zucchini bread.

How to Pick a Pea

Heirloom Vegetable Tips

By: Sandy Swegel

How to pick a pea to grow, that is.

There are so many varieties of peas to choose from….which one shall we grow? Here are three peas with very good reasons to grow them.

For snow peas, the generally accepted superior variety is “Oregon Sugar Pod II.” Research trials have documented that Oregon Sugar Pod producers twice as many snow peas as other cultivars. And there’s a cool reason for that: Oregon Sugar Pods split and produce two peas at every growth node while other snow peas produce just one. And the “II” in Oregon Sugar Pod II? That refers to the fact that this evolution of the pea is disease resistant. So you get lots of peas and no powdery mildew.

Despite the obvious perfection of the Oregon Sugar Pod II, I also like to grow the Dwarf Grey Sugar. They taste about the same to me and I get lots of peas from the Dwarf Grey Sugar, but the real reason to have them is that they have purple flowers. All the other peas have white flowers. More Purple Flowers Please.

Finally, the third pea I’m enamored of is Sugar Ann…an heirloom edible Pod pea. No shucking or shelling…you eat the whole thing…pod and all. They are delicious steamed or sautéed but we rarely eat them that way. Any pea lover will attest: peas taste best fresh picked, while you’re still standing in the garden.

Do you want a secret to more peas in less space? Plant your peas (or thin) a little further apart—4 inches between plants. Research in Oklahoma showed those plants branch more and produce 23% more peas than plants 2 inches apart.

Whatever variety you choose…start them soon. All peas stop producing when the temperatures get up above 75 degrees.

Photo credit:

www.rodalesorganiclife.com/garden/snowpeas
theenchantedtree.blogspot.com/search?q=Pea
www.thekitchn.com/5-ways-to-eat-sugar-snap-peas-144936

Time to Reboot the Veggie Garden

Gardening Tips

by Sandy Swegel

We ate the last of the Spring Peas this week. They were gnarly and kinda tough, but I savored the sweet Spring memories. Even though the peas were planted in a little shade and watered regularly, a pea plant can only take so many blistering hot days. Pooped-out peas are a sure sign that it’s time to start thinking about the Fall Garden. It seems slightly absurd since we still don’t have a single red tomato here in zone 5, but if I want a lush fall and winter garden, the time to reboot the spent Spring garden is now.

But it is July and it’s hot, so let’s start the fall garden in nice easy baby steps. These week’s plan is simple:

1. Pull out the finished pea plants. Pull out the weeds. Scratch in some fresh compost and keep the area watered for a few days as the soil settles down.
2. Plant some seeds. Keep the patch well moistened (or throw some row cover over to keep the water from evaporating so fast.
3. Have something cold to drink and flip through your seed cache or favorite seed website to plan something new and different the next time a little patch of soil is ready for replanting.

Some excellent July planting choices:

Leafy greens: arugula, Asian greens, collards, more kale or chard
Cool-season herbs like cilantro and dill
Root crops you want to enjoy after frosts like carrots and beets
Rapini (Broccoli raab)

Don’t stress yourself in the heat….just plant that one little patch that’s just growing weeds now and reap the rewards in September.

Photos:
http://www.popsugar.com/fitness/Healthy-Recipes-Winter-Vegetables-Fruits-21357784#photo-21357809

Two Ways to Guarantee Your Outdoor Seeds Grow

Seed Starting

by Sandy SwegelPre-sprouting seeds

The next few weeks are crucial for new gardeners. Every year in Spring, first-time gardeners buy some seeds and dig up a garden on the first really warm weekend and sprinkle the seeds out. Then they wait. For some, within the month, weather conditions will be good and they’ll have their first garden seedlings and they will be totally hooked on the magic of gardening.

For others, something bad happens that the newbies don’t know about. They don’t realize they have to water. Or a couple of hot days come and burn the new seedlings to a crisp. Maybe the neighborhood crows watch you plant and come to eat every last pea. Sometimes the soil is cold and it’s just too early to germinate seeds. These newbie gardeners lose hope and say they just have a black thumb and give up gardening.

If you’ve had failures but are still willing to give a garden from seed a try, I have two techniques that virtually guarantee your seeds will germinate outdoors. These are especially good ideas if you’ve given up trying to grow some things because they never work for you. For years I just thought I was broccoli-impaired until I tried these hints.

First of course, you have to start your garden bed.

HOW TO START A GARDEN BED.

You can till and/or turn the soil by hand but you don’t have too if the soil is not solid concrete.
Dig out the weeds. Get the roots if you can.
Take a rake and make the soil level and a bit smoothed out.
Water soil with a soft sprayer if the soil is dry.
Sprinkle seed over the soil. How much seed and how far apart is written in the little print on the packet.
Pat the seed lightly with your hands so there is contact between the seed and the soil. Bury the seed slightly if the packet says so.

If you live in someplace humid and warm, that’s enough. Your seeds should come up.

If you live someplace dry or with fluctuating temperature or you’ve had failures in the past, try these two success techniques:

Sprouts

#1 ROW COVER

Lay a sheet of row cover loosely over the seeded bed. You want it nice and loose so the plants can grow and the row cover lifts with them. I use some heavy rocks to hold down the row cover so it doesn’t blow away. The row cover helps the seeds stay moist enough to germinate and raises the soil temperature a few degrees so the seeds germinate faster.

Water with the soft sprayer. Note….I water right on top of the row cover. You don’t have to lift it to water underneath often causing the seeds to float away. It’s permeable so the water makes its way through.

#2 PRE-SOAK AND PRE-GERMINATE the difficult seeds.

Pea sproutsSeeds like peas or carrots respond well if soak them in warm water in a bowl overnight, drain them, then plant. The soaking activates the enzymes that break the seed coat and speeds up germination. If it’s a seed you really have trouble with, you can put the seeds on a wet paper towel in a baggie and wait a few days until you see the sprouts.

These two shortcuts…pre-germination and row cover…work for me all the time. And I get better germination which means I get more plants per packet of seeds and save even more money.

Now go out and grow some food and flowers!


Photo credits:
http://daphnesdandelions.blogspot.com/2010_09_01_archive.html
http://learningandyearning.com/tag/pre-sprouting/

Learning from Kid’s Gardens

What We Can Learn from Kids’ Gardens

Gardening Tips

There are tons of books and articles on how to teach kids about gardening. And it is lots of fun to teach young gardeners and show them how to pull a carrot or find an earthworm. But kids who like to garden do it for the fun of it…so there’s a lot that we serious grownups can learn about gardening from kids.

Forget the rules. (or hold them loosely.) Plants grow more easily for kids than for adults. The first time I helped with a children’s garden project, we were planting peas for a Peas (peace) Garden. I had prepped the soil along the fence and about 20 kids of all ages came in and willy-nilly planted their peas. I attempted to teach a few about how to plant peas, but everywhere I looked peas were being thrown about or stomped into the ground. After all the kids left, I asked their teacher if I should replant some of the peas so the kids wouldn’t be disappointed when their plants didn’t grow. The teacher laughed and said, “They’ll grow….they always do.” Plants will grow for kids while adults who do the same thing will have failures. Sure enough. Peas planted 4 inches in the ground, or peas barely touching the soil, all sprouted and grew. Adults who have a playful attitude toward their plants, get better results than some of us who follow the rules too much.

More “Garden Candy”

Garden Candy is what one of the kids called peas because it’s what her grandma called them. Truthfully, we all want more strawberries and fewer cabbages. But they don’t have to just be strawberries. Cherry tomatoes and little round carrots and side sprouts of broccoli all have excellent potential as “garden candy.” Think of raw veggies naturally sweet and little enough for nibbling by small mouths. It may take some encouragement on your part to get the kids to taste the fresh peas or carrots and recognize how different they are than the cooked veggies they know.

More Play

Besides colorful fences around the garden, kids know to mix art and plants together everywhere. And they know some plants aren’t just for eating. Beans for example. Sure you can grow them in little bushes or perfect t-post trellises, but they taste even yummier when grown on teepees trellises that you can also hide inside on a hot summer day. And why grow plain beans with white flowers when you can grow scarlet runner beans! Kids always choose our Festive Rainbow blends of carrots or radishes or lettuces. More color, please. More shiny, brightly colored sparkly things in the garden, please.

More Art

Sure, a Sharpie on an ice cream stick marks where your vegetables are. Adults don’t have time to make magnificent Martha Stewart plant labels. However, kids know garden markers from Michaels’ and little drawings on rocks make great art. So do a few “container gardens” planted in old boots and bright plastic flowers stuck in the ground.

Tall Sunflowers are a Must.

Even kids who aren’t all that into vegetables know instinctively that sunflowers are beautiful and make people smile.

Be Proud of your Garden.

Your friends come over and you start apologizing for your weeds. Your kids, however, are pulling on the adults saying, “Come see my garden” because there’s one lonely marigold in full bloom.

Only Plant what You Love.

You don’t see eight-year-olds planting some vegetable they hate because they know they should. They plant flowers based on their favorite colors and they plant peach pits and apple seeds. And they learn to love kale because the red curly one is so cool.

Don’t Forget to Invite the Fairies and Garden Sprites

A little fairy garden is a delight for all ages (and for the fairies.)


Photo Credits
https://www.parentmap.com/article/15-garden-crafts-for-kids
https://whidbeyschoolgardens.wordpress.com/2014/08/14/love-our-scarlet-runner-bean-teepee/

Gardens at Monticello

What We Gardeners Have in Common with Thomas Jefferson

by Sandy Swegel

This Presidents’ Day led me to researching about the gardens of the White House. I expected to write about the many “heirlooms” that Jefferson gathered and preserved for us. He grew 330 varieties of vegetables and 170 varieties of fruit! I found myself instead captivated by the gardening relationship he shared with his oldest granddaughter Ann. His letters to the teenager Ann have been preserved and give us great insight into these talented gardeners.

There isn’t much about gardening that has changed much since the early 19th century. These are some of the things we know we have in common with the third US President and his granddaughter Ann.

We all want more flowers.

Jefferson was famous for collecting seeds from distant lands in order to grow more varieties at home. He quickly saw the natural consequence of his love of variety — running out of garden space — for he writes Anne in 1806:

“I find that the limited number of our flower beds will too much restrain the variety of flowers in which we might wish to indulge, and therefore I have resumed an idea…of a winding walk surrounding the lawn before the house, with a narrow border of flowers on each side.”

We know how to care for young plants.

In this late winter time of year, we gardeners always start too many young plants too early to actually plant and then have to prepare for their movement from my sunny light shelf to the cold outdoors. Ann too reports how careful she was with the many treasures her grandfather sent her in the winter of 1806.

“The grass, fowls, and flowers arrived safely on Monday afternoon. I planted the former in a box of rich earth and covered it for a few nights until I thought it had taken root and then by degrees, for fear of rendering it too delicate, exposed it again. I shall plant Governor Lewis’s peas as soon as the danger of frost is over.”

We watch the weather

When Ann was only 12 years old, Jefferson in the White House relied on her to report on the weather and its effects on the garden. “How stands the fruit with you in the neighborhood and at Monticello, and particularly the peas, as they are what will be in season when I come home. The figs also, have they been hurt?

We are never finished.

After Jefferson retired to Monticello, he and Ann continued to design and redesign the gardens. Ann’s younger sister Ellen described the delight the garden gave the entire family.

. . . Then when the flowers were in bloom, and we were in ecstasies over the rich purple and crimson, or pure white, or delicate lilac, or pale yellow of the blossoms, how he would sympathize in our admiration, or discuss with my mother and elder sister new groupings and combinations and contrasts. Oh, these were happy moments for us and for him!”

Jefferson on Happiness
Jefferson planned many years for his retirement to Monticello. When at last he was able to retire to the gardens Ann had nurtured in his absence, he wrote:

“the total change of occupation from the house & writing-table to constant employment in the garden & farm has added wonderfully to my happiness. it is seldom & with great reluctance I ever take up a pen. I read some, but not much.”
Fortunately for us as a nation, most of his life was not spent in the garden, but he knew, as we do, how special and sacred our gardens are.
The story of Monticello with 330 varieties of vegetables and 170 of fruit is a grand story. You can find out more here: https://www.monticello.org/site/house-and-gardens/thomas-jeffersons-legacy-gardening-and-food

Photocredit
https://flowergardengirl.wordpress.com
http://www.marthastewart.com/945486/monticellos-vegetable-garden#933708
https://www.monticello.org

How to Become a Plant Nerd

How to Become a Plant Nerd

by Sandy Swegel

You know you are a Plant Nerd When…
(Or How to Become a Plant Nerd)

You know every garden starts with graph paper. You draw a scale drawing with trees and fences.

You create an Excel file listing the times to seed and days to harvest. Your file shows when to plant second crops for fall veggies.

You automate your garden
You put a timer on for watering. Your smartphone calendar alerts you six weeks before the last frost. You have to use a moisture sensor to know when to water.

You know the scientific names of your weeds.

You make the most of what you have.
You never plant in rows…you know it’s more efficient to plant densely in quadrants. If space is limited, you grow vertically. If all you have is a balcony to grow on you figure out how to make a hydroponic system out of a Rubbermaid container.

Your garden is full of experiments.
You test everything before you believe it. You have one section of peas planted with inoculant and one section planted without inoculant to see if it matters. You plant carrots with tomatoes and measure yield to see if it made a differences

You collect data.
You have a max-min thermometer to see the actual temperature in your yard. You write down how many days it took pepper seeds to germinate. You record when the apple trees blossomed and when you got your first tomato. You weigh your giant pumpkin to see if it weighs more than you do.

You make use of technology.
You use frost cloth and low tunnels to extend your season, and red plastic mulch to increase tomato yield.


You have taste testings to see which tomato tastes better.

You know the variety names of the vegetables you eat.

You love problems in the garden because it means you get to come up with a solution!

In other words, you garden smarter not harder.

You’re my superhero.


Photo Credit:  http://www.pinterest.com/pin/174796029262705028/