Baby’s Breath

Baby’s Breath…growing for whimsy

by Sandy Swegel

Some plants aren’t the most efficient plants to grow, but you have to do it just because it’s fun.  Annual baby’s breath fits that category for me this week.  I visited a lovely garden where the perennial baby’s breath was allowed to grow and fall where it may and the rest of the flowers just grew up among them.   Very nice looking.  But the baby’s breath I’m interested in is the annual variety because it blooms very fast from seed and I don’t have a lot of time left this season to start new flower from seed. I want some fun and whimsy in my garden before the garden turns into Fall mums.


Gypsophilia elegans (annual baby’s breath) is a very short-lived plant.  Growing guides advise sowing every two weeks if you want the tiny white flowers all season.  That’s more work and irrigation than I need for the full season…but a fast-blooming flower sounds great for the end of the season.

So just for fun, I’m sowing some annual baby’s breath between the roses and hoping they end up looking just like flower arrangements.  I’m also sowing some in the “moon garden” where most of the flowers are white because what could more whimsical than baby’s breath under a full moon!

Have some fun and grow some flowers just for fun.


Photo:

www.sarahraven.com/gypsophila_elegans_covent_garden.htm

Tomatoes in the Heat

Tips for Gardening in the Heat

by Sandy Swegel

My neighbor is panicking and frantically watering all her plants and trees that have droopy wilting leaves. The leaves weren’t getting any better and she feared there was some horrid disease killing everything. But there isn’t some disease…the plants are just stressed by our heat wave with temperatures in the 90s and above. One way plants cope with heat is to let their leaves droop or fold so that they aren’t losing so much water from the leaf surface.


Still, plants coping or not, a heat wave means you are getting few tomatoes. Plants quit setting fruit when the temps are above 92 or so no matter how many pollinators you have. So what can you do? When temperatures are a little lower, July is the time when I usually recommend a good fertilizing to keep the tomatoes at production. But in the heat, tomatoes are just struggling to live and fertilizing may just add to the stress.

What can you do for your heat-stressed plants?

Make sure you keep your watering consistent. You don’t need to drown the plants. No amount of water is going to compensate for temperature.

Mulch any exposed soil exposed to direct sun. Some tomato plants have already shaded the entire surface with leaves, but if there is garden soil getting hit by full sun, put some mulch or grass clippings or old leaves over the soil to keep it from baking in the sun.

If it looks like the heat wave will last quite a while, try to shade your tomatoes. The most effective shading blocks the hot afternoon sun. You can try hoops with shade cloth or throw some row cover over the plants. One frugal local farmer stretches old bedsheets on T-posts on the western side of the plants. Any protection helps until the temperatures lower again. The shade also will help protect the fruit from sunburn.

Photos and information:
http://reaganite71.blogspot.com/2013/07/helping-your-tomatoes-survive-brutal.html
http://www.organicswgardening.com/article4.html
http://squarefoot.creatingforum.com/t3224-watering-during-a-heat-wave

Natural Weed and Pest Control

Alternatives to Poisons

by Jessica of TheBeesWaggle.com

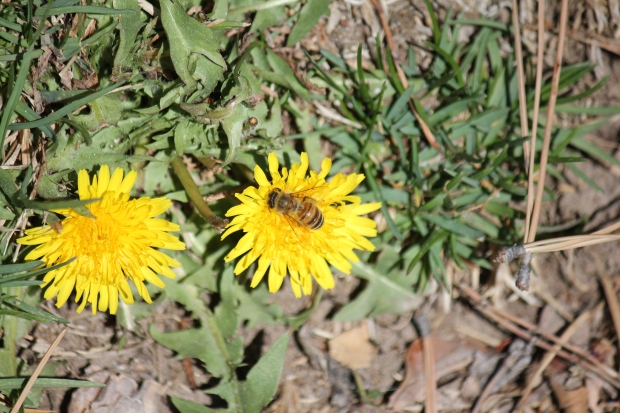
Honey Bee on Dandylion

Weeds do have value to pollinators, as most produce blooms that carry highly nutritious contents for pollinators.  However, they can be overwhelming in their growing power, and we need ways to control them without poisoning the soil and the things that feed on them.  I would like to begin by saying I pull each and every weed that I do not want growing in specific places.  I never use chemicals, not even vinegar and salt.  I would like to urge you to do the same, but I am providing you with some choices that are nontoxic.

  1.  Boiling water.  Pouring boiling water over weeds cooks them, and kills them.  Water is only water, so it’s okay for it to get into the soil and groundwater.
  2. Spray straight White Vinegar on the leaves of weeds being careful not to go overboard.  Too much vinegar in the soil isn’t good for the pH of the soil so it will affect the balance of the existing underground ecosystem if it is applied excessively.
  3. Spray a mixture of salt and vinegar…and then maybe pull them, roast them, and eat them?  Just a joke.  The recipe is 1 cup of salt into 1 gallon of vinegar

Wasps, hornets, and yellow jackets are the other most popular topic of seasonal pests.  I don’t consider them much of a  pest because they eat other insects, which makes them a very important part of the food chain.  So, instead of finding ways to kill them, I find ways to coexist.  They do not like peppermint oil, lavender oil, or eucalyptus oil.  So, the best prevention is to spray a mixture of these oils with water around the areas you’d rather them not set up shop.  The recipe is as follows:  1 tsp of peppermint oil; 1/2 tsp lavender oil; 1/2 tsp eucalyptus oil into 2 cups of water.  Use a good spray bottle to apply this mixture anywhere you do not want them present.  I suggest daily application, and the smell is pleasant, at least I think so.

Bald Faced Hornet

Remember that every living thing has a purpose, so frugally controlling them is in our best interest! I hope you all are having a wonderful summer so far! Thank you for being part of this very important movement to save our bees!

Jessica

Here are a couple of links to steps to control pests using non-chemical controls and least toxic methods, and a link to a great video from BeyondPesticides.org website.

Manage Safe

Organic Land Managment Practical Tools and Techniques


The Flowers and the Bees – Why Bees Matter

The Flowers and the Bees
Why Bees Matter

contributed by Sarah Woodard (of  PerfectBee)

About the Author:  Sarah Woodard has three years experience as a beekeeper, loves constantly learning from her bees and helping others discover beekeeping. See some of her other writing at https://www.clippings.me/sarahwoodard

________________________________________________________________________________________________________________

As flower lovers, you already know that bees are attracted to some flowers more than others and that the more bees in your garden, the more beautiful your flowers. Did you also know that bees are responsible for pollinating 90% of our food supply?

With the introduction of chemicals and mono-agriculture practices, honeybees are increasingly under threat. If we lose the bees, we lose a lot more than food, flowers, and hive products like honey and wax. We also lose the natural antibacterial properties of products produced in the hive and, more importantly, and essential connection with nature.


The Importance of Native Bees

Just as other animals and plants develop differently in different parts of the world, so too, do bees. You’re familiar with invasive plant species and the detrimental effects they have. A similar phenomenon happens with bees. Killer bees, also known as Africanized bees, are not native to the U.S., but were brought to South America as part of an attempt to increase honey production. Gradually, they worked their way north and currently occupy much of the southern U.S. states, altering the genetics of the bee populations in those areas.

Unlike honeybees native to the U.S., Africanized bees are aggressive and don’t handle cool temperatures well. Honeybees native to the U.S. are docile and adapted to survive harsh winter conditions. Although Africanized bees will never overtake honeybee populations in northern states, most backyard beekeepers obtain their bee supply from the south. This means that northern “beekers” (as beekeepers call themselves) often wind up with aggressive bees who are unable to survive the climatic conditions. The best possible solution for bees and humanity is to focus on restoring native bee populations.

How Flower Lovers Can Help the Bees

If you’re like most flower gardeners, you plant the flowers that look good in your yard and make you happy to have in your outdoor space. In many instances that means there’s a lot of blooms at one time and few or none at others. You can extend honey flow, giving native bees more time to store up food for winter and increasing their chances of survival by planting flowers that bloom in a more staggered fashion.

Depending on your location, those plantings may be different and occur at different times. I live in New England and take an “un-managed” approach to plantings. In New England, the first food for bees appears around April and most people mow it down or spend lots of money trying to rid their lawn of them. Can you guess what it is? Dandelions! While I’m not suggesting you let your lawn become a meadow the way I have, perhaps it’s possible to have a dandelion patch. These “weeds” are not only great for bees, but also have tremendous medicinal properties and can be used to make wine.

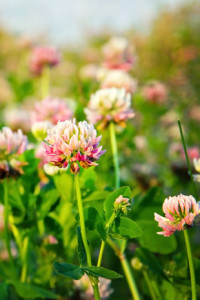
Next up is clover. Bees love clover and these happy little flowers also make tasty honey. Around the same time the clover is blooming, crocuses and other early spring bulbs start to make their way above ground. Clover, if left to its own devices will take the bees through most of the summer and into the fall when asters appear. Summer bulbs and vegetable garden blooms slowly appear throughout the growing season.Alsike Clover, Trifolium hybridum

What’s the bloom schedule like in your area? Do you have a variety of plants blooming throughout the growing season? If you’d like to boost the bee population in your area there are seed mixes available. If you’re a beekeeper or you’d like to help the bees have more food for the winter, these seed mixes might be the way to go.

Vegetables That Grow In The Shade

Vegetables for Shady Areas

by Sandy Swegel

OMG, Can you believe how hot it is? That’s the refrain from everybody I talk to. I’ll work in the garden when it’s below freezing or when there’s light rain, but I draw the line at working in the sun when the temperature is above 90. Unfortunately, temps around Denver area are in the upper 90’s. Poor Phoenix was 118. As one of the weather services said, “millions of people in the US are experiencing temperatures 10 – 20 degrees above normal this weekend.

So as I stood under a big tree and looked across the yard at my lettuce wilting under the hot sun, I started rethinking what my vegetable garden should look like. All those leafy vegetables don’t need full sun….and they’d deeply appreciate some relief on hot afternoons.

So, note to self: next year make some new beds in the shade. Dappled shade is best and dark shade won’t work, but the only vegetables that need lots of sun are those fruit-producing vegetables like tomatoes and peppers.

There are lots of lists on what to grow in shade, but blogger Empress of Dirt has the most thorough, showing the gradient of shade tolerance. Your area will vary. Shade in Denver is different from shade in Seattle, so experiment. You know you have too much shade when the plants are barely growing. But I’ve watched arugula thrive under a big apple tree where it barely got any direct sun.


What to do about those poor greens out in the hot sun now? Give them some temporary shade. A shade cloth structure is ideal. I’m going to pull out the winter frost cloth and drape it over the garden till these extreme temperatures subside.


Keep your garden well watered but don’t drown it. No amount of water can compensate for extreme heat.

In the meantime, we’re grateful to all the firefighters out battling wildfires erupting throughout the Southwest in this record-breaking heatwave. They are true heroes.


Photos and information:

Lupines

Wildflower Seeds

by Sandy Swegel

One way to design your garden is to plan ahead, make sketches and get all of your seeds started indoors 8 weeks before frost.  Another way, for those of us not quite so organized, is to add a plant you absolutely fall in love with, no matter what the time of year.  Lupines fit this latter category for me.  Until I see them bloom, I forget how amazing they are. When they come into bloom, I am awestruck.  They are so unusual and big and beautiful and colorful.  I envy those in New Hampshire who went last week to the Sugar Hill Lupine Festival where you could ride horse-drawn wagons through fields of lupine.  The festival continues this weekend if you live nearby.  Friends sent photos of lupines against the sea in Cape Cod and I knew it was time to get the packets of seeds of lupine that I’ve had unopened since February.


June is probably a little late to get flowers for this year from seed, but it is perfect timing for growing big plants that will put out big flowers next June.  Even if you already have some lupine growing, it is a good time to start some more.  Lupines are biennial or short-lived perennials so you need to keep starting new plants if they aren’t seeding themselves around.  They germinate pretty easily especially if you give them a cold stratification or just soak them overnight in warm water before seeding.  Lupines are easy to grow.  They like moist areas but tolerate drought.


There are good reasons to grow lupine other than their drop-dead gorgeousness.  Permaculturists value lupine as nitrogen fixers and phosphorus accumulators.  Bees and other nectar-eating pollinators value the abundant nectar from lupines.  Lacewings like to lay eggs on them. Birds eat their seeds. And we feast on their beauty.

Photo Credit

Lupines of Cape Cod, L Fulton, 2016

Perched Among the Lupines, Michael Carr of Somersworth, NH 2013

Keep Your Lettuce Sweet

Heirloom Vegetable Seeds

by Sandy SwegelRows of Lettuce

It’s only the beginning of June, but hot days can already cause your lettuce to begin to turn bitter or bolt. But an attentive gardener can keep her lettuce sweet and tasty with a few easy tricks.

Lettuce generally turns bitter when it begins to mature or bolt. The most obvious environmental factors that cause bitterness are high heat and water stress. There are some studies that suggest long day length also speeds bolting. It’s a bit too much trouble to test this and create darkness for your lettuce but there’s a lot you can do to sweeten your lettuce.

Keep it cool.

Light row cover over the lettuce in the easiest way to cool it down. Just keep the sun from baking it. Alternatively next year you can plant the lettuce somewhere it gets shade in the hottest parts of the day.

Keep it well watered.

Sometimes we don’t notice how hot it is becoming and we don’t increase our watering to compensate. Make sure your lettuce is consistently well watered and doesn’t go through stressful too wet/too dry cycles.

Thin your lettuce.

Loose leaf lettuce can get bitter from being planted too densely and not thinned. This is probably just water and nutrient stress from overcrowding, but give those plants a little more room. By thinning as lettuce grows.

Pick it in the morning.

A cool night is often enough to sweeten lettuce so pick the lettuce in the cool of morning, not just before dinner. Bring a bucket of water with you to harvest and put the lettuce directly into the water after picking.


And if your lettuce is already bitter?

No need to eat it bitter or toss it into the compost pile. Wash and dry the lettuce and put it in a crisper in the refrigerator for at least a few hours and up to a couple of days. Lettuce is one of those plants that keeps growing even after it is cut so it will often respond to its new cool humid environment by “sweetening up.”

If your lettuce is still bitter? Send it to compost or toss it in with other vegetables when juicing. You’ll get the vitamins but not notice the bitterness amid the other strong vegetable tastes.

Photo credit:
http://phys.org/news/2015-11-lettuce-quality-conditions.html

Weeds Are Our Friends

Tips for Weeds

by Sandy Swegel 

Say what? Well, Spring weeds ARE my friends. August weeds not so much. But Spring is finally overcoming winter and the big leafy weeds are the proof.

So what’s to love about Spring Weeds? The most important thing is they are an abundant source of food for pollinators. They are also delightfully pretty if you don’t think of them as weeds. I especially love the wild mustards. Invasive in lawns and on bare garden soils, blue mustards’ very tiny blue flowers are everywhere and are an excellent food source for awakening bees. Bees can’t live on dandelions alone you know.

To a gardener, the best part about spring weeds is WEED TEA and COMPOST.

Weeds, especially the perennial ones like dock and thistle, are an excellent source of nutrients because of their deep tap roots. To capture these nutrients in a usable form, you have to break down the plant tissue. The easiest thing to do is just keep throwing the leaves on the compost pile. This time of year your compost bin has too many “browns” anyway with all the dead winter material. The “greens” of spring coupled with warm weather jump-starts your pile.

But if you want to really get all those nutrients available to your plants and soil, you’ll want to make some Weed Tea.

Weed Tea Recipe

Get a big container.  A Rubbermaid garbage can will work, or make a small batch in a 5-gallon bucket. Put in all the weeds you can gather. I throw in cut leaves and whole plants. Put this container someway far away from your back door where you can’t smell it!

Here’s what’s going in my bucket:
Yellow dock leaves…these are everywhere.
Pulled or dug thistles.
Comfrey if you have it….these are especially full of nitrogen, phosphorus and potassium.
Nettles. Wear gloves.
Crabgrass with clumps of dirt still attached.
Dandelions, salsify, prickly lettuce, even bindweed if it’s up already. Nothing’s going to survive this stew.
Pond scum.


Now fill your container with water at least 12 inches over the plant material. And let stand until it is a disgusting gooey stew of fermented and stinking rotted material. Stir weekly. That smell is anaerobic decomposition. If the weather is warm, this takes maybe 10 days or as long as 4 weeks if it’s cooler. That’s it. You’ve made the best fertilizer you will ever use. Capture the liquid to use to pour directly (I dilute about 1 part weed tea to 4 parts water) on your garden beds. Strain some and put it in a sprayer for foliar feeding. Hold your breath and throw the stinking mess of weed material on your compost pile.

My favorite use of weed tea is to use it as a foliar feed and watch the treated plants green up overnight. This is especially good on tomatoes.  Spring Weeds really are a gardener’s friend!

Photo credits

http://wildfoodgirl.com/2013/denver-mustard-mania/

http://permaculturenews.org/2013/12/06/simple-recipe-fertilizer-tea/


Mexican Hat Plant … Ole’

Wildflower Seeds

by Sandy Swegel

What’s your favorite wildflower? When I ask that of people in Colorado, I often get answers like Columbine, a delightful airy flower found in the mountains. But when I go into people’s gardens and see what they actually grow, I often find the wonderful yellow and red Ratiba columnifera that some call Mexican Hat plant or Prairie Coneflower.

Anyone who has driven in the prairie has seen massive fields of these red and yellow flowers growing among the grasses.  This one to two-foot-high wildflower is perennial and sometimes doesn’t bloom until its second year. But once it starts blooming, it gives color and repeats blooms from midsummer to Fall. It does need some cold stratification for good germination. Everything else about the wildly hot-colored plant is easy. It grows in terrible soil. It will tolerate drought. Deer don’t like it. Ratiba likes sun but handles quite a bit of shade. It looks great mixed with grasses or in a summer garden with Black-eyed Susans and Purple Coneflower.

If just being cute and a sturdy plant isn’t enough, Ratiba is also an important food for native bees.

The only problem I have with this plant is getting the Mexican Hat Song out of my head!


http://www.bromeleighad.com/2013/08/prairie-coneflower-naturally-dyed-yarn.html?m=1

How To Deal with Troublesome Pests In Container Gardens

Pests Control Tips

by Angela Thomas04.20.16a

Many gardeners choose to grow plants in containers for the ease of planting and for the convenience of placing the containers anywhere they want. Maintaining healthy plants in a container garden is no different from plants in a garden.

However, container plants need more care. Taking care of them slightly differs from regular plants. They have limited soil volume and are subject to more stress than garden plants which requires constant monitoring for pests. If you’re looking to save time and the stress of having to find the pests that may of intruded into your garden. It could it be worth checking out the best home security camera deals on the market to make finding the pests and what they’ve left behind easier for you.

You must regularly inspect the foliage, bloom, and fruits to find out signs of infestation. You must also examine the underside of the leaves and stems as some insects hide in those places.
If the plants have any infected or dead leaves, you must immediately remove them. If you find few yellow leaves are on the bottom of the stem, do not worry as they naturally occur when the plants grow.

Mix a few drops of mild detergent in water and wash the foliage. Container plants will benefit from this if you repeat it every month.

If the infestation does not respond to soapy water, you may have to use commercial pesticides that are designed to control specific pests. These days manufacturers offer alternatives to chemical pesticides so visit the local store and buy the products if infestation continues. While using such products, you must always follow the instructions, and they must be kept out of reach of children.

To avoid pest infestations, do not reuse the soil especially if the plants were affected by bacteria. Even though the soil looks fine, it might be contaminated or have insect eggs which are hard to see. This infographic on natural pest control methods can give you the ideas to get it done on your own. However, if you would prefer to get some professional help, rather then do it by yourself, then you could always check out someone like pest control Des Moines.

04.20.16b

Clean containers will be helpful to prevent problems. When you are going to start a new planting, scrub the pots and containers using liquid detergent and water. To reuse an infested pot, soak it in a solution of one part household bleach to ten parts water for about an hour. Rinse all the pots thoroughly and dry them in sunlight before planting. Keep in mind that the area around the containers should also be clean as dirty surroundings is a way through which pests attack plants. After using the tools to treat the infested plant, thoroughly wash them, before you use it on other plants.

Healthy plants can fight off pests that attack them. So make sure you give the plants adequate sunlight, organic fertilizers, and water. There must be proper space between plants so that there will be enough air circulation. If pests infest a plant, keep them away from the rest of the plants because they will infest the healthy ones too.Many pests infect container grown plants especially spider mites. Stressed plants are most likely to be attacked by pests than healthy ones. So regularly monitor plants so that you will be able to detect problems in the early stages.

[http://i.imgur.com/RXdrB4W.jpg] (Plants in containers)

[http://i.imgur.com/QjYu9XV.jpg] (Cleaning container)