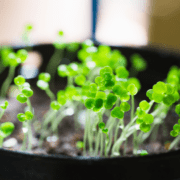
Grow Watercress Indoors

How to Grow Watercress Indoors

by Sandy Swegel

Watercress is another one of those unassuming, almost weedy, plants that is a superfood for humans. In the brassica family of heirloom vegetables, watercress (Nasturtium officianale) is rich in vitamins, minerals (especially calcium) and sulfides. It’s not just for watercress sandwiches and tea. It is a great addition to salads as either sprouts or leaves, excellent juiced or added to juices and makes a lovely pureed spring soup. And pretty yummy just for nibbling.

Watercress is a great plant to start at the beginning of the growing season, but you can also grow watercress indoors during winter. We’ll teach you how.


Sprouts

Watercress sprouts easily and you can grow it in a jar just like you do alfalfa seeds. Its spicy kick is great on sandwiches and salads.

Plants

Seeds are pretty easy to germinate. The biggest challenge to grow watercress indoors is that it needs to always be moist, especially during germination. You can accomplish this by starting the seeds in a small pot of clean potting mix and then setting the pot in a saucer of water. Misting is great or put a plastic cover over the seed mix if your air is dry. Someplace slightly warm like the top of the frig is a great germination spot. They don’t need light to germinate.


Once the seeds are growing, you just need to be sure the plants are moist with fresh water. Think about their ideal natural habitat in Europe: slow-moving creek edges in bright shade. Some people grow them in water tanks with aerators if you want to get fancy.

One secret to tasty watercress is to keep the growing plant cool and out of hot sun and to harvest it before it flowers. After flowering, the leaves become more bitter.


To grow watercress indoors in late winter is such a promise of Spring. But it doesn’t need to be an indoor plant. After your weather warms to above freezing, you can plant your watercress outside if you have a place that stays pretty moist. (Learn more about Zones and Frost Dates). If you have a pond or fountain the watercress is thrilled living in a pot in about an inch or two of water along the edge. I’ve seen it in a shade pot with impatiens and it was pretty happy.

And once you have nice succulent leaves, watercress, slivers of cold cucumber and butter on thin white bread is actually pretty awesome.


Not sure what heirloom vegetables are or why you should grow them? Read more from Gardening Know How.

Windowsill Basil

How to Have Basil in the Winter

by Sandy Swegel

Two Ways to Have Basil all Winter.

August heat is hard on basil. The plants keep producing seed heads and as fast as you try to cut them back, new flowers start with the warm weather. Once the basil goes to seed you can still use the leaves, but they often have a bitter flavor.

But there are ways to keep enjoying fresh sweet basil all winter, besides the obvious strategies of drying or freezing the herbs.

In order to have windowsill basil you need to start seeds in a small window box planter now. This planter starts outside and comes into a bright windowsill as soon as temperatures go below 40 or so. Strew an entire packet of seeds over the soil. You will be growing the basil to a size somewhere between micro-greens and full-sized. The seed should germinate quickly and with regular watering, young plants will start to develop and should be several inches high by frost. Once inside, you can cut them down to the bottom leaves with scissors and the young plants will keep regrowing. If it gets really cold outside, you have to move the plants away from the window because the basil will freeze if they are leaning again the glass. If the basil gets buggy with aphids, you can bring the entire container to the kitchen sink and give it a shower.

Mason Jar Basil
If you don’t have seeds but you have purchased one of those pricey basil plants with the roots still on from the grocery store, you can keep growing that plant indoors. These have been grown hydroponically so you can put them in a mason jar with water on a kitchen windowsill. It might wilt for a week or so adapting, but will usually revive. Change the water every week or two. Again, harvest down to the bottom couple of leaves and the plant keeps regrowing.

Other greens and herbs like cilantro and lettuce also do well if you seed containers now and bring them in before they freeze. By winter the plants will be much bigger than micro-greens and will provide you with lots of intense flavor!


Heirloom Vegetable Seeds

Organic Heirloom Vegetable Seeds

Best Wildflower Seed Mixes

Wildflower and Grass Seed Mixes
Photocredits
http://www.urbanfarmonline.com/urban-gardening/backyard-gardening/5-herbs-perfect-for-container-gardening.aspx
http://melissaknorris.com/2014/02/growbasilindoorsallwinter/

Stay the Course: End of Season Gardening Tips.

Gardening Tips

by Sandy Swegel

It may still be blistering hot, but gardeners, especially in Zone 5, are on the home stretch. Days are getting noticeably shorter. Much of the work of the year culminates in the next month as it’s time to bring the harvest home so here are some end of season gardening tips. You have to pay extra attention in the next few weeks so you get the best harvest possible.

Keep the water steady.
This is not the time to skip watering for several days. Here’s the bad cycle. You forget to water for a day or two. Then you go out and put the water on for hours to compensate. This is a sure recipe for split fruit, especially tomatoes, and reduced fruit production.


Stay after the powdery mildew.
The mildew can be crazy on the squash and melons this time of year. Don’t let the whole vine turn to mildew. At the least, pull off the badly diseased leaves to keep the disease from spreading to the whole plant. Those squash, pumpkins and melons can still put out a lot of good fruit if they have some healthy leaves to photosynthesize.

Keep harvesting.
The more you harvest, the more your plants keep putting out new fruit. Don’t lose courage now just because your kitchen is overflowing with food to be processed or given away. Keep things in a cool area if needed till you get to it.

Consider a light fertilizing.
Some plants have really been putting out and spending themselves for you. I sometimes do a light foliar feed of kelp or other liquid organic fertilizers to keep the plants’ spirits up on these stressful long work days. I think the kelp helps with resisting disease too.

The season may have a long way to go…don’t get distracted by school startups and thoughts of Fall. Your garden’s glory days are here.


Photo credit:
www.rosalindcreasy.com/edible-garden-how-to/
smallimperfectgarden.wordpress.com/2014/09/15/picking-tomatoes-shouldnt-be-this-challenging/


Ancient Wisdom from Women who Grew Vegetables

Buffalo Bird Woman

by Sandy Swegel 

I learned the story this week of Buffalo Bird Woman, a Hidatsa Indian born around 1839 in the Dakotas. She and the women of her tribe were the ones who did all the farming from breaking hard ground to heavy harvesting and transporting. Toward the end of her life, she gave interviews about how her people had farmed sunflowers and corn and beans, and how they preserved and even seasoned them. It was the work of women. Her stories always start with phrases like, “My two mothers and my sister and I went out to the field…” or “My grandmother Turtle would break the hard new ground with a stick.”

But Buffalo Bird Woman was also a scientist in her approach and gives detailed information about creating soil fertility (and softening the ground), about the timing and order of planting. Unlike the stories we hear of other tribes planting beans and corn and squash into single holes, the Hidatsas had an elaborate system that included sunflowers. They also planted in rows and pre-sprouted their corn and had a strict timing system.

Here was how you knew when to plant corn:
“We knew when corn planting time came by observing the leaves of the wild gooseberry bushes. This bush is the first of the woods to leaf in the spring. Old women of the village were going to the woods daily to gather firewood; and when they saw that the wild gooseberry bushes were almost in full leaf, they said, “It is time for you to begin planting corn!”

I think you’ll find it delightful to meet Buffalo Bird Woman. There is a children’s book based on her childhood called Buffalo Bird Girl.

There are even recipes for good warrior food like sunflower-seed balls.

Buffalo Bird Woman’s story of the practice of agriculture among her people is available free online at the Upenn digital library: http://digital.library.upenn.edu/women/buffalo/garden/garden.html

An interview with her was also included in the PBS series, The Sky Above Us.” http://www.pbs.org/weta/thewest/program/episodes/eight/tospeak.htm
At the end of her life, the practices of her people modernized into Western ways, she bragged:

I think our old way of raising corn is better than the new way taught us by white men. Last year, our agent held an agricultural fair… and we Indians competed for prizes for the best corn. The corn which I sent to the fair took the first prize… I cultivated the corn exactly as in the old times, with a hoe.
Buffalo Bird Woman


Flowers to set the mood

Flower Arrangement Tips

by Sandy Swegel

One of my favorite jobs each year is designing twenty-two flower pots for an urban condo. The homeowners are real garden lovers but they live in the middle of the city on a high floor. Rather than be content to just look at the amazing mountain vistas their elevation provides, they decided to bring flowers to them in profusely planted pots.

The fun for me is not just designing the interesting combinations of flowers and foliage, but also using the flowers to set the mood for each tiny “room” on the deck.

Here are some of the moods I’ve asked the flowers to set this year.

Sweet, soft gentle awakening.
I love vivid designs, but sometimes one needs to move slowly into the day. So the flowers outside the bedroom window are pretty and not too stirring. Salmon geraniums with spilling blue lobelia. A small white pot with water plants like papyrus. A gentle mood set for early morning.

Late Afternoon Jolt of Wow
The east side of the deck has afternoon shade and really comfy chairs, so it’s a grand spot for guests and afternoon cocktails. Planters here are full of what I call the diva plants: giant purples and oranges. Weird grasses or showy reds. This year a feathery purple Japanese Maple surrounded by orange tropical kangaroo paw and goldfish plant and any other odd orange flowery thing I could find provide the centerpiece. Last year a hot red castor bean plant and lime green foliage and fuchsia colored flowers did the trick. Pots on the perimeter are full of giant petunias and cascading sweet potato vines. Diva flowers always look even more amazing after a few margaritas.

Dinner time
After cocktails, people shift to the grill area. Plants are sturdy here on a west deck. A couple of potted evergreens to balance the big grill and table. Orange hibiscus that is bright and colorful but doesn’t mind being jostled or heated by the grill. Multi-colored coleus to create the illusion of color and texture in the setting shade. An herb pot in case the grills needs some extra rosemary sprigs.
Fading light
After the sun sets, people move indoors and even though there are soft solar lights coming on near a fountain, the flowers fade in the coming night. Exceptions are the white alyssum and silver foliage spread throughout pots that glow under moonlight or the orange osteospermum with the purple fluorescent centers that hold the light a little longer.

Flowers are such powerful influences in our lives. We choose what we grow for many reasons.

One more thing Bees and Humans have in common: We’re Addicted.

Bees Have Their Addictions Too

by Sandy Swegel

Nature magazine published a scientific study with the odd news that bees, when given a choice, prefer nectar with the neonic pesticides in them. Given a choice, even though scientists don’t think bee can smell or taste the pesticide, bees opt for neonic-treated plants or neonic-treated sugar solutions. Why? It’s because of the “nics.” The nics in neonics are nicotine compounds. A bee sipping on a flower gets the same rush as human dragging on a cigarette. Wow! We really have to get this substance out of the environment.

The study looks at both honey bees and wild bees. Both wanted the nicotine hit.

Of course, it was just last year that Science magazine reported that bees get addicted to caffeine too and prefer nectar and flowers with caffeine over other nectar.


Bees and Humans both love our drugs.

Earlier in the week, I was feeling hopeful because about 90% of the plants at our local Home Depot were neonic-free. Last year virtually all of them had been treated with the pesticide, but Home Depot is requiring more and more of its growers to be neonic-free. That’s hundreds of thousands of plants in our area.

But the Nature article shows us that while we can enjoy the small victories, but we have to keep paying attention to who is silently poisoning our environment.

We know you are our allies with the bees. You use our untreated seeds and you plant our wildflower mixes. Let’s keep up the good fight.


http://mappingignorance.org/2014/01/27/bees-are-coffee-addicts-too/

http://www.tattoojohnny.com/search/cigarette

My Number One Secret for Growing Tomatoes

It’s All in the Soil

by Sandy Swegel

A local grower and I were chatting today about all the ways people grow tomatoes. My friend was laughing at somebody who had an elaborate setup with walls of water in the snow. I don’t necessarily use walls of water, but I understand our local Zone 5 competitions to have tomatoes by the 4th of July. The walls of water help warm the soil and of course, entertain the gardener.

There are many “secrets” to growing tomatoes. Some people put their hope in fertilizers and supplements like Epsom salt. Others do a lot of pruning of “suckers.” And there is no substitute for regular consistent water that doesn’t let the soil dry out.

But for me, the most important part of growing tomatoes is digging and preparing the hole you’re going to plant in. I generally plant little plants…2-1/4 inch pots…somewhere around May 15th. And I do believe in planting deep so roots can grow all along the stem. But back to the importance of preparing the hole you’re going to plant in.

My secret for growing tomatoes is a big humongous hole at least half full of compost.

Step One. Take a five-gallon pot (a bucket can work too) and dig the hole so big that the bucket fits completely in the hole. That usually means you have to keep going back and widening the hole to get the bucket all the way down. And it’s usually a pain digging into that subsoil. If the soil is very clay like, I loosen up the bottom and sides by slicing cuts in both for draining. I fill at least half the hole with finished compost. I put in some finished composted manure if I have it. I throw in some rather unfinished compost too. I mix in an organic fertilizer that includes phosphorus. I’ll also add any other goodies I have like kelp or alfalfa meal. Leaf mulch if I have some. I don’t mind if a worm or two ends up in there too. I then fill the rest of the hole with original soil and mix it well. I water it.

Only now is the hole ready for the tomato. I pluck off its lower leaves and plant the tomato up to its neck. I put the trellis or whatever support I’ll need now. And that’s it. I personally run a drip line with a timer since it’s so dry here and I don’t want my sporadic memory to sporadically water. I’ve done comparison tests year after year with people who dig holes only large enough to squeeze the plant in. They never get the number of tomatoes I get. My large composted planting hole means the tomato puts out a huge rootball that gobbles up all that good compost and fertilizer food produces a huge crop of tomatoes. If you only have a shovel-sized hole in the ground for your tomato, you only have little roots to feed the plant. If you don’t believe me, when winter comes this year, pull up your tomato and see how big your rootball is.

So if you want a lot of healthy tomatoes this year, take out your shovel and work up a sweat preparing that soil!

Photo credit:

World Tomato Society


Make your own seed tape

DIY Seed Tape

by Sandy Swegel

I’ve been toying with my new packet of the Cosmic purple carrot seeds. They are so colorful I can’t wait to see them in my garden. Or better, on my own plate. But the seeds are so darn small. Some years I’ve put the seeds in and forgotten to thin the hundreds of carrot seedlings coming up and I end up with really skinny carrots. Seed tape is an obvious solution but pricey…and I don’t want ordinary orange carrots…I want purple carrots! Never mind my recent googling discovery that carrots used to be purple until about the 17th century. Then growers in Holland, trying to be patriotic to the ruling “House of Orange” hybridized seed until they got “orange.” I swear, I couldn’t make this stuff up. There is some thought the Dutch might have made it up, but that’s the official story told in the Netherlands.

It’s crazy easy to make your own seed tape.
Most of the DIY seed tapes involve dollops of glue and trying to drop a single seed onto to the glue.
My favorite technique is this:
Cut a length of thin toilet paper about one inch wide.
Put some seeds onto a flat plate
Put some glue into a tiny bowl.


Dip a toothpick into the glue and then use it to pick up a seed or two. Put the seed onto the paper. About an inch apart. That’s it. It’s not much glue so you don’t have a long drying time.

If you are going to plant soon, I don’t think you need to put on another piece of paper to hold the seeds in place. Just go out and plant.

Now, I don’t actually plant in single rows. I like to plant in swaths. So I skip cutting the toilet paper and just glue down three staggered rows of seed right onto the toilet paper.

I can’t wait for my swath of purple carrots to appear!


Photo credit:
http://pegrowe.com/?page_id=1684
http://www.treehugger.com/lawn-garden/why-carrots-are-orange-and-5-non-orange-carrots-grow-your-garden.htm


Best Heirloom Vegetable Seed

Wildflower Mixes

Pollinator Mixes

Grass Seed


Thrills, Fills, Spills

Flower Pot Rhyme

by Sandy Swegel

These are your clues today to have a container garden that causes people to stop in their tracks. This cute little rhyme is how the professional designers make fabulous flower pots. If you learn how to follow this basic rule, your designs will be breathtaking whether you are using traditional annuals or native plants or succulents.

THRILL

The thrill is the highlight of your pot. It’s tall and commands space and attention. Often the thrill is brilliantly colorful with big flowers or something unusual like red foliage. Some of the thrills I use are

Large tropical hibiscus or canna lilies or castor beans if I’m going for color.

Red grasses if I’m going native, a knockout rose if I’m going for an English garden look.

An agave or euphorbia if I’m going desert garden, big multicolored coleus if you’re in the shade, a mini tree or shrub works too.  A thrill is a big plant that catches your eye from a distance.

You place the thrill slightly to the back of the center of the pot.

FILL

The fill is next. This is several plants of medium flowering height. They provide fullness and reliable color. Don’t be stingy with plants: the secret is to have no soil showing. Geraniums or salvias or shorter zinnias or daisy-like flowers do the job well. Place two or three “fills” around the central “thriller.”

SPILL

Finally, two or three “spillers” are needed around the edge of the pot. Anything from sweet potato vine to creeping Jenny, or petunias or million bells. You want to have overflowing plants soften the edges of your pot…and it makes the planting look twice as big and luxuriously abundant.

That’s it….the basic recipe. Now you can read the container gardening magazines and books and see how most ‘artistic’ designs are just variations on this theme.

Photo credit:
http://tidbitsandtwine.com/container-garden-formula/
Sandy Swegel

Early Spring Flowers for Pollinators

Why to Plant These Wildflower Seeds

by Sandy Swegel

Hungry pollinators are starting to wake up. Well, maybe not this week in Colorado if they are smart. We still have a foot of old snow on the ground, but the sun will come out later this week and I expect to see the first crocuses poke out from the melting snow.

The first warm days of Spring bring out lots of our pollinator friends. In a long winter like this, honey supplies are running short and honeybees are eager for fresh food. Wild bees and bumblebees who don’t have honey stores are very hungry. Ladybugs that woke up a few weeks ago and have been eating aphid eggs in the leaf litter are eager for some sweet nectar or pollen. Everybody’s hungry and are flocking to the first flowers to gather nectar and protein. They need to build up their own strength and to provide food for Spring babies.


You can spot some of the first pollinators of the season if you look closely at the first Spring bulbs. Plan to plant more flowers for pollinators in your garden if you want to attract more. You can lure pollinators to your yard by having the first flowers. Then they’ll stay for the rest of the season if you have flowers in bloom all year.


Some of the easiest spring flowers to grow are:
Crocus
Snowdrops
Grape hyacinths
Daffodils
Tulips, especially native tulips.

Little bulbs like snowdrops and grape hyacinths re-seed themselves and naturalize a good-sized patch. If you don’t have these in your own yard, it’s easy dig up a few bulbs from a friend’s overgrown patch and transplant into your own garden. They don’t mind the transplanting too much and will bloom as usual…attracting more pollinators to your yard.

So bend down close to those little crocus flowers to see our pollinator friends. Bring a camera. The bees get groggy from gorging on pollen and are often moving pretty slowly, so it’s easy to get a good picture.


Photo credits:
Mason bee on crocus: http://www.earthtimes.org/scitech/saving-bees-new-pesticide/2612/

Bee on tulip: http://matthewwills.com/tag/honey-bees/

Bee on muscari and fly on snowdrop: http://urbanpollinators.blogspot.co.uk/2014/03/more-early-spring-flowers-for.html

To make your pollinator garden click here!

comp