Growing Tulips

Three Myths about Growing Tulips04.22.16

by Sandy Swegel

We are having a beautiful tulip year despite heavy snows. Trees broke in half, but the tulip stems were just short enough when it snowed that they didn’t break. Walking around the neighborhood in wonder at tulips under broken trees, I thought about how sturdy tulips really are. There are some false myths about how you have to coddle tulips, but they are easier than you think.

The Myths:
Myth One: Tulips don’t bloom in the shade.

Once again my neighbor who loves flowers but isn’t all that interested in working in the garden has an amazing garden bed even though she didn’t follow the rules. She planted tulips along the concrete foundation of the north side of her house. These tulips never get a single ray of sun winter or summer because of the high roof. They are never fed. They are now putting on their third year of beautiful bloom because they don’t know the rules!

Now I’m not advising you to plant in full shade, but I do regularly plant in areas that seems marginal. Tulips don’t need a full day of sun. Nor do they need sun during bloom time. I’ve seen beautiful tulips under shady deciduous trees because there’s plenty of sun for the growing tulip foliage before the tree leafs out.

04.22.16a

Myth Two. You have to leave the leaves on them until they turn brown.

I’ve tested this myth for years now and it is indeed not true. You can cut off the foliage much sooner than you think. All those people who tie the dying foliage in cute knots could just cut the foliage off. An elderly neighbor who had the most beautiful tulips each year said that as soon as the foliage looks a little limp (but still green) it is no longer photosynthesizing enough to make food for the bulb and you can cut it down.

Myth Three: Tulips are perennials. Plant them once and have years of beauty.04.22.16b

Some tulips are perennials. The original species bulbs are perennial. But the fancier the flower, the less likely the tulip will come back. This is especially true of multicolored tulips. The tulip color “break” is cause by a virus. So the tulip is awesomely beautiful but is weakened by the virus and often dies that year. You need to plant those every year.

Some single color tulips are perennial in perfect conditions. But tulip varieties that thrive in one garden won’t return in other gardens. This is especially true if you have heavy clay soil that doesn’t drain well. My lucky neighbor with tulips in the shade lost all of the tulips that she planted in the hard-pan lawn in the full sun. The soil was horrible after 20 years of a neglected lawn and the root competition was too much. But they were beautiful the first year so she’s happy.

Tulips are such a delight of the Spring garden. Make a note in your calendar right now for next September: Plant more tulips!


http://us.hellomagazine.com/travel/gallery/201103255154/tulip/fields/holland/10/

Rules You Can’t Break

Some Rules You Can’t Break

by Sandy Swegel


Nature is a fierce taskmaster. We can bend many rules by starting seeds in our basements under lights or planting tomatoes in Walls of Water in the snow. But there are definite limits to how much nature will bend to our will and when we’ve just gone too far. A warm early Spring and now a deadly April blizzard have brought to mind who really makes the rules here…and it’s not gardeners.

Laws of Time and Space that can’t be broken.

Six weeks before last frost
The rule of thumb for cool season plants is to seed six weeks before last frost. April 1st is 6 weeks before our last frost, but a warm spell had impatient gardeners planting peas in February. Some peas did come up but many more rotted under the sodden snows and rains. Others were eaten by birds and mice. Most people had to replant.

After danger of frost has past
Really. 72 degrees in early April is not a reason to break this law. My eager neighbor planted green beans a couple of weeks ago. It was very warm and they sprouted and started to grow. They all turned brown and died in our below-freezing temperatures this weekend.

Snow on Crabapple Blossoms


Days to Harvest
Well, I’ve tried the squash planting experiments and learned what the seed packets say. It takes 100 days to get my favorite butternut squash ripe before killing frosts in the Fall. I cannot procrastinate and not get the seeds planted until June 14th like I did two years ago. No amount of heat or sun or fertilizer speeds up the natural process of development. The squashes were beautiful but immature and not edible. Nature doesn’t forgive procrastinators no matter how well-intentioned.

Fruit tree flowering
The law of time sadly broken this weekend was by people who plant trees that bloom early. In eastern Colorado, one of the frequently planted and least productive fruit trees is the apricot. It buds and blooms in very early Spring and hopes are raised for a grand harvest. Then inevitably there are April freezes and all the flowers freeze. We get apricots maybe every seven to ten years. It just doesn’t make sense to plant them. But now with more global warming-induced fluctuating temperatures, we are going to have the same problems with our reliable fruit trees: apples, plums and pears. A warm Spring brought all the fruit trees into full bloom last week….when the trees are most susceptible to killing frosts. It may be as cold as 24 degrees tonight which could me no backyard or local fruit this year…the second year in a row. We have to begin choosing very late budding trees to handle climate change.


There are many other laws that can’t be broken. Anyone who has forgotten to thin the carrots knows you can’t break Laws of Space and expect normal carrots….instead you have hundreds of carrots thinner than chopsticks. I tried breaking the Laws of Light and Dark by falling for beautiful pineapple sage at the garden center. It only blooms when the days get short. Our days get short about a week before Fall frost….so the plant sat without bloom most of the summer until a fabulous October display and then frost.

To be happy, successful gardeners, we must notice how nature works and try to work with her, not against her. Climate change is discouraging to say the least, but we can adapt.


Two ways to have more birds in your yard

Gardening Tips

by Sandy Swegel

I was chatting with a local bird habitat specialist hoping for some tips on what I could plant or build that would attract more birds to my new garden. I was surprised as she struggled to think of flowers that might work. Then she blurted: “The biggest obstacle to birds in the garden is the humans.” If the humans would just quit “improving” the garden, more birds would automatically come.

Don’t deadhead so much.

She elaborated, the first most important thing to do for birds is to quit deadheading so much and leave the seed heads of spent flowers on the plant so the seeds can mature. You can do some deadheading to keep your plants making more flowers, but especially at the end of the plant’s season, you need to leave the seeds on. I used to throw the seed heads into a corner of the garden near a bird feeder, but I learned that birds don’t like to eat off the ground unless they are desperate. They like to land on the top of the seed stalk and bend over and pull the seeds out one by one. Up on top of the plant, they feel safer from predators and can fly off at a moment’s notice.


Learn to Tolerate Some Pests

The other mistake gardeners make that discourages birds is being too diligent about getting rid of all the pests and larvae in the garden. Leaving some pests may damage a few plants, but birds need caterpillars and bugs in the spring to feed their hungry babies. A pest-free garden is not a healthy habitat. And you won’t have to worry about the pests overtaking your garden in most cases because the birds are going to eat them!

So to attract more birds to your garden, let your garden look a little more unruly. I did get a couple of plant ideas of seeds birds particularly like: coreopsis, sunflowers, coneflowers and cosmos are all seed heads that birds consider especially yummy.


Photocredits

rachelinthegarden.wordpress.com
animalstime.com/what-feed-baby-bird-what-feed-baby-birds/
audubonportland.org/about/events/hidden-habitats
birdnote.org

Two Ways to Guarantee Your Outdoor Seeds Grow

Seed Starting

by Sandy SwegelPre-sprouting seeds

The next few weeks are crucial for new gardeners. Every year in Spring, first-time gardeners buy some seeds and dig up a garden on the first really warm weekend and sprinkle the seeds out. Then they wait. For some, within the month, weather conditions will be good and they’ll have their first garden seedlings and they will be totally hooked on the magic of gardening.

For others, something bad happens that the newbies don’t know about. They don’t realize they have to water. Or a couple of hot days come and burn the new seedlings to a crisp. Maybe the neighborhood crows watch you plant and come to eat every last pea. Sometimes the soil is cold and it’s just too early to germinate seeds. These newbie gardeners lose hope and say they just have a black thumb and give up gardening.

If you’ve had failures but are still willing to give a garden from seed a try, I have two techniques that virtually guarantee your seeds will germinate outdoors. These are especially good ideas if you’ve given up trying to grow some things because they never work for you. For years I just thought I was broccoli-impaired until I tried these hints.

First of course, you have to start your garden bed.

HOW TO START A GARDEN BED.

You can till and/or turn the soil by hand but you don’t have too if the soil is not solid concrete.
Dig out the weeds. Get the roots if you can.
Take a rake and make the soil level and a bit smoothed out.
Water soil with a soft sprayer if the soil is dry.
Sprinkle seed over the soil. How much seed and how far apart is written in the little print on the packet.
Pat the seed lightly with your hands so there is contact between the seed and the soil. Bury the seed slightly if the packet says so.

If you live in someplace humid and warm, that’s enough. Your seeds should come up.

If you live someplace dry or with fluctuating temperature or you’ve had failures in the past, try these two success techniques:

Sprouts

#1 ROW COVER

Lay a sheet of row cover loosely over the seeded bed. You want it nice and loose so the plants can grow and the row cover lifts with them. I use some heavy rocks to hold down the row cover so it doesn’t blow away. The row cover helps the seeds stay moist enough to germinate and raises the soil temperature a few degrees so the seeds germinate faster.

Water with the soft sprayer. Note….I water right on top of the row cover. You don’t have to lift it to water underneath often causing the seeds to float away. It’s permeable so the water makes its way through.

#2 PRE-SOAK AND PRE-GERMINATE the difficult seeds.

Pea sproutsSeeds like peas or carrots respond well if soak them in warm water in a bowl overnight, drain them, then plant. The soaking activates the enzymes that break the seed coat and speeds up germination. If it’s a seed you really have trouble with, you can put the seeds on a wet paper towel in a baggie and wait a few days until you see the sprouts.

These two shortcuts…pre-germination and row cover…work for me all the time. And I get better germination which means I get more plants per packet of seeds and save even more money.

Now go out and grow some food and flowers!


Photo credits:
http://daphnesdandelions.blogspot.com/2010_09_01_archive.html
http://learningandyearning.com/tag/pre-sprouting/

Tomato Lovers: It’s Time! Make Your Decisions!

Heirloom Vegetable Seeds

by Sandy Swegel

If you don’t already have your tomatoes growing….this is The Day. April 1st is my official day to start my tomatoes indoors. I’m in Zone 5 and last frost is six weeks away. You may start yours earlier if you live in a warmer place or have walls of water or other season extenders. No matter where you are, if you want tomatoes and haven’t seeded them yet…Do It Now. Or start a new variety or two because come late summer, we can’t possibly have too many tomatoes.

How to Decide What Tomato to grow.

Gardeners used to have only about five different varieties of tomatoes available to them. Now there are literally hundreds. Here are the tomato seeds we carry and the reason why you might grow each of them:

Beefsteak

Everybody knows this tomato. It’s the perfect big slice for hamburgers on the grill. It’s a manly tomato….a big sturdy tomato that holds up on the grill and on sandwiches.

Black Krim

This is my favorite tomato. It has a rich heirloom taste like many of the black tomatoes and it pumps out lots of medium-sized tomatoes. This makes it perfect for eating right off of the plant on a hot summer day. Earlier than some heirlooms.

Cherokee Purple

Cherokee isn’t just a marketing name. This is an heirloom tomato saved by the Cherokee people pre-1890s. Another black tomato with great taste. Gnarly looking tomatoes, too, which makes it even more interesting.

Amish Paste, Organic

This is a “paste” tomato. It’s very meaty and not too watery. It’s ideal for making sauces. Because it is so meaty, it’s also excellent for sun-drying. It is determinate, so most of the fruit ripens at the same time which is perfect for canning.

Aunt Ruby’s German Green

Remember to label this one in your garden. I spent one year waiting for them to turn red. Why grow green tomatoes? Because they have a unique flavor that is fresh and sweet. The flavor is lighter than the dark tomatoes. Aunt Ruby’s German Green is often a winner is our back yard taste tests.

Pink Brandywine

Brandywine is well known as an heirloom that defines what tomatoes “used to taste like.” These are big delicious fruit. Their growing season is a little longer so you have to be patient….but then they produce lots of tomatoes. And give this plant more space. It’s a giant.

Red Pear

Red pears are smaller pear-shaped tomatoes and are an heirloom dating back to colonial times. Pear tomatoes taste like regular tomatoes but are really prolific. In the olden days, people preserved them as “tomato figs.”


Jumpstart your Lettuce Garden

Heirloom Vegetable Seeds

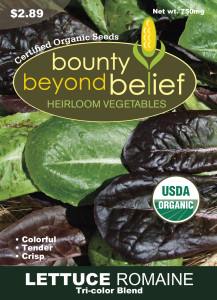
Our new tricolor blend of romaine lettuces has me itching to get my salad garden started. I like Romaines because they are especially nutritious, comparable to kale. And I like this blend because it’s shiny and colorful. There’s a lovely gloss to the colorful Romaines that looks beautiful in the garden and on the plate. I want my food pretty!

OrgLettuceRoamaineTri_BBB

It’s pretty easy to get lettuce ready to eat earlier than your standard growing season. If you’re either busy or lazy (or both as I often am) there are some almost no work ways to get your salad growing.

Almost No Extra Work: Row Cover

Direct seed as usual into your garden. Put a layer of row cover loosely over the area. Secure with anchors or with heavy rocks which will also capture a tiny bit of extra heat. The row cover alone will speed germinate the seeds if you have a spell of warmer weather. The row cover then will protect it if the warm weather is followed by frigid temps.

A Little Bit of Extra Work: Pots

Want to have lettuce even sooner? My friend Cathy seeds her lettuce in lightweight pots and brings them inside at night or when the weather is extreme. It’s easy for her because she has a south-facing sliding glass door and moving the pots in means sliding open the door and moving the pots two feet in or out. She has the extra satisfaction of going to the Farmer’s Market in April where market farmers are selling similar pots for $25.

Invest Work for the Future: Cold Frames

Cold frames are an awesome way of having more of your own fresh food. They do take some time and money….but you will quickly make up that investment with what you save on fresh greens.

Work like a Farmer for Lots of Lettuce: Plugs

Growing your own lettuce plugs is one way to get a garden of lettuce without thinning or empty spots. Start your seeds under lights in plug trays that you can plant out when it’s a bit warmer. Very satisfying to have a full evenly-space plot of lettuce plants in the hour or so it will take you to plant out the entire plug tray (100-200 plants).

http://wcfcourier.com/lifestyles/home-and-garden/gardening/lettuce-plant-some-frilly-fun-veggie-can-be-grown-in/article_2a856188-c725-5af2-960d-9fd1d89f4896.html

http://thefoxplot.com/tag/beekeeping/

Gardens at Monticello

What We Gardeners Have in Common with Thomas Jefferson

by Sandy Swegel

This Presidents’ Day led me to researching about the gardens of the White House. I expected to write about the many “heirlooms” that Jefferson gathered and preserved for us. He grew 330 varieties of vegetables and 170 varieties of fruit! I found myself instead captivated by the gardening relationship he shared with his oldest granddaughter Ann. His letters to the teenager Ann have been preserved and give us great insight into these talented gardeners.

There isn’t much about gardening that has changed much since the early 19th century. These are some of the things we know we have in common with the third US President and his granddaughter Ann.

We all want more flowers.

Jefferson was famous for collecting seeds from distant lands in order to grow more varieties at home. He quickly saw the natural consequence of his love of variety — running out of garden space — for he writes Anne in 1806:

“I find that the limited number of our flower beds will too much restrain the variety of flowers in which we might wish to indulge, and therefore I have resumed an idea…of a winding walk surrounding the lawn before the house, with a narrow border of flowers on each side.”

We know how to care for young plants.

In this late winter time of year, we gardeners always start too many young plants too early to actually plant and then have to prepare for their movement from my sunny light shelf to the cold outdoors. Ann too reports how careful she was with the many treasures her grandfather sent her in the winter of 1806.

“The grass, fowls, and flowers arrived safely on Monday afternoon. I planted the former in a box of rich earth and covered it for a few nights until I thought it had taken root and then by degrees, for fear of rendering it too delicate, exposed it again. I shall plant Governor Lewis’s peas as soon as the danger of frost is over.”

We watch the weather

When Ann was only 12 years old, Jefferson in the White House relied on her to report on the weather and its effects on the garden. “How stands the fruit with you in the neighborhood and at Monticello, and particularly the peas, as they are what will be in season when I come home. The figs also, have they been hurt?

We are never finished.

After Jefferson retired to Monticello, he and Ann continued to design and redesign the gardens. Ann’s younger sister Ellen described the delight the garden gave the entire family.

. . . Then when the flowers were in bloom, and we were in ecstasies over the rich purple and crimson, or pure white, or delicate lilac, or pale yellow of the blossoms, how he would sympathize in our admiration, or discuss with my mother and elder sister new groupings and combinations and contrasts. Oh, these were happy moments for us and for him!”

Jefferson on Happiness
Jefferson planned many years for his retirement to Monticello. When at last he was able to retire to the gardens Ann had nurtured in his absence, he wrote:

“the total change of occupation from the house & writing-table to constant employment in the garden & farm has added wonderfully to my happiness. it is seldom & with great reluctance I ever take up a pen. I read some, but not much.”
Fortunately for us as a nation, most of his life was not spent in the garden, but he knew, as we do, how special and sacred our gardens are.
The story of Monticello with 330 varieties of vegetables and 170 of fruit is a grand story. You can find out more here: https://www.monticello.org/site/house-and-gardens/thomas-jeffersons-legacy-gardening-and-food

Photocredit
https://flowergardengirl.wordpress.com
http://www.marthastewart.com/945486/monticellos-vegetable-garden#933708
https://www.monticello.org

Six Reasons to Grow Borage

Borage Gardening Tips

by Sandy Swegel

  1. Bees love borage

Bees absolutely cover the plant when it is in bloom.  And bloom lasts a long time and repeats throughout the season.  Bees and other pollinators seem to prefer it to other nearby plants.  Must be extra tasty or sweet.

  1. Borage is super easy to grow

My neighbor lets her’s grow along her alleyway against chain link fence.  No water, no fertilizing….just run off from the grass and a bit of shade.  When the plants go to seed, she throws the seed heads a little further down the fence line.  Even in our arid climate, that’s hospitable enough for borage to grow.  No deadheading or fussing…just lots of plants. It’s is supposed to be an annual, but it acts like a perennial….plants grow back in the same place every year.

  1. Birds love borage

Borage makes a lot of flowers and seed heads.  In the Fall, the birds were hanging out on the sunflower heads nearby and I didn’t notice them in the borage.  But this Spring morning, about eight of those little birds that chatter so much in spring were digging and rooting in the borage patch.  Bird food in February is a good thing!


  1. Borage is edible for humans

The young greens can be added to mixed salads or steamed. (Older leaves are too hairy and not so yummy.)  The little flowers are adorable in salads. Pastry chefs candy the flowers for decorating desserts.

  1. Borage is medicinal. It has long been a medicinal herb for skin diseases, melancholy, diabetes and heart conditions. Borage oil is an important anti-inflammatory.
  2. And the number one reason to grow borage: They’re Blue!!!!!

OK, that’s the real reason I grow borage.  Blue flowers make me so happy and the blue of borage is one of the most amazing blues in the plant kingdom.


Photo Credits:

http://medicinalherbinfo.org

http://shop.gourmetsweetbotanicals.com/

http://kiwimana.co.nz/borage-good-for-bees/

Planting Wildflowers

Grow a Wildflower Meadow!

by Sandy Swegel

This blog post is for anyone who wants to grow wildflowers.  It is especially dedicated to BBB Seeds’ friends at the Rockies Audubon Society who have an awesome program called Habitat Heroes that encourages “wildscaping” your garden with native plants that attract pollinators and birds and support wildlife even in an urban area.

  • Deciding What and Where to Grow

Look at the site where you want to grow a wildflower meadow or patch.  An ideal site would have sun and good drainage and not too many weeds. Nature seldom provides what we consider ideal. So the next step is choosing the right mix of wildflowers.  We help by providing mixes for unique conditions such as sites that are dry or sites that shady.

  • Prepare the Soil

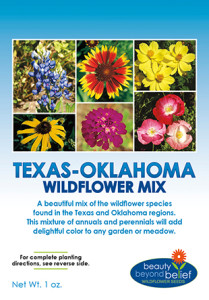
TX-OK-1oz

Some don’ts:

  • Don’t deep till!

That’s the number one rule….unless you are planning a year ahead of time.  There are enormous numbers of weed seeds in any soil and tilling up the soil brings up all those weed seeds to the light and they start to grow.  You do have to deal with weeds and you will lightly till/scratch in a shallowly.  But this is time to leave the tiller in the garage.

  • Don’t use weed killer

Especially don’t use the weed killers for your lawn or those with pre-emergents that stop new seeds from germinating. Those will have long-lasting effects that will thwart your wildflower growing efforts.

  • Weeds:

You will have to deal with weeds especially if you have an area that is pretty barren of other vegetation.  People have good success with putting down black fabric or cardboard weeks ahead of time to suffocate the weeds.  For big hunkin’ weeds like dock, it’s good to get the shovel out. You can’t get all the weeds, but after you put your seeds out, you won’t be doing any weed-pulling for a while because you’ll accidentally pull the new wildflowers or disturb their young roots. Replacing weeds with wildflowers will be an ongoing process.

  • Scratch and Rake

You do need to break the soil and rake it smooth, but not more than 2-3 inches deep.  You want little crevices for the seeds to slip into so they have a cozy home.  I’ve had the best success by loosening that top couple inches of soil and waiting a couple of weeks for all the weeds to germinate. I then scratch up those weeds, rake again, and then put the wildflower seed out.

  • How Much To Plant

One ounce of seed (a small packet) plants about 100-150 square feet.  (eg 10 feet by 15 feet.)  Follow this rule of thumb.  Planting more than this makes the plants choke each other out.  Planting less gives weeds free run.

Expert Tip:  Mix some sand with the wildflower seed to make it easier to spread the tiny wildflower seeds evenly.  About four parts sand to one part seed.


  • When to Plant

If you live someplace mild and humid, you can plant almost anytime.  The rest of us either plant in the Spring (about one month before last frost date) or Fall.

  • Water

That’s the biggest challenge for many.  If you aren’t living in the above mentioned mild and humid area, you need to be sure the wildflowers get enough water.  One gardening buddy said her secret was to go out and seed the night before a big snowstorm and let the melting snow help.  I personally use row cover over the area to keep water from evaporating.  I also use a soft rain nozzle to hand water over everything.

Our website has a Resources Section with more detailed instructions on seeding wildflowers. https://bbbseed.com/wildflower-grass-tips/


That’s really it.

Pick an appropriate wildflower mix.

Get rid of the huge weeds and prepare the top couple inches of soil.

Plant.

Water.

Wait for Nature to do What She Does Best: Create beauty for you and food for all the wild creatures.


Before and After Pictures are some of my favorite things.  The Habitat Heroes program has awesome before and after pictures that will inspire you:

Photo Credit:

http://rockies.audubon.org/get-involved/habitat-hero-winners

A Parking lot median at the West View Rec Center in Westminster, CO, before and after

02.15.16 'Planting Wildflowers' WestViewRecCenter

02.15.16 'Planting Wildflowers' WestViewRecCenter2


Walla Walla Sweet Onions…You know you want them

Heirloom Vegetable Seeds

by Sandy Swegel

It doesn’t take much effort to convince us we should grow Walla Walla sweet onions. Think about thick slices hot from the grill. Or cold on our hot cheeseburger. Dream of oven-roasted whole onions. Or be one of those brave people who bite into the Walla Walla like it’s an apple.

Onions are really easy to grow so when I heard the Walla Walla Sweet Onion seed had arrived at BBB Seed for the first time, I rushed over. There’s only one problem for me with Walla Walls….their growing season is 125 days…a little longer than I can count on in Colorado. So I start the seeds indoors in February and transplant the seedlings in April.


The most important rule of growing onions is you have to use fresh seed. After a year or so, germination rates drop down to “almost none” so you do need new seeds each year.

Onions grow happily in decent soil. They can handle hot sun and they’ve forgiven me letting the weeds get a little overrun. There’s not too much guesswork as to when they are ripe…their tops fall over. So you can grow onions off in a corner of your garden without too much extra effort. Although quite labor intensive for farmers, onions are pretty cheap at the grocery so we don’t grow them so much to save money as to capture the awesome flavor of fresh homegrown Walla Wallas.


For more pictures and recipes, go to the website of the annual Walla Walla festival!
OR go to the festival in June!


Photo Credits:
http://www.sweetonions.org/

http://www.wiveswithknives.net/2010/08/02/potato-walla-walla-onion-and-gruyere-galette/
http://savorthebest.com/roasted-sweet-baby-walla-walla-onions/