Four Tips for Growing Your Best Watermelons

Gardening Tips

by Heather Stone

Picture of a just-cut red watermelon

Photo courtesy of pixabay

If you have space, make room for a hill or two of watermelons in your garden. They are easy to grow and like any fruit and vegetable, they just taste better when they are plucked straight from the garden. Besides, nothing says summer quite like a juicy slice of watermelon.


Here are a few tips for successfully growing watermelon.


    1. Choose the right variety for your climate

Most watermelons need 80-95 days to ripen, but some varieties require even longer. Choose one that works for your area. You can get a head start by starting seeds indoors about three weeks before your last frost date or by purchasing established plants. Plant outside when all chances of frost have passed and the soil temperatures are in the 70’s.


  1. Give them room to roam

Watermelons need lots of room to ramble. It is not uncommon for vines to reach up to 20 feet in length. The vines don’t like to be regularly moved so pick a spot where you can let them roam freely.


  1. Know when to water

Keep plants moist when starting off and until fruits begin to form. Watermelons are fairly deep-rooted plants, so in some climates, you might not need a lot of extra moisture except during extended dry periods. When watering, water at the roots and try to avoid getting the leaves wet. This helps to keep down on the spread of fungal diseases. Once the fruit has begun to set, experts say to hold off on the water to concentrate the sugars in the fruit, giving you a sweeter melon.


  1. Know when to harvest

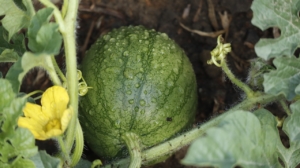
    Tips for growing watermelon.

    Photo courtesy of pixabay

It’s not always easy to know when your watermelon is ripe. To start, check the “days to harvest” of your variety and begin to check for maturity when plants have reached that age. The color of the bottom spot where the melon sits on the ground will turn from white to yellow as the melon matures. Also, watch for the rind to turn from a bright, slick appearance to a more dulled look. The skin or rind should be tough enough that a thumbnail won’t pierce the skin. After picking, chill for best flavor.

 

June Garden Chore List

Gardening Tips

By Heather Stone

Here are some June garden chores to keep your veggies and flowers going strong.

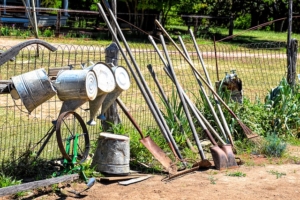
Buckets and gardening tools lined up along a fence.

Photo courtesy of pixabay

  1. Cage or trellis any vining vegetables such as cucumbers, beans and tomatoes. By training these vegetables to grow up you are saving precious garden space and keeping the fruit off of the ground and away from critters. Click here for trellis ideas!


  1. Continue watering your vegetable and perennial beds. Try to keep water close to the roots and off of leaves. Checked potted plants often, they tend to dry out faster.


  1. Keep up with the weeds! This can start to feel like a never-ending battle at this time of year, but keeping the weeds under control means more nutrients, water and sunlight for your vegetables and flowers.


  1. Mulch around vegetables to help conserve water.


  1. Side dress with compost for a mid-season boost.
An oldfashioned wooden wheel barrow..

photo courtesy of pixabay

  1. Begin replacing cool season crops that have begun to wind done or have bolted from heat.


  1. Plant successive crops of summer greens like collards, kale, chard and lettuce (Protect them from hot afternoon sun).


  1. Transplant any remaining warm season vegetable starts.


  1. Plant your squash, melon and cucumber seeds if you haven’t already.


  1. Keep an eye out for pests.


  1. Keep your birdbaths full and clean.


  1. Plant a new patch of bush beans every couple of weeks.


  1. Pinch out suckers on your tomatoes.


  1. Keep deadheading perennials for continued bloom.


  1. Sit back, relax and enjoy your garden.

ILLITERATE GARDEN

Garden Problems We All Have

By: Sandy Swegel

“My garden is illiterate.  It didn’t read the book about what it can’t do.”

That was the wisecracking opening remark at a gardening talk I attended recently.  We all laughed and during the break we started talking about some of the stupidest plants we know.

Looking at wild plants, we laughed about orchids native to cold, arid Colorado.  But the most illiterate plants are the ones we humans planted because we didn’t know better.

The plants that don’t know they can’t survive in Zone 5.

Pineapple sage don’t you know anything? You like living in semi-tropics.  What are you doing living another year in the Colorado clay soil iris garden with 70 mph winds?

The plants that don’t know that being an annual means can’t live longer than one year.

Yep Verbena bonariensis I’m talking about you.  The books say you are an annual but I’ve watched you survive for three years in a row.  Ditto snapdragons…I have trees younger than you.

Plants that don’t know they are supposed to be invasive.

I’m waiting for you, bamboo. Any day now you’re supposed to fill in that entire border between my yard and my neighbor’s ugly garage.  Sure, four years ago I saw one runner into the grass…but what have you done lately?

Codependent plants.

These are the plants that not only don’t know they can’t survive but also put up with terrible abuse.  Don’t be sweet-talking me Japanese Maple.  You know who you are.  You croaked all those times I planted you in protected areas and nurtured you with extra mulch in winter and water in summer.  But the year I put you, a tree, in a pot with six other plants on a third-floor deck without protection from the cold and without winter watering…that’s the year you survive?

If it were up to humans, we’d never have surprises in the garden or tulips blooming in July or scabiosa blooming in December literally under the snow.  Or the gallardia that blooms in my driveway. We won’t even mention the weed that seeded and bloomed in my truck bumper the December I was driving around Louisiana.

What a relief that our plants are so darn illiterate.


Photocredits:

fullycoolpix.blogspot.com/2014/08/plants-live-everywhere.html

www.boredpanda.com/plants-flowers-versus-concrete-asphalt-pavement/


The Windy Garden

Building a Wind Resistant Garden

By: Sandy Swegel

This could be a perfectly beautiful early Spring. We’ve had a week of warm sunny weather that is waking up the daffodils and tulips. Birds are flitting about and energetically singing out mating calls. It’s a joyful break from dark winter days. But then there’s the wind. Chinook winds. Or as they were called the year I lived in the Alps, “scheiss foen.” Everyone understood if the foen had arrived that you could be in a foul mood because of the irritability and headaches from the air pressure changes these mountain-made winds caused.

Wind can have devastating effects on a garden. Sure the strong winds can break stems and tree branches, but the greatest stressors comes from the drying effects of the winds. Plants close their stomata (leaf pores) to reduce water loss, but that slows the plants’ ability to grow. The winds desiccate the plant tissue and dry out the top inches of the soil meaning the plants need more water. Even plants under snow cover can get very drought stressed because the winds evaporate the snow before it can melt.

If it’s going to be a windy season, I make a few mental changes in my garden plans. Here’s things to consider if you have a windy garden:

Use more drought tolerant plants.
Increase your watering after the winds die down.
Grow shorter plants.
Grow plants like lavender with thinner leaves that won’t desiccate so easily.
Plant some tall ornamental grasses through the flower garden. They look beautiful in the wind and provide some wind break protection.
Plant evergreens as windbreaks.
Consider a garden wall.

And take an aspirin for your sinus headache.


Photocredits:

http://clarenbridgegardencentre.ie/
Top Tips for Windy Gardens
http://www.pc.gc.ca/pn-np/ab/waterton/ne/ne-galerie-gallery-2.aspx?a=1&photo=%7Bdfae32e8-4d1e-47e4-a909-08c9ea68dd13%7D

February Plant of the Month – Carrots

Plant of the Month

February 2017


Common Name:

Scarlet Nantes Carrot

Scientific Name:

Dacus carota var. sativus

Native Range:

Mediterranean Region

Hardiness Zone:

4 to 10

Days to Maturity:

65-75

General Description:

Scarlet Nantes Carrot is a standard market carrot that has a long, cylindrical shape and a rich reddish-orange color. The flavor is sweet and delicious. Roots are fine-grained, containing almost no core. High moisture content makes this variety perfect for juicing. Carrots can reach up to 7 inches long. To prevent diseases, rotate planting location every season.

Site Requirements:

  • Light: Full sun. Will tolerate very light shade.
  • Water: Moderate moisture. Crusted soil can suppress germinated sprouts.
  • Soil: Well-drained soil with organic matter. The area needs to be free of stones.

Seeding:

This cool-weather crop is easily over-planted due to its fine seeds. Sow seeds directly into loose soil in early spring 2-3 weeks before last frost date. Carrots are slow to germinate, emerging in 2-4 weeks. Cover seeds with a ¼ inch of soil—no more than ½ an inch. Lightly water seeds every day for best germination. Once sprouts emerge thinning is critical to reducing competition. Thin seedlings to 1/2 – 1-inch spacing. Best time for thinning is when soil is damp. Plant seeds every 2-3 weeks throughout midsummer for continuous harvest.

Harvest Time:

Start harvesting as soon as carrots have reached the desired size (up to 7 inches). Try pulling up one at a time to check the size. Watering the area before harvest can make pulling by hand easier. Harvest by mid-September to avoid pest damage.

Fun Facts:

  • Carrots are a great source of fiber, potassium and vitamin A.
  • Carrot greens can be used in soup stock, pesto, curries or tea.
  • Common pest: carrot rust fly
  • British gardeners plant sage around the area to repel the carrot fly

Drought again?!

Gardening Tips

by Sandy Swegel

Unseasonably warm weather means I finally had time to get some more bulbs planted this week.  It has been warm and sunny this fall but I didn’t fully realize how drought had snuck up on us until I went to dig the deep holes for the daffodils.  In decent garden soil that has had regular if modest irrigation all year, the soil below six inches was dry dry dry.  Pulverized dirt dry.  During times of drought, the soil all over dries down.  The water table recedes and deep-rooted trees and grasses have used up whatever water is available.  We can keep irrigating with an inch of water a week on the surface, but it’s not possible to water enough to keep the soil moist deep in the ground if there’s no natural rainfall.

Drought really snuck up on lots of the US this year.  Except for poor southern California, most of the country started the year with good water.  Now significant parts of the plains and southeast (as well as southern California which started the year dry) are experiencing moderate to severe drought.  See the drought monitor for your area.  http://droughtmonitor.unl.edu  In my area, we went from an awesome spring to virtually no rain since July.

So what’s happening in your garden now?  Here’s what happens in moderate drought:

Soil with clay in it turns hard and cracks open.  (The clay shrinks when it dries out.)

Soil critters go into self-preservation mode.   During times of drought, they have varying survival techniques from as simple as laying eggs for the next generation once conditions improve.  Earthworms go into a hibernation-like state called estivation.  Balled up little earthworms are what I found in my garden bed when I was planting bulbs.

What can you do besides pray for rain or snow or freeze?

Give your trees and shrubs a good long slow-watering now.  Trees need 10 gallons of water per inch of trunk diameter once a month.  If your irrigation is still turn on, you can run it longer than usual.  Or put a light sprinkler on for several hours.  Here’s a great fact-sheet on ways to water trees during drought.   http://www.colostate.edu/Dept/CoopExt/4dmg/Trees/caring.htm

Otherwise, leave the soil alone.  Digging in too dry soil ruins soil texture just like digging in too wet soil.  The soil I had dug for the daffodils was like dust when I filled the holes back in.

Pay attention to rain or snow this month.  If you aren’t getting significant precipitation, water the trees and shrubs once a month even if the ground is frozen.

And pray for rain.

Bird Baths

Eight critters you can find in your bird baths

by Sandy Swegel

Cute little birds hatched out of a nest in my roof eaves this spring so I decided to put a bird bath in the front yard so I could watch strategically from the window. I didn’t have traditional bird baths so shallow stone bowls on the ground had to make do. It’s been a couple of months and I have yet to see the birds in the bath although they may splash about when I’m not home. I have discovered lots of critters need water in the heat of summer. Here’s who shows up if you have a water source in your yard.

8. Wasps

OK, so they’re not my favorite although they have an important role in the garden. Wasps aren’t just insatiably thirsty, the water is crucial for keeping their nests cool.

7. Mosquito Larvae
Duh…standing water attracts mosquitoes. Since West Nile is prevalent around here, I empty out the water whenever I see the tiny larvae swimming around.

6. Raccoons
Fortunately, we don’t have too many raccoons in my yard, but if the birdbath is all muddy or knocked over, it’s a sign the raccoons were there.


5. Bunnies
We have a bunny overpopulation this year. Officially, I hate them. They chow down on young garden plants and my favorite flowers. Secretly they are so cute. It’s been so hot and dry who could deny a baby rabbit a sip of water. I guess the baby squirrels can drink too.

4. Bees
I always make sure there are rocks in my bird bath for the bees to stand on so they don’t drown. Bees need lots of water for digestion and to cool the hive.


3. Butterflies
Be sure to have nice shallow water to attract butterflies. These are so delightful! Even the cabbage moths are cute.


2. All the other mammals
Neighborhood dogs, deer taking a break from eating your flowers. If it’s a big enough bird bath, you might get a bear or two in bear country. My friends used a motion detector night camera to catch a bobcat drinking from their little water pond.

1. And finally birds!

Photos:

http://www.scoontemplations.com/2012/06/bunny-with-death-wish.html
http://hillsidegardencenter.com

http://animalwall.xyz/bird-bath-fun-water-hd-background/

Keep Your Sunflowers Blooming

Wildflower Seeds

by Sandy Swegel

Sunflowers inspire a primordial joy in us.  We may be rosarians, orchid specialists, rock plant lovers or even urban folk who barely see the outdoors, but sunflowers against a blue sky spark an inner gasp of delight.  Sunflowers often plant themselves on their own and can manage to grow without any attention from us, but if we have a nice little patch of sunflowers, we can nurture them so they last and last for weeks longer than their normal bloom.

What to do to get the most of your sunflowers?

Keep them deadheaded until the end of the season.

If you deadhead your sunflowers, they will keep pumping out new blossoms in their will to create seeds and more sunflowers.  Don’t cut the stalk way back, the next sunflower often forms just inches from the place you deadheaded.

Leave the very last batch of spent flowers for the birds and for next year’s flowers.

When it seems like the sunflowers are slowing down, do leave the last set on flower heads on the plant for the birds.  Even if its a little ugly going into Fall, birds like the seed heads right on the plant.  Little finches especially like to sit on top of the old brown seed head and bend over and pluck seeds out.


Give the sunflowers a splash of water

If your sunflowers have self-seeded into a dry back alley or someplace in hot sun, throw them a bucket of water once in a while during hot spells.  They’ll survive without the extra water, but thrive with it…and make more sunflowers just for you.

Photos:

www.pinterest.com/dreamwild/birds-bugs-butterflies-flowers-to-paint/

https://kanesonbikes.files.wordpress.com/2013/09/p9020895.jpg

http://www.lovethispic.com/uploaded_images/33858-Sunflower-Farm.jpg

Tomatoes in the Heat

Tips for Gardening in the Heat

by Sandy Swegel

My neighbor is panicking and frantically watering all her plants and trees that have droopy wilting leaves. The leaves weren’t getting any better and she feared there was some horrid disease killing everything. But there isn’t some disease…the plants are just stressed by our heat wave with temperatures in the 90s and above. One way plants cope with heat is to let their leaves droop or fold so that they aren’t losing so much water from the leaf surface.


Still, plants coping or not, a heat wave means you are getting few tomatoes. Plants quit setting fruit when the temps are above 92 or so no matter how many pollinators you have. So what can you do? When temperatures are a little lower, July is the time when I usually recommend a good fertilizing to keep the tomatoes at production. But in the heat, tomatoes are just struggling to live and fertilizing may just add to the stress.

What can you do for your heat-stressed plants?

Make sure you keep your watering consistent. You don’t need to drown the plants. No amount of water is going to compensate for temperature.

Mulch any exposed soil exposed to direct sun. Some tomato plants have already shaded the entire surface with leaves, but if there is garden soil getting hit by full sun, put some mulch or grass clippings or old leaves over the soil to keep it from baking in the sun.

If it looks like the heat wave will last quite a while, try to shade your tomatoes. The most effective shading blocks the hot afternoon sun. You can try hoops with shade cloth or throw some row cover over the plants. One frugal local farmer stretches old bedsheets on T-posts on the western side of the plants. Any protection helps until the temperatures lower again. The shade also will help protect the fruit from sunburn.

Photos and information:
http://reaganite71.blogspot.com/2013/07/helping-your-tomatoes-survive-brutal.html
http://www.organicswgardening.com/article4.html
http://squarefoot.creatingforum.com/t3224-watering-during-a-heat-wave

Keep Your Lettuce Sweet

Heirloom Vegetable Seeds

by Sandy SwegelRows of Lettuce

It’s only the beginning of June, but hot days can already cause your lettuce to begin to turn bitter or bolt. But an attentive gardener can keep her lettuce sweet and tasty with a few easy tricks.

Lettuce generally turns bitter when it begins to mature or bolt. The most obvious environmental factors that cause bitterness are high heat and water stress. There are some studies that suggest long day length also speeds bolting. It’s a bit too much trouble to test this and create darkness for your lettuce but there’s a lot you can do to sweeten your lettuce.

Keep it cool.

Light row cover over the lettuce in the easiest way to cool it down. Just keep the sun from baking it. Alternatively next year you can plant the lettuce somewhere it gets shade in the hottest parts of the day.

Keep it well watered.

Sometimes we don’t notice how hot it is becoming and we don’t increase our watering to compensate. Make sure your lettuce is consistently well watered and doesn’t go through stressful too wet/too dry cycles.

Thin your lettuce.

Loose leaf lettuce can get bitter from being planted too densely and not thinned. This is probably just water and nutrient stress from overcrowding, but give those plants a little more room. By thinning as lettuce grows.

Pick it in the morning.

A cool night is often enough to sweeten lettuce so pick the lettuce in the cool of morning, not just before dinner. Bring a bucket of water with you to harvest and put the lettuce directly into the water after picking.


And if your lettuce is already bitter?

No need to eat it bitter or toss it into the compost pile. Wash and dry the lettuce and put it in a crisper in the refrigerator for at least a few hours and up to a couple of days. Lettuce is one of those plants that keeps growing even after it is cut so it will often respond to its new cool humid environment by “sweetening up.”

If your lettuce is still bitter? Send it to compost or toss it in with other vegetables when juicing. You’ll get the vitamins but not notice the bitterness amid the other strong vegetable tastes.

Photo credit:
http://phys.org/news/2015-11-lettuce-quality-conditions.html