Tag Archive for: Garden Maintenance

4 Ways to Compost in Winter

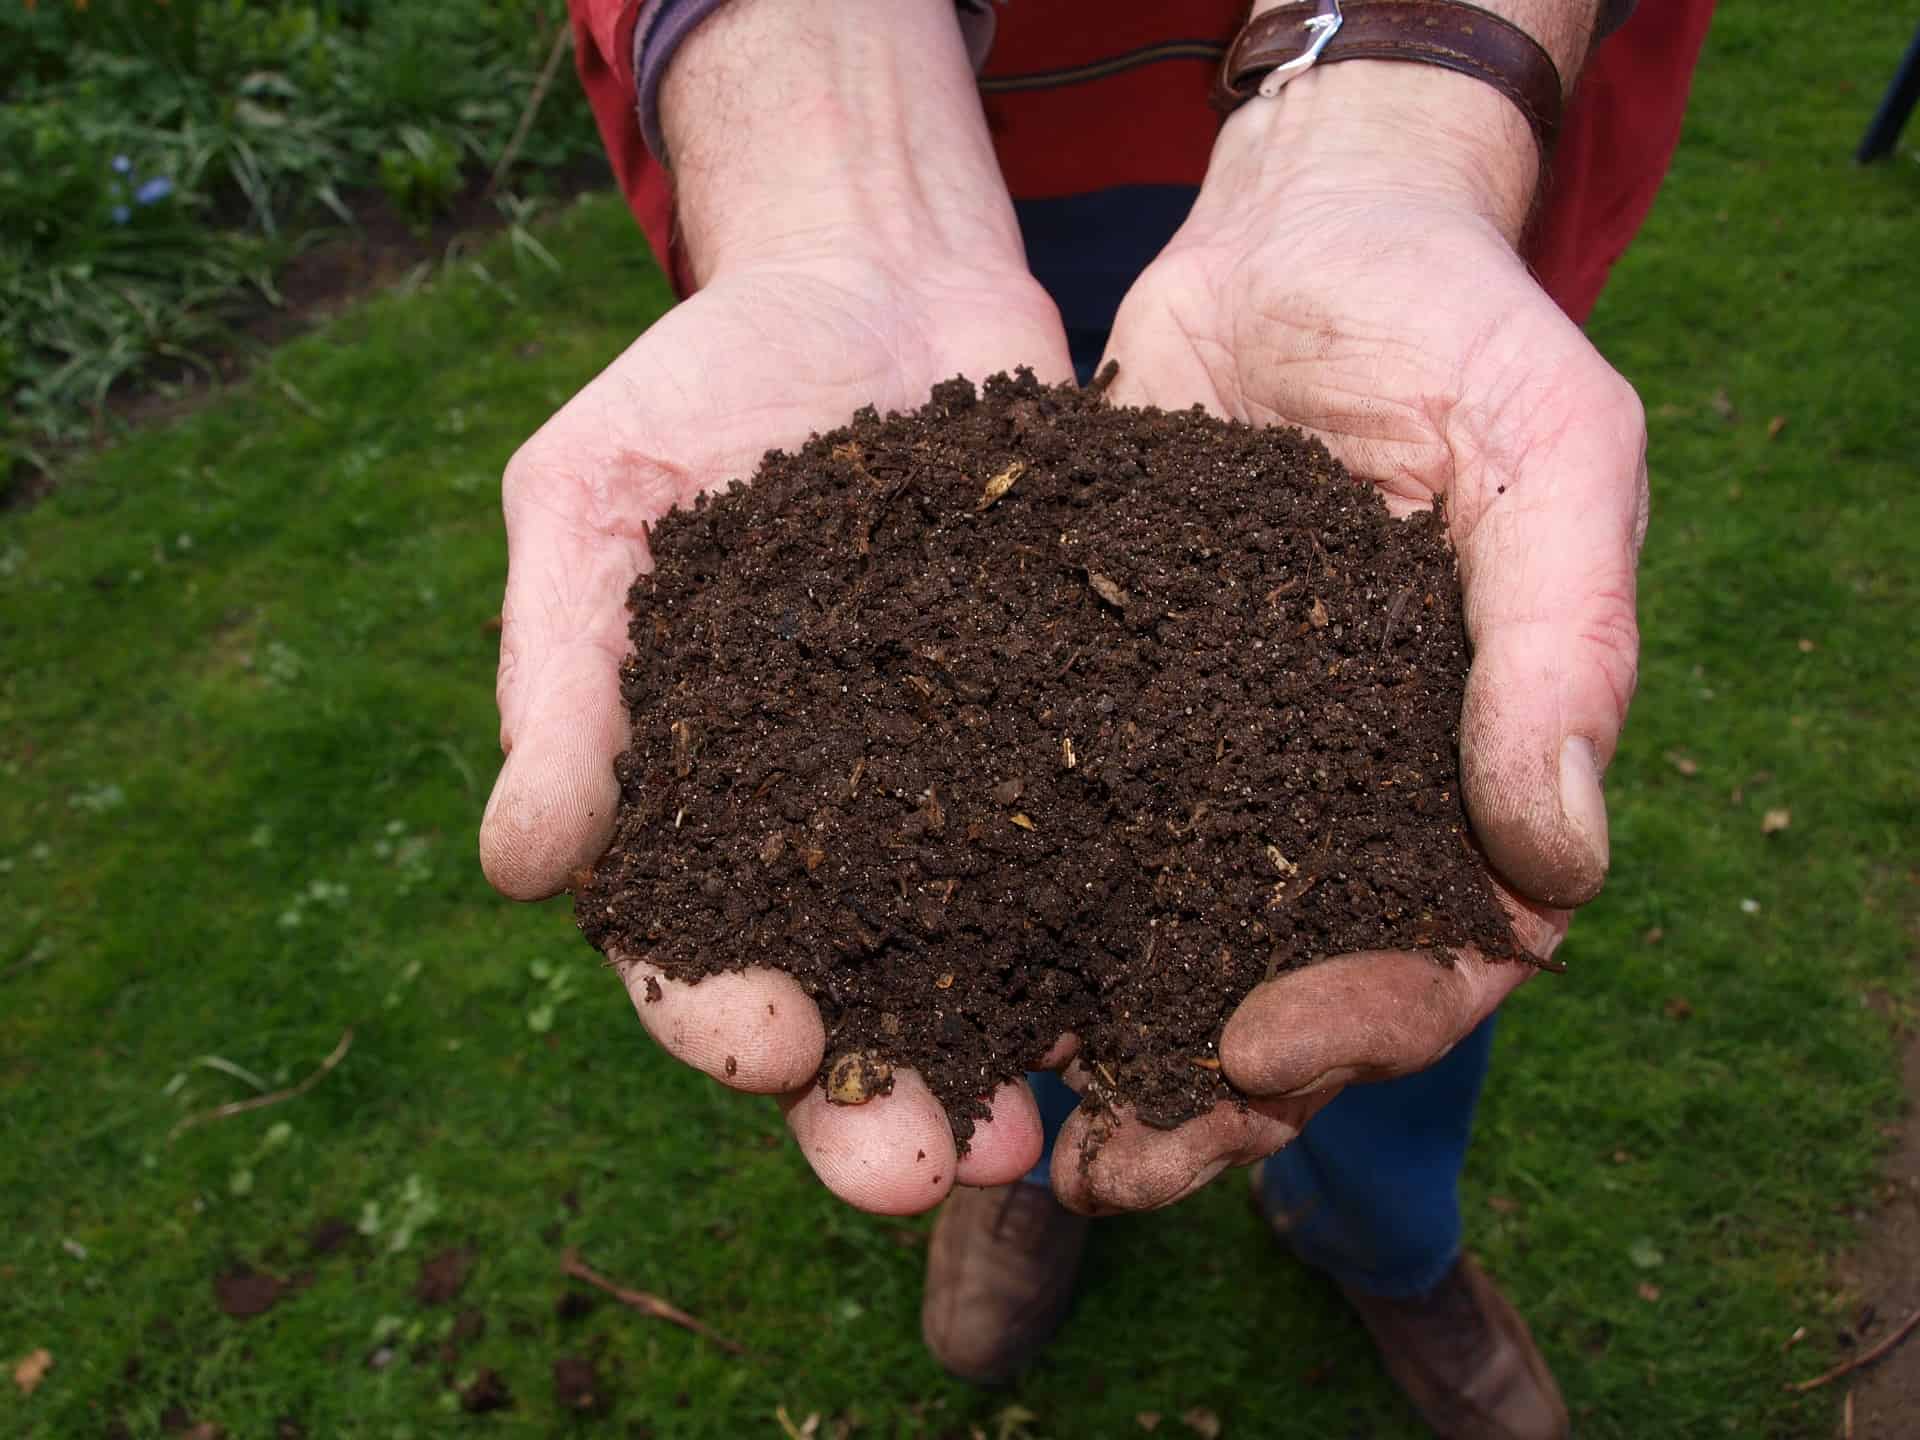
Composting in Cold WeatherPhoto of hands holding fresh compost.

by Sandy Swegel

It snowed yesterday.  It’s going to snow again today.  This makes me so happy because it means I get a vacation from work.  My gardening business is a lot like a teacher’s schedule.  Work like crazy most of the year then I get a wonderful interlude to catch up on the rest of my life.  Working in the garden may come to an end during Colorado winters, but eating usually continues and we continue to make lots of food scraps that any gardener would hate to waste.

When I lived on acreage, I did all my food composting by sending it through the chickens.  The backyard chickens loved food scraps and eagerly ran around when I brought the compost bucket. Even if it was just onion scraps and things they didn’t like to eat, they relished scratching it around and mixing it with the coop bedding and poop. Spring compost in the making.

Without chickens, there are still ways that you can compost in winter and capture your kitchen scraps:

1. Use your regular compost bin

I empty mine to about ¼ full of compost in progress with lots of worms.  I fill it all the way to the top with dry leaves and sort of hollow out the center. The leaves don’t freeze solid and all winter I drop the scraps down the middle of the leaves.  The leaves provide some insulation and the food scraps and leaves at the bottom of the pile are warmed enough by the earth that a tiny bit of composting keeps happening even when temps get well below freezing. The earthworms are slow but still keep working and reproducing.

2. Compost in a protected sunny spot

Keep a plastic (black if possible) bin against the house on a sunny side.  I started with the bin half full of partially finished compost that hopefully has some worms already busy in it.   The center, next to the ground, will stay unfrozen so the worms will stay alive.  The compost probably won’t process much over the winter except on sunny days.  You may need to secure it against raccoons or other varmints.

3. Make a trench

This takes a bit of planning before the cold weather arrives, but produces amazing results and saves time and labor.  Dig a long trench right in the garden…about a foot deep and a foot wide.  Leave the soil heaped right next to the trench with a rake nearby.  I left the excavated dirt on the side of the trench. Every time the indoor compost bin was full, I just took it out to the garden and dumped it into the trench.  If things weren’t too frozen, I pulled some of the excavated dirt on top of the food scraps. If there was snow on the ground, I just put the scraps on top, and eventually, it fell into the trench.

This process attracts all the worms to the trench.  Some composting takes place in the Fall but most decomposition happens in early Spring.  By early May, when it’s time to plant tomatoes, the compost is broken down enough that I can transplant my tomatoes directly into the filled trench that is crawling with decomposers and happy earthworms.  If it was a very cold winter and the compost isn’t finished, just plant right next to the trench.  Some people like to compost in trenches all year.  They set up a three-year rotating system where they compost one year, plant the next and use the area as a walkway the third year.  Pretty clever!

4. Make a windrow

John, the Worm Man, Anderson in northern Colorado keeps his worms happy all winter by setting up short windrows of compost, food scraps, and worms.  He throws old carpet or tarps over the top.  Periodically, he lifts the carpet and puts new scraps on top of the piles.  The worms slow down in winter but keep working and reproducing.  For small households, just make a pile on the ground and cover it with a tarp.  The tarp keeps moisture and some heat in.  Just slip the food under the tarp.  Worms show up.   This doesn’t work so well if you have raccoon or mice and rat issues.

Photo of a windrow compost

10 Reasons Why You Should Prune Trees and Shrubs

Tree & Shrub Pruning Tips

by Chris McLaughlin

Not sure about pruning your plants? We’ve compiled 10 reasons why you should prune trees and shrubs in your yard or garden to help maintain their long-term health.

Practicing simple techniques, using the right tools, along with proper timing for each plant species is the key to effective pruning and most require very little pruning in order to achieve the gardener’s goal. But before taking sharp tools to your plants, you should understand exactly what those goals are and why you’re pruning them in the first place.

Remember that every cut made will alter the plant’s shape and growth. In fact, the list below addresses the many reasons that any tree or shrub should be pruned in the yard or garden. If you are interested in having your trees or bushes trimmed, remember that you can use a service like TreeSurgeon.Care to help.

Here are ten great reasons to prune trees (including fruiting) and shrubs:


Reason #1: Vigor

Pruning a growing shoot stimulates new growth production. So if you’re looking for some vigorous new growth on a shrub, prune it hard (a lot). Consider this type of pruning when you have a shrub that has a weak section of growth; such as the back. In fact, when you “pinch” back new growth with your fingers on any plant, you’re actually pruning.

Reason #2: Shape

Plants that have grown out of balance with either the yard or their own growing pattern (such as stray and awkward branches) can be reshaped by pruning.

Reason #3: Restrict a Plant’s Size

This can be especially important if you live in an area with restricted space. Gardeners living in urban and suburban areas almost always have to prune trees and shrubs to keep them from out-growing the yard, garden, or container. Root-pruning is another technique that can help restrict the size of plants in containers.

Reason #4: Let in More Light

If you have an extremely shady yard or you’d like to have more sun reaching the area under a tree for plants or lawn, careful pruning can let in a little extra sunshine.

Reason #5: Health and Structural Soundness

Any diseased, injured, dying, or dead branches should be removed for the health of the tree. Branches that rub together should be removed to eliminate potential damage to a main branch. Much of maintaining structural soundness in a tree is about careful pruning practices such as not “topping” trees. Topping can make the tree weak and susceptible to pests. It’s also associated with the slow death even if it takes years for the tree to actually die.

Reason #6: Create Special Effects

Most often, pruning for special effects is seen in formal-type gardens. They often take the shape of boxwood topiary or an apple tree that’s been trained as an espalier. Pollarding or coppicing pruning techniques may be used, as well.

Reason #7: Encourage Flowering and Fruit

Pruning can coax growth spurs (produces the flowers and the fruit) to form on the branches. Strong flower buds are also encouraged to form due to pruning. Fruit trees can be lightly pruned in the summer which will provide better air circulation around the fruit. This results in less trouble with fruit diseases and the fruit ripens faster.

Reason #8: Protect People and Property

Prune trees that have been planted near homes, sheds, play structures, and other buildings as they propose a potential threat to human safety if heavy branches break off or the tree falls. They can also interfere with telephone or power lines. Proper pruning can keep people, pets, and property safe.

Reason #9: Keep Evergreens Proportionate

Pruning will keep boundary hedges under control. Evergreens benefit from light pruning as it keeps their foliage dense, and therefore, attractive.

Reason #10: Improve Appearance

Many gardeners’ top priority when pruning their plants is about their appearance in the yard or garden. Removing dead, unwanted branches, as well as suckers creates a pleasing shape and leaves plants looking neat and tidy. Many lovely blooming shrubs such the Butterfly Bush (Buddleia spp.) are capable of spectacular blossom displays due to good pruning techniques.

Usually pruning is about working with a plant’s natural growth pattern as it’s developing, as well as maintaining mature tree and shrub species. One of the few exceptions is when it’s used to create effects such as espalier. In general, a successful pruning job will leave your healthy, beautifully-shaped fruit trees or shrubs looking like they haven’t been touched at all.

Ready to get pruning in your garden? Check out our list of must-have gardening tools!

June Garden Chore List

Gardening Tips

By Heather Stone

Here are some June garden chores to keep your veggies and flowers going strong.

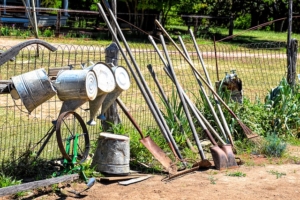
Buckets and gardening tools lined up along a fence.

Photo courtesy of pixabay

  1. Cage or trellis any vining vegetables such as cucumbers, beans and tomatoes. By training these vegetables to grow up you are saving precious garden space and keeping the fruit off of the ground and away from critters. Click here for trellis ideas!


  1. Continue watering your vegetable and perennial beds. Try to keep water close to the roots and off of leaves. Checked potted plants often, they tend to dry out faster.


  1. Keep up with the weeds! This can start to feel like a never-ending battle at this time of year, but keeping the weeds under control means more nutrients, water and sunlight for your vegetables and flowers.


  1. Mulch around vegetables to help conserve water.


  1. Side dress with compost for a mid-season boost.
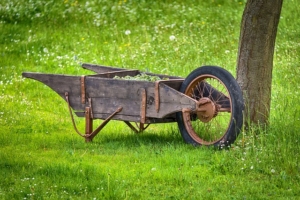
An oldfashioned wooden wheel barrow..

photo courtesy of pixabay

  1. Begin replacing cool season crops that have begun to wind done or have bolted from heat.


  1. Plant successive crops of summer greens like collards, kale, chard and lettuce (Protect them from hot afternoon sun).


  1. Transplant any remaining warm season vegetable starts.


  1. Plant your squash, melon and cucumber seeds if you haven’t already.


  1. Keep an eye out for pests.


  1. Keep your birdbaths full and clean.


  1. Plant a new patch of bush beans every couple of weeks.


  1. Pinch out suckers on your tomatoes.


  1. Keep deadheading perennials for continued bloom.


  1. Sit back, relax and enjoy your garden.

Tomato Staking 101

Supporting Tomatoes

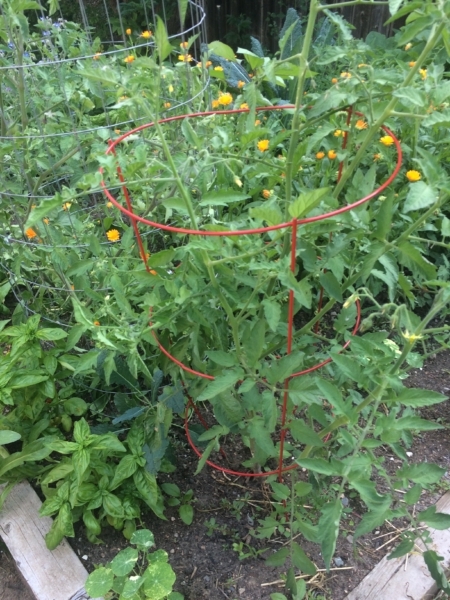
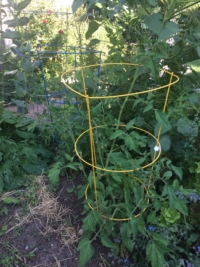
by Heather StoneTomato plant in a cage for support.

 The ways in which to support tomatoes are as varied as the gardeners who grow them. Staking your tomatoes is important for many reasons. Keeping your plants upright and off the ground helps keep not only insects and critters at bay but can prevent many tomato diseases as well. Click here to check out our comprehensive guide to tomato diseases. Staking maximizes growing space, makes harvesting easier and keeps the garden looking tidy. Here is a little information about three different methods you can use to successfully stake your tomatoes.

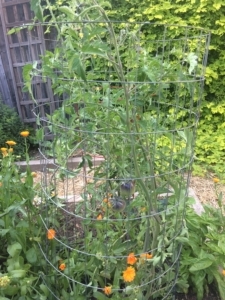
Tomato plant supported by a cage.

Cages

Caging tomatoes is an easy and efficient way for the home gardener to support tomatoes. Store bought cages come in a wide variety of sizes and colors. The smaller cages are more appropriate for determinate tomato varieties which are more compact in size averaging around 3-4’ tall. The larger cages will best suit the large, sprawling indeterminate varieties which can range in height from 6-12’.


You can make your own tomato cages too. Hardware stores sell rolls of wire fencing or mesh that when cut in 5’x5’sections can be rolled into a circular cage and placed over the plant. This is best done while the plants are still small. Pin the ends together with wire or zip ties and anchor the cage into the ground with stakes. Make sure your grid openings are at least four inches in diameter. This will make pruning and harvesting a breeze. These cages are sturdy and will last for years.

Tomato plant supported by a section of wire fence.

Stakes

Staking tomatoes is also an effective way to support your tomatoes. This method simply requires driving a stake into the ground near the plant and tying the plant up the stake as it continues to grow. To avoid any root damage, place stakes in the ground before planting or when plants are still young.

For indeterminate tomato varieties, stakes should be at least 7 feet tall and driven a good foot into the ground. This will keep the stake from tumbling over with the weight of the plant. Stakes can be wood, plastic, metal or made from salvaged materials. When tying up your tomatoes, it is best done loosely and with a soft material. I like to use old t-shirts cut into strips.

The Florida Weave

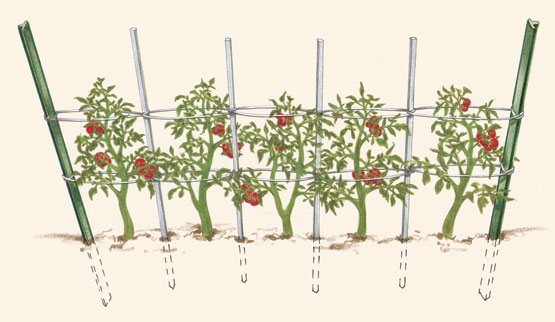
http://www.finegardening.com/how-to/articles/supporting-cast-for-tomatoes.aspx

In the Florida or basket weave technique you are essentially sandwiching your tomato plants between two walls of twine. This technique works best when you are planting in rows. Begin by placing one stake at the end of each row, or space stakes every 3- 4’ apart for longer rows. Drive stakes into the ground at least one foot deep. Next, tie your twine to your end stake about 8-10” from the ground. Pull the twine past one side of your tomatoes to the front of the next stake. Loop the twine around the back of the stake and pull tight. Keeping the string taught continue down the row until you reach your last stake. Tie off at the last stake. Now, loop back the other direction until you are back where you started. Tie the twine to the first stake. As your tomatoes grow you will need to add another layer of twine about every 6-8” to keep the plants upright.

Check out this video demonstrating the Florida or basket weave technique.

SUMMER HARVEST

Favorite Summer Vegetables

by Engrid Winslow

At last, the bounty of your summer garden is at its peak and you can gather all of those glorious tomatoes, peppers, eggplants, corn, chard, kale, summer squash, onions and other vegetables to enjoy at their freshest and most flavorful. But, ahem, some of us may plant more than we can eat in a day. Well, whether that is planned excess or not, here are a few tricks for preserving that bounty using just your freezer and pantry.

Onions –

When the tops flop over onto the ground it’s time to pull them out and let them dry out in the sun or inside in a cool, dry location. Some onions, such as cippolini, are great storage onions but for the ones that aren’t…Ever tried onion jam? How about bacon and onion jam. You can refrigerate them and use them up quickly or pop a few jars into the freezer for a festive addition to a holiday cheese platter. Here are the links to two delicious recipes you can try:

http://www.cookingchanneltv.com/recipes/onion-jam https://cooking.nytimes.com/recipes/1015978-bacon-onion-jam.

You’re welcome.


Corn –

Shuck as much as you can and then flash boil for about 2 minutes. Let cool and then scrape off the kernels into a large bowl and scoop out two cups into a plastic bag or container for freezing. Add them to that turkey soup you make after Thanksgiving every year along with some of the frozen shell peas you harvested and froze in the spring.

Tomatoes –

This technique works best with cherry tomatoes and is a little bit of trouble but OMG are these delicious. Add them to pizza, pasta, soups, sandwiches or serve on grilled bread as a quick crostini. The flavor of these will make you want to plant even more tomatoes next year. Heat oven to 200 degrees. Arrange cherry tomatoes on a lined, rimmed baking sheet, cut side up. Drizzle with olive oil and add a sprinkle of salt and pepper. Let them “oven dry” for up to 2 ½ hours, checking frequently at the two-hour mark. You can also do this with large tomatoes which will yield a “saucier” result.


Zucchini –

Use small, tender-skinned, deep green ones. Shred and steam for 1-2 minutes. Freeze in desired quantities for adding to slaw, pasta, soups or your famous zucchini bread.

Quit Working so Hard This Fall

Garden Clean Up

by Sandy Swegel

The old adages say cleanliness and hard work are virtues. That may be true in your kitchen, but in the garden, a little sloth can save many lives and make your life a little easier.  Mother Nature isn’t just messy when she clutters up the Fall garden with leaves and debris….she’s making homes for her creatures.  Old dead leaves may look like clutter that needs to be tidied up, but it’s really nice rustic sustainable homes for many of a gardener’s best friends.

Here’s who is hiding in your garden this winter if you DON’T clean up.

Ladybugs in the garden beds next to the house.  Ladybugs want a nice sheltered home safe from wind and exposed soil. I most often find them under the leaves and dead flower stalks in the perennial garden.

Butterfly larvae (aka caterpillars) in leaf bundles. Sometimes in winter, you’ll see a couple of leaves looking stuck to a bush or tree or in a clump on the ground.  Often there’s a butterfly baby overwintering there.

Lacewing at the base of willows or in the old vegetable garden.  Insects don’t work very hard in the fall either.  Often they are eating happily on the aphids in your vegetable garden or your mini forest and just go through their life cycle right there.  They lay their eggs on the bottom of leaves and the leaves fall to the ground.  If you clean up too much, you’ll clean up all the beneficial insect’s eggs

Slugs in your hosta garden. Even slugs are a good thing to leave for the winter.  They will be plump food for baby birds next Spring.

The bottom line is don’t do a good job of cleaning up in the Fall.  Take away any very diseased leaves.  Clean up the thick mats of leaves on the lawn so they don’t encourage lawn fungus.  But leave the flower stalks with seeds and the leaves in the beds.  They insulate and protect plants and insects.

Another good reason to be a little lazy this Fall.

Photos: http://www.nashvilleparent.com/2013/07/fall-for-fun/http://antsbeesbutterfliesnature.blogspot.com/2009/11/overwintering-caterpillars.html

1000 bags of leaves and what to do with them

How to Repurpose Fall Leaves

by Sandy Swegel

Fall leaves are Nature’s parting gift from the growing season to the gardener.  Tree roots run deep and wide and have collected minerals and nutrients from deep in the soil.  These are nutrients that then spent the summer high in the sky at treetop collecting sun rays and are now being placed abundantly at your feet.

If you’ve been gardening any length of time you know how valuable leaves are.  They decompose beautifully in the compost bin when mixed in with the green matter.  You can run them over with the mower to break them down and use them as mulch in all your garden beds.  You can keep piles of them in a shady moist corner of the garden decomposing down into leaf mold which is a superior soil amendment.

The most important thing gardeners in my neighborhood do within Fall leaves is collect them.  Our neighbor Barbara is the Queen of Fall Leaves and had taught us about how valuable leaves are to the gardener.  She lives on a busy street and puts a big cardboard sign in front of her house every year that says “Bagged Leaves Wanted.” Pretty soon bags and bags of leaves start piling up, brought from strangers all over town who are happy to have a place to recycle their leaves.  Barbara gets the first 1000 bags and about fifteen of us split the next 1000 bags of leaves.

So what do you do with 1000 bags of leaves?

Mulch the garden beds. Some of the leaves have already been chopped by blower vacs. These leaves easily go on perennial beds.

Mulch the garden paths.  Big dried leaves that are slow to break down like oak leaves or pine needles go on the paths to keep the weeds down.

Put a layer over the vegetable garden. If you don’t till in the spring, a thick layer of leaves will block light and suppress weeds and keep in moisture. But wait, you say, the wind will blow the leaves away.  That’s when you put the bagged leaves on top of the garden. It’s a place to store extra leaves and the weight of the bags keeps the loose leaves from blowing away. Moisture collects under the bags and earthworms come to feast there.

Till the molding leaves into the soil in Spring with the cover crop.

Insulate the cold frame or greenhouse with bags of leaves stacked around.

Line the troughs you dig for your potatoes next year with rotting leaves.

Make easy Leaf Mold.  Stack the bags that look like they don’t have holes somewhere (as insulation or just as storage) and put the hose in to fill the bag about ¼ way with water.  This makes speedy leaf mold.

Use as free litter for chickens and bunnies. If you have farm animals, dried leaves are perfect free litter for the bottom of the coop or cage. And the manure is already pre-mixed with carbon for composting.

Feed the Goats. The most fun thing to do with the leaves (aside from jumping in piles of them) is to feed the goats.  Apparently, dry leaves are yummy like potato chips to goats and they come running to eat the crunchiest ones when I’m hauling the latest bag of leaves to the backyard.

Happy goats running with floppy ears flying is a highlight of my day.

Photo credit:  http://www.onehundreddollarsamonth.com/mavis-garden-blog-how-to-find-free-compost/

Aphids on your Kale – Ewwww

All About Handling AphidsImage by <a href="https://pixabay.com/users/melanimarfeld-7353531/?utm_source=link-attribution&utm_medium=referral&utm_campaign=image&utm_content=5224572">Melani Marfeld</a> from <a href="https://pixabay.com/?utm_source=link-attribution&utm_medium=referral&utm_campaign=image&utm_content=5224572">Pixabay</a>

by Sandy Swegel

A gardener I know recently went out to his cold frame to harvest some beautiful kale he could see pushing against the top of the frame.  Instead of an ecstatic reaction of joy to this spring treat, he quickly retreated with a big “Ewww.”  His kale was absolutely coated in aphids.  He had nursed it and even given it extra organic nitrogen fertilizer recently and this was the thanks he got.

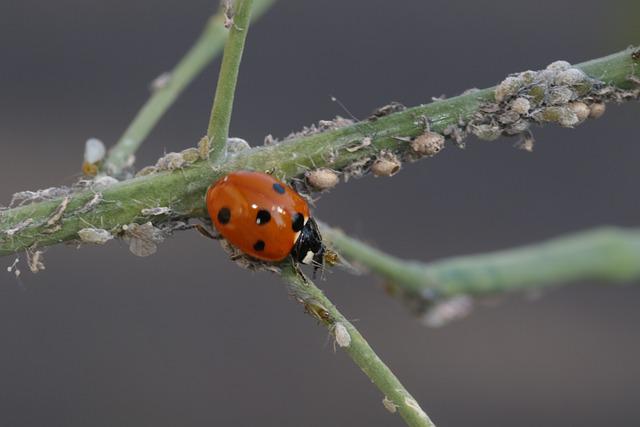
Aphids are irritating pests.  They are very prolific and can have twenty generations in a season. And it could take a long time to rinse each one off a leaf of kale, so what’s a gardener to do if they are not ready to become an insectivore?

You Can Prevent Aphids

Our gardener probably got aphids for a couple of reasons: 

His cold frame was sealed pretty tight, so predators like birds and ladybugs couldn’t get in to control the aphids. Also, recent warm temperatures stressed the plants in the closed frame. Opening the cold frame on warmer days will help.

They are everywhere.  They overwinter on mustard weeds which are prolific in the spring garden. There’s no avoiding the aphids altogether on cole plants, but cleaning up the debris in the garden and weeding out the mustard weeds will remove many of the eggs from last year.

They adore nitrogen. The soluble nitrogen he had just added just enticed even more aphids to come eat over here!

Plant chard and spinach. Aphids don’t bother them as much.

You Can Treat Aphids

Aphids are super easy to treat:  a blast from a garden hose washes them to the ground and they don’t easily crawl back.

Soapy water (a drop or two of dish soap or Dr. Bronner’s in your watering can or spray bottle) kills them easily.

Check the plants frequently: the aphids are often under the leaves or along the stems…hard places to reach.

You Can Clean the Kale

A sink full of water, most people agreed, was the best way to clean the aphids off so you don’t disgust your dinner guests.  Submerge the kale completely and squish it around a lot.  The aphids float to the surface. Repeat.

Someone else suggested dissolving some salt in hot water and then adding it to the sink of cold water, letting the kale sit for 30 minutes.  The salty water helps dislodge the aphids.

Don’t give up. Kale is incredibly nutritious not to mention tasty and easy to grow.


Read more about aphids here

For complete information on managing cabbage aphids, http://www.ipm.ucdavis.edu/PMG/r108300811.html


Fall Gardening: Getting Ready

Preparing Your Garden For Fall

by Sandy Swegel

What a great time of year this is.  And not just because the harvest is upon us and tomatoes are ripening and winter squash are filling out.  It’s a great time because school is starting again and school supplies are in the stores bringing up great memories and nostalgia for the beginning of the school year.  Sure we all hated summer vacation ending, but getting new pencils and notebooks and going back to school and seeing old friends was invigorating. The slight nip in the night air that starts in August in Colorado stimulates a new enthusiasm, much like a new year or a new chance.

Going into the garden in August is a lot like getting ready for school again.  First, you have to get rid of the chaos and clutter of summer.  We’ve been vacationing or sneaking naps in hammocks and somehow, the weeds we were carefully hoeing when they were an inch tall in May, have grown taller than us and have seed heads. So the first step of getting ready for Fall Gardening is taking a deep breath and clearing out the weeds and debris that might have snuck into the garden.

On Your Marks First, you have to be able to see your marks.  Clear out the weeds that are choking things like the bindweed threatening to bring the corn to its knees. Pull out tough stalks of spring lettuce.  They’re done…let them go! Those radishes that have been baking in the summer heat…time to recycle them into compost. Any place with diseased-looking leaves:  clear out every last leaf to reduce the chances of trouble there in the future.

Get Ready. Get ready to meet old friends again…the cold-hardy or cool season crops.  These are all the sturdy plants that don’t mind a morning freeze.  Swiss Chard and Kale or Spinach can be frozen solid on an October morning and be perfect for dinner that night.  The secret to having fresh vegetables in the Fall and long into winter is to plant while the soil is warm so that the plant is full-grown by frost.  After it gets cold, plants don’t grow very quickly, but the garden will keep them ready to eat for months.  Get ready to plant a big garden.  It’s not the end of a garden season, but the beginning of one.

Get Set. Make a plan.  Think about how many salads you’ll want  (or how many pounds of greens you bought last year.)  For greens, you want two general different kinds:  the soft sweet salad greens that will last you until hard frost and the sturdy kales and chards and collards that will be good for cooking. The local farmers call it a “braising mix” that you can pick and stir-fry well into winter. Don’t forget carrots.   This is also time to make a plan if you want a cold frame or want to set up a row cover to extend the season.

Go. It’s just like Spring again…only this time your mind isn’t gaga over a million possible gardens.  So focus on the task at hand—growing enough food for you and your family and friends to eat all Fall and Winter. Prepare the soil. Dig out big weeds. Mix in compost or organic fertilizer. Smooth the surface. Water thoroughly. Let the soil sit for two weeks for soil activity to restore itself. Order the seed you don’t have. Try something a little different like the Asian greens or just something new. They should arrive by the time your soil has rested. Plan a season extender. You can stretch your fall garden into January or February even if you live in a cold place. You can use a cold frame, a hoop house, some row cover or just bags of Fall leaves thrown over plants on extra cold nights.

End of the Growing Season

How Our garden Holds it Own in the Snow

by Sandy Swegel

We had our first big snow…just six inches but very cold and wet followed by more snow and below freezing temperatures so one might easily assume the vegetable garden is done for the year.  It certainly looks forlorn outside my window.  But fortunately, Nature is kinder than that.  For reasons I can’t quite fathom, lettuce that freezes if it’s too far in the back of my refrigerator can handle quite a lot of extreme temperature especially when it’s well insulated by snow.  I expect that when the sun returns in a couple of days, I’ll be able to brush away any remaining snow and harvest excellent crispy sweet lettuce.  Hardier greens like spinach and chard can even be exposed to the air and frozen solid at 8 am but then be perfect and ready to eat by noon with a little mid-day thawing.

The warm season plants like basil and tomatoes have no chance in the cold.  Basil turns brown below about 35 degrees.  Tomatoes don’t taste nearly as good once night time temps dip into the 30s.  Squash leaves croak right at 32 although sometimes the ambient heat from the ground will keep the pumpkins and winter squash edible even though the air is freezing.  Still, the warm season plants are done. Corn on the cob is a memory held by the dried stalks turned into Halloween decorations.

The root crops are another story.  Carrots and beets improve with each freezing night.  As long as you can pry root crops from the freezing ground, you’ll be rewarded with intense flavor and sweetness that improves even more if you roast the vegetables with some olive oil. Many a picky eater who refused to eat turnips or rutabagas, finds November turnips roasted with rosemary and thyme to be irresistible.

It may be the end of the growing season….but the eating season has just begun!