Tag Archive for: Seed Starting

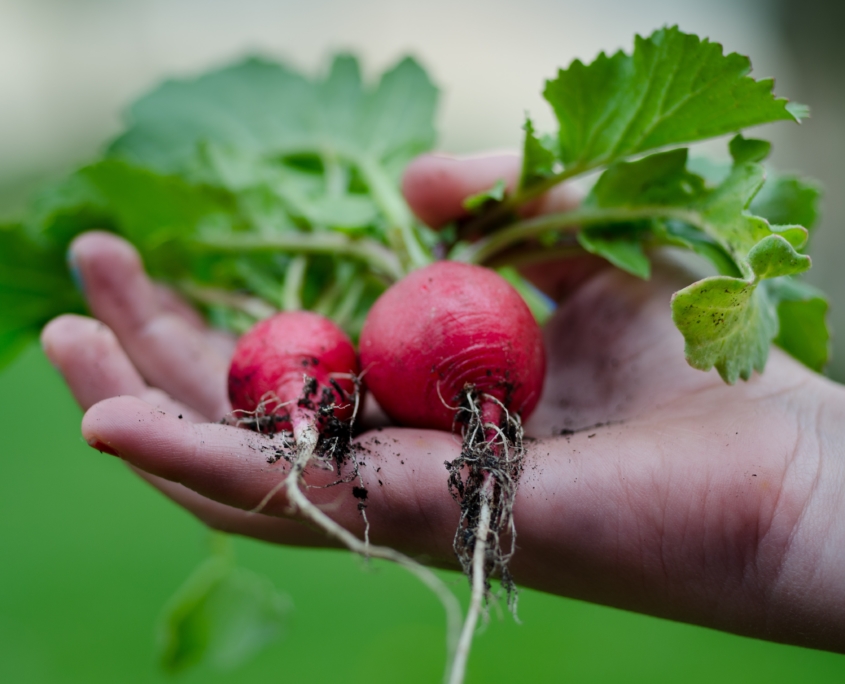
Vegetable Seed Starting

tips_seedstarting2Starting your vegetables and herbs indoors from seed is easy and very rewarding. By starting indoors you give yourself a jump-start on the growing season and you will be ahead of the game when it is time to start planting outdoors! The back of your BBB seed packet will have the basic information you need to know to ensure you have successful germination.
Here are a few tips to remember to kick off your seed-starting efforts.

  1. Plastic pots are best for starting seeds as they retain moisture more easily compared to terra cotta or other clay pots. If you don’t have traditional seed-starting containers available from your local garden center you can use recycled yogurt cartons, salad containers, or any other plastic container you find in your recycle bin! You can also make your own wood seed starting trays or your own newspaper pots. No matter what type of container you use make sure it is clean and sterile.
  2. Proper drainage is essential. Make sure there are holes in the bottom of your seed starting container to allow for good drainage. If you are using a recycled plastic item you can drill or poke holes in the bottom by using a screwdriver or nail. Excessive moisture trapped in a pot can lead to damping off and other fungal diseases. Ew!
  3. Soilless seed starting mix. Really we mean it! If you want good germination start your seed in a soilless mix. The key is that when your seeds germinate and have at least their first set of true leaves you must transplant them to the next pot size up and into regular potting soil. Or, you need to start feeding them with a half-strength fertilizer.  The soilless mix is essentially sterile with minimal nutrition which is a perfect medium for your plants to germinate in. Less chance for contamination or other weird diseases to set in!
  4. Moisten your mix. Pour your soilless mix into a bowl. Moisten it with water so that it isn’t soaked, but is nicely damp. Fill your seed starting pot or tray up ¾ of the way full with your damp soilless mix. Gently press the seed into the soil approximately two (2) times the depth of the diameter of the seed. Then lightly cover your seed with more of the soilless mix. Gently press the soil to ensure good seed-to-soil contact.
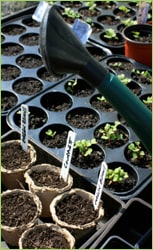
  5. Identify each pot. Even if it is only 2 pots we highly recommend that you mark each pot with the name of the vegetable and the date planted. You can use wooden craft sticks, left-over popsicle sticks, or any other object that sticks up and beyond the soil that you can write on.
  6. tips_seedstarting4Water gently. We can’t tell you how many times we have washed away seeds and newly born seedlings by watering too hard! We recommend watering from the bottom by placing your seed starting container in a dish or basin filling it with water 2-3 inches and allowing the moisture to be drawn upward. If just the top has dried out use a spray bottle or a child’s watering can with small holes. And if you don’t have either, while pouring out the water (gently!) put your hand in between the water and the soil to break the fall of the water before it lands on the seeds or tender seedlings. Water daily and remember, gentle!
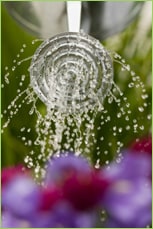
  7. Cover! Immediately cover your pot with a piece of saran wrap or a plastic bag to help retain the moisture. If you have a garden dome then place the lid on top.  Keeping your seed evenly moist until germination is essential.
  8. Temperature. Most seeds require temperatures of 65° to 75°F to germinate. The back of your BBB Seed packet will tell you the preferred germination temperature for your seed. Place your seed containers near an existing heater, on top of the stove (pilot lights can be very warm at night!) or use a space heater with the proper precautions to raise the ambient temperature as needed. Heating pads designed specifically for plant use can also be placed directly under the seed containers which will encourage germination.
  9. Good Light. Plants require at least 12 hours of daylight. If you are starting your seed where light is poor or during a time when there is less than 12 hours of light per day we recommend growing lights. If sowing your seed indoors, place your seed containers in a sunny, south-facing window and give the container a quarter turn each day to prevent the seedlings from overreaching toward the light and developing long and weak stems.
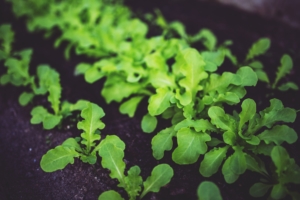
  10. Acclimate Your Seedlings. Before you transplant your seedlings outdoors they need to be hardened off or acclimated to direct sunlight and fluctuating temperatures. It is best to do this over a three-to-five-day period by placing them in direct sunlight during the morning only on the first day, then increasing their time outside by a few hours each day until they are strong enough to be transplanted. Don’t feel rushed. If unexpected weather or wind arises, keep them indoors. Nothing is more disappointing than spending all of your time growing your precious seedlings to then having something go wrong when you put them outside.

If you have any questions at all about how to start your BBB Seed please do not hesitate to email us at info@bbbseed.com. We look forward to answering any questions you might have!
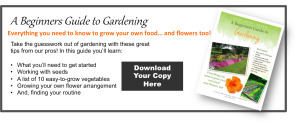
Download our E-Book here:
CTA_BBBSeed

Saving Seeds

Saving Seeds from Heirloom VegetablesSaving seeds from heirloom vegetables.

What are “heirloom” vegetables? An heirloom vegetable is a non-hybrid, open-pollinated variety that has been passed down from generation to generation and, in some cases, can be traced back hundreds of years.  These seed lines have been carefully selected to maintain uniformity and consistency for germination.

Heirloom seeds become ‘heirloom’ because they exhibit exceptional traits desired by the gardener.  Often this means the plants are more colorful, flavorful, and unique, or have great germination and vigor.  Often the traits are location-dependent.  Meaning, seeds planted in one garden will not produce in the same manner in another location.  We encourage you to try heirloom seeds, see which have the qualities for your area to become your favorites and make them into your own very special seed line.  Seed saving from heirloom vegetables is easy and fun.

Gardeners have found that as seeds are selected and saved over many years, production is increased and the quality is improved, creating plants that will produce best for that locale and will resist diseases and pests of that locale.  Contributing to genetic diversity strengthens the ecosystem. Historically farmers and local gardeners have created and sustained this rich genetic heritage by learning to save their own seeds from varieties that perform best in their own mini-ecosystems.  The current trend toward mono-crops where only one seed type is used to produce a crop worldwide is eliminating the ability to be able to find genetic variations that will withstand emerging pathogens and climate changes.

Planting your crop:

Start with good Heirloom Seed varieties.  Keep in mind that to allow the plants to produce seed and to allow the seed to fully mature, you will have to allow for a longer growing season.  This can be done by starting plants indoors and arranging for protection from frost in the late season. You will grow some for food or flower harvest and some for seed production.  Fully mature seeds will be viable (able to germinate) and produce vigorous plants.  You may want to do some research on the different flower types for proper pollination techniques and plant with row/species separation in mind, to prevent cross-pollination.

You also may look into caging procedures to isolate species that are in flower at the same time.  By caging different plants on alternate days, you can take advantage of the pollinators to do the work without cross-pollinating your crop.  Cage one plant or group on one day and early the next day, before the bees wake, transfer your cage to a different plant or group.  Some crops are biennial and do not produce seed until the next year, so you will need to determine whether you should leave the roots in the ground over the winter or dig and store them.

There are many publications with detailed information on seed-saving and growing techniques for each species.  “Seed to Seed” by Suzanne Ashworth, 2002 by Seed Savers Exchange, Inc. is a good way to get started. Also, check out these easy instructions for seed saving, written by the International Seed Saving Institute, a non-profit established to teach seed saving.

Why save seeds:

When you grow crops using your own saved seeds from your best plants for next year’s crops, the seeds begin to adapt to the growing conditions (temperature, moisture levels, pests, diseases, and so forth) that exist in your garden.  This adaptation makes your garden stronger over time.  Seeds that are used to grow crops year after year have the opportunity to adapt to incremental climate changes.  As global temperatures change, these plants will have a better chance at survival and productivity.  A single plant from a single seed can produce dozens or hundreds of seeds, increasing your seed stock exponentially.  Sharing and exchanging seeds with other gardeners, community gardens or seed libraries helps to increase the diversity of everyone’s collections.

Harvesting and collecting seeds:

When saving seeds from heirloom vegetables, look for favorable characteristics such as; freeze and cold tolerance, heat tolerance, adaptability, winter hardiness, early maturation, vigor (strong germination, and growth), flavor, color, size, texture, etc. Also, look for desirable traits such as; vine or plant type, seed type, and specific disease resistance.  Plan to be ready to harvest the seed as they mature.

– Collecting dry seed:

It’s easy to save seeds from plants that produce pods, husks, and other dry casings such as peas, beans, and flowers.  The technique is called “dry processing” and is faster than collecting seed from fleshy, pulpy fruits such as tomatoes and cucumbers.  Seeds that are dry-processed can be allowed to dry right on the plants unless there is wet weather in the forecast.  Seeds often fall where they may, naturally, little by little.  Often the pods will pop open when you are not around to collect the seed and it will be lost.  Allow the seed pods to remain on the plant in the ground for as long as possible.  Usually, the seed will not continue to mature after the pods are cut from the plant. To collect the seeds easily as the seeds begin to mature, secure paper bags over the seed heads and attach them to the stems of the plants.  As they mature they will drop into the bags.

Separating the seeds from the chaff (dried pods and stems) is called threshing.  Commercial threshing is done by multitasking machines that can harvest, thresh, and winnow the seeds all at once.  For the home gardener, a bag, pillowcase, or small sack is all that’s necessary.  Put the seeds into the bag, secure the ends, and roll it around, lightly crushing and breaking up the pods a bit.  Be gentle so you don’t damage the seeds, but just loosen the chaff.  For tinier seeds, you can just put them on a board and crush them with your fingers.

Then you will need to winnow the chaff from the seeds.  Place the seeds in a bowl and gently blow on them to remove the lighter-weight chaff.  Swirl the seeds around and continue blowing gently until most of the chaff is removed.  Another option is to use a screen or sifter where the holes are smaller than the chaff to simply sift them apart.

– Collecting seeds from pulpy fruits:

Pick the best, most ripe (even to the point of over-ripe) tomato, pepper, cucumber, etc.  Choosing an over-ripe veggie will ensure the seed has fully developed.  If you wait for a frost or freeze before you pick the fruit or veggie, most of the seed will not be developed enough to be viable next year.

Cut open the fruit and scoop out the seeds or for small fruits like cherry tomatoes, simply squeeze the seeds out into a glass jar.   Add a little water and label the jar with the seed variety.  The seeds usually are surrounded by a gel that inhibits germination.   Leave for two to five days to begin fermenting. This will break down the seed coat while killing off many of the harmful bacteria and fungi lurking on the seeds.  Swirl the contents in the jar every day.

When the pulp floats to the top, the seeds are ready for cleaning.  Most of the seeds will have sunk to the bottom.  Carefully skim off the pulp then tip the liquid and seeds into a strainer. Wash the seeds under running water, using the back of a wooden spoon to carefully remove any remaining material stuck to the seeds.  Spread the seeds onto a paper towel to remove most of the water, then transfer them to a non-stick surface such as a dinner plate. Dry the seeds in a warm place out of direct sunlight. It will take two to three weeks for the seeds to completely dry out.

Make sure you label the seeds with their name and the date they were collected immediately after you have finished harvesting each variety.  Excellent record-keeping is your best friend when it comes to seed-saving.  It’s amazing how easy it is to mix up seed varieties!

How long do seeds last?

If you keep your seeds in a cool dry place, your seeds can last for years.  These things are seed killers: excess moisture, excess heat, light, and rodents.  Some seeds last easily for years. Others only last one year before the germination rate goes down.

Here is a chart from the Chicago Botanic Gardens on longevity in vegetable seeds as well as one from Iowa State University extension.

Seeds that have passed their prime for producing viable plants can be used to scatter as a cover crop, for bird seed, for eating, or for cooking (as in herb seeds).

Plant Your Cool Season Vegetables Now

Know Which Crops to Plant and When

by Heather Stone

Photo of a hand holding two red radishes.

Photo courtesy of pexels – skitterphoto 9301 (1)

Mid- August to Mid- September is the prime time to start planning and planting your fall vegetable garden and your cool season vegetables. Even though it’s still hot outside, the nights are getting cooler and the days shorter. Now is the time to get those quick-growing, cool-season vegetables in the ground. For bountiful late-season harvests here are a few guidelines to follow.

-Know which crops to plant and when. Here’s a list of our favorite cool-season vegetables and their days to maturity.

  • Kale should be planted 85 – 90 days before the first frost. The leaves can handle a few light touches of frost and become sweeter each time.
  • Carrots can be planted 80-85 days before frost.  They can be harvested when young and tender.  Even after the cold temperatures shrivel the tops, they can be dug, sweet and juicy, from the ground throughout the fall.
  • Beets can do double duty with green tops for salads and tasty roots as well.  Plant seeds about 65-70 days before frost, depending on the type you choose.
  • Leafy greens such as spinach and leaf lettuces, arugula, mustard greens and Swiss chard all do best in the cooler temperatures of fall. Plant seeds about 50-60 days before frost depending on the type of green chosen. These can be harvested when young and immature for delicious baby greens.

    Photo of leafy green seedlings.

    Photo courtesy of pexels by kaboompics 5809

  • Radishes are always great to spice up salads. These are fast-growing and can be planted 30-35 days before the first frost. Pull them when young and tender.


-Keep moist. The garden will dry out more quickly in the warm days of late summer than it did in the spring. Keep a close eye on new plantings to make sure those seeds or seedlings stay well-watered. A light covering of grass clippings or straw can serve as mulch, helping to retain moisture. Using a light row cover over newly planted areas can also help retain moisture, provide shade and protect against light frosts further down the road.

Fertilize once a week with an organic fertilizer with nitrogen and enjoy delicious salads and veggies all fall long.

Our Ultimate Milkweed Growing Guide

Our Ultimate Milkweed Growing Guide

Growing milkweed graphic with a Butterfly on a milkweed flower.

Tips for Planting and Growing Milkweed Successfully 

by Sam Doll

Milkweeds are hardy, perennial wildflowers found throughout North America. Some species can grow up to six feet tall and they produce beautiful, fragrant flower clusters. Since they’re common ingredients in traditional medicine, their genus name, Asclepias, comes from the Greek god of medicine.

Milkweed has gotten a bad rap over the years. Allergies and perceptions of the wildflower as a weed have caused it to be wiped out throughout large portions of North America.

This is bad news for the Monarch Butterfly. Monarch mothers will only lay their eggs on milkweed plants (genus Asclepias) and, once hatched, their caterpillars exclusively live on and eat the leaves of those same plants. They cannot survive without them.  The prevalence of pesticides has not helped and the loss of milkweed, wildflowers, and other floral resources has devastated the monarch butterfly population. However, by restoring Milkweed to urban and wild landscapes, we can begin the process of saving the Monarch Butterfly! And our Ultimate Milkweed Growing Guide is here to help.

Don’t have your seeds yet? Check out our Complete Milkweed Buying Guide for all you need to know about our Milkweed Products!

Milkweed Growing Guide Table of Contents

  • Prep
  • Planting
  • Transplanting

Why all these steps?

Milkweed seed has a high percentage of dormancy, which means many of the seeds won’t germinate without a little special treatment or might need to age for a season. Since we want to make sure you have complete success with our seeds, here are some tips!

Prep:

Milkweed seeds need to be exposed to cold temperatures that normally occur in winter to help break their natural dormancy and begin to soften their hard outer casing. If you are planning to start your Milkweeds indoors, you will need to do this cold stratification yourself.

You can do this by putting your Milkweed seed in a damp paper towel, folding it to fit into a sealed plastic bag, then placing the bag into the refrigerator. Keep it there for 4-6 weeks before planting.

Planting:

Plant your seeds in small 2-4″ peat pots (recommended) or tall plastic pots. Make sure to use ‘seed-starting’ soil or medium. Moisten the soil, place 1-2 seeds into each pot and cover with no more than 1/6″ damp soil or medium.

Place the pots where they can drain. Water gently or fill a tray with 1/2” of water to be absorbed from the bottom of the peat pots. Dump the excess water after absorption.  Water when the top of the soil is dry and be mindful to not overwater.

Milkweed seeds germinate in warm conditions, so place your tray of pots in a warm spot like a sunny window, greenhouse, or under a grow light. Germination usually occurs after 10-15 days for cold-stratified seeds. To encourage sturdy stems, place your grow light bulb close to the soil. Sometimes a small fan blowing gently towards the new seedlings will encourage sturdier stems.

Other planting methods: Plant non-stratified seed into peat pots filled with seed-starting soil or medium. Moisten, and place in a greenhouse or under a grow light. Germination in this scenario might take several months.

If planting outside, seed in late fall. Let the Milkweed seed remain over the winter. This will accomplish the cold-stratification, needed. Germination should occur when the soil warms and the days are longer.

Oh, and while you’re at it, check out our Monarch Rescue Wildflower Mix. It has Butterfly Milkweed and a mix of other wildflower seeds to provide a nectar-rich place for Monarch Butterflies to fuel up and raise their young! Find it here!

Transplanting:

When the danger of frost is past and your plants reach 2-3″ tall, you can transplant outdoors. Choose a location in full sun if possible.

Milkweed produces a long taproot, so take care to not disturb the roots. Plant peat pots so that the top edge of the small pot is underground to avoid drying out. If your Milkweed seedlings were planted in plastic pots, be extremely careful with the roots. Continue to water after planting until plants become established. Once they are established, you can taper off your watering unless the season is extremely dry. The newly planted Milkweed seedlings may lose all their leaves due to transplant shock but should grow them back again.

Congratulations!

You’re now a proud Milkweed parent! Now just sit back and watch the Monarch Butterflies arrive!

P.S. – Save our Milkweed Growing Guide for next year by bookmarking this page on your browser.

*Note that all Milkweed contains cardiac glycosides, chemicals that are toxic when eaten. These chemicals, in turn, make the Monarch Butterflies toxic to any would-be predators. Avoid letting livestock and small children eat milkweed and wash any skin that comes in contact with the sap to avoid irritation.

Learn more about the Monarch Butterfly Migration by checking out this Blog post!

Monarch graphic.

Nasturtiums!

Wildflower Seeds

by Heather StonePhoto of red nasturtium blooms.

The bright, rich colors of nasturtium flowers make an impact along the edge of the border, in a pot or climbing a wall or trellis. Their gorgeous rounded leaves, much like a water lily, are a vibrant shade of green with a few varieties having variegated leaves. These easy to grow annuals deserve a place in any garden.


Growing Nasturtiums is easy from seed. Sow directly in the garden starting in late spring after all chances of frost have passed. If you want to get a head start you can plant seeds indoors 3-4 weeks before your last frost date. Plant the seeds ½- 1” deep and about 10” apart. Nasturtium seeds are large and germinate quickly (5-7 days) which makes them a great seed to plant with children. Nasturtiums can be grown in full sun or part shade. They prefer a leaner soil and do not need to be fertilized. Keep them watered during dry spells and remove spent blossoms to encourage prolonged blooming.


Flower colors range from orange to red to yellow, peach and even burgundy. Both the flowers and leaves of the nasturtium plant are edible. The flowers have a peppery flavor and make a bright addition to any salad. They are delicious stuffed with soft cheese or can be used to make an infused vinegar.

Photo of red nasturtium blooms.

Nasturtiums make great edging plants. I especially like to use them along the edges in my vegetable garden where they spill over the sides of my raised beds and attract the bumblebees. They are also great tucked into bare spots in the garden. The climbing varieties can share space with roses and clematis in the perennial garden or beans and cucumbers in the vegetable garden.


Bring these gorgeous and tasty flowers to your garden by planting our Alaska Mix Nasturtium

Don’t Pass On Peas

Tips for Successfully Growing Peas

by Heather Stone

Green Sugar Snap peas on the vine.

Image by Reginal from Pixabay

Plant Green Peas for one of the first crops in the spring. As soon as you can stick your finger into the soil you can plant peas. Whether you plant shelling, snap or snow peas this early crop loves the cool weather of spring, producing tender pods that are hard to resist.  More often than not, they are eaten straight off the vine right there in the garden, very few making it to the kitchen. Every year I always wish I would have planted more.

Planting green peas should happen as soon as the soil can be worked, about 4-6 weeks before your average last frost date. For best germination, soil temperatures should be around 50 degrees F. Do be cautious of excess moisture. You don’t want your seeds sitting in wet soil.

Before planting, soak your seeds overnight. This will help speed germination. Plant seeds about 1” deep and 2-3” apart in well-loosened soil in a sunny spot in your garden. Peas will also do well in part shade. Give your peas a trellis, as most peas need something to climb on. Keep the area moist until the seeds germinate, on average between 7-14 days.

Green Peas are an easy crop to grow. Keep the plants moist, especially once they start producing. When they reach 8-12” tall mulch your vines well to keep the soil cool and help retain moisture. Peas grow best in temperatures below 70 degrees F, so plant your seeds early. Once temperatures reach 80 degrees the vines tend to stop producing.  

When the peas begin to ripen, harvest daily and be sure to use two hands to pick. Use one hand to hold the vine and the other to pick the peas. This way you will avoid damaging the tender vines. For the crispiest peas, pick in the morning after the dew has dried. Peas will last about 5 days in the refrigerator (if they make it there) and any extra freeze well.

Like all legumes, peas fix nitrogen in the soil that other plants can use. When your peas are done for the season, remove the vines but leave the roots in the ground. Plant a nitrogen-loving plant in the area that can benefit from the extra nitrogen in the soil.

Don’t wait! Get out in the garden and plant some peas today! Try one of our tried and true varieties such as Sugar Ann, Oregon Sugar Pod or Green Arrow.

Packet of Oregon Sugar Pod Pea seeds. Pea, Sugar Ann Pea, Green Arrow


IT’S ALL ABOUT THE SNAPDRAGON IN 2019

Photo of many snapdragon flowers in bloom.

photo courtesy of pixabay

Wildflower Seeds

By Engrid Winslow


Snapdragons (Antirrhinum majus) are one of the most widely grown and well-known flowers in the garden for many reasons. Children adore them because of the distinctive bloom of the dragon’s head shaped flowers with mouths that open and close when squeezed from both sides. Many gardeners associate them with memories of their parents’ or grandparents’ gardens and they come in every color of the rainbow and beyond with shades from white to a purple so deep it almost looks black. They can be short or tall, bloom for a really long time and are easy to grow in full sun to part shade. Usually blooming in cooler weather in the spring and fall, they can bloom in hotter months if given additional water and deadheaded regularly. Snapdragons are useful as perennials because they often overwinter or as annuals in planters. They are a lovely addition to a cottage-style garden, pretty in bouquets and are not too fussy about soil type, although they do better with the addition of organic matter. They can even tolerate dry conditions. On top of all that, bumble bees love them and they are lightly fragrant. The National Garden Bureau has named the Snapdragon one of its 2019 plants of the year: ww.https://ngb.org/year-of-the-snapdragon/

Snapdragons are readily available as plants but they are so easy to grow yourself from seed if you decide to give them a try. They germinate better if placed in the freezer for a couple of days before planting and should be started sometime in February for spring planting. They do need light to germinate and since the seeds are tiny, press them into the top of the soil and water them from the bottom. They take 1 to 2 weeks to germinate and should be pinched back once they have 6-8 leaves to encourage a stronger stem. Plant your starts outdoors about the time of the last frost once they have been hardened off. https://bbbseed.com/care-planting-seedlings/

For additional helpful information about starting flowers and vegetables from seed check out this past blog: https://bbbseed.com/ez-indoor-seed-starting/

DREAMING OF SPRING

Plan your vegetable garden. Rows of Vegetables in a Garden.

Plan your vegetable garden!

By Engrid Winslow

Yes, it is still very cold and very dark but nothing fills the heart in the dead of winter than planning for spring. What should you be doing now that will keep those spirits up? Plan your vegetable garden and herb garden!

1. First of all, take a look at those vegetable and herb beds and decide what and how many varieties you want to plant next year. Do you want to start those peppers a bit earlier this year? Did you plant tomatoes there last year – rotate tomatoes every 3 years if at all possible to avoid depleted soil and issues with many diseases. What do you want to grow more of this year? Anything you want to try that’s new? What did you and your family really love? Want more tomatoes or basil for pesto or tomato sauce? [4 Tips For Keeping Your Basil Productive and Pesto Secrets] Were there any epic fails? Maybe it’s time to move on to buy those at your local Farmer’s Market and devote the precious real estate to something else.

2. Speaking of soil, this is a great time to start adding mushroom compost in a nice thick layer that can work its way into the soil during late winter freeze and thaw cycles and heavy periods of moisture. You can also cover the compost with a layer of seed-free straw that was grown organically.

3. Peruse the seed catalogs and websites. It is so fun to read those descriptions and they all sound wonderful but be aware of your space and climate when choosing seeds. Take stock of any seed that you saved from last year and organize and assess any leftover seed packets. Seed viability goes down over time. Onions, corn, parsnips, parsley and leeks should be refreshed every year, but tomatoes and lettuce can go 4-6 years and still germinate. Check out these charts if you have questions: https://hortnews.extension.iastate.edu/1999/4-2-1999/veggielife.html/

and http://ottawahort.org/wp-content/uploads/2017/02/Seed-Viability-Times.pdf/

4. Gather up your seed starting supplies and order more if needed. Dust off those grow lights, check the heat mats and make sure they still work and clean any seed starting containers that you plan to re-use with a weak bleach solution. Again, assess what worked and what didn’t in prior years. Did lettuce seeds that were direct-sown in the garden elude you? Try starting them indoors under a plastic dome which helps retain moisture until they are fully germinated.

5. Did friends and neighbors share anything they learned with you? Maybe it’s time to get everyone together for a Happy Hour, swap saved seeds and talk about their gardening experiences.

6. Review past blogs, books and articles that you might have saved for ideas, tips and new information. Here’s a good place to start: Care and Planting of Seedlings, Rules You Can’t Break, and Two Ways To Guarantee Your Seeds Grow

Grow Your Own Sprouts in 6 Easy Steps

Photo of seeds sprouting.

photo courtesy of pixabay


Seed Starting

by Heather Stone

  1. Choose a container and lid

    Sprouting seeds in a jar is easy and convenient. The first step when you grow your own sprouts is to make sure to choose a jar that is large enough to accommodate the seeds when sprouted. I find a quart jar with a wide mouth to work well.  You will also need a mesh lid of some kind or thick cheesecloth to easily drain your sprouts after rinsing.  Sprouting lids can be purchased at most health food stores, online or you can easily make your own.


  1. Rinse and pick over your seeds

Carefully rinse and pick through your seeds removing any stones or debris.


  1. Soak your seeds

Fill your jar about ¾ full with cool water.  Soak your seeds overnight (8-12 hours). Soaking time will vary depending on the size of your seeds.


Sprouted seeds

photo courtesy of pixabay


  1. Drain your seeds

After soaking you will want to thoroughly drain your seeds. Tip your jar on its side and let it drain for several hours to be sure all liquid is removed.


  1. Continue to rinse and drain

For the next 2-4 days, you will rinse and drain your seeds three times a day. Using cool water, gently rinse your seeds so you don’t damage any sprouts and drain well.


  1. Final rinse and drain

When your seeds have sprouted and reached the desired length give them one final rinse and drain well.  Enjoy in salads, on sandwiches or stirred into soups. Sprouts can be stored for several days in a tightly sealed container in the refrigerator.


Some great seeds for sprouting include:

Beans (lentils, mung beans and chickpeas)

Alfalfa

Broccoli

Sunflower

Radish

Clover


Additional resources:

https://www.culturesforhealth.com/learn/sprouting/how-to-sprout-seeds-jar/

https://boulderlocavore.com/sprouting-101-homemade-sprouting-jars-tutorial-diy-mason-jars-giveaway/


Walla Walla Sweet Onions…You know you want them

Heirloom Vegetable Seeds

by Sandy Swegel

It doesn’t take much effort to convince us we should grow Walla Walla sweet onions. Think about thick slices hot from the grill. Or cold on our hot cheeseburger. Dream of oven-roasted whole onions. Or be one of those brave people who bite into the Walla Walla like it’s an apple.

Onions are really easy to grow so when I heard the Walla Walla Sweet Onion seed had arrived at BBB Seed for the first time, I rushed over. There’s only one problem for me with Walla Walls….their growing season is 125 days…a little longer than I can count on in Colorado. So I start the seeds indoors in February and transplant the seedlings in April.


The most important rule of growing onions is you have to use fresh seed. After a year or so, germination rates drop down to “almost none” so you do need new seeds each year.

Onions grow happily in decent soil. They can handle hot sun and they’ve forgiven me letting the weeds get a little overrun. There’s not too much guesswork as to when they are ripe…their tops fall over. So you can grow onions off in a corner of your garden without too much extra effort. Although quite labor intensive for farmers, onions are pretty cheap at the grocery so we don’t grow them so much to save money as to capture the awesome flavor of fresh homegrown Walla Wallas.


For more pictures and recipes, go to the website of the annual Walla Walla festival!
OR go to the festival in June!


Photo Credits:
http://www.sweetonions.org/

http://www.wiveswithknives.net/2010/08/02/potato-walla-walla-onion-and-gruyere-galette/
http://savorthebest.com/roasted-sweet-baby-walla-walla-onions/