It snowed yesterday. It’s going to snow again today. This makes me so happy because it means I get a vacation from work. My gardening business is a lot like a teacher’s schedule. Work like crazy most of the year then I get a wonderful interlude to catch up on the rest of my life. Working in the garden may come to an end during Colorado winters, but eating usually continues and we continue to make lots of food scraps that any gardener would hate to waste.
When I lived on acreage, I did all my food composting by sending it through the chickens. The backyard chickens loved food scraps and eagerly ran around when I brought the compost bucket. Even if it was just onion scraps and things they didn’t like to eat, they relished scratching it around and mixing it with the coop bedding and poop. Spring compost in the making.
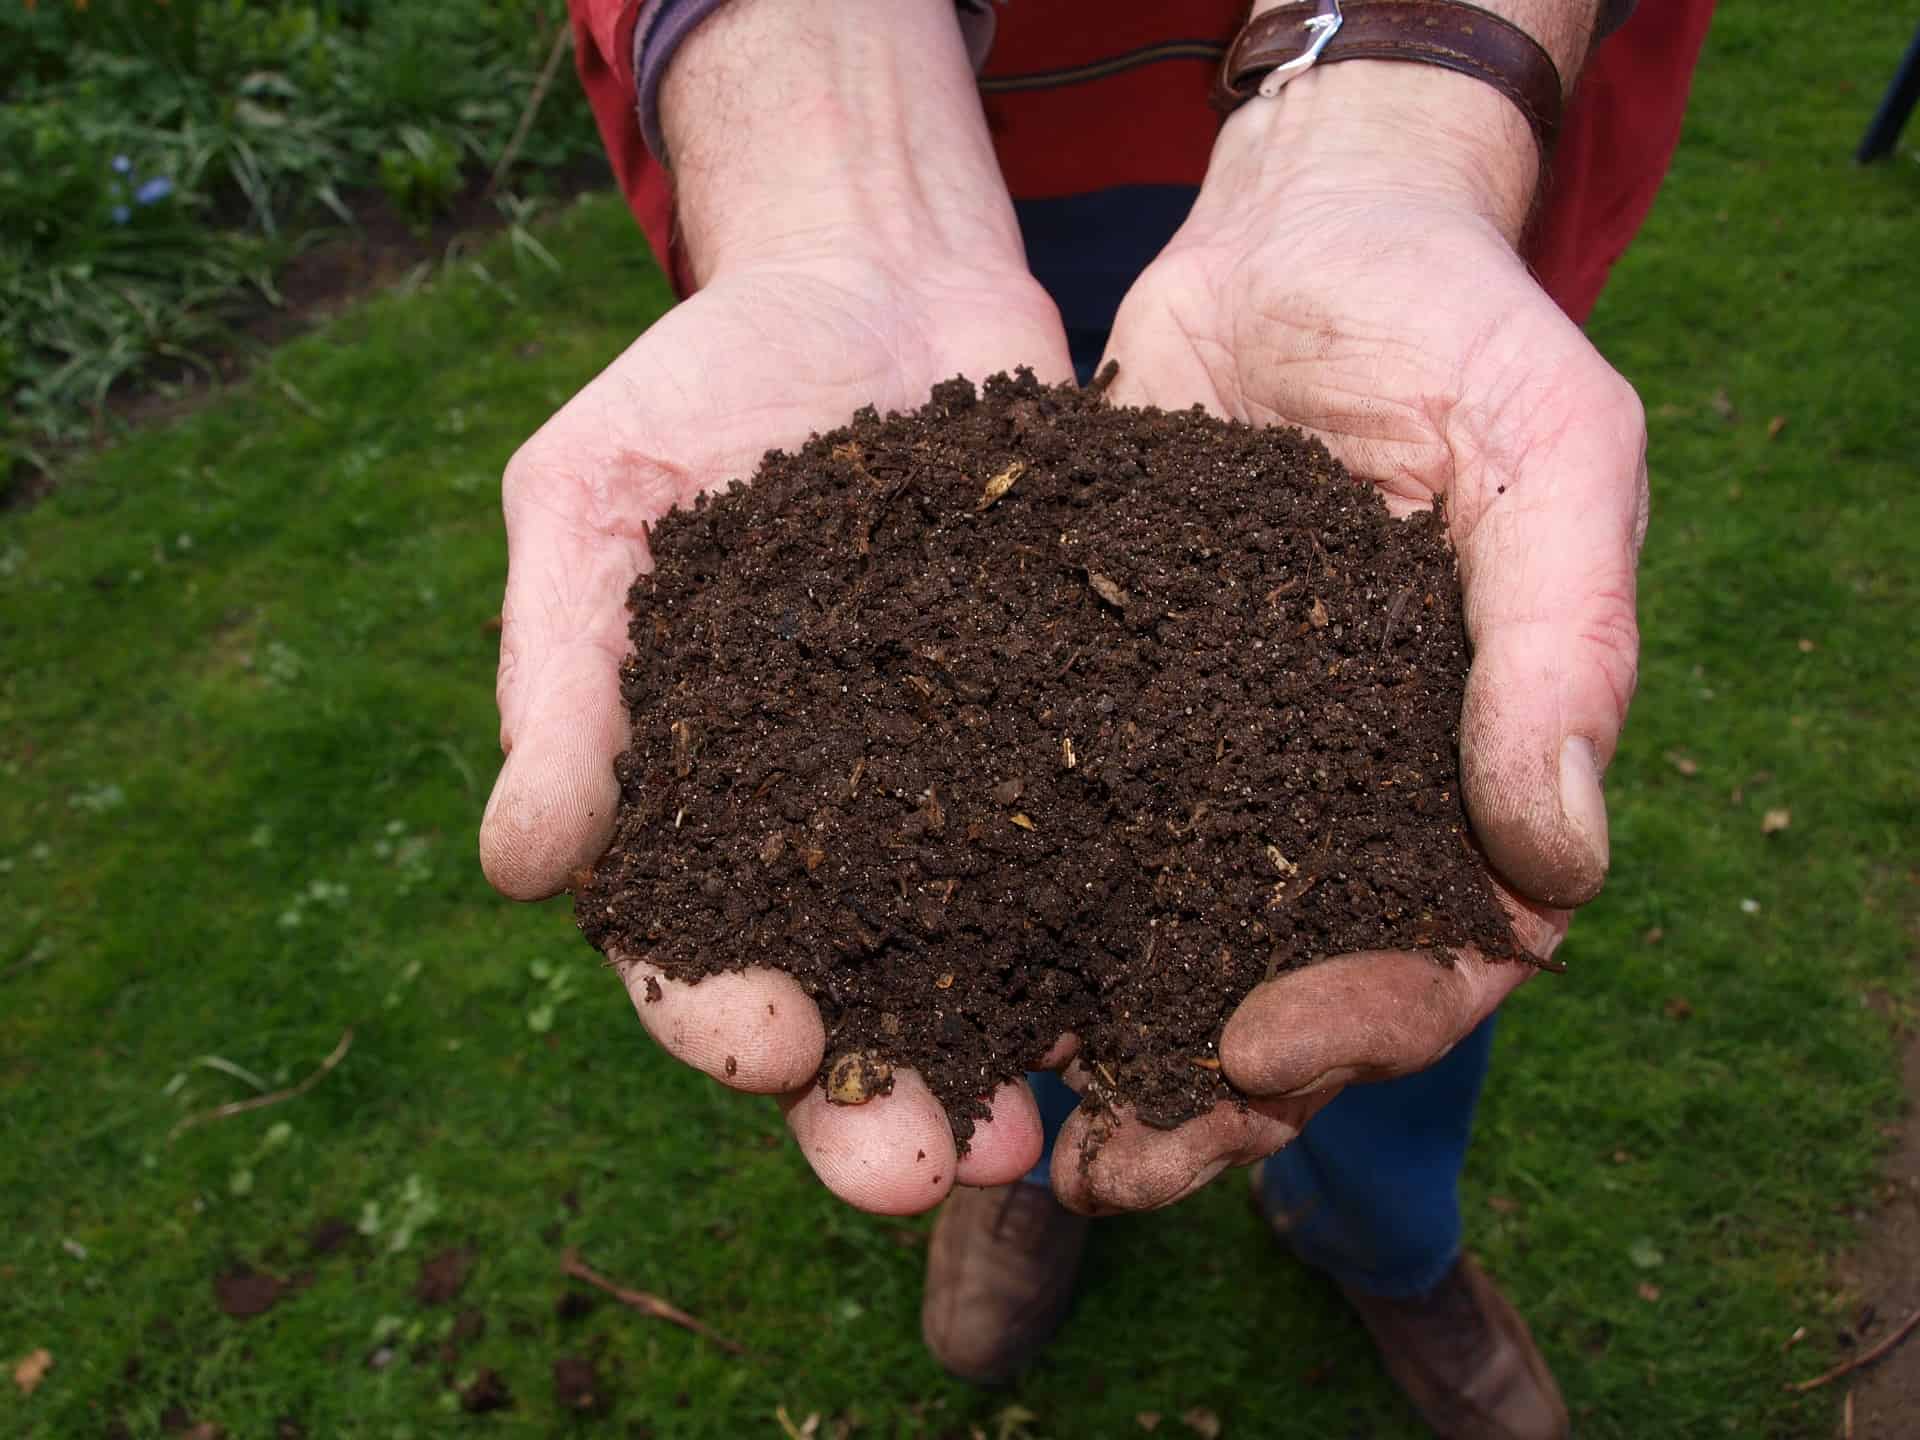
Without chickens, there are still ways that you can compost in winter and capture your kitchen scraps:
1. Use your regular compost bin
I empty mine to about ¼ full of compost in progress with lots of worms. I fill it all the way to the top with dry leaves and sort of hollow out the center. The leaves don’t freeze solid and all winter I drop the scraps down the middle of the leaves. The leaves provide some insulation and the food scraps and leaves at the bottom of the pile are warmed enough by the earth that a tiny bit of composting keeps happening even when temps get well below freezing. The earthworms are slow but still keep working and reproducing.
2. Compost in a protected sunny spot
Keep a plastic (black if possible) bin against the house on a sunny side. I started with the bin half full of partially finished compost that hopefully has some worms already busy in it. The center, next to the ground, will stay unfrozen so the worms will stay alive. The compost probably won’t process much over the winter except on sunny days. You may need to secure it against raccoons or other varmints.
3. Make a trench
This takes a bit of planning before the cold weather arrives, but produces amazing results and saves time and labor. Dig a long trench right in the garden…about a foot deep and a foot wide. Leave the soil heaped right next to the trench with a rake nearby. I left the excavated dirt on the side of the trench. Every time the indoor compost bin was full, I just took it out to the garden and dumped it into the trench. If things weren’t too frozen, I pulled some of the excavated dirt on top of the food scraps. If there was snow on the ground, I just put the scraps on top, and eventually, it fell into the trench.
This process attracts all the worms to the trench. Some composting takes place in the Fall but most decomposition happens in early Spring. By early May, when it’s time to plant tomatoes, the compost is broken down enough that I can transplant my tomatoes directly into the filled trench that is crawling with decomposers and happy earthworms. If it was a very cold winter and the compost isn’t finished, just plant right next to the trench. Some people like to compost in trenches all year. They set up a three-year rotating system where they compost one year, plant the next and use the area as a walkway the third year. Pretty clever!
4. Make a windrow
John, the Worm Man, Anderson in northern Colorado keeps his worms happy all winter by setting up short windrows of compost, food scraps, and worms. He throws old carpet or tarps over the top. Periodically, he lifts the carpet and puts new scraps on top of the piles. The worms slow down in winter but keep working and reproducing. For small households, just make a pile on the ground and cover it with a tarp. The tarp keeps moisture and some heat in. Just slip the food under the tarp. Worms show up. This doesn’t work so well if you have raccoon or mice and rat issues.
https://bbbseed.com/wp-content/uploads/2026/01/47710_BBB_Logo_HiRes_Transparent_1023-01-removebg-preview.png00Sandy Swegelhttps://bbbseed.com/wp-content/uploads/2026/01/47710_BBB_Logo_HiRes_Transparent_1023-01-removebg-preview.pngSandy Swegel2022-10-28 03:57:142025-06-23 14:54:414 Ways to Compost in Winter
The old adages say cleanliness and hard work are virtues. That may be true in your kitchen, but in the garden, a little sloth can save many lives and make your life a little easier. Mother Nature isn’t just messy when she clutters up the Fall garden with leaves and debris….she’s making homes for her creatures. Old dead leaves may look like clutter that needs to be tidied up, but it’s really nice rustic sustainable homes for many of a gardener’s best friends.
Here’s who is hiding in your garden this winter if you DON’T clean up.
Ladybugs in the garden beds next to the house. Ladybugs want a nice sheltered home safe from wind and exposed soil. I most often find them under the leaves and dead flower stalks in the perennial garden.
Butterfly larvae (aka caterpillars) in leaf bundles. Sometimes in winter, you’ll see a couple of leaves looking stuck to a bush or tree or in a clump on the ground. Often there’s a butterfly baby overwintering there.
Lacewing at the base of willows or in the old vegetable garden. Insects don’t work very hard in the fall either. Often they are eating happily on the aphids in your vegetable garden or your mini forest and just go through their life cycle right there. They lay their eggs on the bottom of leaves and the leaves fall to the ground. If you clean up too much, you’ll clean up all the beneficial insect’s eggs
Slugs in your hosta garden. Even slugs are a good thing to leave for the winter. They will be plump food for baby birds next Spring.
The bottom line is don’t do a good job of cleaning up in the Fall. Take away any very diseased leaves. Clean up the thick mats of leaves on the lawn so they don’t encourage lawn fungus. But leave the flower stalks with seeds and the leaves in the beds. They insulate and protect plants and insects.
Another good reason to be a little lazy this Fall.
https://bbbseed.com/wp-content/uploads/2026/01/47710_BBB_Logo_HiRes_Transparent_1023-01-removebg-preview.png00Sandy Swegelhttps://bbbseed.com/wp-content/uploads/2026/01/47710_BBB_Logo_HiRes_Transparent_1023-01-removebg-preview.pngSandy Swegel2016-10-24 12:30:562025-06-23 15:00:07Quit Working so Hard This Fall
Nothing like the first deeply freezing temperatures followed by a warm day to get people in Zone 5 areas asking if the gardening season is really over if they can still tackle their garden to do lists even though winter looms with Thanksgiving is around the corner. We have two conflicting impulses…the really good bulbs are on sale at our local garden center AND there’s an inch of snow and refrozen ice on the garden bed.
What does happen to our soil in winter? Once soil temperatures are in the forties, all the creatures and denizens of the soil put themselves to sleep through dormancy or through laying lots of eggs or spores that will hatch when temperatures are warmer. Seeds stop germinating or else require weeks and weeks at low temperature to come up. They’re smart…no point in germinating if sub-zero temperatures in another few weeks are going to kill young growth. So the soil goes into stasis until the temperatures warm.
Here are some of the questions I hear people asking as our soil begins its freeze:
Can I still plant bulbs? Can I transplant daylilies now? Yes, if you can pry the soil open and get water to the plant, there’s a good chance your bulbs will bloom and the daylily will be fine. Daffodils especially prefer getting planted earlier to have some time to make roots. Sometimes blooming is delayed the first season, but I have had good success in planting bulbs too late…especially if I throw in some compost in the hole and don’t plant too shallowly. I’ve also had years when the bulbs just ended up being frozen mush…so plant earlier next year.
Can I put in a cover crop? In Zone 5, it’s too late. The temperatures are too cold for seed germination. Put lots of mulched leaves over the soil to cover it.
Do I have to water? Ideally, you got the garden well watered sometime in Fall through rain or irrigation. If not or if there are long dry sunny spells, you should winter water.
What do I do with my Fall greens that are freezing solid? Keep eating…they get better every day. Spinach frozen at 8 am is delicious at room temperature. If you cover greens with row cover or a cold frame or even throw big bags of leaves over the plants, you can keep harvesting easily through January or longer if you haven’t eaten them all.
Can I still use herbs? Yep, remember where your herbs are and you can put your hand through a foot of snow for snippings of intensely flavored frozen thyme or oregano leaves.
Can I still fertilize? You can, but the soil organisms won’t be processing it. Organic fertilizer like alfalfa meal stay on the soil and will eventually be used when things warm up next Spring.
Is there something I should plant? Winter hardy violas and pansies don’t mind a little snow and ice. In a sunny location, they’ll keep throwing up blooms all winter long…a surprise of color in a white or brown winter-scape. Plant well hardened off plants and keep them watered.
Fall leaves are Nature’s parting gift from the growing season to the gardener. Tree roots run deep and wide and have collected minerals and nutrients from deep in the soil. These are nutrients that then spent the summer high in the sky at treetop collecting sun rays and are now being placed abundantly at your feet.
If you’ve been gardening any length of time you know how valuable leaves are. They decompose beautifully in the compost bin when mixed in with the green matter. You can run them over with the mower to break them down and use them as mulch in all your garden beds. You can keep piles of them in a shady moist corner of the garden decomposing down into leaf mold which is a superior soil amendment.
The most important thing gardeners in my neighborhood do within Fall leaves is collect them. Our neighbor Barbara is the Queen of Fall Leaves and had taught us about how valuable leaves are to the gardener. She lives on a busy street and puts a big cardboard sign in front of her house every year that says “Bagged Leaves Wanted.” Pretty soon bags and bags of leaves start piling up, brought from strangers all over town who are happy to have a place to recycle their leaves. Barbara gets the first 1000 bags and about fifteen of us split the next 1000 bags of leaves.
So what do you do with 1000 bags of leaves?
Mulch the garden beds. Some of the leaves have already been chopped by blower vacs. These leaves easily go on perennial beds.
Mulch the garden paths. Big dried leaves that are slow to break down like oak leaves or pine needles go on the paths to keep the weeds down.
Put a layer over the vegetable garden. If you don’t till in the spring, a thick layer of leaves will block light and suppress weeds and keep in moisture. But wait, you say, the wind will blow the leaves away. That’s when you put the bagged leaves on top of the garden. It’s a place to store extra leaves and the weight of the bags keeps the loose leaves from blowing away. Moisture collects under the bags and earthworms come to feast there.
Till the molding leaves into the soil in Spring with the cover crop.
Insulate the cold frame or greenhouse with bags of leaves stacked around.
Line the troughs you dig for your potatoes next year with rotting leaves.
Make easy Leaf Mold. Stack the bags that look like they don’t have holes somewhere (as insulation or just as storage) and put the hose in to fill the bag about ¼ way with water. This makes speedy leaf mold.
Use as free litter for chickens and bunnies. If you have farm animals, dried leaves are perfect free litter for the bottom of the coop or cage. And the manure is already pre-mixed with carbon for composting.
Feed the Goats. The most fun thing to do with the leaves (aside from jumping in piles of them) is to feed the goats. Apparently, dry leaves are yummy like potato chips to goats and they come running to eat the crunchiest ones when I’m hauling the latest bag of leaves to the backyard.
Happy goats running with floppy ears flying is a highlight of my day.
https://bbbseed.com/wp-content/uploads/2026/01/47710_BBB_Logo_HiRes_Transparent_1023-01-removebg-preview.png00Sandy Swegelhttps://bbbseed.com/wp-content/uploads/2026/01/47710_BBB_Logo_HiRes_Transparent_1023-01-removebg-preview.pngSandy Swegel2014-10-31 09:22:592025-06-23 14:58:051000 bags of leaves and what to do with them
A friend who has gardened “naturally” for sixty years always has beautiful stands of poppies that I covet. She shared her secret for poppies and it works great for calendula too.
“Anytime after the new year, preferably the night before a big snow, spread a packet of seeds where you want the flowers to grow.”
That’s it. That’s all it takes. In nature’s time, the seeds will germinate and grow. Putting the seeds out before a snow helps both with giving a little moisture and with hiding the seeds from birds. But I’ve also had luck just throwing the seeds on hard snow.
https://bbbseed.com/wp-content/uploads/2026/01/47710_BBB_Logo_HiRes_Transparent_1023-01-removebg-preview.png00Sandy Swegelhttps://bbbseed.com/wp-content/uploads/2026/01/47710_BBB_Logo_HiRes_Transparent_1023-01-removebg-preview.pngSandy Swegel2014-01-13 00:22:482025-06-23 14:57:24Seeds You Can Start Outdoors NOW!
Frost? Are you crazy some might say? We’re finally hitting 90 degrees and the tomatoes are starting to grow. And you’re thinking about frost? But this isn’t about the last frost in the Spring…it’s about the first frost in the Fall. Knowing when the first frost is, is how you know if you have enough time. I’ve gotten behind in my planting and I really wanted winter squash this year. Do I still have time to plant or has procrastination done me in this year? How about you? Do you still have time to plant the long-season crop you wanted?
There are two things we need to know: • What is the time to maturity of seeds you’re thinking of planting? • What is your area’s first frost average?
How Many Days to Maturity? The seeds I’m thinking about are the Hubbard Squash, a good meaty winter squash that’s perfect for baking. The packet says it takes 105 – 115 days to mature and 5 – 12 days to germinate. So I’m going to assume the best case scenario….that I can use the heating pad to get the squash to germinate in just 2 days and then add 105 days till I get my first mature squash. Delusional, I know. Nevertheless, at the minimum, I need 107 days to make one winter squash. Today is June 3rd.. 107 days from now is September 18th. (What? Summer Vacation will be over before I get squash?!)
When is First Frost? Now I check out my favorite, if obtuse, data chart from NOAA and find out there’s a 50% chance of 32 degrees occurring here in Boulder by October 8th. There’s a 10% percent chance of freeze occurring by September 20 but I’m going to go the optimist’s route (and keep the bed sheets ready in case I have to cover the entire plant one night) and say “YES!…I have time to get some winter squash ripe this year.” Some years we have one night of frost and then weeks of warm weather. I may not get many squashes that have time to ripen. I should have planted earlier. But still! For the dates for your area, here’s the chart:http://www.ncdc.noaa.gov/oa/climate/freezefrost/freezefrost.pdf
Wow, it is later than I think. Gardening is the greatest challenge to the procrastinator…Mother Nature just hates being rushed. Still, I’m relying on her benevolence to give me a strong productive plant and a warm fall so I can enjoy my favorite roasted winter squash this year.
https://bbbseed.com/wp-content/uploads/2026/01/47710_BBB_Logo_HiRes_Transparent_1023-01-removebg-preview.png00Sandy Swegelhttps://bbbseed.com/wp-content/uploads/2026/01/47710_BBB_Logo_HiRes_Transparent_1023-01-removebg-preview.pngSandy Swegel2013-06-03 10:50:132025-06-23 14:56:54First Frost: Is There Still Time?