Scattering mature seeds is one way to get more flowers.

2 Easy Ways to Have More Flowers Next Year

A fun guide on how to grow more flowers, easily!

The two methods include:

1. Sowing mature seeds

– Remove seed pods from spent and dried flowers.
– Break apart seed pod to release mature seeds.
– Scatter seeds and stir them into the soil surface.

2. Replanting new starts

– Locate new seedlings starting from established perennials.
– Carefully dig out these seedlings.
– Replant in a new location and water thoroughly.

How to make plants grow more flowers?

Someone somewhere has certainly declared “The more flowers, the better”. This is a sentiment I share with that “someone, somewhere”. I have two assignments for you if you’d like to set yourself up quickly and easily to have more flowers in your garden next year.

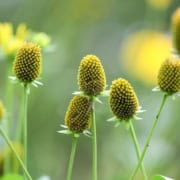
Your first assignment is to go stand in the part of your garden that has wildflower-y plants.  You’ll notice two things. The first thing is that there are lots of spent flowers and seed heads that need to be deadheaded. Everything from rudbeckia to dill to penstemon has mature seed heads. You can always collect these seeds and put them in little envelopes to save for spring or you can take my lazy way out and snip off the seed head and fling it in the general direction you’d like it to grow next year.

The second thing you will see is that flowering plants always seem to migrate to the edge of the garden bed and need some encouragement to move to the middle and back of the bed.  Keep flinging seeds knowing that some of them will germinate right where they fall…so fling them merrily for…

More flowers!

Your second assignment is to find a spring or early summer bloomer and stand in front of it.  A Columbine or Penstemon, Agastache, and Echinacea are good possibilities.  Often right at the feet of these now-finished beauties are dozens of little plants or even seedlings that have germinated in the past month and are growing next year’s plants.  I take my hori-hori knife and gently dig or carve out (we have lots of clay soil) a nice plug of soil that keeps the baby plant’s roots intact and put it where I’d like more plants.  If the plant is young and you didn’t disturb the roots much, there won’t be transplant shock…just a new perennial that will bloom next year.

In conclusion, whether you are flinging seeds or digging up plant plugs, you’ve saved yourself a lot of time and fussing with seed starting trays under lights and you’ve tricked Mother Nature into letting those perennials bloom next year.  New plants, more flowers – easy, quick, and free.  That’s my kind of gardening.

People also ask:

  • What are some tips for digging up and re-establishing plants in my garden?
    Make sure that the plant that you are going to dig up is well-watered and healthy.  Dig the new hole twice the width of the transplant and not any deeper than the rootball.  Dig around the base of the plant outside of the roots area.  Keep the root ball intact.
  • How and when do I transplant seedlings?
    Anytime after the seedlings have developed their second set of true leaves.
  • How do I  save and store flower seeds?
    Wait until the flowers have finished blooming and the seed pods have turned brown and dry.  Lay seed pods on paper towels to make sure they are thoroughly dry.  You can store the pods whole or remove the seeds from the pods.  Store harvested seeds that are well-dried in a cool place in a sealed glass jar.  A small desiccant packet can help eliminate any moisture in the jar.  Individual seed species can be stored in envelopes. Label and date the envelopes holding the seeds.  Plan to use within 1-2 years.
  • What are the dos and don’ts of deadheading flowers?
    Deadheading is the process of removing spent or faded flowers from the plant.  The plant begins putting its energy into producing seeds after the blooms fade.  To keep the plant’s energy directed towards blooming more flowers, remove the faded ones.  Don’t just remove the flower top, remove the entire stem back to the live stem.


Free Rose Bushes in Less than Five Minutes

Wildflower Seeds

by Sandy Swegel


This is going to be a short post because it only takes moments to act now to have free rose bushes growing in your yard next spring.  No lights, heaters, no fussing.

The internet often calls this method of rose propagation “Grandma’s Mason Jar Method” because it’s how pioneer gardeners brought their favorite roses across the country.    And that’s how I learned it from a grandma and esteemed rosarian years ago.

What you need:


A cutting from the end of a mature rose cane.  About 8 inches.  (Not the soft green growth of late summer but a cane that had a rose on it. )

A quart mason jar or plastic jar.

Some mud.

Some water.

Decide where you want the rose to grow.  You’re going to put the cutting exactly where you want it. No transplanting needed.  Put some water and mud in the jar and swish around.  This is to make the jar more opaque. (Here in Colorado we have to worry about harsh winter sun frying the cutting.)

Prepare the place the rose is going to go…it should be decent garden soil. Water it if the soil is very dry.

Push the cutting about 3 or 4 inches into the soil and tamper in.  Put jar over cutting.

Now leave it alone until next May or June.  Seriously.  No peeking or opening it up for air on warm April days.  Leave it alone.  Water the area if the soil dries out terribly.  Let leaves drift on top of it.  Just let nature do what nature does.

Not every cultivar of rose propagates easily, but many do.  Do lots of cuttings, each with their own jar, to increase the odds of success.  My gardening friends have used this technique in harsh Colorado weather and it’s just a miracle.

Photos and more info:

http://www.rose.org/the-rose-whisperer/

http://scvrs.homestead.com/cuttings1.html

Starting Rose Bushes From Cuttings

Three Ways to Hurry Spring Along

How to Quickly Prepare for Spring

by Sandy Swegel

Even in snowy Colorado, signs of Spring are showing up. The landscape is mostly brown, but on the warm side of rocks, weeds are greening up. Who knew how happy I could get watching a weed grow! Wednesday we had five inches of snow and Thursday the temperatures hit 60. But I am still IMPATIENT. Here are three ways to make it feel like Spring is here and to hurry spring along.
Dig Winter Up and Bring it Indoors

In warm sunny spots, grape hyacinth foliage is greening up and the soil’s not too frozen. I dug up a little four inch patch of the shallow bulbs, potted them up and gave them a home in the south window. The grateful bulbs started growing right away and will give me flowers in another few weeks….while their brothers in the garden are still sleeping.

Do some Pruning and Force some Branches.

This later winter time is the best time for pruning dormant shrubs AND for forcing flowering branches. Just a few days in your warm kitchen will trick some pussy willows branches and forsythia to start to bloom. The Early Spring issue of Country Gardens magazine has a whole section now on using pussy willow branches.

Put Micro Greenhouses in your Garden

Take an empty 1-gal plastic water jug and cut the bottom off. Tent an area of pansies or the grape hyacinths and let the tiny greenhouse bring blooming on now. As soon as the flowers show up you can remove the greenhouse…the flowers can handle the snow. After the flowers are blooming, you can move the water jugs over to the reseeding arugula bed to force some arugula microgreens.

C’mon Spring. We need you NOW!


Photo Credits
http://www.bhg.com/blogs/everydaygardeners/tag/pussy-willow/
http://feralkitchen.com/2012/04/
Weekly Photo Challenge: Treasure


Bring More Color to Your Wild Areas

Wildflower Seeds

by Sandy Swegel

At this time of year when we’re mired in cold and snow, I yearn for two delights of Spring:  when the daffodils and tulips bloom and when the meadows burst with wildflowers.  One thing about wildflowers though, especially in our suburban gardens.  A few years after planting it seems that just a few wildflowers start to dominate.  Often it’s the bachelor buttons and California poppies, both beautiful flowers, but we need diversity and variety and wild color to really shake winter off.

The secret to a lush wildflower area (besides good rainfall) is to over-seed the area every once in a while with some of your favorite flowers.  I usually take the easy way and just throw out a packet of our mixed wildflower seeds to get an overall refreshing of the original mix I planted years ago.  But for one friend who has created a “hot colors” theme of red and orange in her garden, we throw out packets of red wildflowers.  This year we just did a search for Flowers by Color and picked out the flowers we liked with the truest red colors.  We settled on red columbines for Spring, red firecracker penstemons for early summer and red gaillardia for mid-summer.

Finally, my absolute favorite reseeding in the Spring is to seed the Parade of Poppies mix.  There just are never enough poppies of any sort in my mind.  This year I’ve slipped a seed packet in my coat pocket for some guerilla gardening during my sunny day walks along old abandoned properties and ditches that grows lots of weeds.  Poppies will brighten my path this year!

This year I’m also going to try taking a baggie full of our new StrawNet (pellets of straw) when I do my wild area guerilla gardening.  The biggest problem with just throwing seeds out onto abandoned land is that I can’t water them every day.  StrawNet absorbs water and helps create a little moist barrier for new seeds so I expect it to help more seedlings survive even if we have a dry Spring.  Sometimes nature needs a little help to be as beautiful as she can be.

Photo Credit: http://www.fs.fed.us/wildflowers/beauty/columbines/images/aschockleyi/aquilegia_schockleyi_habitat_katewalker_lg.jpg

How to Become a Great Gardener

Why You Should be a Self-Taught Gardner

by Sandy Swegel

I garden and landscape for a living.  I have accumulated a massive amount of information about the best ways to grow things, to take care of the soil, to encourage native plants and bees, etc.  When I’m talking to people, they naturally assume I have a degree in horticulture or botany.  So it surprises people to learn I have a BA in History and an MA in Theology. I’ve been thinking a lot about this because my friend’s kids are all starting college and trying to decide what to major in.  I had no idea when I was 18 that I would one day garden for a living.  But studying history taught me to think and analyze and reflect. And studying theology taught me the world is a mystery and it’s important to learn to observe and notice and simply “be” with nature.

So I encourage everyone to become self-taught gardening experts. You don’t have to go to school or even study.  You just need to start noticing what’s going on in the natural world. No teacher can tell you as much as your own personal experience will.  If you’re just a little systematic about it, you can be a much better gardener at the end of this year. Here’s some homework to learn how to become a great gardener:

Journal.

Keeping a garden journal of what you do, what you plant and what the weather is like is a great way to learn.  You may not know why what you are writing is important (when you planted, when plants started, days without rain, birds and insects observed, etc) but in hindsight, you can figure out when to plant so there are flowers for hummingbirds, or how much rain it takes to have big fungal outbreaks.  Even just being able to read the seed packet you glued into your journal when it’s time to harvest will be a big help.  Keep notes. Understand them later.

Pick a specialty this season.

One year I decided to learn herbs.  I bought seeds and plants of every herb I could think of and grew them in a tiny 4 x 6-foot garden. I learned tansy is a big space hog that kinda stinks and crowds out the other plants, that cilantro and dill practically grow themselves, and that ginger root from the grocery store grows beautiful plants and tons of free ginger.

Take pictures of everything that intrigues you.

Take shots of plants in other people’s yards, wildflowers on walks, blooming containers, weird plants you’ve never seen before. The photos will show you what you like and what really interests you.

Observe.

Just look and notice everywhere you go. Ask questions of gardeners. Wonder about the weather. Notice creepy crawly things or buzzing flying things.  Again. Just take notice with a sense of wonder. You’ll make sense of it eventually.

One thing I’ve noticed about our BBB Seed readers:  you notice the natural world. You stand in awe at beautiful landscapes, tiny birds in nests, and clever ways people arrange flowers in a shabby chic decoration.  Use these great powers of observation and really teach yourself something new this year.

Seeds You Can Start Outdoors NOW!

Seed Starting

by Sandy Swegel

Yes, most of the country has been caught up in a polar vortex. Snow and ice are on the ground and you, the gardener, are stuck with nothing to garden.

There are still two flower seeds you can start outdoors now!

Poppies and Calendula.

A friend who has gardened “naturally” for sixty years always has beautiful stands of poppies that I covet.  She shared her secret for poppies and it works great for calendula too.

“Anytime after the new year, preferably the night before a big snow, spread a packet of seeds where you want the flowers to grow.”

That’s it. That’s all it takes. In nature’s time, the seeds will germinate and grow. Putting the seeds out before a snow helps both with giving a little moisture and with hiding the seeds from birds.  But I’ve also had luck just throwing the seeds on hard snow.

It’s National Pollinator Week!

Celebrate These Hard Workers!

Six years ago the U.S. Senate’s unanimous approval and designation of this week in June as “National Pollinator Week” marked a necessary step toward addressing the urgent issue of declining pollinator populations. Pollinator Week has now grown to be an international celebration of the valuable ecosystem services provided by bees, birds, butterflies, bats, beetles, etc.

Often overlooked or misunderstood, pollinators are in fact responsible for one out of every three bites of food that we eat. In the U.S. bees alone undertake the astounding task of pollinating over $15 billion in added crop value, particularly for specialty crops such as almonds and other nuts, berries, fruits, and vegetables. Beginning in 2006, pollinators started to decline rapidly in numbers.

BBB Seed Company (Boulder, CO), The Colorado State Beekeepers Association, Northern Colorado Beekeepers Association, Boulder County Beekeepers Association & 12 garden centers/stores across Boulder & Larimer Counties in Colorado are teaming up to celebrate National Pollinator Week! We will have a Pollinator Table set up at all 12 locations during Pollinator Week June 17-23rd with pollinator literature, brochures, pollinator wildflower mixes and more. On Saturday, June 22nd from 10am-2pm, each table will have a beekeeper there to answer any questions adults & children may have about pollinators, planting for pollinators, protecting pollinators, etc! Come help us Celebrate, Honor & Protect our Precious Pollinators!
So visit your local nursery or garden center during Pollinator Week, pick up some seeds or flowering plants and learn about the vital role of bees and other pollinators!

Locations in Larimer County include: • Downtown Ace Hardware, Fort Collins • Fort Collins Nursery, Fort Collins • Fossil Creek Nursery, Fort Collins • Bath Garden Center, Fort Collins • Gardens on Spring Creek, Fort Collins • JAX Ranch & Home, Fort Collins • JAX, Loveland

Locations in Boulder County include: • Flower Bin, Longmont • JAX, Lafayette • McGuckin Hardware, Boulder • Harlequin’s Gardens, Boulder • Sturtz & Copeland, Boulder

Gardening for Beginners

Try These First Timer Tips

If you are a beginner, you’ll soon learn that Gardening is both an art and science….and a bit of luck. You start by reading books and the backs of seed packets. You ask other gardeners and talk to strangers at the garden center. But mostly you observe. You watch what others are doing. You watch the plants in your garden. You pay attention to the weather and birds and insects and raccoons. And best of all, no matter what you know, or how long you’ve gardened, there is always something new to learn. It doesn’t matter either if you don’t have enough space outside to do gardening. You can easily just get something like these LED grow lights and do some gardening inside, or you could go see if there is a community garden center that you could partake in. There are loads of options.

The Very Basics you Need:

Light. Gardens do better in sun. You can get by with partial shade but if you want tomatoes and beans, you need at least six hours of sun a day. More preferably.

Soil. Roots need soil and air. If you have soil that needs a pickaxe to dig a hole, you need to add “amendments” like compost or composted manure, to lighten the soil. It doesn’t need to be fluffy like potting soil…but it needs to have enough air to receive water and to drain.

Water. With drought at record levels all over the country last year, it’s easy to understand that plants need water. When you’re starting seeds, the soil needs to be moist on the surface till the seeds germinate. Later, the soil needs to be moist an inch down when you put your finger in the soil. In the beginning, when plants are young, you might need to water every day. You have to keep checking. There’s a solution to this problem, if you have a look into the Powerblanket sizing chart and follow up by purchasing the recommended size, this will allow you to have a temperature controlled bucket which will preserve the water supply throughout summer.

Space. Plants need space both above and beneath the ground. Not too much space because they do like growing in groups and communities. But read your seed packet and be sure to give your plants at least a few inches of space.

Time. Gardening is a four-dimensional event. It changes dramatically over time. You need enough time for the plants to grow to full term. Lettuce is ready to eat in a few weeks. Winter squash can take 100 days. As the weather changes, what the plant needs changes, so you have to keep adapting. You also have to keep track of time and can’t let a week or two pass without checking on your garden.

Love. Gardens that children grow will often thrive even though the kids don’t do everything right. That’s the love factor. I look back at my first gardens and can’t believe I managed to get anything to eat. But I loved the process. I loved playing in the dirt and watching seeds germinate. I loved the idea of the garden even when I forgot to go out to water. I loved the red tomatoes in the sun. And the plants forgave my shortcomings and grew in that atmosphere of love.

Watch, Learn and Enjoy.

Or as we like to say at BBBSeed: Grow. Enjoy. Share.

Resources:

‘Organic Gardening’ magazine is a great resource. Years of articles are online. You can start with their basic how to garden. http://tinyurl.com/bhlqfcy

Square-foot Gardening was most helpful to me when I started learning. Gardening seemed like such a big project…but I could do 4 feet x 4 feet without feeling overwhelmed. http://www.squarefootgardening.org/

Gardening is very different in an arid climate like Colorado compared to humid places like Louisiana or Oregon. Check with your local Cooperative Extension (every state has an extension service from its ag university.)

Gardening for newcomers to Colorado is here: http://www.ext.colostate.edu/pubs/garden/07220.html

www.gardeninginfozone.com

Winter Watering Decision Matrix

How To Make The Right Choice

Yesterday was a glorious snow day. There was light fluffy snow falling steadily all day. It gathered about three inches on the car, but this morning, winds have reduced what’s on the ground to a rather negligible half inch. That great day of snow is going to amount to almost no actual water getting into the ground. In dry climates like Colorado, the snow evaporates under relentless winds or high sun and after a day of warm sun, it won’t be muddy or wet in the garden…except in little north side niches.

The taunting appearance of moisture is one of the reasons I made my own winter watering decision matrix…so I would have a methodical approach of deciding when to water in winter and not just let visual clues like ”it snowed all day” decide whether watering is necessary.

So here’s my Decision Matrix for Wintering Watering:

Has it been dry without significant precipitation or snow cover for the last two weeks and/or have the temperatures been warmer than usual?

If yes, the next step is to walk outside and ask,

“Is the ground frozen?”

If the soil is frozen, winter watering doesn’t help anything. Any water would just roll off the soil and not do the plants any good.  Go back inside.

I usually wait until a couple of days of warmer or sunnier mid-day temps and repeat the “Is the ground frozen?” question in the afternoon.

When the soil is thawed, then the next question is,

Did I plant new plants in 2012? If the answer is yes….then you need to winter water those plants once a month during dry times.  This is true for new trees, bushes and perennials.  You need a good slow soak right at the root ball.

Now move to other parts of the garden with older plants and ask, “When I put my finger in the soil, is it moist one inch down?  You’re checking the soil here….not just the mulch on top of the soil.  If it’s still moist, then go back inside and leave the water in the aquifers.

If the soil is dry an inch down, water now to save the lives of your plants and especially your trees which have suffered greatly with drought in most of the country over the last year.

Water slowly so it can seep into the soil.  A good rule of thumb is 10 gallons of water per inch of stem caliper.  If you have one of those root watering spikes….insert it shallowly…less then six inches….most roots are rather shallow and you don’t want to water under the roots.

Here are resources: a winter watering fact sheet, and the US Drought Index.  Most of the country is under greater drought now than it was a year ago. In Colorado after the drought in 2002, we lost many of our trees the following years….because the impact of one year of drought stresses trees and plants for years. So this is the time to save your landscape. Don’t water on top of snow or frozen soil….but keep your decision matrix in mind as we finish out this winter.

http://www.ext.colostate.edu/pubs/garden/07211.html http://droughtmonitor.unl.edu/

Floriferous! Designing with Annuals

Our Favorite Wildflower Seeds

More color. More flowers. These are the most common requests I hear from clients and friends who have lovely gardens full of perennials but whose gardens at certain times of the year still look a bit too green. Annuals planted in large drifts or patches is an easy and very colorful answer. And with certain annuals, they reseed themselves so it’s almost as if they are perennials…you don’t have to do much to get them to return each year.

To get this effect of a burst of color in your garden, you’ll want to try a “specimen planting”. This is an intense patch of just one type of flower. It can be many different colors of the flower but just one kind of flower gives a vivid look.

Here are my favorite specimen plantings:

Cosmos bipinnatus in a tall mix of pink, white and crimson is a favorite in gardens.  They grow about waist high and don’t really need deadheading.  There’s something old-fashioned and timeless about cosmos that people love to have them as regulars in their yards.

Four O-clocks.  I was excited to see this new addition to the catalog this year.  Not as ubiquitous as cosmos, they are a magnificent part of a garden, especially when planted somewhere you can see them outside your kitchen window when you’re preparing dinner. They really do stay closed during the day and open around 4 pm.  They aren’t adapted to daylight savings time….so it might be more like 5 pm in your yard.

Zinnias.  These are the annuals you wish you planted, come mid-summer. Each bloom lasts a long time, is perfect for cutting, and the specimen planting provides a tall sturdy vibrant color.  Another old-time favorite for a good reason: they are great flowers.

Chinese Asters. This is another new addition to the catalog this year that inspires me.  Midsummer and fall, in particular, are times that don’t have the variety of colors people desire.  The perennials of this time tend to the yellow/orange range  Chinese asters are a great burst of purples and pinks and creamy whites that have large flower heads that make them perfect for cutting. They’ll handle full sun, but I’ve seen asters thrive in areas with dappled shade where just a little shade enhances their color in the blazingAugust sun.

These four are my current favorites for annual specimen plantings. Add in other annuals like poppies mixed throughout the garden and maybe the calendula mix in the vegetable garden, and your garden will “pop” all season long.