Canning Fruit
by Sam Doll
Summer is the perfect time to enjoy fresh, local fruit. Whether it’s plump, Maine blueberries or sweet, Colorado peaches, every part of the country is offering up a local bounty of great unique fruits.
The only problem is that it is hard to make these harvests last! Maybe want to save a local treat for winter or you just have more than you know what to do with? Well, the best way to preserve your local fruit harvest is to can them!
Here is our beginners guide to canning fruit at home.
*Important Note*
Whenever you are canning, make sure to strictly follow a tested recipe from a trusted source. Canning is safe when done properly, but improperly canned food can harbor dangerous pathogens.
We recommend recipes from the following sources:
The National Center for Home Food Preservation
Ball/Kerr Food Preservation
Or your local extension office!
Also, if you are above 1,000 ft, make sure to adjust the processing time on your recipe for altitude!
Equipment
Water-Bath Canning Kit
Most fruits are naturally acidic foods, which means you should be able to process your canned fruit using a water-bath canning kit. For non-acidic foods, you will need to use a pressure canner, which can heat foods to higher temperatures than water-bath canners can.
*Processing is just the step of heating the jars for a certain period to kill off all dangerous bacteria.
A canning kit usually consists of the following
- A large metal pot with a lid
- A rack to keep the jars off the bottom of the pot and for lifting jars in and out of the bath.
- A magnetic wand for retrieving lids and rings
- A jar lifter
- A canning funnel
- A paddle to check fluid height and for removing bubbles
We recommend the Ball Enamel Water Bath Canning Kit
If you don’t want to use a kit, you can always assemble a makeshift water-bath canner out of your normal kitchenware. Just make sure that there is enough headspace to cover the jars with at least an inch of water and that you can place some sort of rack in the bottom of it to prevent the jars from touching and breaking from the direct heat.
Canning Jars and Lids

photo courtesy of Pixabay – Lolame
Equally important as the water-bath canner, having the proper containers is essential for successful home canning.
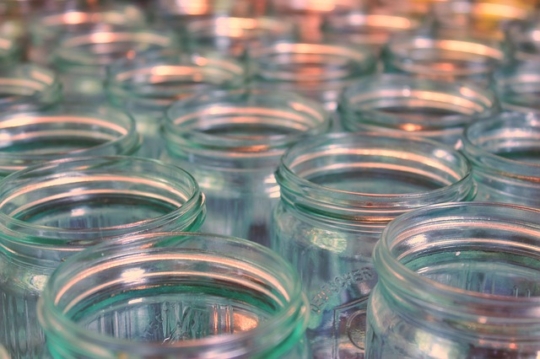
Make sure you are using clean, canning grade jars designed for home canning. These mason jars are sturdier and safer than commercial glass jars and their availability makes them easy to replace and get lids for.
While the lid rings can be reused, make sure only to use new canning lids when preserving food. Old lids will not seal properly and can lead to improperly processed food.
Choosing and Preparing your Fruit
As always, the best ingredients make the best, finished product. This is especially true when trying to preserve fruit. Fruit needs to be fresh and sturdy to keep their color and shape throughout the canning process.
Fresh, firm fruits will do best for canning. Don’t wait until the fruit is at peak ripeness, because the heat from the processing will soften them. If they are too soft to start with, your end product will be mushy.
Thoroughly and gently wash your fruit to remove any dirt and debris. Bacteria can hide and survive in dirt, so do your best to make sure that all your fruit is cleaned.
If you want to preserve your fruit peeled, you can either use a vegetable peeler for hardier fruits, like apples, or you can use the blanching method for stone fruit like peaches or even tomatoes.
Here is a handy guide for blanching and peeling stone fruit.
Canning Liquids
For the canning process to actually work its magic and properly preserve your food, there needs to be a liquid that can transfer the heat from the bath and sides of your jars to the food. There are a variety of different liquids that you can pack your fruit in: water, juices, and syrups are most common.
Water and juices are useful for hardier fruits that don’t need much to preserve the shape, color, and texture of the fruit. Apples, pears, and peaches can all be packed in water.
Syrups are more common and are a great way to preserve the fruits shape, color, and flavor. You can pack all fruit in syrups from very light to very heavy. However, heavier syrups are better for fruits that are tart or sour, while very light syrups do well for naturally very sweet fruits.
For specific syrup ratios and fruit recommendations, check out this guide by NCHFP
Packing
Packing is the step right before processing your fruit. Packing is, very simply, how you package your fruit into the jars.
Hot Packing
Hot packing is the more preferred method to pack your fruits when water-bath canning. It often involves heating the fruit to a boil in the packing liquid and then packing them into the clean jars before processing.
Some very juicy fruits can be heated without packing liquid to cook out their juices, and then packed into the jars with that fluid.
Since hot packed fruit have already been cooked, you do not have to worry about them shrinking during processing.
Cold or Raw Packing
Cold packing is when you tightly pack cold fruit into the jars and then pour the hot packing liquid over them before processing. This is not as recommended as hot packing since the fruit will shrink and release fluid during processing and it is not the most efficient use of jar space.
Processing
- After packing your jars, use a plastic spatula or paddle to remove any bubbles trapped in the fruit by sliding it down the sides of the jar. Check your headspace and, if necessary, add more packing fluid (headspace is dependent on the type of jar you have).
- Wipe the rim with a damp cloth to remove any debris or residue and ensure a clean seal.
- Gently screw on a new, clean lid and rim until it is finger tight. Do not over tighten!
- Bring the water bath to a simmer (~180° F) for hot packing or ~140° F for cold packing.
- Keeping the jars straight up and down, lift the jars and slowly lower them into the bath. A jar lifter can be helpful here, so you don’t burn yourself.
- Make sure there is at least an inch of water above the lids. If not, heat water to a boil and fill the bath to the proper level before moving on.
- Bring the bath to a full boil. Once the bath has reached a rolling boil, place the lid on the bath and start the processing timer according to your recipe.
- Once the timer has finished, remove the lid and turn the heat off. Wait 5 minutes before removing jars.
- Remove jars and place them on a towel or rack. Make sure to keep them upright. Wait for 12 to 24 hours before checking if the jars sealed properly. Do not touch the lids!
- After letting them sit, check the seal by pushing down lightly on the center of the lid. If it is firm and doesn’t move or “pop”, they should be ready to be cleaned and labeled.
 garden by weeding is one of the keys to keeping your crops productive and your enthusiasm strong. Here are some great weed-prevention strategies, and simple techniques for a relatively weed-free garden.
