Vegetable Planting Times and Strategies

Vegetable Planting Times and Strategies for High Altitudes

High Altitude

Growing vegetables in the mountains, at higher elevations can present challenges but is quite possible.  Check out these informative sites for great planting time & strategies for high-altitude gardening.
CSU Extension fact sheet
High Altitude Gardening
Growing Tomatoes in short-season areas
Other gardening strategies

Start times by region

Every region has its own best time for planting.  Here is an excellent link to find out the best time to plant your garden in your area.

Planting Times

Vegetables that take a long time to mature need to be planted earlier or even started in the greenhouse.  Here is a table that lists those vegetables and the estimated time to plant them.  Pick your region at the top row and scroll down that column to see when to plant your veggies.

Growing recommendations by region for vegetables with long maturing times.

Ds = direct sow  Gh = greenhouse
Ts = transplant
N.E. Mid Atlantic S.E. and Gulf Coast Upper Midwest S.W. Central West Coast Pacific N.W. General
 Broccoli Gh start Apr 15 and ts May 20. Use floating row covers for insect pests. Ds Mar. 1. Mulch to protect from heat. Gh start Aug 1 or Jan 30 and ts Sept. 1 or Mar. 10.  Harvest  Oct 20 – Dec. 1 or June 1. Gh start Mar. 1 and ts Apr. 15. Ds Aug. 1 – May 15. Ds Mar. 1 – Apr 1, or Aug. 15 – Sept. 30. Will overwinter in garden. Ds Mar 20 – Apr 10.  Use floating row covers to protect against insect pests.  Will overwinter. Optimum germination temperature is 70 deg. F.  Full sun, average water.
Brussel Sprouts Ds May 1 or gh start April 1 and ts May 15.  Dig plants in late Oct. and store in buckets with dirt over roots.  Replant May 1 for final year crop or seed. Ds March 1.    Difficult to get to seed. Gh Aug 1 and ts Sept. 10.  Harvest Nov. 30 – Mar 1. Gh start Mar 1 and ts Apr. 1 – 15.  Dig in Nov. and store in moist sand, replant April 1. aren’t grown here Ds July 1. Use shade cloth for young plants. Will overwinter in garden. Gh start Jul. 15 and ts Aug. 15.  Use floating row covers to protect against insect pests. Will overwinter in garden. Optimum germination temperature is 70 deg. F.  Full sun, average water.
Cabbage (head forming) Ds May 1.    Use floating row covers to protect against insect pests. Ds Mar 1 or from Sept 1 – 15 or gh start Jan 15 or Aug 1 and ts Mar 1 or Aug. 1 – Sept 15.   Will overwinter in garden for seed production with mulch. Gh start Aug. 1 or Jan 20 and ts Sept 10 or Feb 15 – Mar. 1.  Harvest Nov. 10 – Dec. 15 or Jun. 15. Ds May 1 or gh start Mar. 1 and ts Apr. 1 – 15. Ds Aug 1 – Apr 15. Ds Aug 15 – Sept. 30. Will overwinter in garden for seed production. Gh start July 15 and ts Aug 15.  Use floating row covers to protect agains insect pests. Optimum germination temperature is 70 deg. F.  Full sun, average water.
Cauliflower Doesn’t do well here Ds Mar. 1. Mulch to protect from heat. Gh start Aug 1 or Jan 30 and ts Sept. 1 or Mar. 10.  Harvest  Oct 20 – Dec. 1 or June 1. Doesn’t do well here Ds Aug. 1 – May 15. Ds Mar. 1 – Apr 1, or Aug. 15 – Sept. 30.   Will overwinter in garden. Ds Mar 20 – Apr 10.   Use floating row covers to protect against insect pests.  Will overwinter. Optimum germination temperature is 70 deg. F.  Full sun, average water.
Cucumbers Use early maturing varieties and ds after May 25.  Use floating row covers to protect against insect pests. Ds april 15 or gh start Mar. 1 and ts April. 15. Ds April 1 – May 10. Ds may 1 – June 20. Ds Mar. 15 – June 15. Ds April 15 – June 15. Ds May 20 Optimum germination temperature is 75 – 95 deg. F.  Full sun, average water.
Eggplant Use only early varieties.  Gh start Mar 20 and ts June 1. Ds Apr. 15 – May 15 or gh start Mar. 1 – April 1 and ts April 15 – May 15. Gh start Mar. 10 and ts May 1 – 20. Full sun and are drought tolerant. Gh start April 1 and ts May 20. Ds Jan. 15 – May 15. Gh start Feb. 1 and ts Apr. 1. Use early varieties.  gh start Mar. 20 – Apr. 1 and ts May 20 – June 1. Optimum germination temperature is 75 – 95 deg. F.  Full sun, average water.
Melon Gh start April 20 – May 10 and ts June 1.  Use floating row covers until flowering to protect against insect pests. Ds April 15 – June 1, or gh start March 1 – April. 15 and ts April 15 – June 1. Mulch in hot, dry weather. Ds April 1 – May 1.  Use floating row covers for protection agains insect pests. Ds May 1 – June 20. Ds March 15 – June 15. Ds April 15 – June 15. Ds June 1 – 10 only if weather will be warm for several days after planting. Optimum germination temperature is 80 – 90 deg. F.  Full sun, average water.
Okra Doesn’t do well here Ds April 15 – June 15 Ds May 1 – 30. Ds May 15. Ds March 15 – June 10 Ds April 1 – June 1. Doesn’t do well here Optimum germination temperature is 70 – 95 deg. F.  Full sun average water.
Peppers Gh start Apr. 20 and transplanted Jun. 1  Use varieties that mature early in full sun Ds Apr 15 – Jun 1 or g.h. start Mar 1 – Apr. 15 and ts Apr 15 – Jun 1 in full sun Gh start Mar 1 and ts Apr. 15-30. Gh start Apr. 1 and ts May 20. Ds  Mar 15 – May 15. Gh start Feb 1 and ts Apr. 1, pot in 5 gal pots before frost and replant Apr. 1 Gh start Mar 20 – Jun 1 and ts May 20 – Jun 1. Optimum germination temperature is 75 – 95 deg. F. Normally started 6-8 weeks before the last average frost date
Pumpkins Ds May 20 – June 10.  Use floating row covers to protect against insect pests. Ds April 15 – June 1, or gh start Mar. 1 – april 15 and ts April 15 – June 1. Ds Apr. 15 – May 1, or gh start in July 1 and ts July 21- 30 Ds May 1 – Jun 15. Ds Mar. 15 – Jun 10. Ds April 15 – May 30. Ds May 20 Full sun, avgerage water.  Protect against insect pests.
Squash Ds May 20 – June 10.  Use floating row covers to protect against insect pests. Ds April 15 – June 1, or gh start Mar. 1 – april 15 and ts April 15 – June 1. Ds April 15 – May 1 or gh start July 1 and ts July 21 – 30.  Full sun and avg water. Ds May 1 – Jun 15. Ds Mar. 15 – Jun 10. Ds April 15 – May 30. Ds May 20 Full sun, avgerage water.  Protect against insect pests.
Tomatoes Gh start Apr. 20 and transplanted Jun. 1  Use row covers for protection if needed Ds  Apr. 15 – Jun. or g.h.  Start Mar1 – Apr. 15 and ts. April 15 – Jun 1.  Stake or cage soon.  Mulch. Gh start Mar. 1 and ts. Apr. 15 – May 15. Full sun avg. water, cage or stake soon.  Mulch. Gh start Apr. 1 – May 1 and ts May 15 – Jun. 15. Ds Mar 15 – May 10, or Aug. 1  – Sept. 15. Protect from mid day sun. Ds Apr. 15 or gh start Feb 1 – 15. Gh start Apr. 1 – 20 and ts May 20 – Jun. 1. Full sun, avgerage water.  Protect against insect pests.
Watermelon May be able to grow early maturing varieties.  Gh start Apr. 20 – May 10 and ts June 1. Use floating row covers to protect agains insect pests. Ds April 15 – May 15 or gh start Mar. 1 and ts April 15 – May 15.  Mulch for hot, dry weather. Ds April 15 – May 20. Ds May 15 – June 15. Ds Mar. 15 – July 1. Ds April 15 – June 15. Ds June 1 – 10 only if weather will be warm for several days after planting. Germination temp. 85 – 95 deg. F.  Full sun, average water.

Compiled from ‘Seed To Seed’ by Suzanne Ashworth
Copyright 2002 by Seed Savers Exchange, Inc.

CONTAINER GARDENING

Growing a Garden in a Container


Planning ahead-container-plants
Take a moment to look at the locations where you want to place your containers.  Consider such things as sunlight (strength and time) and wind.  If you have pots with sun/heat-loving plants, arrange them to shade your pots with those plants that need less sun and heat.  Tall plants or plants that vine can be trellised to grow vertically and provide a natural barrier for tender plants.  Make sure to anchor trellises and containers with tall plants, to keep them from getting blown over.  If you plan to place your containers on a covered porch or balcony or any place that receives limited sunshine, you should select vegetables and flowers that don’t require as much.  Leafy greens, snap peas, Chinese mustards, and kale will do quite well in these conditions, but tomatoes, and peppers, probably not.
When growing your garden in containers rather than a garden plot, it is just as important to choose varieties that will be able to reach maturity in your growing season.  If you have a short growing season, check the maturity dates on the packages and plan to start some seedlings in the warmth of the indoors to get a jump on the growing season.

These varieties are not practical for container gardening due to their size or length of growing season (At the end is a list of vegetables/plants that will do well in containers.):

Watermelon and most cantaloupes (although there are some midget varieties that can do well)
Large Pumpkins and winter squash
Corn
Head cabbage (except as microgreens)
Mammoth sunflowers (except as sprouts or micro greens)
Beefsteak type tomatoes
Garlic bulbs/full sized Onions
Make sure to prepare your containers and pots properly, to give your veggies the best chance possible.  You will be surprised by how much those little seedlings will expand, and there is as much growth below the soil as there is above the soil, so don’t squeeze them into tiny containers.  Any type of vessel can be used, just keep in mind the size of the plants and the location.  Terra cotta pots are inexpensive but dry out more quickly than others, metal tends to get quite hot in the sun, and plastic is versatile and lightweight.

 ………………………………………………………………………………..

Getting started-

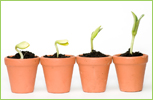
tips_seedstarting3For Container Gardening, start your long-season varieties, indoors, in good quality starting soil or soilless mixture.  Seedlings should be kept consistently moist (not wet) and exposed to fairly strong light, sunlight, or florescent, for at least 10 – 12 hours each day as soon as sprouts appear.  This will keep them from getting leggy and looking for light.  Seedlings that are sown more closely together can show more vigor as their roots symbiotically help each other extract nutrients from the soil.  As the first true leaves appear, choose the strongest seedling starts that you will need for your containers and clip off the remaining which gives the strong ones some space to expand.  Transplant to pots and containers shortly after the first true leaves appear. When transplanting to your containers and pots, make sure to space the seedlings according to the package directions for each type of vegetable.

Here are some plants that do not like to be transplanted.  Instead, start them in individual moss starter cubes or use homemade newspaper pots or toilet paper tubes that can just be set into your containers at the appropriate spacing.
Beans                                      Squash                        Burnet
Chinese Cabbage                    Borage                        Chervil
Cucumbers                              Caraway                      Pumpkins
Melons                                    Coriander                     Dill
Root crops (except beets, turnips, and celeriac)
Make sure that your container has drainage holes in the bottom.   Place a couple of layers of newspaper in the bottom of the pot to keep soil from falling through the holes, then place a 1-inch layer of moss on top of the newspaper.  If you don’t have a source for sphagnum moss, coarse gravel will work.  Fill the container with good, rich pre-moistened, potting soil, leaving room at the top.  Pat it down firmly to fill in the spaces but do not pack hard.  Take your young transplants (holding by the leaves or root ball, not the tender stem)  or degradable seedling pots, one at a time, placing each on the top of the soil.  Spread out the roots, and sprinkle more pre-moistened soil over the roots, covering them completely.  Use enough soil to bring the level up to just under the first leaves for most seedlings.  Do not cover the crown on plants such as lettuce.  The plant’s first leaves should be at the level of the top of the container.  Pat the soil gently, firming it over the roots and young stems.
tips_seedstarting4 Water your containers when the soil feels dry in the top few inches.  Continuously wet soil suffocates the roots and encourages bacteria and fungi to grow.  Usually, we water when we have time or are home, but watering when needed instead of on a schedule is usually best.  Avoid wetting the leaves as much as possible.  Try to use tepid water and if you are using chlorinated tap water, allow it to sit overnight exposed to air to dissipate the chlorine which can damage plants and kill beneficial soil bacteria.
Fertilize with low doses of good quality organic fertilizer every 7-10 days.
Don’t be shy about removing plants that are past prime or are beginning to bolt.  Removing these will leave spaces where you can plant another round of short-season varieties and ones that prefer to mature in the cooler weather of fall.  Lettuces and other leafy greens are good for this, maybe another round of snap peas, beets or radishes, arugula, and bunching onions.  Mustards and kales and fennel love the cool days of fall
………………………………………………………………………………..
Design – Container Gardening can be beautiful
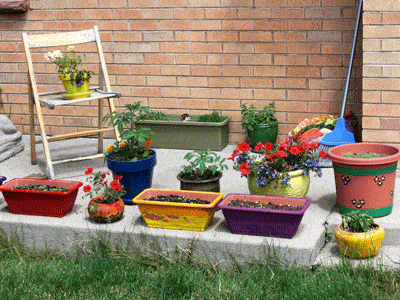
Create groupings with your pots and experiment with variations in height, by placing some containers on concrete blocks or other empty containers turned upside down. This adds visual appeal and at the same time maximizes the space available.  Groupings also help to make the job of watering a bit easier.  Pick a particularly spectacular container plant to be the visual focus and arrange other not-so-pretty container plants around.
Make your containers a bit more decorative by planting different varieties together in one pot.  Use the spaces under taller plants to place smaller herbs and leafy greens. Some vegetables live in harmony with one another, some are actually beneficial to each other and some hate each other.  Mix colors and textures and think about including edible flowers tucked in around the edges. See the article, Flavorful Flowers.  category-color Check each variety on our website to see if your combinations will work together.  Here are some examples:
• Lettuce does well with beets, bush beans, pole beans, cabbage, carrots, cucumbers, onions, radishes, and strawberries.  You can also plant your lettuce at the base of young sunflowers for a little shade.
•Celery, dill, onions, and potatoes are great companion plants for cabbage. Planting clover with your cabbage will keep insects away and chamomile will improve the flavor. Cabbage does not like strawberries, tomatoes, peppers, eggplant, rue, grapes, or pole beans.
Cauliflower is compatible with basil, beans, dill, garlic, hyssop, lettuce, mint, onion, rosemary, sage, and thyme. It does not like grapes and rue.
•Plant your peas with bush beans, pole beans, carrots, celery, cucumber, eggplant, parsley,  radish, spinach, strawberry, sweet pepper, tomatoes and turnips. Keep your peas away from chives,  and onions.
Tomatoes grow well with asparagus, basil, beans, carrots, celery, chives, cucumber, garlic, head lettuce, marigold, mint, nasturtium, onion, parsley, peas, peppers and marigold. Basil will repel flies and mosquitoes from your tomato plants while also improving their growth and flavor. Beebalm, chives, and mint will improve the health and flavor of your tomatoes. Keep potatoes, fennel, dill, cabbage, and cauliflower away from your tomato plants.
………………………………………………………………………………..

VEGETABLES/PLANTS THAT DO WELL FOR CONTAINER GARDENING:

Beans (Pole and Bush types)

Direct sow into containers when night temperatures reach 60 degrees F, 6“ minimum soil depth, full sun, and harvest in mid-late summer, Provide a trellis or climbing structure
Beets – Direct sow into containers in early spring and late summer, 6” minimum soil depth, full sun to partial shade, harvest early summer and again in fall
Carrots (Nantes, Round, or Finger-type are best for containers) –  Direct sow into containers when night temperatures reach 60 degrees F, 8” minimum soil depth, full sun, harvest in summer through fall.
Cucumbers (vine or bush-types) –  Direct sow into containers when the day temperatures reach 70 degrees F or start indoors and transplant, 10” minimum soil depth, full sun, harvest in summer, Provide a trellis or climbing structure for vine-types.
Eggplant –  Start inside 8 weeks before temperatures usually reach 80 degrees F for your area, then transplant to your container, 10” minimum soil depth, full sun, and harvest late summer.
 Leafy Greens (Swiss chards, Collards, Kales, Mustards, Asian Greens, Pak Choy) –  Direct sow into containers when the nighttime temperatures are above freezing, or, start indoors 3-4 weeks before and transplant, 8” minimum soil depth, full sun to partial shade, harvest late spring through winter.
Lettuces and Salad greens –  Direct sow into containers after Spring’s last frost date, or start indoors 4 weeks before and transplant after hardening off when about 2 “ tall,  sow seed again in early fall, 6” minimum soil depth, full sun to partial shade, harvest spring through early summer and again in fall.
Onions, Garlic, Leeks – Direct sow into containers after Spring’s last frost date, 6” minimum soil depth for bunching onions and young (green) garlic, 8” for Leeks, full sun, harvest summer to fall.  Mounding soil up around the base of bunching onions and leeks will encourage long white stalks.  Grow garlic in containers to use the green shoots and any small bulb growth.
Peas –  Direct sow into containers when the soil is no longer frozen, Soaking the seeds overnight will speed up germination, use an inoculant (a beneficial bacteria that enables the roots to use the nitrogen pulled from the atmosphere and stored in nodules on the roots), especially when planting into containers with new potting soil.  8” minimum soil depth, full sun, harvest in late spring to early summer with secondary fall crops possible, Provide trellising for vine-types or cages to support bush-types.
Peppers –  Plant seeds indoors, keeping at 80 degrees F for about 2 weeks, starting 10 weeks before nighttime temperatures remain above 55 degrees and daytime temps reach at least 70 degrees.  Transplant into containers after hardening off, 8” minimum soil depth, full sun, and harvest in late summer.
Potatoes –  Plant disease-free seed potatoes in a large container (30” deep, 20” across) filled 1/3 full of potting soil,  5-6 “ apart, and cover with 2 inches of soil, When plants are about 6” tall cover the bottom half with potting soil,  continue doing this as the plant grows until reaching the top of the pot. Full sun, harvest summer to fall.
Radishes –  Direct sow into containers when the soil is no longer frozen and every other week till late spring, 4” minimum soil depth, full sun to light shade, harvest all spring and second harvest in fall.
Spinach –  Direct sow into containers when the soil is no longer frozen, replant first of August for fall, 6” minimum soil depth, full sun to partial shade, harvest in spring, early summer, and fall.
Squash (zucchini, yellow summer, yellow crookneck, patty pan, mini pumpkins) – Plant seeds indoors 2-3 weeks before the spring last frost date, transplant into sunny, warm containers, and cover with a row cover for several days, 10” minimum soil depth, full sun, harvest summer to early fall, pick when young and small, provide trellis and support for vines.
Tomatoes –  Plant seeds indoors keeping them at 75 degrees F for about 2 weeks, starting 6-8 weeks before Spring’s last frost date, transplant at least once to another larger pot when they have 3 sets of true leaves burying them up to the first set of true leaves, keep in good light, 12” minimum soil depth, full sun, harvest late summer and fall.
Herbs –   Herbs are mostly perfect plants for container gardens, being small and not fussy.

How to Share Your Plant Starts for Profit

Plant Starts

Image by Shameer Pk from Pixabay

by Sandy Swegel

Sharing plants is a simple joy in life. Sharing plants and making money, well that’s even better. Read on to learn how to share your plant starts for profit.

My happy group of gardening buddies first got to know each other because of our great avarice for more seeds. We had all joined a local gardening email list so we could talk more about plants and gardening, but the more we spoke with each other, the more seeds and plants we wanted. Every time someone mentioned a new variety of tomatoes or annual flowers or ground cover, we had to have one of those.

The first year, we decided to meet in person and share seed packets. Armed with dozens of recycled envelopes, we doled out tiny seeds to each other, taking home three Cherokee purple tomato seeds or six cosmos seeds. This quickly became confusing and chaotic and required so many tags in our seed trays. So the next year we decided to become more economical. We’d each buy a packet of seeds and grow out all the plants…and then swap our plant starts. We definitely got more plants than we would have grown on our own and we each had unusual varieties you can’t buy in stores.

But the third year of our avarice proved to be the year we figured out that we could get as many seeds as we wanted…and they practically paid for themselves.  All we had to do was start our seeds and sell 2-month-old plant starts to each other and to the other greedy gardeners who envied our ever more diverse gardens. We learned that anyone can sell healthy organic heirloom tomato starts, especially if you have pictures of last year’s garden.

You can try your own mini plant exchange and sale. We price our seedlings cheap ($1 or $2 at most). I can afford all the heirloom tomato plants I want if I just sell three seedlings for $1 from each seed packet. Throw in some herbs and flowers and soon the plants barely fit in the car. Our little group now has a giant plant sale every May where everyone brings their plants to sell to each other, but thanks to free advertising on Craigslist and neighborhood electric poles, we also sell our humble little plants to the public.

Avarice never ends, of course, and now we have to grow more plants so we can make money so we can afford backyard greenhouses. Last year our small group of about 12 home gardeners sold some $4000 worth of plants that they started in closets and on top of refrigerators just two months before. Not enough to get rich, but enough to buy more seeds, build hoop houses and season extenders, and have a load of precious organic sheep manure delivered to our gardens.

So enjoy your seed shopping and think about swapping some of the plants you start with others. We learned that while there is no end to avarice among gardeners, there is also no end to generosity. It is a great joy to have an abundance of little plants to share with friends and strangers.

7 Plants to Keep the Mosquitos Away

Gardening Tips

by Heather Stone

Purple lavender flowers attracting honey bees.

photo courtesy of pixabay


The long, warm days of summer are meant to be enjoyed. Sitting poolside, bar-b-queuing with friends or just relaxing in the garden. But sometimes pesky mosquitoes have a way of taking the fun right out of our outdoor activities. Instead of dousing yourself and your loved ones in chemical bug sprays try planting some of these mosquito repellent plants around your garden and patio to help keep the bugs at bay.


  1. Lemongrass-

    Lemongrass is an ingredient in citronella oil and its strong lemon scent is a proven mosquito repellant. This tropical grass is best grown in pots as an annual or brought indoors during the winter months.

  2. Marigolds-

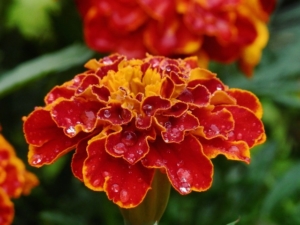
    The strongly scented flowers of marigolds repel mosquitos, flies and even rabbits. These beauties come in an array of colors that will brighten up any spot. Keep pots of marigolds near seating areas and doorways to deter mosquitos. In the vegetable garden, marigolds repel many of the insects that attack tomato plants.

    Bright orange marigold bloom.

    photo courtesy of pixabay

  3. Lavender

    The aromatic, purple flower spikes of lavender not only repel mosquitoes but moths, flies and fleas too. Use the fresh or dried flowers directly on the skin or dry them and hang them indoors to repel moths and flies inside. Don’t forget, the bees love lavender!

  4. Basil

    Who doesn’t enjoy the smell and taste of fresh basil? Mosquitos, it seems. Unlike many of the other mosquito repellant plants, you don’t have to crush the leaves or flowers of basil to receive the mosquito deterring properties.

  5. Catmint-

    Catnip and many other plants in the mint family are excellent at keeping the mosquitos at bay with their strong scent. Ticks and biting flies also avoid catmint. You can rub the leaves and flowers directly on your skin for added protection. Catmints are easy to grow plants that do well in sunny and dry spots in the garden. The lavender-blue flowers bloom all season and attract a wide array of pollinators.

    Fuzzy green catmint leaves.

    photo courtesy of pixabay.

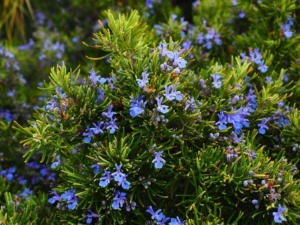
  6. Rosemary-

    Cooking out? Toss a few sprigs of rosemary on the grill and let the aromatic smoke drive the mosquitos away.

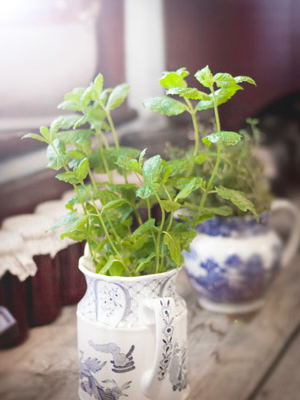
  7. Peppermint

    – the strong scent of peppermint deters flies and mosquitos. Keep a few plants in pots on your patio to deter insects and enjoy the fresh leaves in your iced tea.

    Blue flowering rosemary plant.

    Photo courtesy of pixabay.

All these mosquito repellent plants deserve a place in your garden or on your patio not just because they deter pesky insects, but for their beauty, fragrance and attractiveness to our pollinator friends.


Here is a simple herbal mosquito repellent recipe you can make at home using essential oils (“eo”).

  • ½ witch hazel
  • ½ cup of water
  • 20 drops Eucalyptus eo
  • 30 drops Citronella eo
  • 10 drops Rosemary eo
  • 20 drops Lavender eo
  • 20 drops Tea tree eo

If you don’t have one of these simply leave it out or substitute with another. A few other essential oils that will work include lemongrass, catnip, clove, mint and geranium.


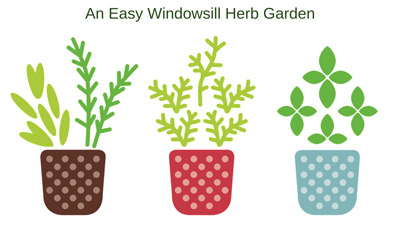
AN EASY WINDOWSILL HERB GARDEN

Graphic of herbs in pots.

photo courtesy of pixabay

At Home Gardening Tips

by Heather Stone

Are you are itching to get your hands in the dirt, but outside the ground is covered in snow? Well, a windowsill herb garden might be just the thing to get you through until spring finally arrives. Every kitchen and every cook deserves fresh herbs. They will help liven up not only your cooking but your gardening spirit too. Check out our herb collections here and here!


To get started make sure you have a sunny windowsill that gets at least 6 hours of sunlight. If you get less than that you will want to provide some additional lightening or your herbs will struggle.

Photo of basil growing in a pot on the windowsill.

photo courtesy of pixabay

Next, purchase some small starter plants from your local nursery or garden center or try starting your herbs from seed. Starting from seed may take a little longer, but it’s less expensive. When choosing plants or seeds pick herbs you know you like to cook with. Some great herbs for containers include thyme, basil, cilantro, parsley, chives, oregano, dill, sage, mint and savory.


Whether you are purchasing plants or starting from seed you will need containers and quality, lightweight potting mix. If you are starting with plants make sure your container(s) have a drainage hole(s) and are roughly 6-10” in diameter. Start by adding some potting mix to the bottom of your container. Next, place your plant in the pot and gently fill in and around it with more potting mix, leaving around an inch of room at the top for watering. Gently press the soil down and water well. Most herbs don’t like their soil too wet so make sure to test your new herb plants for water by sticking your finger an inch or two below the soil surface. If you find the soil is dry, it’s time to water. Fertilize your new herb garden once a month with a ½ strength liquid fertilizer. Be sure to give your plants some time to get established before you start harvesting.

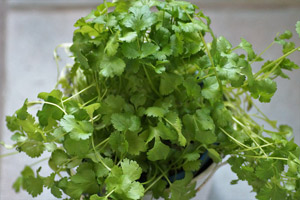
Photo of Cilantro sprigs in a cup.

photo courtesy of pixabay

If you are starting from seed, you can plant in smaller containers to start and pot up as your plants get bigger. Fill your containers with a damp potting mix. Sprinkle 4-6 seeds on top of the surface. Gently press them in and cover lightly with more potting mix. Cover with a plastic bag or plastic wrap and place them in a warm, sunny windowsill making sure the soil surface stays moist. Once your seeds start to sprout, remove the plastic. Keep your new sprouts watered whenever the soil surface feels dry and watch them grow.


Here are some herbs that are easy to start from seed:


Basil

The dried version is no comparison to fresh basil. With so many uses and so many varieties to choose from basil is an easy choice for the indoor herb garden.


Cilantro

Cilantro is easy to start from seed and germinates in 7-14 days. Use the fresh leaves in salads, sauces and to garnish a wide array of dishes.


Parsley

Parsley is both productive and attractive when container-grown. It takes a bit longer to germinate, 12-28 days, but it’s worth the wait. Harvest leaves as you need them once the plant is growing strong.


Chives

Chives are another plant easily grown in a pot. The slender grass-like leaves are delicious and make an excellent flavoring in soups, stews, dips and salads. Sprouting in just 10-14 days you will have fresh chives in no time.


Anise Hyssop

Herb of the Year

By Heather Stone

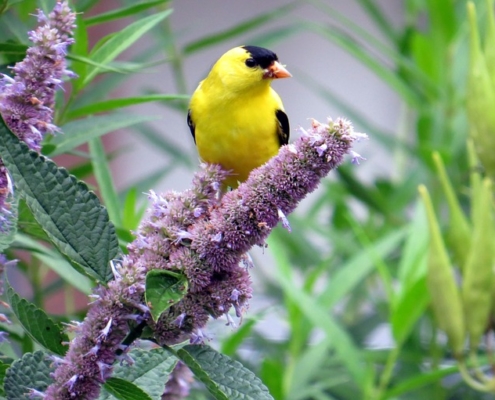
Photo of a yellow bird sitting on an anise hyssop blossom.

photo courtesy of pixabay

Every year since 1995 the International Herb Association has named an Herb of the Year. This year’s selection is Anise hyssop, Agastache foeniculum. This North American native wildflower has a lot to offer in the garden, the kitchen, the medicine chest and to the pollinators.


Anise hyssop is native to the Upper Midwest, Great Plains and into Canada. It’s found growing in prairies, dry upland forests, plains and fields from Northern Colorado to Wisconsin in the US and from Ontario to British Columbia in Canada. Anise hyssop is a member of the mint family. It grows best in full sun to part shade in dry to moderately moist soils with good drainage. This low maintenance perennial thrives in zones 4-9 reaching heights on average of 1-3’ tall by 1-3’ wide. Beautiful lavender flower spikes bloom in summer and with regular deadheading will continue until fall. The flowers are edible and make for a nice cut and dried flower. Both the flowers and the leaves can be added to baked goods or salads. My favorite way to use them is finely chopped in a fruit salad.


Anise hyssop is easily grown from seed and established plants will spread by rhizomes or will self-seed in the right growing conditions. It also transplants easily. Deer tend to leave this plant alone, but the same can’t be said for rabbits. Anise hyssop works well in the middle or back of the border and is at home in native, wildflower and herb gardens as well as in prairies and meadows. Great companions for anise hyssop include Black-eyed Susan, Purple Coneflower, Bee Balm and native grasses. Anise hyssop also looks fantastic in pots mixed with flowering annuals.


While the flowers of this plant have no scent, the leaves of anise hyssop smell and taste like licorice with notes of lemon, pine and sage. Native Americans found the scent uplifting and used the leaves to help treat depression. This was but one of many uses the Native Americans had for Anise Hyssop. It was also used externally as a poultice to treat wounds and burns and as a wash for itchy skin irritations such as poison ivy. Internally, it was used for treating diarrhea, fevers and coughs. Anise hyssops’ antibacterial, anti-inflammatory and expectorant properties make it an excellent herb for soothing coughs and relieving chest congestion. I find it to be especially effective in children. The best time to harvest leaves for use is just past full bloom when the oil content in the leaves is at the highest.


Anise hyssop is also a favorite plant of many pollinators. The lavender flowers are a good nectar source and highly attractive to bumblebees, native bees, honey bees, butterflies, hummingbirds and beetles. Goldfinches love to feed on the seed so make sure to leave some flowers standing in the garden at the season. So let’s celebrate 2019 by adding a plant or two of Anise Hyssop to the garden this year.

HERBAL SALVE FOR YOUR BEST FRIENDS PAWS

Close of of furry dog face. Herbal salve for paws.

Photo of Cute fluffy dog compliments of M. Cosselman.

Herbal Salve for Paws

By Engrid Winslow

It’s clearly winter and we can tell because our skin gets drier and we use more lotions and balms to combat dry, chapped skin. But what about your dog? Winter means cold, ice and salted roads, all of which can dry out your furry friends’ paws. Did you know that there are herbs which are particularly healing for dogs and can be mixed into a salve? Here are a few ideas and the master recipe for turning them into a creamy topical application for your dog. If you didn’t save any of these from last year’s herb garden or have never grown them, this will give you some ideas for the next growing season. Also, there are herbal apothecaries in many towns or you can order the ingredients from https://www.rebeccasherbs.com/. You should gently massage the salve into the skin before your dog spends long periods outside. Also, these are safe on humans as well as dogs so when you apply it to your dog’s paw pads, you will get the benefit too.

Calendula

(Calendula officinalis) flowers are antimicrobial, antifungal, antibacterial and very healing. It is ideal for treating all skin irritations and wounds for humans and dogs. It can, however, be potentially toxic to cats, so refrain from sharing it with feline house members.

Chamomile

(Matricaria recutita, Chamaemelum nobile) flowers don’t just make a calming tea. It is also antibacterial and can help soothe irritated skin. Occasionally, a dog will have an allergic reaction so proceed with caution to be sure your pet is not one of those unlucky few.

Rosemary

(Rosemarinus officinalis) leaves, stems and flowers is a versatile herb for cooking as well as having anti-inflammatory and antifungal properties. It works well in treating abrasions and is antifungal.

Sage

(Salvia officinalis) leaves or flowers have both cleansing and antiseptic properties and are very healing. It is also a very safe herb as long as you take care for to use Artemisia (Artemisia spp.) sages.

Slippery Elm’s

(Ulmus fulva) inner bark is healing for topical wounds and soothes irritation. Rarely, a dog will have an allergic reaction so, once again, be in-tune with your dog and watch for any signs of itching sneezing or other allergy symptoms.

MASTER SALVE RECIPE

5 oz. coconut oil

3 ½ oz. powdered or finely ground herb from the list above

4 oz. beeswax

Heat the coconut oil and herb in the top part of a double boiler and let the water boil for 1 ½ hours to infuse the herb.

Strain the herb out of the oil with cheesecloth, squeezing out as much liquid as possible. Return to oil to the double boiler and add the beeswax. Heat over boiling water, stir frequently until the wax is melted and thoroughly combined.

Pour into small jars and allow to cool, then seal.  If stored in the refrigerator, this herbal salve for paws will keep for at least two years.


Using Your Frozen Summer Bounty (Part 1 – PESTO)

Cooking with Pesto

by Engrid Winslow

Summer Bounty

Photo courtesy of pixabay


Already the bounty of vegetables and herbs from the summer garden are becoming a distant memory. It’s time to dig into the freezer and start to use up some of those precious flavors in the cold winter months.


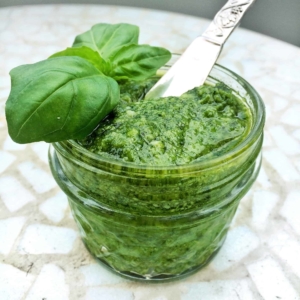
Let’s start with the delicious pesto(s) you made and froze back in June [Pesto Secrets] which is so useful in so many more ways than pasta. Pesto pairs particularly well with such winter delights as frozen roasted or sundried cherry tomatoes [Summer Harvest] and creamy mozzarella or burrata cheese so think of ways to include those items in some of the ideas listed below. But let’s look at some special spins on pesto.


*  Stir into softly scrambled eggs, or drizzle on top of a frittata

*  Mix with mayonnaise and use as an aioli on bread, in sandwiches or as a dip with vegetables

*  Spread it on a sandwich – especially a hot pressed sandwich like a Panini or grilled cheese

*  Substitute for tomato sauce on a pizza

*  Drizzle on soups such as Minestrone or Pasta e Fagioli

* Mix into salad dressing

* Toss with roasted veggies from potatoes to broccoli to eggplant

*  Serve with grilled steak, chicken, pork or even fish

*  Stir into the filling for a quiche

*  Add to chicken salad

*  Put it in a quesadilla or on pita bread sandwiches

*  Top a turkey burger with it

*  Stir into mashed potatoes or cauliflower

*  Mix it in with quinoa, rice or other grains

*  Add it to meatball, burger or meatloaf mixtures

*  Bake it into puff pastry with feta cheese and tomatoes

Here are a few others.

Let us know if you have other uses beyond pasta for the delicious pesto you made and froze this summer!

Preserving Herbs in Vinegar

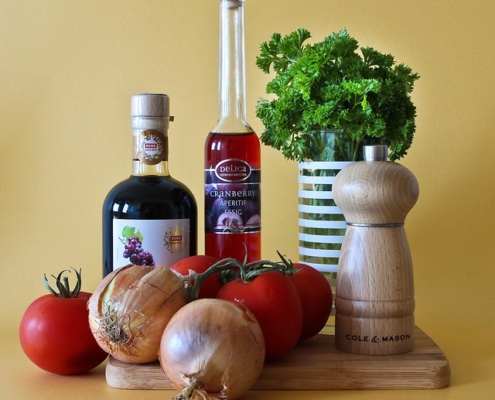
Infusing vinegars with herbs.

photo courtesy of Anelka / pixabay

Vinegar Infusing

By Heather Stone

Last week we talked about drying as an easy way to preserve your herb harvest. This week we are going to dive into infusing herbs in vinegar. There is lots of room for creativity when making infused vinegars. You can infuse single herbs, a combination of herbs, herbs with flowers and don’t forget fruit. The possibilities are endless.

The end product can be used in a number of ways including; salad dressings, marinades, rubs, sauces, beverages and more. Beautifully bottled vinegars also make great gifts.


  • First, you will need to choose your vinegar. There are many varieties of vinegar including white, apple cider, rice, champagne and wine vinegars. Milder tasting vinegars are well suited for delicate herbs and flowers. Your more robust herbs do best in wine vinegar. Really it’s up to you and what you like best.


  • Wash and gently pat dry your herbs. Make sure you are using the best quality leaves and flowers, leaving behind those that are bruised, brown or have been nibbled on.


  • Place three to four sprigs of fresh herbs or 3-4 tablespoons of dried herbs per pint of vinegar.


  • Cover your container tightly with a non-metallic lid and place it in a cool, dark place to infuse. Allow it to steep for 2-4 weeks, giving it an occasional shake.


  • Once your vinegar has reached your desired flavor, remove the herbs and place the vinegar into a sterilized jar or bottle. Don’t forget to label and date your vinegars! Stored in a cool, dark place your vinegar should last 4-5 months. Refrigerate for longer storage.


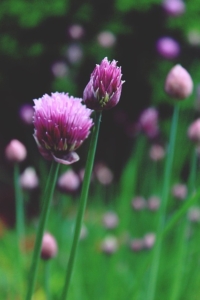
Chives with pink blossoms.

Photo courtesy of TanteTati / pixabay

Some of my favorites include:

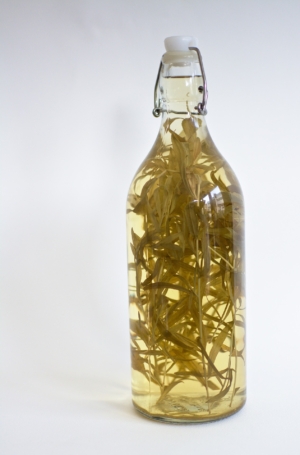
A bottle of taragon infused vivegar.

Photo courtesy of mammela / pixabay

French tarragon in apple cider vinegar

Chive blossoms in rice vinegar- the beautiful blossoms turn the vinegar a beautiful shade of pink

Violets in white wine vinegar- this vinegar turns an amazing shade of purple

Raspberries in cider vinegar

Parsley, thyme and sage in red wine vinegar


Check out these links for more ideas for flavor combinations.

https://theherbalacademy.com/making-herbal-vinegars/

http://www.frontiercoop.com/community/how-to/herbal-vinegars

https://nchfp.uga.edu/publications/uga/uga_flavored_vinegars.pdf