Tag Archive for: Fall

Saving Seeds

Saving Seeds from Heirloom VegetablesSaving seeds from heirloom vegetables.

What are “heirloom” vegetables? An heirloom vegetable is a non-hybrid, open-pollinated variety that has been passed down from generation to generation and, in some cases, can be traced back hundreds of years.  These seed lines have been carefully selected to maintain uniformity and consistency for germination.

Heirloom seeds become ‘heirloom’ because they exhibit exceptional traits desired by the gardener.  Often this means the plants are more colorful, flavorful, and unique, or have great germination and vigor.  Often the traits are location-dependent.  Meaning, seeds planted in one garden will not produce in the same manner in another location.  We encourage you to try heirloom seeds, see which have the qualities for your area to become your favorites and make them into your own very special seed line.  Seed saving from heirloom vegetables is easy and fun.

Gardeners have found that as seeds are selected and saved over many years, production is increased and the quality is improved, creating plants that will produce best for that locale and will resist diseases and pests of that locale.  Contributing to genetic diversity strengthens the ecosystem. Historically farmers and local gardeners have created and sustained this rich genetic heritage by learning to save their own seeds from varieties that perform best in their own mini-ecosystems.  The current trend toward mono-crops where only one seed type is used to produce a crop worldwide is eliminating the ability to be able to find genetic variations that will withstand emerging pathogens and climate changes.

Planting your crop:

Start with good Heirloom Seed varieties.  Keep in mind that to allow the plants to produce seed and to allow the seed to fully mature, you will have to allow for a longer growing season.  This can be done by starting plants indoors and arranging for protection from frost in the late season. You will grow some for food or flower harvest and some for seed production.  Fully mature seeds will be viable (able to germinate) and produce vigorous plants.  You may want to do some research on the different flower types for proper pollination techniques and plant with row/species separation in mind, to prevent cross-pollination.

You also may look into caging procedures to isolate species that are in flower at the same time.  By caging different plants on alternate days, you can take advantage of the pollinators to do the work without cross-pollinating your crop.  Cage one plant or group on one day and early the next day, before the bees wake, transfer your cage to a different plant or group.  Some crops are biennial and do not produce seed until the next year, so you will need to determine whether you should leave the roots in the ground over the winter or dig and store them.

There are many publications with detailed information on seed-saving and growing techniques for each species.  “Seed to Seed” by Suzanne Ashworth, 2002 by Seed Savers Exchange, Inc. is a good way to get started. Also, check out these easy instructions for seed saving, written by the International Seed Saving Institute, a non-profit established to teach seed saving.

Why save seeds:

When you grow crops using your own saved seeds from your best plants for next year’s crops, the seeds begin to adapt to the growing conditions (temperature, moisture levels, pests, diseases, and so forth) that exist in your garden.  This adaptation makes your garden stronger over time.  Seeds that are used to grow crops year after year have the opportunity to adapt to incremental climate changes.  As global temperatures change, these plants will have a better chance at survival and productivity.  A single plant from a single seed can produce dozens or hundreds of seeds, increasing your seed stock exponentially.  Sharing and exchanging seeds with other gardeners, community gardens or seed libraries helps to increase the diversity of everyone’s collections.

Harvesting and collecting seeds:

When saving seeds from heirloom vegetables, look for favorable characteristics such as; freeze and cold tolerance, heat tolerance, adaptability, winter hardiness, early maturation, vigor (strong germination, and growth), flavor, color, size, texture, etc. Also, look for desirable traits such as; vine or plant type, seed type, and specific disease resistance.  Plan to be ready to harvest the seed as they mature.

– Collecting dry seed:

It’s easy to save seeds from plants that produce pods, husks, and other dry casings such as peas, beans, and flowers.  The technique is called “dry processing” and is faster than collecting seed from fleshy, pulpy fruits such as tomatoes and cucumbers.  Seeds that are dry-processed can be allowed to dry right on the plants unless there is wet weather in the forecast.  Seeds often fall where they may, naturally, little by little.  Often the pods will pop open when you are not around to collect the seed and it will be lost.  Allow the seed pods to remain on the plant in the ground for as long as possible.  Usually, the seed will not continue to mature after the pods are cut from the plant. To collect the seeds easily as the seeds begin to mature, secure paper bags over the seed heads and attach them to the stems of the plants.  As they mature they will drop into the bags.

Separating the seeds from the chaff (dried pods and stems) is called threshing.  Commercial threshing is done by multitasking machines that can harvest, thresh, and winnow the seeds all at once.  For the home gardener, a bag, pillowcase, or small sack is all that’s necessary.  Put the seeds into the bag, secure the ends, and roll it around, lightly crushing and breaking up the pods a bit.  Be gentle so you don’t damage the seeds, but just loosen the chaff.  For tinier seeds, you can just put them on a board and crush them with your fingers.

Then you will need to winnow the chaff from the seeds.  Place the seeds in a bowl and gently blow on them to remove the lighter-weight chaff.  Swirl the seeds around and continue blowing gently until most of the chaff is removed.  Another option is to use a screen or sifter where the holes are smaller than the chaff to simply sift them apart.

– Collecting seeds from pulpy fruits:

Pick the best, most ripe (even to the point of over-ripe) tomato, pepper, cucumber, etc.  Choosing an over-ripe veggie will ensure the seed has fully developed.  If you wait for a frost or freeze before you pick the fruit or veggie, most of the seed will not be developed enough to be viable next year.

Cut open the fruit and scoop out the seeds or for small fruits like cherry tomatoes, simply squeeze the seeds out into a glass jar.   Add a little water and label the jar with the seed variety.  The seeds usually are surrounded by a gel that inhibits germination.   Leave for two to five days to begin fermenting. This will break down the seed coat while killing off many of the harmful bacteria and fungi lurking on the seeds.  Swirl the contents in the jar every day.

When the pulp floats to the top, the seeds are ready for cleaning.  Most of the seeds will have sunk to the bottom.  Carefully skim off the pulp then tip the liquid and seeds into a strainer. Wash the seeds under running water, using the back of a wooden spoon to carefully remove any remaining material stuck to the seeds.  Spread the seeds onto a paper towel to remove most of the water, then transfer them to a non-stick surface such as a dinner plate. Dry the seeds in a warm place out of direct sunlight. It will take two to three weeks for the seeds to completely dry out.

Make sure you label the seeds with their name and the date they were collected immediately after you have finished harvesting each variety.  Excellent record-keeping is your best friend when it comes to seed-saving.  It’s amazing how easy it is to mix up seed varieties!

How long do seeds last?

If you keep your seeds in a cool dry place, your seeds can last for years.  These things are seed killers: excess moisture, excess heat, light, and rodents.  Some seeds last easily for years. Others only last one year before the germination rate goes down.

Here is a chart from the Chicago Botanic Gardens on longevity in vegetable seeds as well as one from Iowa State University extension.

Seeds that have passed their prime for producing viable plants can be used to scatter as a cover crop, for bird seed, for eating, or for cooking (as in herb seeds).

BBB Seed’s Wildflowers to Attract Butterflies and Birds

Wildflower Seeds

by Heather Stone

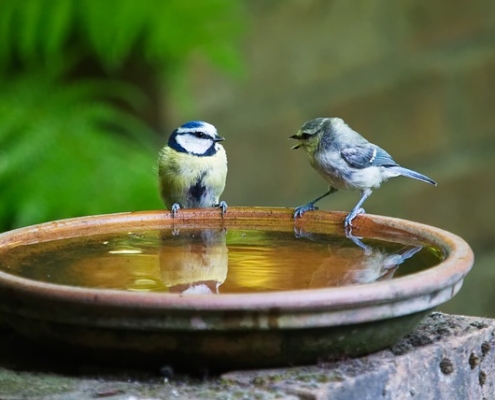
Photo of two birds on a birdbath.

Photo courtesy of pixabay

It brings great pleasure to see more birds and butterflies about the garden and we as gardeners can do a lot to attract and protect the birds and butterflies that visit our garden. These critters simply need a safe place to live and healthy food to eat.

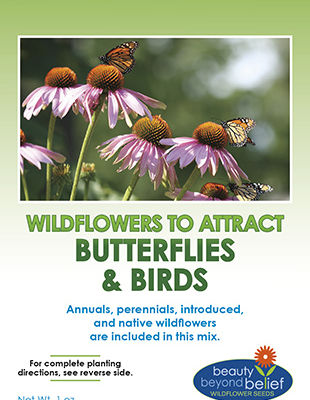
Wildflowers to attract butterfly and birds seed packet.

Butterflies

For butterflies, providing food (host plants) for caterpillars, nectar sources for adult butterflies and a safe place to overwinter can all be accomplished in a small area. Caterpillars of some species of butterflies have very specific larval host plants, while some will eat a wide range of species. Nectar is the primary food source for most adult butterflies. Planting nectar-rich plants in the garden is sure to attract more butterflies. Depending on the species, butterflies overwinter in all stages of life from egg to adult. Some places they overwinter include leaf litter, the bases of bunch grasses, rock piles, brush or wood piles, behind loose tree bark and near their host plants.


Birds

Just like butterflies birds need healthy food to eat and shelter. Start by planting native plants in your garden that provide seeds, berries, nuts and nectar. Shrubs and trees, especially evergreen species, provide excellent shelter and nesting sites for birds. Birds also need a year-round water source such as a bird bath. Providing nesting boxes and offering food in feeders will attract even more birds.

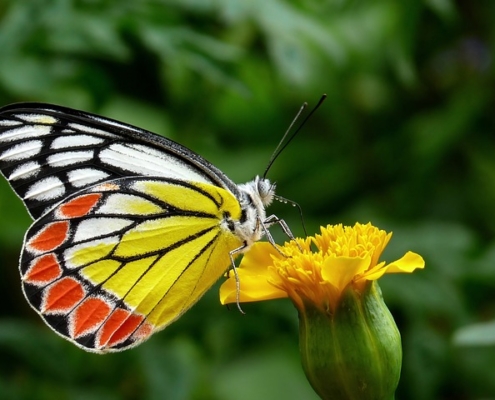
Photo of an orange and yellow butterfly on a marigold bloom.

Photo courtesy of pixabay.

Try planting our Birds and Butterflies mix to attract more birds and butterflies to your landscape. The mixture of annuals, perennials, introduced and native wildflowers is designed to attract butterflies over a long season of bloom from spring until fall and a variety of birds to the seeds come autumn.


Sources:  Gardening for Butterflies, The Xerces Society

https://www.nwf.org/sitecore/content/Home/Garden-for-Wildlife/Wildlife/Attracting-Birds

The History of the Jack-O-Lantern

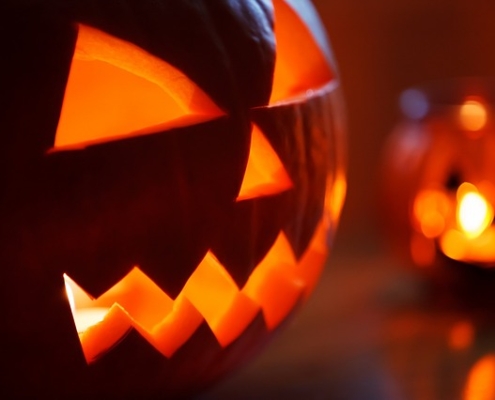
History of the jack-o-lantern.

photo courtesy of pixabay


by Heather Stone

As the last days of October approach pumpkins carved in an array of faces and lit from within by candles dress porches, stoops, windows and walkways. The jack-o-lantern as we know it is a true American icon of Halloween, but where and how did this tradition begin?

There are several theories on the origin history of the jack-o-lantern. In 17th century Britain, an unknown man or night watchman carrying a lantern was referred to as “Jack of the lantern.”

During the same century in Ireland the “lanterns of Jack” were one of many names to describe the strange phenomenon of lights seen flickering over the peat bogs. These lights are known by many names including the “will o’ the wisps.”

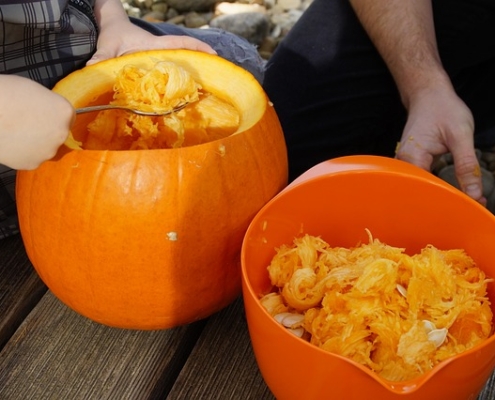
Scooping out the innards of a jack-o-lantern.

photo courtesy of pixabay

My favorite history of the jack-o-lantern theory is based on an old Irish folktale about a man named Stingy Jack who tricked the Devil. The legend of “Stingy Jack” has many forms. Here is one.

Stingy Jack invited the Devil to have a drink with him, but Stingy Jack didn’t want to pay for his drink, so he convinced the Devil to turn himself into a coin (the Devil being able to take one any form) that Jack could use to buy their drinks. After the Devil turned himself into a coin, Jack decided to keep the money placing it in his pocket. Inside his pocket lay a silver cross preventing the Devil from changing back into his original form. Jack agreed to free the Devil, under the condition that he would not bother Jack for one year. The next year, Jack again tricked the Devil into climbing into a tree to pick a piece of fruit. While he was up in the tree, Jack carved a sign of the cross into the tree’s bark so that the Devil could not come down until the Devil promised Jack not to bother him for ten more years. Eventually, Jack died and legend has it that God would not allow him into heaven and the Devil angry from being tricked didn’t want Jack either. The Devil is said to have sent Jack off into the night with only a burning ember to guide his way. Jack but this ember into a carved out turnip and roams the earth to this day.


In Ireland, folks began carving faces into turnips to ward off Stingy Jack and evil spirits on All Hallow’s Eve. Beets were used in England. This tradition likely came to America with immigrants from these countries. The pumpkin being plentiful here and easy to carve became today’s jack-o-lantern.

Read more about the Queen of Halloween.

All About Gourds

by Heather Stone

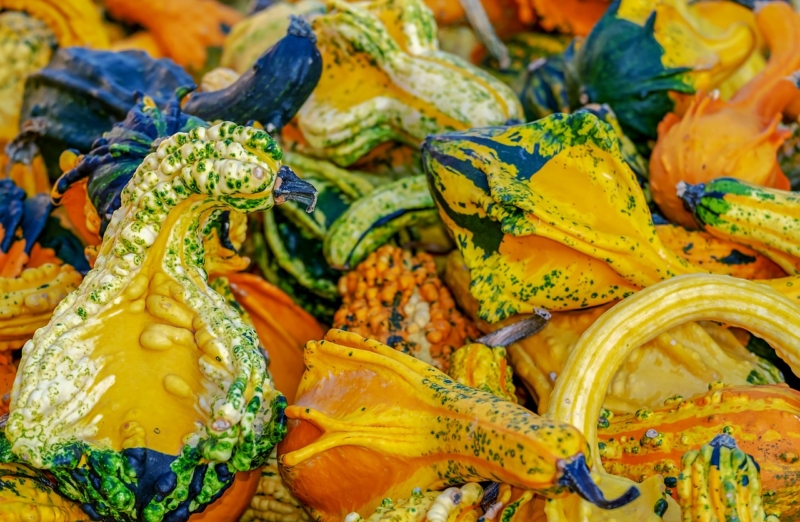
Photo of mixed gourds.

Photo courtesy of pixabay – Couleur


Fall is here and pumpkins and gourds can be found in abundance. From the farm stand to the local grocery store, these colorful and sometimes funny shaped fruits are part of the season. But, did you know that gourds are one of the oldest cultivated plants? Originally grown to make storage vessels and utensils, nowadays we largely use them for decoration. A member of the Cucurbit family along with cucumbers, squash and melon, gourds grow on large, vigorous vines that can be trained along fences or up trellises.


Humans around the world have utilized gourds for a very long time for a variety of purposes. Most commonly, gourds were used for storage containers, utensils, dippers and dishes. Gourds were also used for creating musical instruments such as shakers, maracas, drums and various stringed instruments resembling a banjo. Some of the earliest guitars and violins in the United States were made from gourds by African slaves.


There are three types of gourds:

  • Cucurbita pepo are the colorful little ornamental gourds that make good decorations.
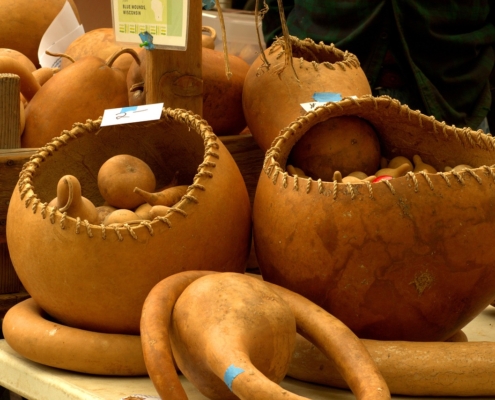
  • Lagenaria siceraria are the hard-shelled gourds . Varieties include the Speckled swan gourds, bottle gourds, dipper gourds, birdhouse gourds and powderhorn gourds. Hard-shelled gourds have been grown for over five thousand years for use as containers, utensils and drinking vessels.
  • Luffa aegyptiaca is the well-known bath sponge. When dry, the outer shell is scraped off and the inner fiber is used as a sponge.


Gourds are easy to grow and come in a wide array of colors, shapes and sizes. Sow the seeds in a sunny location after all chance of frost has passed. Gourds will grow in almost any soil and under most conditions. Ideally, train the vines up a trellis or fence to keep the fruits off the ground while ripening and drying.  Most gourds reach maturity in 90-150 days. Harvest after the shells harden by cutting the fruits from the vines with 1-2 inches of stem attached. Cure them for a week in a warm, dry location with good air circulation.

Photo of dried gourds made into baskets.

photo courtesy of pixabay – mikegoad

To fully dry your gourds for crafting:


  • Place gourds in a warm, dark spot.
  • Regularly turn your gourds so air reaches all sides.
  • When you can hear the seeds rattle inside your gourd, it is fully dry and ready for use.
  • This drying period can take several weeks depending on the variety and size of the gourd.


You can create a number of things from your homegrown gourds.


Here’s the how-to for turning that birdhouse gourd into a birdhouse.

Want to make a bowl or two? Here’s a great tutorial.

Sources: http://indianagourdsociety.org/education/Gourds_In_American_History_2010.pdf

https://homeguides.sfgate.com/decorative-gourds-57941.html

https://www.almanac.com/blog/gardening/garden-journal/gourds-types-gourds-growing-gourds-curing-gourds

HIVE HAPPENINGS IN SEPTEMBER

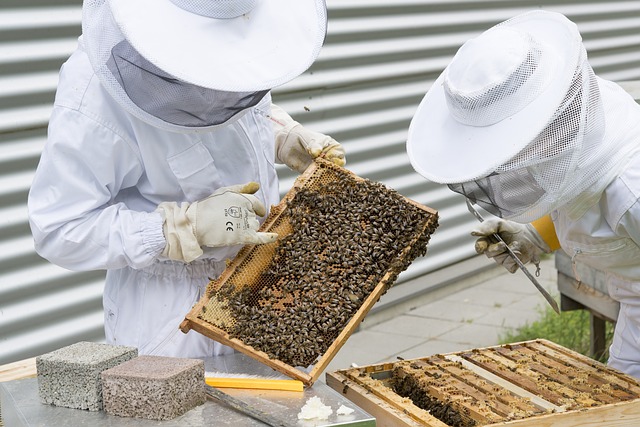
Two beekeepers in bee suits inspecting a hive.

photo courtesy of pixabay – topp-digital-foto

All About Honeybees

By Engrid Winslow

Have you ever wondered what beekeepers actually do? Did you think that they just put hives in fields and then visit to collect honey every once in a while? Well in Hive Happenings, we are going to take you inside the duties of a beekeeper in the first of a series of articles explaining what the bees are up to and how a beekeeper helps them to survive and thrive.

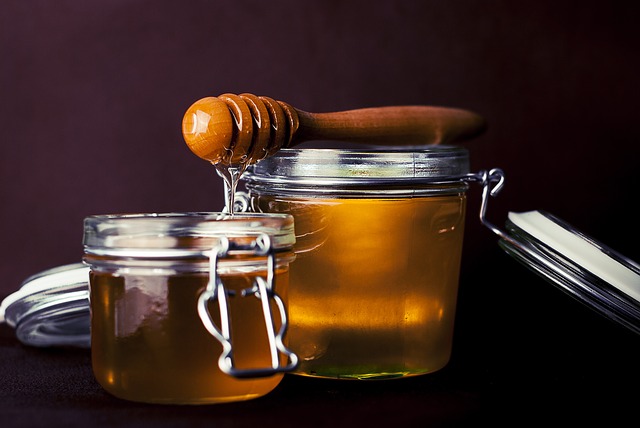
Two jars of golden honey with a honey dipper.

photo courtesy of pixabay – fancycrave1

Honeybees are the only bees that overwinter as a colony and cold weather can be stressful enough that many colonies will not survive without some help from a beekeeper. Even with that help, a hive that is weak or doesn’t have enough food stored or suffers from a mite infestation will not make it through.  Each colony has worked very hard all spring and summer collecting honey and pollen to feed the new brood that the queen spends all day (and night!) laying. They are also storing extra honey and pollen to make it through the winter when there is very little forage (in most parts of the country).  Every colony needs 60-90 pounds of honey to survive the cold season. A responsible beekeeper only harvests whatever extra honey has been stored by the hive. Beekeepers watch their hives grow during the season and add “honey supers” on top of a two-deep hive colony with a “queen excluder” between the hive and the supers. Some hives will produce many of these supers that hold the excess honey – it varies by the colony and by the amount of forage available during the season. The excluder ensures that no brood is laid in the supers. In the early fall, beekeepers check to make sure that the honey stores are capped with wax and proceed to harvest the honey in a variety of ways ranging from using a “capping scratcher” with the frames set over a bucket to using electric or manual extracting machines.

Honey is a marvelous thing to have for personal use, to sell or to give to friends and family as gifts. The National Honey Board website has numerous recipes for all types of dishes using honey as an ingredient.  Check them out at National Honey Board.

There are many other duties for the beekeeper to take care of as the weather cools and, concurrently, the hive is also preparing itself for winter. The queen slows down her egg laying, drones are evicted from the hive and the colony shrinks to a size that can huddle together when it’s cold outside. I’ll share more of this information in my next blog about honeybees.

Fall Blooming Plants for Pollinators

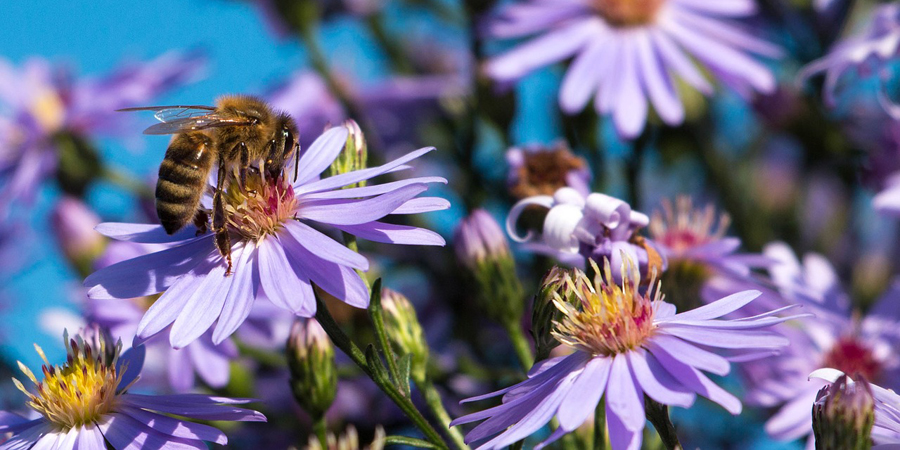
Photo of a honey bee on a purple aster bloom.

photo courtesy of pixabay – 1735564

Wildflower Seeds

by Heather Stone

As the days become shorter and the nights cooler and the season shifts from summer to fall many of us can find our gardens to be a little lackluster. Not much is blooming after the abundance of color throughout the spring and summer.

This is where fall blooming plants come in. There are many native and non-native plants that bloom in late summer and fall that can keep your garden filled with color.

But, autumn-blooming plants don’t just benefit the gardener. As the bountiful blossoms of spring and summer decrease, it is important to provide pollinators with plenty of food sources as they begin to prepare for winter. Hummingbirds and butterflies will need plenty to eat before heading south and the honeybees and native bees need to gather as much pollen and nectar as possible to create winter food stores.

Here is a list of fall blooming plants that make great additions to the garden.

Fall Blooming Perennials:

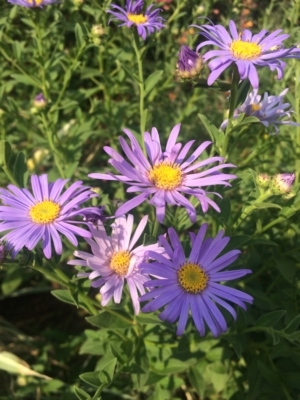
  1. Asters-there are various species of asters native to different parts of North America. Most plants have flowers in shades of white, blue, purple and pink. They are drought tolerant, grow to around 2-3’ and do best in full sun to part shade. Attractive to various species of bees, including bumblebees and leafcutter bees. Some species help fuel monarch butterfly migration.Photo of purple aster blooms.
  2. Black-Eyed Susan-the brilliant yellow flowers of Black-eyed Susan are long blooming and loved by both bees and birds.
  3. Blanket Flower– this tough plant needs little water, blooms a long time and it’s orange, red and yellow flowers are beautiful. Of course, the pollinators love it too!

Want to know more about the pollinators that visit blanket flower? Check out this link: https://bit.ly/2BvEmj4

  1. Liatris-the tall pinkish-purple flower spikes bloom late summer and attract a plethora of bees and butterflies.
  2. Goldenrod– when the goldenrod starts to bloom I know fall is just around the corner. There are a variety of native goldenrods all being easy to grow, drought tolerant and excellent bee plants.
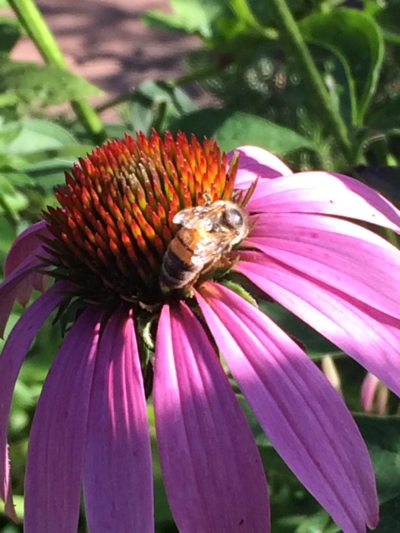
  3. Purple Coneflower– this long-lived perennial comes to life in late summer with a striking display of large purple flowers and attracts a variety of bees and butterflies.Photo of honey bee on purple coneflower bloom.
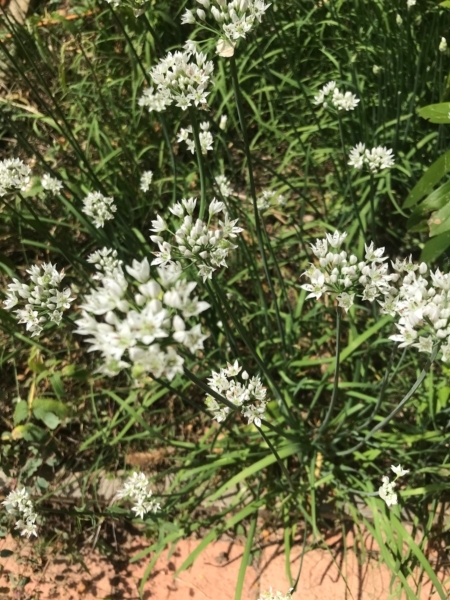
  4. Garlic Chives- when the white star-shaped flowers of garlic chives start to bloom they are abuzz with so many bees you won’t believe your eyes. They are a late season nectar source for butterflies too.

Photo of the white blooms of garlic chive.

Fall Blooming Annuals:

These flowers have been working hard in the garden all summer and will continue to bloom until the first frost strikes.

  1. Cosmos– these drought-tolerant flowers come in shades of pink, white and red and will begin to bloom in late summer and last well into fall.
  2. Cleome-with ample nectar stores, the pink to lavender flowers of this western native are loved by bees and butterflies.
  3. Calendula-this long-time garden favorite loves the cooler weather of fall and its flowers of yellow, orange and gold add a great splash of color to the garden.
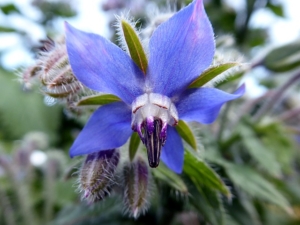
  4. Borage– the long-blooming, blue, star-shaped flowers are adored by the bees.

    Single blue Borage bloom.

    Photo courtesy of Pixabay virginie-I

Check out this blog post about borage- https://bit.ly/2MtXMKv

  1. Mexican Sunflower– loved by bees, butterflies and hummingbirds the vibrant orange blooms will last until frost.
  2. Marigolds– this garden staple will add a blast of color to your border and looks great in pots.
  3. Sunflowers-nothing is more cheerful than a sunflower and the bees, butterflies and birds adore them.
  4. Zinnias– with blooms in every color of the rainbow these long-lasting flowers are a great addition to the garden and the bees love them.
  5. Pincushion Flower– both the perennial and annual varieties of the pincushion flower produce a sweet fragrance that attracts butterflies, bees and hummingbirds. Regular deadheading of the spent blossoms will keep these beauties blooming all season long.

Curing Winter Squash

Helpful Tips on Curing

by Sandy Swegel

All winter squash improve greatly by having a curing time.  Most of us inadvertently cure our winter squash without even realizing it…by leaving it on the counter or a shelf until we get around to cooking it. Curing is keeping the squash at a warmish temperature (70-80) for about two weeks.  If the growing season is long in your area and the squash is ripe before temperatures start to freeze at night, squash can cure perfectly well just sitting in the field.  Here in Colorado this year, we had a hard freeze that caused us to run out, cut all the squash off the plants and bring them indoors.

What is it curing actually does?  Even though you have picked the squash from the vine, it doesn’t “die” but continues to breathe or respirate (a creepy kinda of thought of all those pumpkins on Halloween porches “breathing.”) Respiration is a good thing because it means the squash are still vital and full of life to nourish you. What curing winter squash does is lower the temperature so the respiration slows down. During the curing time, many of the starches in the squash convert to sugar making for a yummier squash.

After keeping the squash at room temperature for 10-20 days, you can then move the squash to a basement, cool garage or unheated room where it will last for months.

Some helpful tips on storing winter squash:

Space the squash so they aren’t touching one another.

Don’t put the squash directly on a cold garage or basement floor. They need to have air circulation around them and will be more likely to rot at the spot where they are touching the floor. Put it up on a shelf or on a board.

Don’t try to cure and store acorn and delicata squashes…they don’t keep well and should be eaten soon after picking

Why do Leaves Turn Red in the Fall?

Myth or Science?

by Sandy Swegel

Because the Wind told them they were naked and they turned red with embarrassment.

There’s a Native American story that says it’s because hunters in the sky killed the Great Bear and his blood spills on the trees. (When the hunters cooked the bear, fat from the pot spilled and turns some of the trees yellow.

Scientists have a story that the trees stop producing chlorophyll. Chlorophyll is what makes leaves look green. When it disappears, the leaf’s true color (red or yellow or orange) shows through.

I’m at an awkward time of life when there are no young children in my life.  No one to tell me riddles. No one I can tease as my father teased us by telling us very tall tales that we never quite knew whether to believe or not.  No one to tell me riddles like the old Cajun guy who lived down the street who never answered a question with a straight answer but told a wild story about the bayou.

So if you know any kids or myth-makers or sacred storytellers….can you ask them why do leaves turn red in the Fall?  That chlorophyll story is a little hard to believe and kinda boring if you ask me.

Taking Care of the Bees and other Creatures this Fall

Planting Flowers for the Bees

What’s your favorite flower this year?  That’s the question our local gardening magazine posed to its readers this issue.  Many candidates came to mind, but I realized my criteria in Fall for a good flower is one that blooms late to feed the bees and other pollinators that are still around scrambling for nectar and pollen to sustain them or their babies through winter.

So my favorite flowers right now include the dandelions that have responded to our recent rains with a bloom worthy of Spring.  Every time I see a dandelion now, I don’t respond with a desire to pull it, but with a word of encouragement because it’s not a weed when it has a happy bee gorging in the middle of the flower.

Other favorites that are feeding bees and other creatures:

Cosmos are tough annuals, and still blooming despite some frosty weather.
Scabiosa has won my garden awards for several years for being the last flower blooming in November.  It’s one flower I keep deadheading instead of leaving the seed because I know it makes new flowers as long as it can.
Violas and Pansies planted now will make flowers to please me and the bees during warm spells this winter.

As always, there is one really important thing pollinators and especially bees need in Fall:

WATER.  At my house, the seasonal ditch dried up in August, and standing water is rare in our arid climate.  I keep water in the birdbath and in the flat little saucer with pebbles for the bees.  I notice signs that other bigger creatures like the squirrels and rabbits and field mice sneak water when I’m not watching from the bird bath top that I left sitting on the ground. I got pretty angry with the ravenous rabbit over-population this year, but when I see one lonely bunny hunkered down in the dry leaves under the trees, I can’t help but leave water out for her.  I know I’ll be rewarded with hungry baby bunnies in the Spring, but as the cold winds of Fall send chills through the gardener, my heart goes out to all the creatures who live outdoors during the long winter season.

Use Red to Make your Garden “Pop”!

Adding Color to Your Garden

by Sandy Swegel

A friend is a marketing guru and always talks about wanting to make things “pop” whether its brochures, interior design or gardens.  Fall is a great time when colors pop. We naturally think of New England with its amazing Fall display. In fact, East Coasters coming to Colorado are often disappointed their first Fall. It is gorgeous here, but it’s pretty darn yellow. Yellow aspens are beautiful, but yellow and brown don’t pop as red does.

A neighbor has a wild red unkempt thicket of shrubs and trees along his fence that makes people stop in the road to take pictures. The key to its glory (besides the fact that it requires virtually no upkeep except watering) is huge shrubs and small trees…all with lots of berries: orange Pyracantha with blue Euonymous, intermingled with red viburnum berries. The whole thing is held together by a wayward Virginia Creeper vine that is one of the plants that does red here in Colorado.

Most of our gardens may be better organized. But a wild uncontrolled area that “pops” with bright reds and oranges is a joy to behold as the growing season winds down. Use red to make your garden pop! Then the regular yellows and golds and browns of your xeric garden or your fading vegetable garden look beautiful against their red backdrop.