7 Plants to Keep the Mosquitos Away
Gardening Tips
by Heather Stone
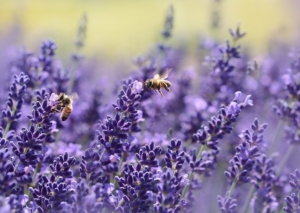
photo courtesy of pixabay
The long, warm days of summer are meant to be enjoyed. Sitting poolside, bar-b-queuing with friends or just relaxing in the garden. But sometimes pesky mosquitoes have a way of taking the fun right out of our outdoor activities. Instead of dousing yourself and your loved ones in chemical bug sprays try planting some of these mosquito repellent plants around your garden and patio to help keep the bugs at bay.
Lemongrass-
Lemongrass is an ingredient in citronella oil and its strong lemon scent is a proven mosquito repellant. This tropical grass is best grown in pots as an annual or brought indoors during the winter months.
Marigolds-
The strongly scented flowers of marigolds repel mosquitos, flies and even rabbits. These beauties come in an array of colors that will brighten up any spot. Keep pots of marigolds near seating areas and doorways to deter mosquitos. In the vegetable garden, marigolds repel many of the insects that attack tomato plants.
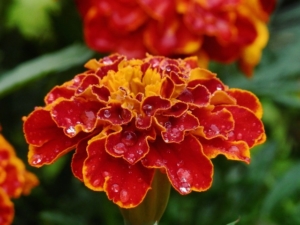
photo courtesy of pixabay
Lavender–
The aromatic, purple flower spikes of lavender not only repel mosquitoes but moths, flies and fleas too. Use the fresh or dried flowers directly on the skin or dry them and hang them indoors to repel moths and flies inside. Don’t forget, the bees love lavender!
Basil–
Who doesn’t enjoy the smell and taste of fresh basil? Mosquitos, it seems. Unlike many of the other mosquito repellant plants, you don’t have to crush the leaves or flowers of basil to receive the mosquito deterring properties.
Catmint-
Catnip and many other plants in the mint family are excellent at keeping the mosquitos at bay with their strong scent. Ticks and biting flies also avoid catmint. You can rub the leaves and flowers directly on your skin for added protection. Catmints are easy to grow plants that do well in sunny and dry spots in the garden. The lavender-blue flowers bloom all season and attract a wide array of pollinators.
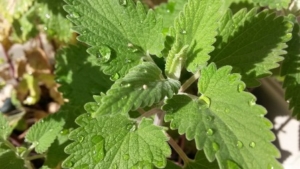
photo courtesy of pixabay.
Rosemary-
Cooking out? Toss a few sprigs of rosemary on the grill and let the aromatic smoke drive the mosquitos away.
Peppermint
– the strong scent of peppermint deters flies and mosquitos. Keep a few plants in pots on your patio to deter insects and enjoy the fresh leaves in your iced tea.
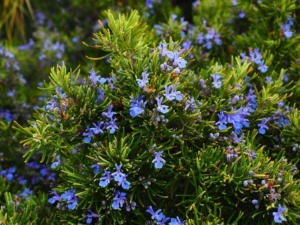
Photo courtesy of pixabay.
All these mosquito repellent plants deserve a place in your garden or on your patio not just because they deter pesky insects, but for their beauty, fragrance and attractiveness to our pollinator friends.
Here is a simple herbal mosquito repellent recipe you can make at home using essential oils (“eo”).
- ½ witch hazel
- ½ cup of water
- 20 drops Eucalyptus eo
- 30 drops Citronella eo
- 10 drops Rosemary eo
- 20 drops Lavender eo
- 20 drops Tea tree eo
If you don’t have one of these simply leave it out or substitute with another. A few other essential oils that will work include lemongrass, catnip, clove, mint and geranium.


 Composting Basics