The Complete Milkweed Buying Guide
What Species of Milkweed is Best For You
By Sam Doll
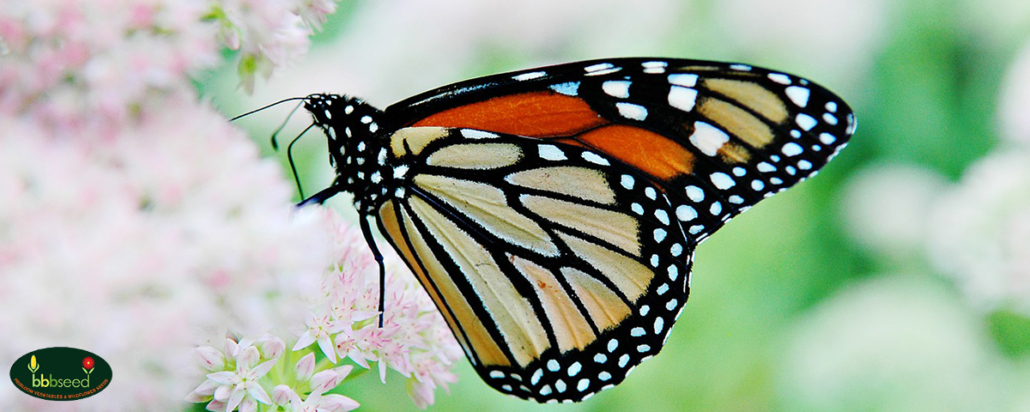
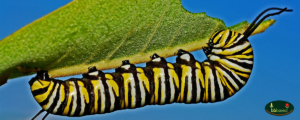
Monarch Butterflies are amazing North American animals! Their iconic, colorful wings are actually warnings for potential predators. Those spots and strips are big caution signs saying: STOP; I TASTE BAD!
Every year, the Monarchs embark on one of nature’s most astonishing mass migrations. This incredible journey takes four generations and covers over 3000 miles through the United States, Mexico and Canada.
Monarch mothers will only lay their eggs on milkweed plants (genus Asclepias) and, once hatched, their caterpillars exclusively live on and eat the leaves of those same plants. They cannot survive without them.
The problem is that milkweed has gotten a bad rap over the years. Allergies and perceptions of the wildflower as a weed have caused it to be wiped out throughout large portions of North America. The prevalence of pesticides has not helped and the loss of milkweed, wildflowers, and other floral resources has devastated the monarch butterfly’s population.
It’s not without hope, though! Everyone can do their part to help. The most important thing you can do is to plant more milkweed on your property and in your community. This guide to purchasing milkweed seed will help you figure out which species of milkweed is best for you, and you can help Monarch Butterflies!
Oh, and while you’re at it, check out our Monarch Rescue Wildflower Mix. It has Butterfly Milkweed and a mix of other wildflower seeds to provide a nectar-rich place for Monarch Butterflies to fuel up and raise their young! Find it here!
1. Common Milkweed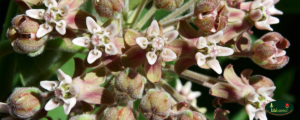
The Common Milkweed is a hardy perennial with fragrant, terminal blossoms made up of tiny dusty-pink blossoms on hairy stems. This milkweed is found throughout the Great Plains and is tough enough to tolerate most soil conditions. It does well in soils that are clay, sandy or rocky calcareous (high in calcium carbonate). These conditions occur naturally along stream banks, ponds, lakes, forest margins, and roadsides. Common Milkweed grows 2′ – 6′ tall and like areas with full sun. They bloom from June through September and will germinate between 65° and 85° F.
This milkweed is also a favorite of other butterflies, native bees and hummingbirds. The seeds will grow easily and do well when planted in the fall or when cold-treated for three months prior to planting. Common Milkweed will spread both through seed normal distribution and as well as through underground shoots. Common milkweed spread readily and may need to be controlled. Common milkweed is particularly good for wetland rehabilitation and as a component in wildlife seed mixtures.
2. Showy Milkweed
Similar to the Common Milkweed, this hardy perennial is a favorite of butterflies. This species has traditionally provided food, medicine and fiber to indigenous peoples. The clusters of star-shaped flowers will range from dark-rose to white. The plant has tall woody stems with milky sap and with alternate, oval leaves that are velvety underneath. Showy Milkweed grows 24” – 36” tall and like areas with full sun. They bloom from May through July and will germinate between 65° and 85° F.
These plants grow well in a variety of locations from prairies and open woodlands to roadsides. The seeds are very easy to grow and do well when planted in the fall or when cold-treated for three months prior to planting. Showy Milkweed will spread through seed distribution and underground shoots
3. Butterfly Milkweed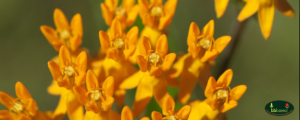
Also known as Butterflyweed, this hardy perennial. Unlike their cousins, this species lacks the milky sap that gives milkweed their namesake. The clusters of flowers will range from dark orange to white on tall woody stems with smooth shiny leaves that are velvety underneath. The blooms begin in May and will last through July. These plants will grow between 12”-24” and perform well in a variety of locations; from prairies and open woodlands to roadsides.
Butterfly Milkweed is only pollinated by large insects. This trait is common among fall wildflowers, many of which depend on specific pollinators to survive. Butterfly Milkweed pollen is contained in a heavy, sticky structure called pollinium. Since these pollinium structures are so large and sticky, only larger insect pollinators can fly with them. There are several nectaries per flower and multiple flowers per bloom, which makes these flowers great pollen and nectar resources
The seeds will grow well when planted in the fall or when cold-treated for three months prior to planting in the Spring. Butterfly Milkweed will spread through seed distribution and underground shoots.
4. Swamp Milkweed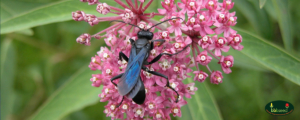
The Swamp Milkweed is widely distributed across the U.S. and Canada; from Quebec and Maine south to Florida and Texas and west to Nevada and Idaho. This species prefers neutral to slightly acidic soil, although it will tolerate a pH up to 8.0. It has high moisture requirements, and it is usually found in wet habitats such as meadows, riverbanks, pond shores, stream banks, wet woods, swamps, and marshes, although it will also grow in drier areas such as prairies, fields, and roadsides. Swamp milkweed needs full sun or partial shade to flourish.
The plant grows into a two=foot tall perennial with fragrant, terminal blossoms made up of tiny rosy-purple blossoms. This milkweed prefers average to very moist soils, will tolerate heavy clay soils and is easy to start from seed and deer resistant. Like most milkweed, Swamp Milkweed seeds are easy to grow and do well when planted in the fall or when cold-treated for three months prior to planting. Swamp Milkweed will spread through seed distribution and underground shoots.
Like the Common Milkweed, Swamp Milkweed is great for wetland rehabilitation and as a component in wildlife seed mixtures.
5. Bloodflower Milkweed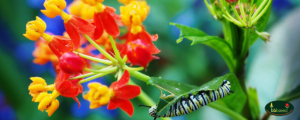
Bloodflower Milkweed, also known as Tropical Milkweed, is winter hardy in zones 9-11 and is easily grown from seed each year as an annual. It is great for attracting hummingbirds, butterflies and a wide variety of pollinators. Showy red-orange flowers with yellow hoods in rounded clusters grow on upright stems with medium-green, glossy, pointed leaves. Attractive foliage and flowers for beds, borders, cottage gardens, meadows and butterfly gardens. It is also a good cut flower. Dried seed pods are attractive in arrangements. Monarch Butterflies lay their eggs on the leaves and the larvae feed on the plants. Plant in rich, well-drained soil. These have a longer blooming period than most other milkweeds, ranging from June through October.
This milkweed is not native to North America and can potentially be invasive in warmer climates. If you’re one of our Southern friends, monitor your plantings and keep out of wild lands and ranches and cut the foliage to the ground in the winter to avoid luring Monarchs away from their migratory paths.
*Note that all milkweed contains cardiac glycosides, chemicals that are toxic when eaten. These chemicals, in turn, make the Monarch Butterflies toxic to any would-be predators. Avoid letting livestock and small children eat milkweed and wash any skin that comes in contact with the sap to avoid irritation.
Learn more about the Monarch Butterfly Migration by checking out this Blog post!