Three Ways to Compost that Will Fit Your Lifestyle

Composting Basics

by Sam Doll

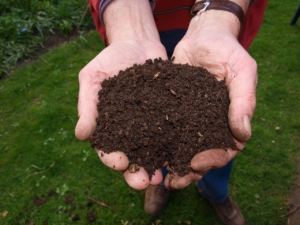
Composting seems like ‘all the rage’ right now! Taking some of your food and paper waste out of the landfill is a great way to reduce your waste, take care of the environment, and create an excellent supplement for your (or a lucky neighbor’s) garden! We’ll show you three ways to compost that will work with your lifestyle.


No matter where or how you are composting, there are some basic guidelines to be aware of.

First off, if you are composting at home, you want to avoid any animal products like meat and dairy (eggshells are fine). These products can create unwanted odors and attract pests like raccoons!

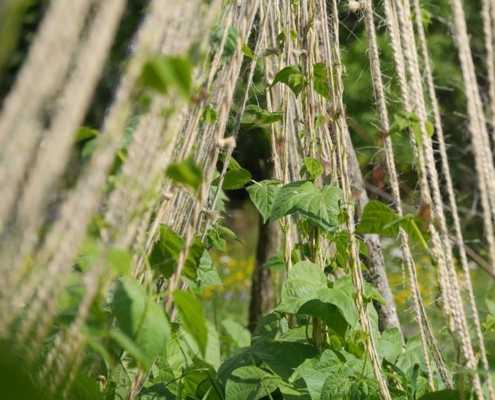
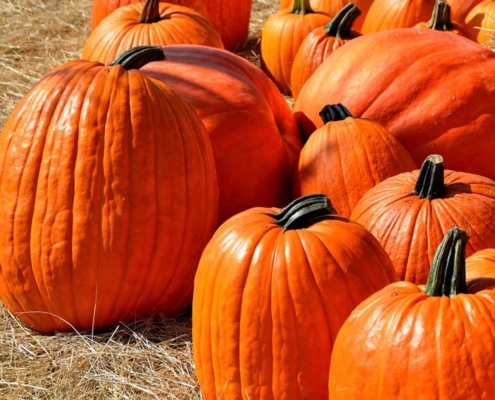
You also want to be aware of how much brown and green material that is going into your compost. Brown material is any dry, carbon-rich material. This includes shredded paper, dried leaves, or old plant material. Green material is nitrogen-rich material like food scraps, eggshells, grass clippings, and coffee grounds.

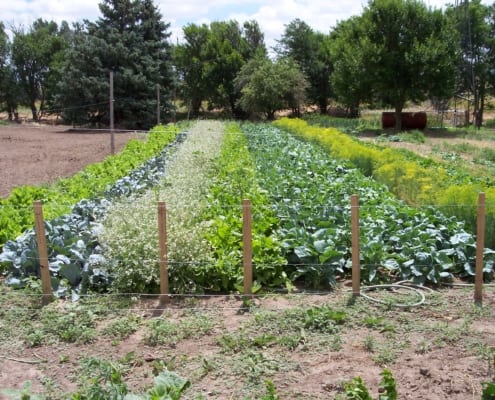
When composting you want to include equal amounts of brown and green materials. If you are using an outdoor composting system, you’ll want to alternate layering brown and green materials, usually starting with brown.

Finally, you can’t let the compost just sit. Mix it and water it to keep the microbes happy and healthy. Mixing it incorporates oxygen and watering cools the pile and prevents it from drying out.

Indoors

You may have been reading this and thinking, “I have an apartment, I can’t compost!”. Composting inside can be difficult, but it’s not impossible!

The simplest solution is to find a neighbor, community garden, or farmer who would love to add your food scraps to their compost pile. Just store your scraps in a plastic bin with a lid and run over to the pile every few days.

If you don’t have a friend with a compost pile, you can still do it yourself. Many people have found great success in vermiculture, or “worm farming”! Vermiculture is a quick, odorless composting method that is great for those without access to a yard.

Check out this guide for various vermiculture methods and tips!

In-Vessel Composting

Have a little outdoor space, but don’t want to devote half your yard to composting? There are specialized composting bins that can handle all your household waste, speed up the composting time, and stay out of sight.

One of the fastest methods of the three ways to compost is to use a tumbler. Tumblers are plastic drums that can be rotated to mix the compost easily without getting your hands dirty. They are contained and inconspicuous. We recommend double-chambered rotating compost bins like this, which can turn scraps to finished compost in as little as two weeks.

There are also plastic compost bins. These bins are open at the top and bottom. You usually add fresh material to the top and wait for finished compost to be scooped out of the bottom. These bins require little work, just the occasional watering, but can take a while longer than the rotating drum. We recommend this classic Soil Saver from All Green.

These composters are great and beginner-friendly, but they have limited capacity. They can handle an average household’s compost, at most, and that doesn’t include yard waste like grass clippings. If you want something that can handle a larger amount of compost, you’ll have to pursue more traditional methods.

TOP 10 VEGETABLES FOR PART SHADE

Gardening Tips

by Heather StoneShady Gardens Plants

Do you have a garden that gets more shade than sun, but you still want to grow vegetables? No problem! There are plenty of vegetables that will grow well with partial sun. We’ve put together a list for you of vegetables that perform well with 6 hours or less of direct sunlight. Read on to find out how to keep yourself in fresh veggies all season by making the most of your shady spots.


Partial Shade Plants

  1. Mesclun Greens (Needs 3 hours of sun)

Mesclun is simply a “mix” of various greens. All of them doing well with just a few hours of sunlight. They germinate quick and reach maturity in a matter of weeks. Try our Mesclun Mix– a great combo of arugula, mustard greens and Chinese cabbage.

  1. Arugula 3-4 hours

This delicious peppery green is one of the easy-to-grow vegetables for shade and loves the cool weather. Plant in early spring about 1 month before the last frost and continue sowing every 20-30 days until mid-summer. Grows well in containers. Try our Wild Arugula!

  1. Lettuce 3-4 hours

Lettuce is a cool-season green that isn’t a big fan of direct sun. The varieties are endless and so easy to grow in the ground or in containers. Plant in early spring and again every two weeks for a continuous supply of lettuce. Make sure to provide shade for the late spring and summer plantings.

  1. Spinach 3-4 hours

The nutrient-packed leaves of spinach love cool weather and protection from the full sun. Spinach is an easy to grow and productive crop that every garden should find a spot for. Like lettuce and arugula plant in early spring and sow successively every 2 weeks for a continuous supply of spinach. Try our Bloomsdale or Nobel Giant varieties.

  1. Kale 3-4 hours

A powerhouse of nutrition, kale is easy to grow in the ground or in containers. The young tender leaves of kale are great in salads. The mature leaves are excellent sauteed or added to soups and stews. Start in early spring and continue you to sow for fresh greens all season long.

  1. Swiss Chard 4-5 hours

Easy to grow from seed and looks fabulous all season long Swiss Chard’s beautiful leaves are great shady gardens plants that are easily planted in the perennial garden as well as the vegetable patch.

  1. Radish 4-5 hours

There’s nothing like a fresh spring radish. They are quick to germinate, fast to mature and come in a rainbow of colors. We carry 5 different varieties! No garden should be without radishes.

  1. Peas 4-5 hours

Other partial shade plants are Peas, in either the garden or the container. They are pretty quick to germinate and prefer cool weather. So get them in the ground early and you’ll have peas to snack on in early summer.

  1. Beets 4-5 hours

Beets can thrive along the shady edge of the garden. The roots might not get quite as big, but if you keep them well watered they will produce excellent tasting greens and sweet, tender roots.

  1. Bok Choy 4 hours

This cool-season vegetable germinates in a few days and can be eaten raw or cooked.  Bok Choy is an excellent addition to the part shade garden.


AN EASY WINDOWSILL HERB GARDEN

Graphic of herbs in pots.

photo courtesy of pixabay

At Home Gardening Tips

by Heather Stone

Are you are itching to get your hands in the dirt, but outside the ground is covered in snow? Well, a windowsill herb garden might be just the thing to get you through until spring finally arrives. Every kitchen and every cook deserves fresh herbs. They will help liven up not only your cooking but your gardening spirit too. Check out our herb collections here and here!


To get started make sure you have a sunny windowsill that gets at least 6 hours of sunlight. If you get less than that you will want to provide some additional lightening or your herbs will struggle.

Photo of basil growing in a pot on the windowsill.

photo courtesy of pixabay

Next, purchase some small starter plants from your local nursery or garden center or try starting your herbs from seed. Starting from seed may take a little longer, but it’s less expensive. When choosing plants or seeds pick herbs you know you like to cook with. Some great herbs for containers include thyme, basil, cilantro, parsley, chives, oregano, dill, sage, mint and savory.


Whether you are purchasing plants or starting from seed you will need containers and quality, lightweight potting mix. If you are starting with plants make sure your container(s) have a drainage hole(s) and are roughly 6-10” in diameter. Start by adding some potting mix to the bottom of your container. Next, place your plant in the pot and gently fill in and around it with more potting mix, leaving around an inch of room at the top for watering. Gently press the soil down and water well. Most herbs don’t like their soil too wet so make sure to test your new herb plants for water by sticking your finger an inch or two below the soil surface. If you find the soil is dry, it’s time to water. Fertilize your new herb garden once a month with a ½ strength liquid fertilizer. Be sure to give your plants some time to get established before you start harvesting.

Photo of Cilantro sprigs in a cup.

photo courtesy of pixabay

If you are starting from seed, you can plant in smaller containers to start and pot up as your plants get bigger. Fill your containers with a damp potting mix. Sprinkle 4-6 seeds on top of the surface. Gently press them in and cover lightly with more potting mix. Cover with a plastic bag or plastic wrap and place them in a warm, sunny windowsill making sure the soil surface stays moist. Once your seeds start to sprout, remove the plastic. Keep your new sprouts watered whenever the soil surface feels dry and watch them grow.


Here are some herbs that are easy to start from seed:


Basil

The dried version is no comparison to fresh basil. With so many uses and so many varieties to choose from basil is an easy choice for the indoor herb garden.


Cilantro

Cilantro is easy to start from seed and germinates in 7-14 days. Use the fresh leaves in salads, sauces and to garnish a wide array of dishes.


Parsley

Parsley is both productive and attractive when container-grown. It takes a bit longer to germinate, 12-28 days, but it’s worth the wait. Harvest leaves as you need them once the plant is growing strong.


Chives

Chives are another plant easily grown in a pot. The slender grass-like leaves are delicious and make an excellent flavoring in soups, stews, dips and salads. Sprouting in just 10-14 days you will have fresh chives in no time.


Three Types of Vegetable Trellises You Can Build Yourself

Vegetable trellises. Plants climbing up a trellis of twine.

Vegetable Trellises

by Sam Doll

Spring is just around the corner. That means that it is time to start getting your garden prepped for the growing season! You’re probably busy cleaning, ordering, and planning your garden before you need to worry about getting those seeds in the ground.

One DIY project you should consider is building your own vegetable trellises! Here are three types of trellises that your plants will love, and you can make yourself.

1.    Teepee Trellis

This is probably the simplest and cheapest type of trellis to make yourself. All you need to make this trellis are three bamboo poles and some twine.

Using the bamboo poles, make a teepee shape and push them into the ground until they are relatively deep and stable. Then, using the twine, lash the bamboo poles together where they meet. Wind the twine around and down the structure until you reach the bottom. To secure the twine, you can twist the twine around the poles where they meet and knot it. You can also use staples or zip-ties if you want.

This type of trellis is perfect for growing climbing squash and cucumbers. We love planting our Organic Delicata Squash under these trellises. The base of each pole should be used as a planting site.

2.    A-Frame Trellis

Another trellis that is perfect for your vegetable garden is an A-frame style trellis. There are many methods to building these. This is a little more involved than the Teepee trellis and will require some woodworking.

As with any garden project, we don’t recommend for splurging on the nicest wood you can find. This will be outside and exposed to the elements, so don’t get too attached to it. You can still seal or paint it to get more life out of it, but these projects won’t last forever.

For this trellis, all you need are some boards, screws or nails, hinges, and a climbing surface. Create a frame using your lumber. We like using 2X4’s because they are sturdy and easy to find, but any flat boards will work. Screw or nail the board together by putting the horizontal boards on the “inside” of the vertical boards. You can complicate this project by making the boards flush or adding other embellishments, but this is the simple and dirty version.

The final dimensions of your frames will depend on the size of your space and how tall you need the trellis to be. The important thing is to make them identical. Once you’ve assembled your frames, it’s time to attach the climbing surface. The most affordable route here would be to create a grid using twine or string and create a grid that attaches to the sides of the frame. If you have a bit more budget, we recommend a chicken wire or metal fencing that you can just staple onto the frame. This saves a lot of time and will last a little longer.

Finally, attach the two frames with the hinges and place them in your garden. These style frames are great for peas and beans. Our Mardi Gras Blend of beans are a great and colorful way to show off this project.

3.    Row Cover Trellis

Many of you use row covers to get your garden through the early and late part of the season. Well, why not make a multi-functional row cover. Our version of this is rather simple. Cut even segments of a light metal fencing and make an arch out of them that covers your row or planter. Stake those into the ground and continue the length of the plot. This is a great easy trellis that can be covered with a floating row cover if needed!

Let’s Celebrate Pumpkins!

Year of the Pumpkin

by Heather Stone

Year of the Pumpkin. Fall orange pumpkins sitting on straw.

photo courtesy of Pexels – 160662

When you hear the word pumpkin what comes to mind first? Is it autumn, Halloween, jack-o-lanterns, pumpkin pie or pumpkin spice latte perhaps. There are so many things to love about pumpkins. They are fun to grow and fun to eat. This year the National Garden Bureau named 2019 The Year of the Pumpkin, so let’s celebrate the pumpkin. https://ngb.org/year-of-the-Pumpkin/

Pumpkins are part of the Cucurbitaceae family along with squash, cucumbers and melons. There are a wide selection of pumpkin varieties ranging in size from as little as 4 oz to some weighing over several thousand pounds. Just this past fall a New Hampshire man grew the largest pumpkin on record weighing in at 2,528 lbs. Now, that would make a lot of pumpkin pie.

Pumpkins are easy to grow. They can be started indoors or directly sown into warm (70 degrees), rich, fertile soil when all danger of frost has passed. Sow the seed into “hills” of 4-6 seeds and thin to the 2 strongest plants per hill. Make sure to give your pumpkins plenty of room to grow to get the best fruit. Depending on the variety you are growing, pumpkins need anywhere from 12 sq.ft. to 48 sq.ft. of growing space. Water your pumpkin seedlings regularly and fertilize throughout the growing season. When it comes time to harvest make sure to cut the pumpkins from the vine when the skin is hard and leave a 3” piece of the stem attached to decrease the chances of decay.

Photo of a jar of pumpkin soup on a green placemat with wooden spoon.

Photo courtesy of Pixabay -congerdesign


Pumpkins aren’t just fun to grow. They are fun to eat too! We use pumpkins to make soups, breads and pies. We put pumpkin in smoothies, yogurt and even pancakes. Check out some of these great pumpkin recipes. But the flesh of the pumpkin isn’t the only tasty part. Roasted pumpkin seeds make a great snack too. Pumpkin flesh is rich in vitamin A, potassium and beta carotene. The seeds are a good source of protein and are rich in minerals such as manganese, phosphorous, magnesium and zinc. Not all pumpkins are created equal. There are pumpkins for carving and decorating and there are pumpkins for eating.  Look for pie pumpkins and cooking pumpkins for the best taste. Two of my favorites are Cinderella and Long Island Cheese, but there are countless choices.

So what kind of pumpkin will you grow this year?


PRAISE FOR THE LOWLY CABBAGE

Heirloom Vegetable Seeds

by Engrid Winslow

Photo of a growing head of purple cabbage.

photo courtesy of pixabay – angelsover

Pity the lowly cabbage, which doesn’t get the love of its sexier brassica brothers and sisters such as Brussels sprouts, broccoli, cauliflower or kale. But this overlooked vegetable is plentiful and inexpensive at this type of year. Cabbage is also a breeze to grow and does great in cool spring and fall temperatures. They actually taste sweeter when exposed to light frosts as do other cool-season brassicas.

It comes in two types: European and Asian. The European types are white or green cabbage, red cabbage and savoy. The most popular Asian types are bok choy and Napa. Napa is an excellent choice for summer slaw when combined with grated carrots, red bell peppers and simple soy and rice-wine vinegar dressing with a touch of honey. Toss in some peanuts for crunch and/or cooked chicken to make it a complete meal. But today we are focusing on a couple of winter cabbage recipes.

If the taste of cabbage doesn’t convince you then maybe this will: cabbage is full of vitamin K and anthocyanins that help with mental function and concentration. These nutrients also prevent nerve damage, improving your defense against Alzheimer’s disease and dementia. Red cabbage has the highest amount of these power nutrients. Cabbage is an excellent source of vitamins C, B1, B2 and B6. It is also a very good source of manganese, dietary fiber, potassium, folate and copper. Additionally, cabbage is a good source of choline, phosphorus, magnesium, calcium, selenium, iron, pantothenic acid, protein and niacin.

This soup is adapted slightly from the wonderful cookbook: Six Seasons – A New Way with vegetables by Joshua McFadden which you might want to add to your cookbook library. https://www.amazon.com/Six-Seasons-New-Way-Vegetables

The red coleslaw is a family Easter favorite that is great as a side with ham and scalloped potatoes.

Two other favorite cookbooks for you to also consider are Brassicas by Laura B. Russell https://www.amazon.com/Brassicas-Healthiest-Vegetables-Cauliflower-Broccoli and The Book of Greens by Jenn Louis https://www.amazon.com/s?k=the+book+of+greens+by+jenn+louis&crid

Cabbage Recipes

COZY CABBAGE and FARRO SOUPFront of the Flat Dutch Cabbage seed packet. Cabbage recipes

Serves 4

Notes: If you use savoy cabbage it will not take as long as green cabbage once it is added to the pot to steam.

  • 1 pound cabbage, savoy or green
  • Olive oil
  • 1 medium onion, thinly sliced
  • Kosher salt and freshly ground black pepper
  • 3 garlic cloves, peeled and chopped finely
  • 1 sprig of rosemary or thyme
  • 1 tablespoon red wine or white wine vinegar
  • 2/3 cup uncooked farro
  • About 4 cups chicken or vegetable stock
  • 1 tablespoon fresh lemon juice
  • Shaved parmesan, to finish
  • Cut out the cabbage core and finely chop it. Cut the leaves into fine shreds or about 1/8-inch ribbons. Heat 1/4 cup olive oil in a large pot or Dutch oven over medium heat. Add the onion and cabbage core, some salt and pepper, and cook, stirring frequently, until the onion starts to soften but is not yet browned, about 5 to 7 minutes. Add the garlic and cook another 3 to 5 minutes, until the garlic softens too. Add the shredded cabbage leaves and herb sprig. Reduce the heat to medium-low and cover the pot and let it steam a bit to soften the leaves, then toss the cabbage to combine with other ingredients. Cook, covered, until the cabbage is very sweet and tender, which may take 30 minutes or as little as 15 to 20 minutes, stirring occasionally.

Meanwhile, in a small skillet, heat 2 Tablespoons of olive oil over medium and add the uncooked farro. Toast it, stirring, for a few minutes, until half a shade darker.

When the cabbage is ready, stir in the vinegar. Taste and season with more salt and pepper. Add toasted farro and stock. Bring mixture to a low simmer and cook for 25 to 35 minutes, until farro is tender and all the flavors are married. The soup will be very thick, but if you’d prefer more liquid, add another 1/2 cup stock. Taste and adjust seasoning again. Stir in lemon juice.

Ladle into bowls and finish each with a drizzle of olive oil and a shower of parmesan, with more parmesan passed at the table.

Soup keeps well in the fridge for 3 days and for much longer in the freezer.


RED CABBAGE COLESLAWPhoto of the Red Drumhead Cabbage seed packet.

Serves 4

Vinaigrette:

  • ¼ cup extra virgin olive oil
  • 2 teaspoons chopped, fresh tarragon
  • ½ cup tarragon or apple cider vinegar
  • 1 tsp dry white wine
  • 1 tsp Dijon mustard
  • 1 TBL honey
  • Salt and pepper to taste

Put all in a blender and blend for 1 minute.

Toss with:

  • 1 head shredded purple cabbage
  • 1 cup golden raisins
  • 1 tsp caraway seeds

The vinaigrette will keep for 5 days and after prepared, the salad will keep for two days in an airtight container.


Here is a recipe from our blog “The Dirt” for Spicy Tofu Tacos with Cabbage Slaw from the kitchen of Michael Scott

and more on planting Cabbage and other uses, here.

DREAMING OF SPRING

Plan your vegetable garden. Rows of Vegetables in a Garden.

Plan your vegetable garden!

By Engrid Winslow

Yes, it is still very cold and very dark but nothing fills the heart in the dead of winter than planning for spring. What should you be doing now that will keep those spirits up? Plan your vegetable garden and herb garden!

1. First of all, take a look at those vegetable and herb beds and decide what and how many varieties you want to plant next year. Do you want to start those peppers a bit earlier this year? Did you plant tomatoes there last year – rotate tomatoes every 3 years if at all possible to avoid depleted soil and issues with many diseases. What do you want to grow more of this year? Anything you want to try that’s new? What did you and your family really love? Want more tomatoes or basil for pesto or tomato sauce? [4 Tips For Keeping Your Basil Productive and Pesto Secrets] Were there any epic fails? Maybe it’s time to move on to buy those at your local Farmer’s Market and devote the precious real estate to something else.

2. Speaking of soil, this is a great time to start adding mushroom compost in a nice thick layer that can work its way into the soil during late winter freeze and thaw cycles and heavy periods of moisture. You can also cover the compost with a layer of seed-free straw that was grown organically.

3. Peruse the seed catalogs and websites. It is so fun to read those descriptions and they all sound wonderful but be aware of your space and climate when choosing seeds. Take stock of any seed that you saved from last year and organize and assess any leftover seed packets. Seed viability goes down over time. Onions, corn, parsnips, parsley and leeks should be refreshed every year, but tomatoes and lettuce can go 4-6 years and still germinate. Check out these charts if you have questions: https://hortnews.extension.iastate.edu/1999/4-2-1999/veggielife.html/

and http://ottawahort.org/wp-content/uploads/2017/02/Seed-Viability-Times.pdf/

4. Gather up your seed starting supplies and order more if needed. Dust off those grow lights, check the heat mats and make sure they still work and clean any seed starting containers that you plan to re-use with a weak bleach solution. Again, assess what worked and what didn’t in prior years. Did lettuce seeds that were direct-sown in the garden elude you? Try starting them indoors under a plastic dome which helps retain moisture until they are fully germinated.

5. Did friends and neighbors share anything they learned with you? Maybe it’s time to get everyone together for a Happy Hour, swap saved seeds and talk about their gardening experiences.

6. Review past blogs, books and articles that you might have saved for ideas, tips and new information. Here’s a good place to start: Care and Planting of Seedlings, Rules You Can’t Break, and Two Ways To Guarantee Your Seeds Grow

The Essential Pollinator

Pollinators
Essential Pollinator

Those pesky critters that buzz by, causing us to dance and flap our arms when we are outside, are far more than a mere annoyance.  We don’t give these tiny powerhouses the credit they are due.

Native pollinators such as bees, butterflies, flies, moths, beetles, and bats are essential for human survival but their populations are in a serious decline.  Our fuel, food, drugs, and fiber are directly and indirectly taken from plants that depend on pollinators for their existence.  Some have estimated that one out of every three to four mouthfuls of food we eat results from the actions of pollinators.  Pollinated crops contribute an estimated $20 billion to our economy each year.   Native pollinators control the healthy function of our natural ecosystem.  The documented decline of native pollinators, as well as that of the introduced European honeybee, concerns the scientific community.  This decline results from the fragmentation and destruction of native habitats which has reduced the food sources for many native pollinators.  The traditional corridors of nectar- and pollen-rich plant sources have been destroyed by development and changes in land use.  Isolated habitats are further degraded by non-native and invasive species.  Misuse of pesticides and the introduction of non-native pollinators have contributed to the extinction of many of our native species.

The bright side of this issue is that we can help our native essential pollinator populations by choosing to plant nectar- and pollen-rich vegetation species that are native to a specific area that will provide nutrition and cover.  Remember to include plants that provide food for the larval stage and also to provide a water source.  The flowering plants that are native to your area have co-evolved along with their pollinators to provide the perfect combination of petal shapes, fragrances, and colors for their mutual benefit.  Make sure to plant a variety of native plant species of mostly perennials to ensure an appropriate and dependable supply of nectar and pollen for the bees, butterflies, and other pollinators throughout the spring, summer and fall.  Select nectar-rich species with clusters of brightly colored tubular florets and plant them in groupings rather than as individual plants.  Avoid cultivars of plants grown mainly to produce larger flowers as these often do not have the pollen or nectar that the pollinators require.  Bees are attracted to purple, blue, and yellow flowers and hummingbirds prefer red and orange flowers.  Try to include night-blooming varieties to attract bats and nocturnal moths.  Use pesticides sparingly or not at all.  Have patience, most perennials will take one or two seasons, with good care, to bloom.  Read more here>https://bbbseed.com/pollinators/about-pollinators/

Thoughtful plantings, whether in pots and containers or backyard gardens and a conservative, integrated pest management system, can create and establish a stable ecosystem that is pollinator-friendly.


7 Stocking Stuffers Under $25 for Gardeners

Gifts for Gardners

by Sam Doll

Here are 7 must-have tools to keep in mind if you are looking for great gardening gifts for your favorite gardener.

–Nisaku Japanese Hori Hori Garden Knife for 24.95 on amazon.com

Photo of a garden knife and sheath to give as a garden gift.

photo courtesy of Nisaku


These compact garden tools feature serrated and straight edges that are perfect for a variety of garden needs, including cutting back weeds at the root. They also feature handy measuring marks, so you know the exact depth when planting and sowing. Get this handy little tool for the gardener who can appreciate a tool that can get the job done!


Photo of tan leather gardening gloves.

Photo courtesy of Home Depot

–Leather Gardening Gloves for $10.98 at homedepot.com


Upgrade your favorite gardener’s glove game with some stylish and comfortable leather gloves. The more your green thumb works in these, the better they’ll fit! These pigskin gloves from Home Depot will last for years.


–Wildflower Seed Mixes from $5.79 at bbbseed.com

The front of the Monarch Rescue seed mix.

Wildflower mixes can provide season-long color and important forage for bees and butterflies. BBB Seed has a variety of regional and specialty wildflower seed mixes that will make any gardener, novice or expert, smile all season long!


–Gardening Knee Pads for $8.49 at amazon.com

Photo of green strap-on gardeners knee pads.

Photo courtesy of Fiskar’s


Save your friends knees with these waterproof and forgiving knee pads. These knee pads are designed specifically for getting your hands dirty in the backyard.


–Garden-Themed Jewelry from Etsy

Silver watering can earrings.

Photo courtesy of Glitterartijewellry.


A little costume jewelry can show a personal touch for someone you care about! We love how many cute, garden themed charms, pendants and earrings you can find on Etsy.


Garden Snips from $11.99 at Fiskars

Photo of gardener's snips.

Photo Courtesy of Fiskar’s

You can always use new snips. Especially nice ones from Fiskars.


–A BBB Seed Gift Card

Gift Card from BBB Seed.


Still don’t know what to get someone? Don’t worry about it. Just get them a gift card to bbbseed.com and they can get whatever they want!

Tools to be a Better Gardener

Garden Tools

by Sandy Swegel Photo of the bbbseed $25 gift card.

Today I’ve been thinking about how the garden tools I use have made me a better gardener. I have spent a lot of money over the years on tools that break or tools that seemed clever but end up unused. I garden at least twenty hours a week for other people, so my tools need to be effective and efficient as well as durable. 

(Keep these in mind if you are trying to figure out a good holiday or birthday gift for a gardener friend or relative!  One of these and a great gift card for seeds is sure to be useful and welcome!)

My Must-Have Garden Tools include:


Good Hand Pruners naturally. Felco pruners are great if you can afford them. A sharp edge is the more important feature of hand pruners and you need a high-end pruner that does have cheapo soft metal that dulls the first time you use it. I like Felcos, but Corona and Fiskars both have high-end pruners that are good. For my use, I need a replaceable blade because no matter how much you sharpen, at some point you need a fresh blade. I have hand pruners in two sizes…a smaller pair for perennial maintenance because they are lighter weight and a larger pair for shrubs, roses and trees. Last year Costco had a great deal on a generic version of Felcos in a two-pack.

A Soil Knife. The original name of this tool was a hori-hori knife and my first one came right from Japan. Now I like the bright orange soil knife from AM Leonard. The plastic resin handle holds up better than wood and the bright orange is easier to find when I lose it. You have to be careful of the extremely sharp edges (one side serrated and one side flat) but this is my combo trowel, weed digger, shovel, a garden tool for dividing perennials, etc.
Fiskars Power Gear Bypass Lopper 15 or 18 inches. I love the Fiskars PowerGear line. They really do give you more power per effort than any other lopper. I use the smaller loppers the most because they are lightweight and because they fit more easily between dense branches.

Black and Decker cordless (18V) sweeper. They don’t call this a vac because it’s not strong enough for big piles of leaves…but it’s the perfect quick cleanup at the end of working in the garden whether you’re “sweeping” a path or blowing debris lightly off of rock mulch. I also use it to sweep my kitchen floor.

Milwaukee Sawzall pruning blade. This vicious jagged blade is one of the secret weapons that let me do the work of your average 20-year-old male landscaper. Perfect for cutting trees or cutting right in the soil through old roots.

Mini Shovel and Mini Mattock Pickaxe. OK, laugh if you want, my friends do….but then they go out and get these mini tools when they see how much work they let me do. They are the same tools the aforementioned 20-year olds use in full-sized versions, but lightweight enough for me to use without ruining my rotator cuff, a common gardening injury. I use both while kneeling in the soil up close and personal to my job. Don’t get a wimpy camping pick or a garden pick made of thin metal…get the real thing in the hardware store.

Those tools and a colorful TubTrug or two, (those bendable colorful garden buckets that are worth every nickel) and you’ll find yourself able to work faster and stronger in the garden without trying too hard.