Tag Archive for: Gardening Tips
Cover Crops
A cover crop is simply a dense planting of quick-growing plants that protect the soil and can provide many nutrients to the soil. The most common cover crops are grasses/grains such as Winter Rye. The other favorites are legumes such as clover, vetch, and peas that fix nitrogen in the soil. When the green cover crop plants are tilled into the soil it is called a “Green Manure” crop. These terms are used alternately. You can plant cover crops; during the growing season to keep weeds at bay, in the fall to overwinter adding nutrients and protecting the soil, or in the spring for areas where you will be planting later crops.
Why plant cover crops?
They hold the soil in place. Providing protection from wind and water erosion. The dense planting provides weed suppression. Winter Rye actually has allelopathic properties that inhibit other plant growth. Cover crops enrich the soil by nitrogen fixation from legume plant species and add organic material for helping the soil structure and providing food for beneficial microbes and worms. Cover crops help to reduce garden insect pests by attracting beneficial insects and bees and bumblebees are attracted to the early blooms of some of the species.
Soil Protection:
Protecting the soil is very important. Planting a cover crop is like a living mulch. The roots hold the soil in place and penetrate deeply into the earth, bringing moisture, nutrients, and airway down into the depths. The leaves shade the top of the soil keeping the top from desiccation from wind and sun, and allowing the microbes and earthworms to continue to enrich the soil. Allowing annual cover crop species to just die in place and cover the soil aids in this process and during the winter helps to hold the snow on the soil. It is important to mulch to cover the soil even if you are not using a cover crop. Just use leaves, newspaper, or cardboard covered with burlap or netting to hold it down. The worms love decaying leaves!
Weed suppression:
Cover crops help to combat weeds firstly by sheer numbers. Cover crops need to be planted thickly. Weeds love bare soil! Planting a cover crop in the fall to till under in the spring is a good way to get ahead of the spring weeds. Try to get a fall-planted cover crop for spring tilling in at least 1 month before killing frosts in the fall. Use a spring-planted cover crop to combat weeds in areas between rows of crops or in orchards. Cover crops are effective whether you till or not. They can just be mowed off and in cold winter areas, most annual cover crops die on their own and are a good mulch in place even when dead.
Soil enrichment:
Clovers and legumes enrich the soil by taking up atmospheric nitrogen in nodules in their roots. They are able to achieve this because they are a host to a bacterium, Rhizobium. The relationship between these plants and Rhizobium is symbiotic, meaning they are mutual beneficiaries. The bacteria are fed by the plant and the plant is fed by the bacteria. Plants cannot use nitrogen the way it exists in the atmosphere. Rhizobium converts atmospheric nitrogen into a useful form for plants and animals to utilize. Rhizobium takes up residence in the plant’s root system and forms nodules. Clover and other legumes are susceptible to this type of bacterial “infection” and that is why these plants are great fertilizing plants.!
Want to know more?
Colorado State University – CMG Garden Notes #244
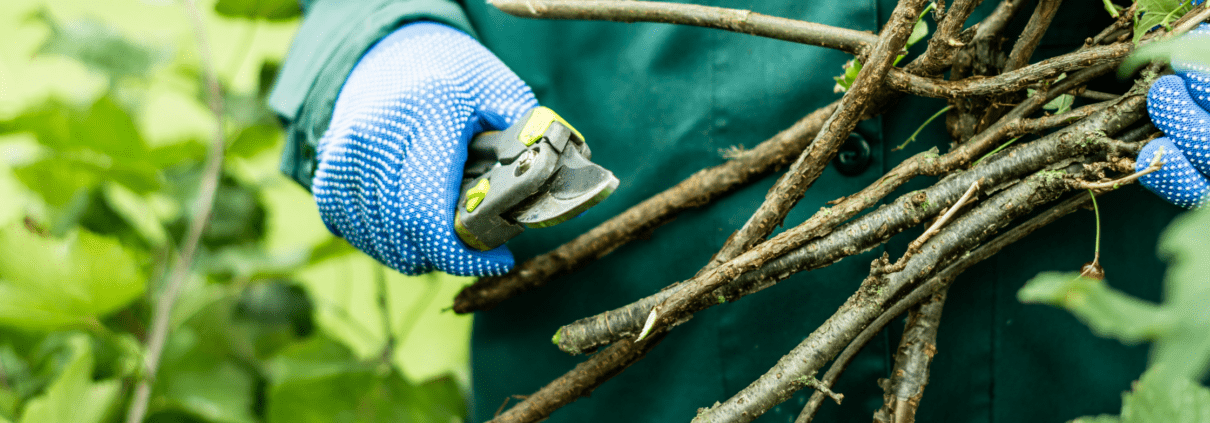
10 Reasons Why You Should Prune Trees and Shrubs
Tree & Shrub Pruning Tips
by Chris McLaughlin
Not sure about pruning your plants? We’ve compiled 10 reasons why you should prune trees and shrubs in your yard or garden to help maintain their long-term health.
Practicing simple techniques, using the right tools, along with proper timing for each plant species is the key to effective pruning and most require very little pruning in order to achieve the gardener’s goal. But before taking sharp tools to your plants, you should understand exactly what those goals are and why you’re pruning them in the first place.
Remember that every cut made will alter the plant’s shape and growth. In fact, the list below addresses the many reasons that any tree or shrub should be pruned in the yard or garden. If you are interested in having your trees or bushes trimmed, remember that you can use a service like TreeSurgeon.Care to help.
Here are ten great reasons to prune trees (including fruiting) and shrubs:
Reason #1: Vigor
Pruning a growing shoot stimulates new growth production. So if you’re looking for some vigorous new growth on a shrub, prune it hard (a lot). Consider this type of pruning when you have a shrub that has a weak section of growth; such as the back. In fact, when you “pinch” back new growth with your fingers on any plant, you’re actually pruning.
Reason #2: Shape
Plants that have grown out of balance with either the yard or their own growing pattern (such as stray and awkward branches) can be reshaped by pruning.
Reason #3: Restrict a Plant’s Size
This can be especially important if you live in an area with restricted space. Gardeners living in urban and suburban areas almost always have to prune trees and shrubs to keep them from out-growing the yard, garden, or container. Root-pruning is another technique that can help restrict the size of plants in containers.
Reason #4: Let in More Light
If you have an extremely shady yard or you’d like to have more sun reaching the area under a tree for plants or lawn, careful pruning can let in a little extra sunshine.
Reason #5: Health and Structural Soundness
Any diseased, injured, dying, or dead branches should be removed for the health of the tree. Branches that rub together should be removed to eliminate potential damage to a main branch. Much of maintaining structural soundness in a tree is about careful pruning practices such as not “topping” trees. Topping can make the tree weak and susceptible to pests. It’s also associated with the slow death even if it takes years for the tree to actually die.
Reason #6: Create Special Effects
Most often, pruning for special effects is seen in formal-type gardens. They often take the shape of boxwood topiary or an apple tree that’s been trained as an espalier. Pollarding or coppicing pruning techniques may be used, as well.
Reason #7: Encourage Flowering and Fruit
Pruning can coax growth spurs (produces the flowers and the fruit) to form on the branches. Strong flower buds are also encouraged to form due to pruning. Fruit trees can be lightly pruned in the summer which will provide better air circulation around the fruit. This results in less trouble with fruit diseases and the fruit ripens faster.
Reason #8: Protect People and Property
Prune trees that have been planted near homes, sheds, play structures, and other buildings as they propose a potential threat to human safety if heavy branches break off or the tree falls. They can also interfere with telephone or power lines. Proper pruning can keep people, pets, and property safe.
Reason #9: Keep Evergreens Proportionate
Pruning will keep boundary hedges under control. Evergreens benefit from light pruning as it keeps their foliage dense, and therefore, attractive.
Reason #10: Improve Appearance
Many gardeners’ top priority when pruning their plants is about their appearance in the yard or garden. Removing dead, unwanted branches, as well as suckers creates a pleasing shape and leaves plants looking neat and tidy. Many lovely blooming shrubs such the Butterfly Bush (Buddleia spp.) are capable of spectacular blossom displays due to good pruning techniques.
Usually pruning is about working with a plant’s natural growth pattern as it’s developing, as well as maintaining mature tree and shrub species. One of the few exceptions is when it’s used to create effects such as espalier. In general, a successful pruning job will leave your healthy, beautifully-shaped fruit trees or shrubs looking like they haven’t been touched at all.
Ready to get pruning in your garden? Check out our list of must-have gardening tools!
5 Easy Tips for Successfully Planting Grass Seed
by Sam Doll
Now that fall is nearly upon us, it’s time to start thinking about planting grass seed! Don’t know what you are doing? Don’t worry. We are here to help.
Here are our 5 tips for successfully planting grass seed this season:
1. The Season Matters
While some warm-weather grasses, like bermudagrass, should be planted in early summer, most grasses need mild weather to successfully germinate and survive. Freezes and harsh heat can kill off your baby grass before it has a chance to become established. Late Spring and early Fall, when the soil temperature is between 50 to 80 degrees, is the best time to plant most grass seeds.
2. Find the Right Seed
Find the grass that will suit your lifestyle and location. Some mixes, like our Green Manure and Cool Season Cover Crop, are great for restoring the soil nutrients in your soil. Some, like our Colorado Supreme Turf Grass Mix, are better for heavy foot traffic. Native and drought-tolerant grasses are great for creating a sustainable and low-maintenance landscape. Make sure to consider your soil type, climate, amount of sun, and intended use when picking a grass mix.
We have a wide variety of grass mixes that will suit all your needs.
3. Prepare Your Soil
Once you’ve chosen your site, use a shovel or a sod cutter to remove the existing plants and grass from the area. Remove any debris and rocks you see, till the soil, and fill in any low spots. You want your soil to be broken into pebble-sized particles.
Rake the site to even out the soil and remove small debris. Be careful when bringing in new topsoil to make sure it doesn’t contain unwanted weed seeds.
Optional: You can send a soil sample to your local extension office to have it tested to see if you need any soil amendments. You can find extension offices near you with the help of this tool from GardeningKnowHow.com.
As for pH, you generally want to keep the soil between 6.0 and 7.0.
4. Seed and Fertilize
Once your site is prepped, it’s time for planting your grass seed! Using a drop spreader or a broadcast spreader, spread half the seed lengthwise over your site, then use the other half and spread crosswise over your site. A recommended seeding rate will be listed on the seed tag.
Feeding with starter (weak) fertilizer the same day as you spread seed will provide proper nutrients for early growth and establishment. Make sure the site stays moist, but not soggy, through germination.
5. Maintenance
Different mixes require different maintenance. Generally, once grass reaches 5-6 inches (for turf type), it is recommended to cut it to encourage even growth. Water and fertilize as needed.
We hope these tips will make planting grass seed a breeze for you! If you still have questions or need any other advice, please don’t hesitate to contact us.
August Garden Chores

photo courtesy of pixabay – photoAC 2518377_1280
Gardening Tips
We are deep into August. Here are a few tips and reminders about where should we be focusing our time and efforts in the garden this month to make the most impact.
For many, August in the garden is an explosion of flowers, fruit and vegetables. Keep on top of harvesting! A daily inspection of zucchini plants ensures none escape your eye and turn into what more resembles a baseball bat than a vegetable. Check tomatoes for blossom end rot and adjust watering if needed.
- Start gathering recipes for the crops you have in abundance. Hit up some of your favorite websites or blogs for recipe ideas. Check out our reader shared recipes here.
2. Harvest herbs for either fresh use or to save for later. Here are some tips for preserving herbs by freezing, drying or in vinegar.
3. As crops are harvested and bare space appears in the garden another August garden chore is to protect your soil by covering it with mulch or planting a cover crop.
4. Side-dress your warm-season crops with a little compost to give them a boost to finish out the growing season.
5. Now is the time to plant another sowing of cool-season vegetables like lettuces, chard, kale, radish, spinach, arugula, beets, carrots and peas. This doesn’t have to take long and you’ll thank yourself later when you have fresh salad greens throughout the fall. Plant another row of bush beans too for a fall harvest.

Photo courtesy of pixabay – couleur 3702999_1280
6. Keep weeds under control in both the perennial and vegetable gardens. Weeds rob moisture, nutrients and light from our desired plantings.
7. Keep perennials deadheaded and cleaned up. Tuck a pair of pruners in your pocket while walking through and enjoying your garden. I little clean up here and there helps keep pests at bay and saves on time later.
8. Continue to care for your plants in pots by deadheading, removing dead and diseased foliage and regularly fertilizing.
9. Take notes and/or pictures of what worked and what didn’t in your garden. These reminders will help next spring when it’s time to plant again.
10. Start planning your fall bulb plantings.
Four Tips for Growing Your Best Watermelons
Gardening Tips
by Heather Stone

Photo courtesy of pixabay
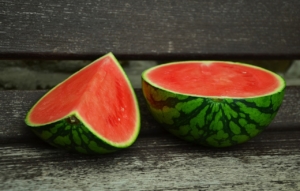
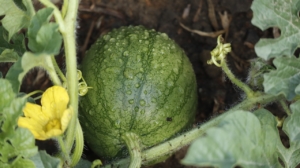
If you have space, make room for a hill or two of watermelons in your garden. They are easy to grow and like any fruit and vegetable, they just taste better when they are plucked straight from the garden. Besides, nothing says summer quite like a juicy slice of watermelon.
Here are a few tips for successfully growing watermelon.
-
-
Choose the right variety for your climate
-
Most watermelons need 80-95 days to ripen, but some varieties require even longer. Choose one that works for your area. You can get a head start by starting seeds indoors about three weeks before your last frost date or by purchasing established plants. Plant outside when all chances of frost have passed and the soil temperatures are in the 70’s.
-
Give them room to roam
Watermelons need lots of room to ramble. It is not uncommon for vines to reach up to 20 feet in length. The vines don’t like to be regularly moved so pick a spot where you can let them roam freely.
-
Know when to water
Keep plants moist when starting off and until fruits begin to form. Watermelons are fairly deep-rooted plants, so in some climates, you might not need a lot of extra moisture except during extended dry periods. When watering, water at the roots and try to avoid getting the leaves wet. This helps to keep down on the spread of fungal diseases. Once the fruit has begun to set, experts say to hold off on the water to concentrate the sugars in the fruit, giving you a sweeter melon.
-
Know when to harvest
Photo courtesy of pixabay
It’s not always easy to know when your watermelon is ripe. To start, check the “days to harvest” of your variety and begin to check for maturity when plants have reached that age. The color of the bottom spot where the melon sits on the ground will turn from white to yellow as the melon matures. Also, watch for the rind to turn from a bright, slick appearance to a more dulled look. The skin or rind should be tough enough that a thumbnail won’t pierce the skin. After picking, chill for best flavor.
Cucumber Growing Guide
Tips for Successfully Growing Cucumbers
by Heather Stone

photo courtesy of pixabay
Once the warm weather hits it’s time to start thinking about planting cucumbers. Nothing beats a fresh cucumber straight from the vine! Cucumbers are fairly easy to grow and are an excellent choice for the new gardener.
Cucumber growing guide:
Cucumbers are very frost tender so don’t plant seed or transplant starts until two weeks after your last frost date or when soil temperatures reach at least 70 degrees Fahrenheit.
Your soil should be well-drained and fertile. Work 1-2” of compost into the top 4-6” of your soil before planting.
Pick an area of your garden that receives at least 6 hours of sunlight. If days regularly reach temperatures of 90 degrees or more provide some afternoon shade.
Plant seeds in groups of 4-6, 1/2” below the soil surface in rows or hills 3’ apart. Most cucumber seeds germinate in 4-7 days. Providing a trellis for the plants to climb frees up garden space and improves airflow around the plants reducing fungal and bacterial diseases. Trellising also keeps the fruits off the ground away from moisture and critters and makes them easier to harvest.
Cucumbers are themselves 95% water so moisture is of key importance when growing cucumbers. Cucumbers need at least 1” of water a week. If plants inadequate moisture the fruit will often develop a bitter taste. To help retain moisture and keep the weeds down place mulch around your plants.
Harvesting

photo courtesy of pixabay.
Pick cucumbers when they have reached their mature length, depending on the variety, and before they begin to turn yellow. Cut or gently twist the fruit from the vine using two hands so as not to damage the plant. When the weather gets warm, check plants daily for ripe cucumbers. Pick often so plants continue to produce. Pick fruits in the early morning for the best flavor and texture. Cucumbers will keep for 7-14 days in the refrigerator.
Varieties
If you are thinking of planting cucumbers, we carry four varieties of cucumber seeds here at BBB Seed. Each is excellent and deserves a place in the vegetable garden.
Spacemaster 80
Spacemaster 80 is an excellent compact cucumber variety. At only 18-24 inches this short but hardy cucumber is a great choice for the small garden or for growing in a container. The dark green fruits reach 7-9 inches in length, have great flavor and are never bitter. A heavy yielder this cucumber is also resistant to mildew, scab and cucumber mosaic virus.
Boston Pickling
Boston Pickling cucumbers bear small, blocky fruits with firm flesh and tender skin that are ideal for making all types of pickles. This long-standing variety, first available in the 1800s is also great used as a slicing cucumber when allowed to reach full size.
Marketmore 76
Marketmore 76 is one of the finest slicing varieties on the market. A standard for the home garden. These vigorous plants produce 8” dark green, delicious fruits.
Suyo Long
An heirloom variety from northern China, Suyo Long grows to an amazing 10-18” long. They are almost seedless, burp-less and incredibly heat resistant. They are great for slicing and fresh eating.
Three Ways to Compost that Will Fit Your Lifestyle
Composting Basics
by Sam Doll
Composting seems like ‘all the rage’ right now! Taking some of your food and paper waste out of the landfill is a great way to reduce your waste, take care of the environment, and create an excellent supplement for your (or a lucky neighbor’s) garden! We’ll show you three ways to compost that will work with your lifestyle.
No matter where or how you are composting, there are some basic guidelines to be aware of.
First off, if you are composting at home, you want to avoid any animal products like meat and dairy (eggshells are fine). These products can create unwanted odors and attract pests like raccoons!
You also want to be aware of how much brown and green material that is going into your compost. Brown material is any dry, carbon-rich material. This includes shredded paper, dried leaves, or old plant material. Green material is nitrogen-rich material like food scraps, eggshells, grass clippings, and coffee grounds.
When composting you want to include equal amounts of brown and green materials. If you are using an outdoor composting system, you’ll want to alternate layering brown and green materials, usually starting with brown.
Finally, you can’t let the compost just sit. Mix it and water it to keep the microbes happy and healthy. Mixing it incorporates oxygen and watering cools the pile and prevents it from drying out.
Indoors
You may have been reading this and thinking, “I have an apartment, I can’t compost!”. Composting inside can be difficult, but it’s not impossible!
The simplest solution is to find a neighbor, community garden, or farmer who would love to add your food scraps to their compost pile. Just store your scraps in a plastic bin with a lid and run over to the pile every few days.
If you don’t have a friend with a compost pile, you can still do it yourself. Many people have found great success in vermiculture, or “worm farming”! Vermiculture is a quick, odorless composting method that is great for those without access to a yard.
Check out this guide for various vermiculture methods and tips!
In-Vessel Composting
Have a little outdoor space, but don’t want to devote half your yard to composting? There are specialized composting bins that can handle all your household waste, speed up the composting time, and stay out of sight.
One of the fastest methods of the three ways to compost is to use a tumbler. Tumblers are plastic drums that can be rotated to mix the compost easily without getting your hands dirty. They are contained and inconspicuous. We recommend double-chambered rotating compost bins like this, which can turn scraps to finished compost in as little as two weeks.
There are also plastic compost bins. These bins are open at the top and bottom. You usually add fresh material to the top and wait for finished compost to be scooped out of the bottom. These bins require little work, just the occasional watering, but can take a while longer than the rotating drum. We recommend this classic Soil Saver from All Green.
These composters are great and beginner-friendly, but they have limited capacity. They can handle an average household’s compost, at most, and that doesn’t include yard waste like grass clippings. If you want something that can handle a larger amount of compost, you’ll have to pursue more traditional methods.
Let’s Celebrate Pumpkins!
Year of the Pumpkin
by Heather Stone

photo courtesy of Pexels – 160662
When you hear the word pumpkin what comes to mind first? Is it autumn, Halloween, jack-o-lanterns, pumpkin pie or pumpkin spice latte perhaps. There are so many things to love about pumpkins. They are fun to grow and fun to eat. This year the National Garden Bureau named 2019 The Year of the Pumpkin, so let’s celebrate the pumpkin. https://ngb.org/year-of-the-Pumpkin/
Pumpkins are part of the Cucurbitaceae family along with squash, cucumbers and melons. There are a wide selection of pumpkin varieties ranging in size from as little as 4 oz to some weighing over several thousand pounds. Just this past fall a New Hampshire man grew the largest pumpkin on record weighing in at 2,528 lbs. Now, that would make a lot of pumpkin pie.
Pumpkins are easy to grow. They can be started indoors or directly sown into warm (70 degrees), rich, fertile soil when all danger of frost has passed. Sow the seed into “hills” of 4-6 seeds and thin to the 2 strongest plants per hill. Make sure to give your pumpkins plenty of room to grow to get the best fruit. Depending on the variety you are growing, pumpkins need anywhere from 12 sq.ft. to 48 sq.ft. of growing space. Water your pumpkin seedlings regularly and fertilize throughout the growing season. When it comes time to harvest make sure to cut the pumpkins from the vine when the skin is hard and leave a 3” piece of the stem attached to decrease the chances of decay.

Photo courtesy of Pixabay -congerdesign
Pumpkins aren’t just fun to grow. They are fun to eat too! We use pumpkins to make soups, breads and pies. We put pumpkin in smoothies, yogurt and even pancakes. Check out some of these great pumpkin recipes. But the flesh of the pumpkin isn’t the only tasty part. Roasted pumpkin seeds make a great snack too. Pumpkin flesh is rich in vitamin A, potassium and beta carotene. The seeds are a good source of protein and are rich in minerals such as manganese, phosphorous, magnesium and zinc. Not all pumpkins are created equal. There are pumpkins for carving and decorating and there are pumpkins for eating. Look for pie pumpkins and cooking pumpkins for the best taste. Two of my favorites are Cinderella and Long Island Cheese, but there are countless choices.
So what kind of pumpkin will you grow this year?
The Essential Pollinator
Pollinators

Those pesky critters that buzz by, causing us to dance and flap our arms when we are outside, are far more than a mere annoyance. We don’t give these tiny powerhouses the credit they are due.
Native pollinators such as bees, butterflies, flies, moths, beetles, and bats are essential for human survival but their populations are in a serious decline. Our fuel, food, drugs, and fiber are directly and indirectly taken from plants that depend on pollinators for their existence. Some have estimated that one out of every three to four mouthfuls of food we eat results from the actions of pollinators. Pollinated crops contribute an estimated $20 billion to our economy each year. Native pollinators control the healthy function of our natural ecosystem. The documented decline of native pollinators, as well as that of the introduced European honeybee, concerns the scientific community. This decline results from the fragmentation and destruction of native habitats which has reduced the food sources for many native pollinators. The traditional corridors of nectar- and pollen-rich plant sources have been destroyed by development and changes in land use. Isolated habitats are further degraded by non-native and invasive species. Misuse of pesticides and the introduction of non-native pollinators have contributed to the extinction of many of our native species.
The bright side of this issue is that we can help our native essential pollinator populations by choosing to plant nectar- and pollen-rich vegetation species that are native to a specific area that will provide nutrition and cover. Remember to include plants that provide food for the larval stage and also to provide a water source. The flowering plants that are native to your area have co-evolved along with their pollinators to provide the perfect combination of petal shapes, fragrances, and colors for their mutual benefit. Make sure to plant a variety of native plant species of mostly perennials to ensure an appropriate and dependable supply of nectar and pollen for the bees, butterflies, and other pollinators throughout the spring, summer and fall. Select nectar-rich species with clusters of brightly colored tubular florets and plant them in groupings rather than as individual plants. Avoid cultivars of plants grown mainly to produce larger flowers as these often do not have the pollen or nectar that the pollinators require. Bees are attracted to purple, blue, and yellow flowers and hummingbirds prefer red and orange flowers. Try to include night-blooming varieties to attract bats and nocturnal moths. Use pesticides sparingly or not at all. Have patience, most perennials will take one or two seasons, with good care, to bloom. Read more here>https://bbbseed.com/pollinators/about-pollinators/
Thoughtful plantings, whether in pots and containers or backyard gardens and a conservative, integrated pest management system, can create and establish a stable ecosystem that is pollinator-friendly.