by Sam Doll
Nothing is better in mid to late summer than the taste of a garden-fresh tomato. However, it takes a lot of hard work and care to help your tomatoes survive their perilous journey from seed to fruit. Here are nine common tomato diseases and what you need to do to treat them.
Fungal Diseases
Many common tomato diseases are caused by fungi. These diseases often are caused by specific environmental conditions like high moisture and certain temperature ranges. They are most often spread by contaminated soil or water and are usually manageable with vigilant prevention techniques and various fungicides.
Anthracnose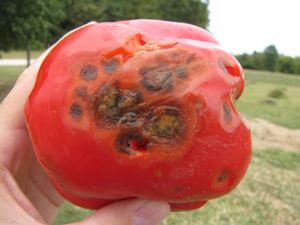
What is it?
Anthracnose (Colletotrichum coccodes) is a fungal disease that primarily attacks the tomato fruits. It will affect both green and ripe tomatoes and will appear as small, sunken water-soaked area on the outside of the tomato.
As the disease progresses, the spot will widen and turn dark and expand. Infected unripe tomatoes will not show symptoms until the fruit ripens and the disease progresses faster the closer the tomato is to maturity.
Septoria Leaf Spot
What is it?
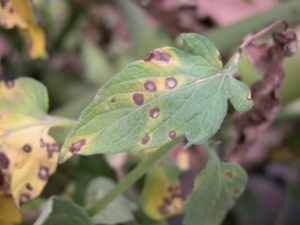
Another fungal disease, Septoria Leaf Spot is caused by Septoria lycopersici. Unlike Anthracnose, Septoria attacks the leaves and stems of the plant but does not affect the fruit. The disease is more likely to appear on leaves closer to the ground and appears as the plant begins to fruit.
The primary symptoms are numerous round and small spots on the leaves that are dark on the outside and lighter in the center where the spore-producing bodies are. Highly infected leaves will yellow and fall off, which can expose the tomato fruit to the sun and cause sunscald.
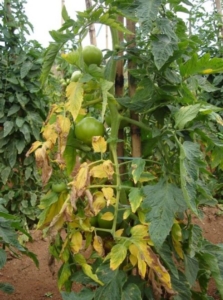
Early Blight
What is it?
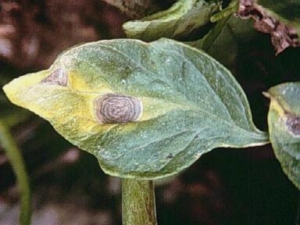
Caused by the fungus Alternaria solani, Early blight affects older leaves and appears as a small brown spot with concentric rings. As it spreads throughout the leaf, it will cause it to yellow and wither. This can weaken the plant and expose the tomato fruit to sunscald and reduce yield.
The fungus can also attack the stem and fruit but is less common than in the leaves. It often progresses upward from the bottom of the plant.
Late Blight
What is it?
Late Blight (Phytophthora infestans) is a disease found in tomatoes and potatoes and is most infamous for causing the Irish Potato Famine.
Late blight thrives in humid, cool weather ( >90% humidity and <80°). It appears on all parts of the plant, usually starting on older leaves and then spreading to fruit and stems. It appears as a dark, water-soaked patch that will soon enlarge and grow a white moldy substance.
Late Blight is a slightly different beast than the other fungal diseases. It can move quickly through the garden and is spread by both water and wind. You can do all the prevention in the world, but a nearby garden with infected plants can blow spores over into your yard!
Use the treatment prescribed bellow but be prepared to pull and destroy plants if it spreads too far to save to rest of your garden and your neighbors’ gardens as well.
Fusarium Wilt
What is it?
Fusarium Wilt (Fusarium oxysporum) is a warm-weather disease most common in southern regions. It appears as a wilting or drooping of the lower leaves, followed by the wilting and death of the entire plant. Oftentimes, leaves on one side of the plant will turn yellow.
The disease attacks the roots through the infected soil and will clog off the vascular system of the plant. It usually hits younger plants and there is no known treatment. The best way to prevent wilt to ensure that any soil or material you place in your bed is clean, including the soil from starts. There are also some disease-resistant hybrids.
The yellowing is a telltale sign, also check the soil. If the soil is dry, the wilt is most likely from lack of water. Water the plant to see if the wilting persists. If you are sure it is fungal wilt, the best thing to do is destroy the plant
Our blog on keeping tomatoes in hot weather will help you tell if your plants are sick or just thirsty!
How To Prevent and Treat Most Fungal Diseases
Fungi thrive in warm wet environments. The spores are transmitted primarily from splashing water, either from rain or irrigation. Poorly drained soil, overwatering, and lack of air circulation around the plant can all create conditions for the spread.
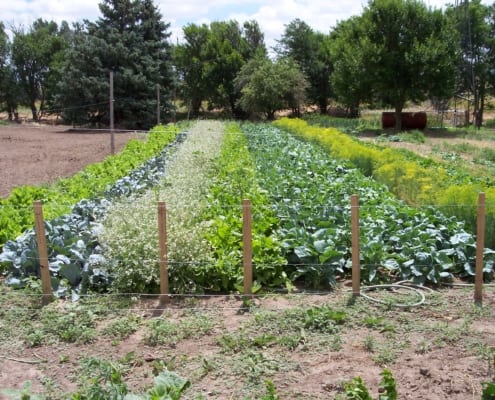
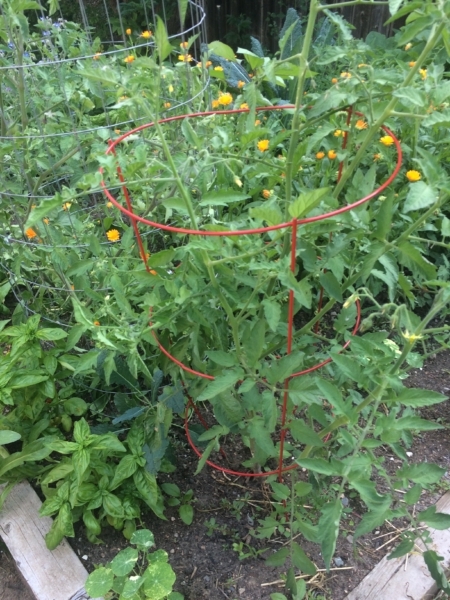
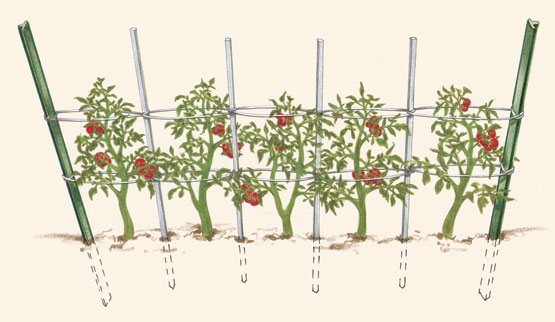
To prevent most fungal diseases, only purchase certified disease-free seeds and don’t replant seeds from afflicted plants. Make sure your bed or container is well drained, do not overwater, plant the tomatoes in full sun. Space and stake or support the plant with cages to make sure that the plant can air out properly after watering. Also, avoid overhead watering to limit water splash, which would spread the spores
If your seeds are healthy, you can save them for future use. Here is our blog on the subject.
If you do see Anthracnose in your tomatoes, make sure to harvest the fruits as soon as they are ripe. Copper-based fungicides and a few organic fungicides can be effective for treatment of infective plants.
If you see infected leaves, feel free to remove them to help slow the spread of the disease. Make sure to wash your hands and tools after handling infected plant material.
After seeing any fungal diseases in your garden (besides Late Blight, which does not overwinter), make sure rotate your planting sites on a three-year cycle with plants that are not from the Solanaceae family (i.e. tomatoes, eggplants, peppers), which are closely related to tomatoes. Make sure to remove all plant material at the end of the season and do your best to keep the site weed free. If you do not have another planting site to rotate with, switch to containers instead.
The best prevention possible is to keep the plants as healthy and vigorous as possible. Like us, unhealthy or weak plants are more likely to get sick
Check out the Clemson Cooperative Extension Tomato Disease Factsheet for more information on fungal diseases like Leaf Mold, Buckeye Rot, or Southern Blight
Bacterial Diseases
Unlike funguses, which are multicellular organisms with complex cells (eukaryotes), bacteria are simple, single-celled organisms (prokaryotes). Bacteria are the most common form of life on earth and are, for the most part, harmless.
However, there are some bacteria that specialize in infecting and living in other species. These can be harmless, like the natural bacteria in your gut that helps you digest things like cellulose, but are sometimes dangerous, or pathogenic. Just like you can get strep throat from bacteria, your tomatoes are susceptible to them as well.
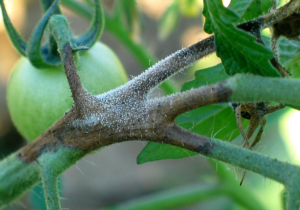
Tomato Pith Necrosis
What is it?
While mostly seen in greenhouse conditions, Tomato Pith Necrosis can occur during the early growing season in periods with cool temperatures and high humidity. Plants are especially susceptible in areas with high nitrogen levels, when the tomato starts are growing rapidly.
The first noticeable symptoms of this disease are usually wilted leaves followed by black lesions on the stems. As the disease progresses and the bacteria become more established in the stems, splits, cracks, shrinking, and other deformations are common.
If there are green fruit, the disease can cause a greasy, water-soaked spot on the blossom end of the fruit.
What do I do?
The best prevention of Tomato Pith Necrosis is to have control over your soil conditions. The main factor in pith necrosis is excess nitrogen in the soil. Don’t over fertilize early in the season and keep tabs on your soil quality.
Check out our Guide to Soil Management
Also, like with the fungal diseases, make sure your plants are properly spaced so they have room to breathe and dry out and avoid overhead watering.
If your plants do become infected, you can wait until warmer, dryer weather to see if they recover. If not, remove and dispose of them.
Make sure that you are rotating your plots on a three-year cycle and do not plant in plots that have had closely related plants like peppers. Do not put them in your compost because the bacteria can live on the diseased plant material for years.
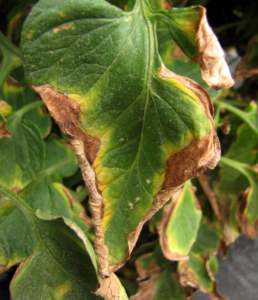
Bacterial Spot
What is it?
Bacterial spot attacks the leaves and fruit of the tomato plant. It occurs during wet and warm conditions and can cause leave wilting, leaf and fruit spots, and defoliation. The leaves will show small and irregular spots as well as yellowing and browning as the disease persists. The fruit will have multiple dark specs that are dry and rough to the touch.
Fruit inflicted with Bacterial Spot, as with any diseased fruit, should not be consumed. While the disease itself isn’t dangerous to humans, it provides openings for dangerous pathogens to enter the fruit.
What do I do?
Spot often appears after heavy summer rainstorms. Make sure your plants are well spaced and pruned so they can air out effectively. Do not use overhead watering. If you are in an area where Spot has been seen, make sure you are cleaning your tools and rotating your plants. Preventative applications of copper-based fungicide can be effective in controlling spot.
If your plant does have Bacterial Spot, make sure that you immediately remove and dispose of it. Clean any tools you use with a 10% bleach solution or rubbing alcohol. Remove any plant debris.
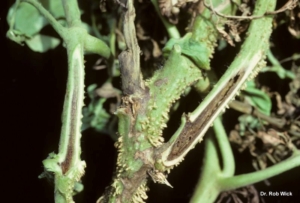
Bacterial Canker
What is it?
Bacterial Canker is one of the most difficult to identify and control tomato diseases once it takes hold. It can affect plants of all ages and has a variety of symptoms that are easily confused with other diseases.
Early symptoms are spots, browning, and wilting of leaves. Later symptoms include raised spots on the stems and fruit, which often include a white “halo” around a brown spot in the center. On older plants. The stems will show cankers or open “sores”. Once this disease takes hold, the plant is essentially doomed.
What do I do?
Prevention is the best defense against bacterial canker. Buy only certified disease-free seeds. Avoid overhead watering and space plants appropriately. Copper-based fungicides can be effective in prevention.
If you notice this disease on your plant, make sure to remove it, any plant debris and its neighboring plants immediately. Bag the removed plant material and dispose of it. Clean your tools and do not plant tomatoes on the site for a few years as the disease can live in the soil.
Viral Diseases
Viruses are pathogens that are usually a piece of genetic material surrounded by a protein. Not technically alive, these diseases are usually spread by “vectors” or living things that carry the disease. Think mosquitoes carrying West Nile.
Since each virus is spread differently, each will need its own prevention plan. There is no treatment for viral infections and the best course of action is often to remove and destroy infected plant material.
Mosaic Virus
What is it?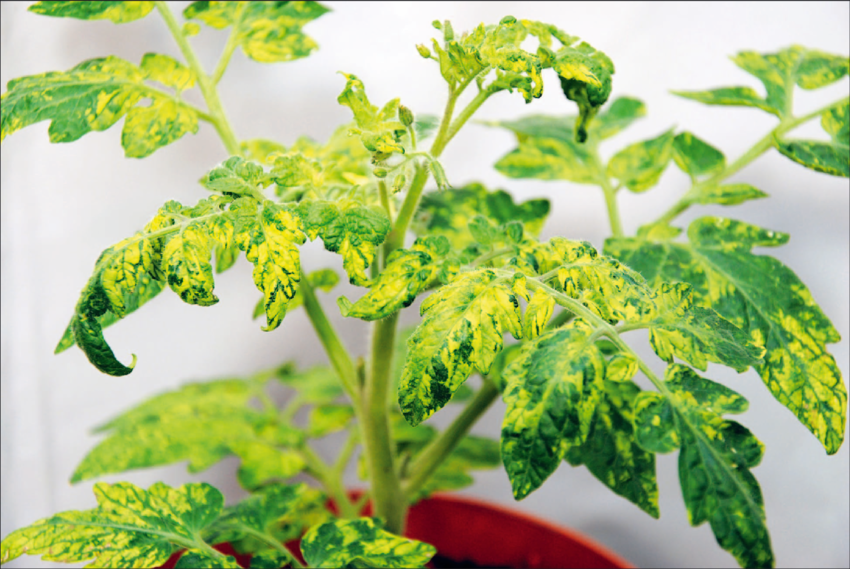
Mosaic Virus is a family of viruses that can affect tomatoes, peppers, and other plants in your garden. The most common one that might impact your tomatoes is the Tobacco Mosaic Virus (TMV), the Tomato Mosaic Virus (ToMV), and the Cucumber Mosaic Virus (CMV). Despite their names, all of these can seriously infect your plants.
The symptoms of both TMV and ToMV are varied and difficult to tell apart. The most common symptoms include irregular growth, strange leaf shapes, and mottled coloring in the leaves and fruit. You may still get yield from tomato plants infected with Mosaic Virus, but it will likely be stunted and fewer than you would have gotten normally.
CMV is spread by aphids and create a stunted, bushy, sometimes yellow plant with severe leaf malformation and mottling. Tomatoes with CMV produce very few fruits.
What do I do?
TMV and ToMV can be easily spread through touch and soil. Even handling tobacco products like cigarettes can contaminate your garden with TMV. Monitor seedlings closely for signs of the disease and make sure to remove any possibly infected plants.
If you are concerned at all, you can make a solution out of skim milk to spray the plants with. Proteins in the milk bind to the virus and make it unable to attack the plant. If you know you have handled any plants, wash your hands and tools with the same milk solution or soap and water to prevent transmission. The virus can live for over two years on surfaces and in the soil, so do not replant in soil that has been infected and make sure to remove all plant material from the site.
Since CMV is spread through aphids, the best prevention is to control the weeds in your garden to prevent aphids from jumping from plant to plant. Insecticides are not effective because new aphids can easily pick up the virus and spread it seconds from coming in contact with the plant. Surrounding the tomatoes with taller plants that are not attractive to the aphids can create a buffer and using aphid predators, like ladybugs, can keep the general population of aphids in check.
Tomato Spotted Wilt Virus (TSWV)
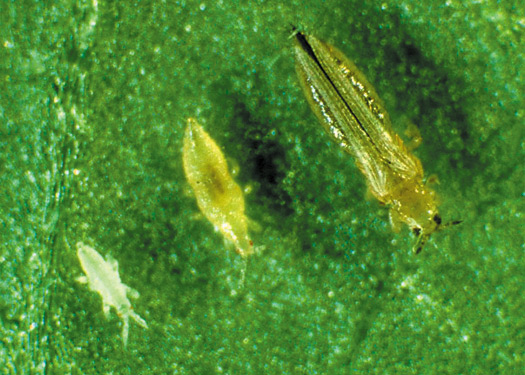
Thrip
What is it?
Tomato Spotted Wilt Virus (TSWV) is a highly contagious pathogen that can infect over 1000 different species of weeds, native plants, and ornamentals. It is transmitted through an insect pest known as thrips, which will feed on a variety of different plants.
See this video on the Thrip lifecycle
The symptoms of TSWV vary from one variety of tomato to another, but often result in stunting and dead (or necrotic) spots on the leaves. They can also cause low plant yield, mottled fruit, and wilt.
What do I do?
Unless your garden is contained within a greenhouse, it will be difficult to control the spread of TSWV. The most effective management is to eliminate the weeds in your garden that can harbor thrips throughout the winter. Remove any remaining plant material and weeds, then till and mulch the garden for winter to remove any habitat for the thrips.
If you have plants that are infected with TSWV, you can remove it to prevent it from spreading the disease to nearby plants. Insecticides are relatively ineffective against thrips because applied insecticides are unlikely to come in contact with thrips on the plant and systematic pesticides are not fast enough to stop the thrip from infecting the plant. Insect predators like ladybugs, minute pirate bugs, and lacewings will all feed on thrips.
Tomato Yellow Leaf Curl Virus (TYLCV)
What is it?
Tomato Yellow Leaf Curl Virus (TYLCV) is a virus that is spread through seeds and whiteflies that causes yellowing and curling of leaves, stunting, flower drop, and severely reduced yield in tomatoes and peppers.
While TYLCV can be spread between seeds, the primary risk factor for your garden would be the spread of the virus through whitefly pests. Whiteflies are small, white flying insects that feed on the undersides of leaves.
What do I do?
Like TSWV, the best prevention is to keep whiteflies off of your plants. Do your best to keep weeds under control to limit available habitat for the whiteflies, till and mulch during the winter, and introduce natural predators. Products that use canola oil or horticultural oil can act as a whitefly repellent. For how to make your own, check out this article.
Another option you may want to consider is to use reflective mulches. These mulches reflect light back up at the plant and disorient insect pests.
Learn more about reflective mulch here
If your plants do become infected with TYLCV you really only have two options. You can wait it out to see if you do get any harvest, and then remove all susceptible plants at the end of the season. The other option is to remove infected plants immediately to try to limit the spread of the virus.
When you do remove your plants, bag them as soon as you can to contain the whiteflies on the plant that are carriers for the virus.
Disease Prevention Checklist
- Buy only disease-free seeds
- Rotate your tomatoes and like crops on a three-year cycle
- Make sure the plants are properly spaced and pruned so they can dry out properly
- Avoid overhead watering
- Remove diseased plants
- Control weeds in and around the garden bed to prevent pests from harboring in them
- Do not compost infected plant material
- Sterilize your tools
- Keep vigilant
- If you are unsure about something, check with your local extension office
Are your tomatoes healthy and beautiful? Read this guide on how to tell when they are ready to pick!