Tag Archive for: Vegetable Gardens

Saving Seeds

Saving Seeds from Heirloom VegetablesSaving seeds from heirloom vegetables.

What are “heirloom” vegetables? An heirloom vegetable is a non-hybrid, open-pollinated variety that has been passed down from generation to generation and, in some cases, can be traced back hundreds of years.  These seed lines have been carefully selected to maintain uniformity and consistency for germination.

Heirloom seeds become ‘heirloom’ because they exhibit exceptional traits desired by the gardener.  Often this means the plants are more colorful, flavorful, and unique, or have great germination and vigor.  Often the traits are location-dependent.  Meaning, seeds planted in one garden will not produce in the same manner in another location.  We encourage you to try heirloom seeds, see which have the qualities for your area to become your favorites and make them into your own very special seed line.  Seed saving from heirloom vegetables is easy and fun.

Gardeners have found that as seeds are selected and saved over many years, production is increased and the quality is improved, creating plants that will produce best for that locale and will resist diseases and pests of that locale.  Contributing to genetic diversity strengthens the ecosystem. Historically farmers and local gardeners have created and sustained this rich genetic heritage by learning to save their own seeds from varieties that perform best in their own mini-ecosystems.  The current trend toward mono-crops where only one seed type is used to produce a crop worldwide is eliminating the ability to be able to find genetic variations that will withstand emerging pathogens and climate changes.

Planting your crop:

Start with good Heirloom Seed varieties.  Keep in mind that to allow the plants to produce seed and to allow the seed to fully mature, you will have to allow for a longer growing season.  This can be done by starting plants indoors and arranging for protection from frost in the late season. You will grow some for food or flower harvest and some for seed production.  Fully mature seeds will be viable (able to germinate) and produce vigorous plants.  You may want to do some research on the different flower types for proper pollination techniques and plant with row/species separation in mind, to prevent cross-pollination.

You also may look into caging procedures to isolate species that are in flower at the same time.  By caging different plants on alternate days, you can take advantage of the pollinators to do the work without cross-pollinating your crop.  Cage one plant or group on one day and early the next day, before the bees wake, transfer your cage to a different plant or group.  Some crops are biennial and do not produce seed until the next year, so you will need to determine whether you should leave the roots in the ground over the winter or dig and store them.

There are many publications with detailed information on seed-saving and growing techniques for each species.  “Seed to Seed” by Suzanne Ashworth, 2002 by Seed Savers Exchange, Inc. is a good way to get started. Also, check out these easy instructions for seed saving, written by the International Seed Saving Institute, a non-profit established to teach seed saving.

Why save seeds:

When you grow crops using your own saved seeds from your best plants for next year’s crops, the seeds begin to adapt to the growing conditions (temperature, moisture levels, pests, diseases, and so forth) that exist in your garden.  This adaptation makes your garden stronger over time.  Seeds that are used to grow crops year after year have the opportunity to adapt to incremental climate changes.  As global temperatures change, these plants will have a better chance at survival and productivity.  A single plant from a single seed can produce dozens or hundreds of seeds, increasing your seed stock exponentially.  Sharing and exchanging seeds with other gardeners, community gardens or seed libraries helps to increase the diversity of everyone’s collections.

Harvesting and collecting seeds:

When saving seeds from heirloom vegetables, look for favorable characteristics such as; freeze and cold tolerance, heat tolerance, adaptability, winter hardiness, early maturation, vigor (strong germination, and growth), flavor, color, size, texture, etc. Also, look for desirable traits such as; vine or plant type, seed type, and specific disease resistance.  Plan to be ready to harvest the seed as they mature.

– Collecting dry seed:

It’s easy to save seeds from plants that produce pods, husks, and other dry casings such as peas, beans, and flowers.  The technique is called “dry processing” and is faster than collecting seed from fleshy, pulpy fruits such as tomatoes and cucumbers.  Seeds that are dry-processed can be allowed to dry right on the plants unless there is wet weather in the forecast.  Seeds often fall where they may, naturally, little by little.  Often the pods will pop open when you are not around to collect the seed and it will be lost.  Allow the seed pods to remain on the plant in the ground for as long as possible.  Usually, the seed will not continue to mature after the pods are cut from the plant. To collect the seeds easily as the seeds begin to mature, secure paper bags over the seed heads and attach them to the stems of the plants.  As they mature they will drop into the bags.

Separating the seeds from the chaff (dried pods and stems) is called threshing.  Commercial threshing is done by multitasking machines that can harvest, thresh, and winnow the seeds all at once.  For the home gardener, a bag, pillowcase, or small sack is all that’s necessary.  Put the seeds into the bag, secure the ends, and roll it around, lightly crushing and breaking up the pods a bit.  Be gentle so you don’t damage the seeds, but just loosen the chaff.  For tinier seeds, you can just put them on a board and crush them with your fingers.

Then you will need to winnow the chaff from the seeds.  Place the seeds in a bowl and gently blow on them to remove the lighter-weight chaff.  Swirl the seeds around and continue blowing gently until most of the chaff is removed.  Another option is to use a screen or sifter where the holes are smaller than the chaff to simply sift them apart.

– Collecting seeds from pulpy fruits:

Pick the best, most ripe (even to the point of over-ripe) tomato, pepper, cucumber, etc.  Choosing an over-ripe veggie will ensure the seed has fully developed.  If you wait for a frost or freeze before you pick the fruit or veggie, most of the seed will not be developed enough to be viable next year.

Cut open the fruit and scoop out the seeds or for small fruits like cherry tomatoes, simply squeeze the seeds out into a glass jar.   Add a little water and label the jar with the seed variety.  The seeds usually are surrounded by a gel that inhibits germination.   Leave for two to five days to begin fermenting. This will break down the seed coat while killing off many of the harmful bacteria and fungi lurking on the seeds.  Swirl the contents in the jar every day.

When the pulp floats to the top, the seeds are ready for cleaning.  Most of the seeds will have sunk to the bottom.  Carefully skim off the pulp then tip the liquid and seeds into a strainer. Wash the seeds under running water, using the back of a wooden spoon to carefully remove any remaining material stuck to the seeds.  Spread the seeds onto a paper towel to remove most of the water, then transfer them to a non-stick surface such as a dinner plate. Dry the seeds in a warm place out of direct sunlight. It will take two to three weeks for the seeds to completely dry out.

Make sure you label the seeds with their name and the date they were collected immediately after you have finished harvesting each variety.  Excellent record-keeping is your best friend when it comes to seed-saving.  It’s amazing how easy it is to mix up seed varieties!

How long do seeds last?

If you keep your seeds in a cool dry place, your seeds can last for years.  These things are seed killers: excess moisture, excess heat, light, and rodents.  Some seeds last easily for years. Others only last one year before the germination rate goes down.

Here is a chart from the Chicago Botanic Gardens on longevity in vegetable seeds as well as one from Iowa State University extension.

Seeds that have passed their prime for producing viable plants can be used to scatter as a cover crop, for bird seed, for eating, or for cooking (as in herb seeds).

4 Ways to Compost in Winter

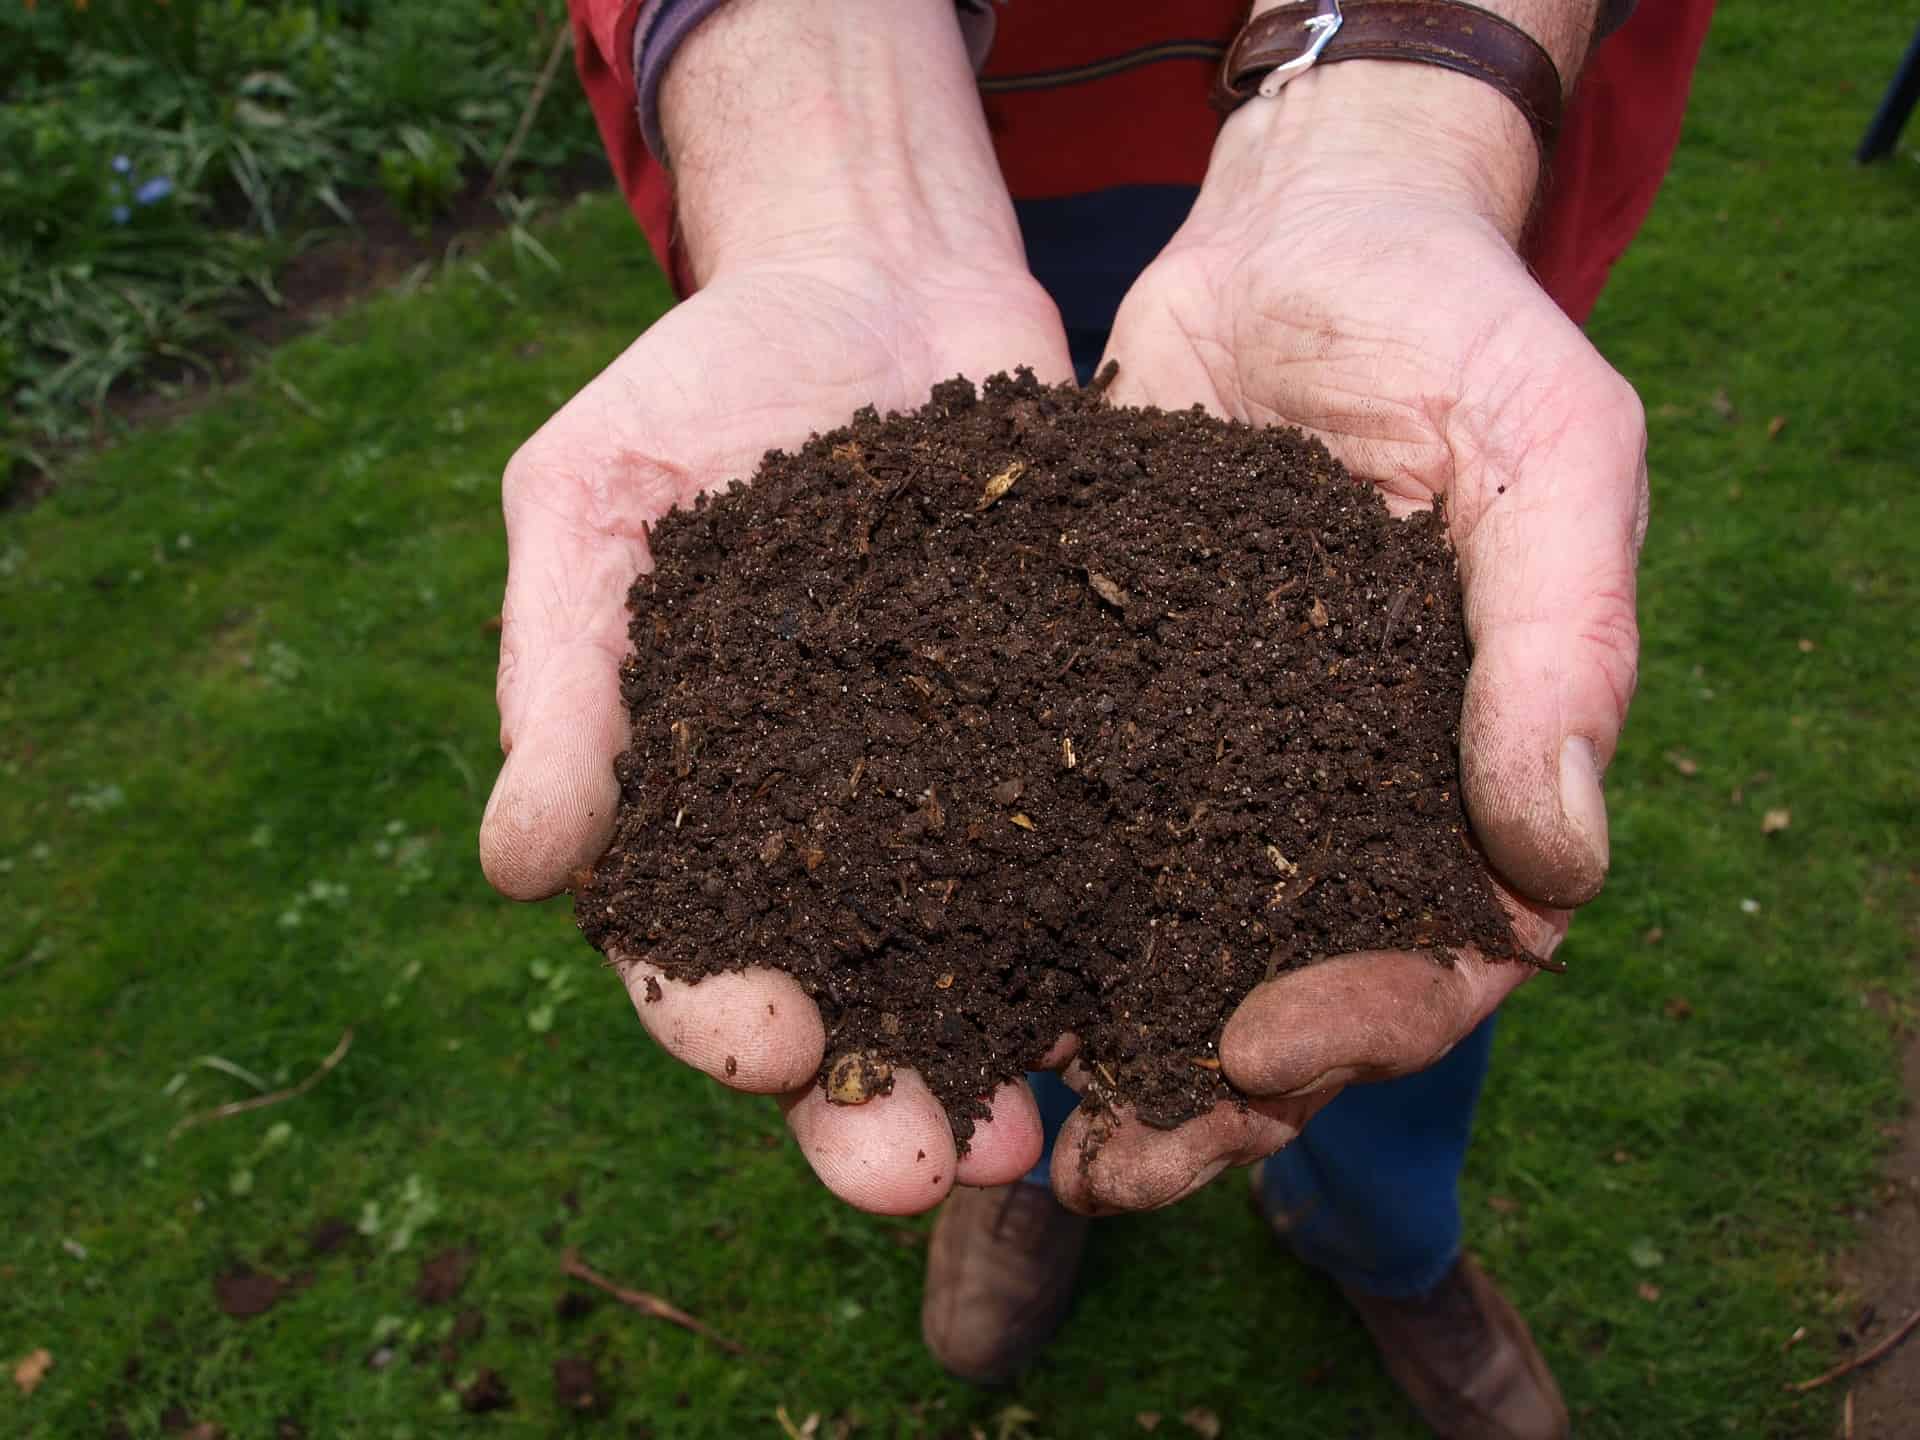
Composting in Cold WeatherPhoto of hands holding fresh compost.

by Sandy Swegel

It snowed yesterday.  It’s going to snow again today.  This makes me so happy because it means I get a vacation from work.  My gardening business is a lot like a teacher’s schedule.  Work like crazy most of the year then I get a wonderful interlude to catch up on the rest of my life.  Working in the garden may come to an end during Colorado winters, but eating usually continues and we continue to make lots of food scraps that any gardener would hate to waste.

When I lived on acreage, I did all my food composting by sending it through the chickens.  The backyard chickens loved food scraps and eagerly ran around when I brought the compost bucket. Even if it was just onion scraps and things they didn’t like to eat, they relished scratching it around and mixing it with the coop bedding and poop. Spring compost in the making.

Without chickens, there are still ways that you can compost in winter and capture your kitchen scraps:

1. Use your regular compost bin

I empty mine to about ¼ full of compost in progress with lots of worms.  I fill it all the way to the top with dry leaves and sort of hollow out the center. The leaves don’t freeze solid and all winter I drop the scraps down the middle of the leaves.  The leaves provide some insulation and the food scraps and leaves at the bottom of the pile are warmed enough by the earth that a tiny bit of composting keeps happening even when temps get well below freezing. The earthworms are slow but still keep working and reproducing.

2. Compost in a protected sunny spot

Keep a plastic (black if possible) bin against the house on a sunny side.  I started with the bin half full of partially finished compost that hopefully has some worms already busy in it.   The center, next to the ground, will stay unfrozen so the worms will stay alive.  The compost probably won’t process much over the winter except on sunny days.  You may need to secure it against raccoons or other varmints.

3. Make a trench

This takes a bit of planning before the cold weather arrives, but produces amazing results and saves time and labor.  Dig a long trench right in the garden…about a foot deep and a foot wide.  Leave the soil heaped right next to the trench with a rake nearby.  I left the excavated dirt on the side of the trench. Every time the indoor compost bin was full, I just took it out to the garden and dumped it into the trench.  If things weren’t too frozen, I pulled some of the excavated dirt on top of the food scraps. If there was snow on the ground, I just put the scraps on top, and eventually, it fell into the trench.

This process attracts all the worms to the trench.  Some composting takes place in the Fall but most decomposition happens in early Spring.  By early May, when it’s time to plant tomatoes, the compost is broken down enough that I can transplant my tomatoes directly into the filled trench that is crawling with decomposers and happy earthworms.  If it was a very cold winter and the compost isn’t finished, just plant right next to the trench.  Some people like to compost in trenches all year.  They set up a three-year rotating system where they compost one year, plant the next and use the area as a walkway the third year.  Pretty clever!

4. Make a windrow

John, the Worm Man, Anderson in northern Colorado keeps his worms happy all winter by setting up short windrows of compost, food scraps, and worms.  He throws old carpet or tarps over the top.  Periodically, he lifts the carpet and puts new scraps on top of the piles.  The worms slow down in winter but keep working and reproducing.  For small households, just make a pile on the ground and cover it with a tarp.  The tarp keeps moisture and some heat in.  Just slip the food under the tarp.  Worms show up.   This doesn’t work so well if you have raccoon or mice and rat issues.

Photo of a windrow compost

Okra Is Not As Yucky As Some Might Think

History of Okra and Okra Recipes

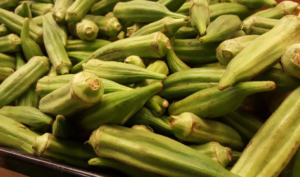
By Engrid WinslowA pile of green Okra pods.

If you grew up in the South, as I did, you loved okra as an essential ingredient in gumbo. If you didn’t then you might think it is “slimy” but okay if coated in batter and deep-fried. Well, you have been treating this amazing vegetable all wrong. First of all, the plants are really pretty and the flowers are fabulous, looking a lot like a hibiscus bloom, and can be grown as a 3-4 foot tall annual flower.  Try our Clemson Spineless Okra Recipes!

Okra probably originated somewhere around Ethiopia and was cultivated by the ancient Egyptians around the 12th century B.C. Its cultivation spread throughout North Africa, Arabia and the Middle East. The seed pods were eaten cooked, and the seeds were toasted and ground and used as a coffee substitute.

The plant spread around the shores of the Mediterranean Sea and eastward and was introduced to the Americas by ships plying the Atlantic slave trade in the mid-1600s when its presence was recorded in Brazil. It was further documented in Suriname in 1686. Okra may have been introduced to southeastern North America from Africa in the early 18th century. By 1748, it was being grown as far north as Philadelphia. Thomas Jefferson noted it was well established in Virginia by 1781.

It’s best to grow okra yourself if you can (or purchase them directly from a farmer) to ensure that the pods are fresh, tender and not overly large. Okra pods are best when harvested at 1-2 inches. Any larger than that and they are fibrous and not so tasty. The plants are easy to grow in most climates as long as they are planted after the danger of frost is past. They are prolific, grow quickly, and several plants can produce a handful or two of the pods nearly every day.

Store them in the vegetable bin of your refrigerator for up to 4 days until you have enough to prepare one of these great okra recipes. Okra is especially adept at soaking up surrounding flavors, making great for Indian and Asian dishes. Give okra a second chance and you might just be surprised.

One of the best ways to cook okra is to toss the pods with a little olive oil, salt and pepper and spread on a rimmed baking sheet. Roast at 400 degrees for 12- 15 minutes, shaking pan half-way through until the pods are lightly browned on the edges.

Pan-Fried Clemson Spineless Okra with Indian Spices

(Serves 4 as a side dish)

25-30 medium-sized okra pods, sliced                     5 TBL butter

¼ tsp ground ginger                                                        ¼ tsp cumin

¼ tsp ground coriander                                                 salt and pepper to taste

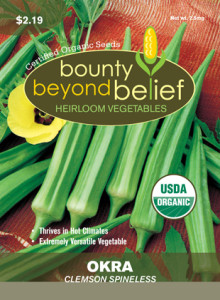
Melt the butter in a skillet, Add okra and spices and sauté until okra is soft, 15-20 minutes. Season with salt and pepper before serving.Organic Clemson Spineless Okra


Picadilly Clemson Spineless Okra

 (Serves 4-6 as a side dish)

2 Qt. fresh okra, chopped                                            1 medium onion, chopped

1 red bell pepper, chopped                                         1 1 lb. can of crushed or chopped tomatoes

¼ tsp sugar                                                                         ¼ tsp olive oil

Salt and black pepper to taste

Sauté the onion and bell pepper in the olive oil for 4-5 minutes on medium heat, stirring frequently until softened. Add the tomatoes, okra, sugar, salt and pepper and cook, covered, over low heat for 45 minutes. Stir occasionally. Check and correct seasoning before serving. May be frozen.

What is your favorite tomato?

Heirloom Vegetable Seeds

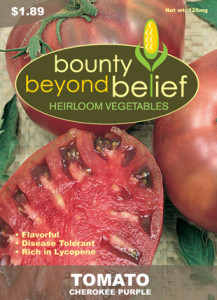
by Heather StoneTomato, Cherokee Purple

What’s your favorite tomato? All true tomato lovers and growers have a few tomato varieties that they just couldn’t imagine not growing and always recommend to their friends and fellow gardeners. One popular heirloom tomato variety that continues to be a favorite among many and consistently wins taste tests across the country is the Cherokee Purple tomato.

Cherokee Purple tomato is a beefsteak style tomato whose skin is a dusky rose-red color. When sliced its interior is an even darker red. The flavor is described as a “balance of sweet, acid and savory with a hint of smoke.” Cherokee Purple is best eaten fresh on sandwiches or in salads.

With a name like “Cherokee Purple,” there has to be a story there somewhere. Craig LeHoullier, a grower of heirloom tomatoes, connoisseur and author of the book Epic Tomatoes is who we can thank for bringing this delicious tomato to the masses. In 1990, Craig received a package from John D. Green of Sevierville, Tennessee containing seeds of an unnamed purple tomato.

John explained that his neighbor had shared the seeds with him and that her family had been passing along the seeds since the late 1800s when they were originally received from Cherokee Native Americans. Craig grew the seeds in his 1991 garden and gave this beauty the name Cherokee Purple. Next, Craig passed the seeds on to the folks at Southern Exposure Seed Exchange. They loved the taste of this tomato and first listed the seed in their catalog in 1993 and its popularity has continued to grow since.

Want to try this delicious variety in your garden this year? Grab some Cherokee Purple seeds today, they might just become your new favorite tomato!

Don’t Pass On Peas

Tips for Successfully Growing Peas

by Heather Stone

Green Sugar Snap peas on the vine.

Image by Reginal from Pixabay

Plant Green Peas for one of the first crops in the spring. As soon as you can stick your finger into the soil you can plant peas. Whether you plant shelling, snap or snow peas this early crop loves the cool weather of spring, producing tender pods that are hard to resist.  More often than not, they are eaten straight off the vine right there in the garden, very few making it to the kitchen. Every year I always wish I would have planted more.

Planting green peas should happen as soon as the soil can be worked, about 4-6 weeks before your average last frost date. For best germination, soil temperatures should be around 50 degrees F. Do be cautious of excess moisture. You don’t want your seeds sitting in wet soil.

Before planting, soak your seeds overnight. This will help speed germination. Plant seeds about 1” deep and 2-3” apart in well-loosened soil in a sunny spot in your garden. Peas will also do well in part shade. Give your peas a trellis, as most peas need something to climb on. Keep the area moist until the seeds germinate, on average between 7-14 days.

Green Peas are an easy crop to grow. Keep the plants moist, especially once they start producing. When they reach 8-12” tall mulch your vines well to keep the soil cool and help retain moisture. Peas grow best in temperatures below 70 degrees F, so plant your seeds early. Once temperatures reach 80 degrees the vines tend to stop producing.  

When the peas begin to ripen, harvest daily and be sure to use two hands to pick. Use one hand to hold the vine and the other to pick the peas. This way you will avoid damaging the tender vines. For the crispiest peas, pick in the morning after the dew has dried. Peas will last about 5 days in the refrigerator (if they make it there) and any extra freeze well.

Like all legumes, peas fix nitrogen in the soil that other plants can use. When your peas are done for the season, remove the vines but leave the roots in the ground. Plant a nitrogen-loving plant in the area that can benefit from the extra nitrogen in the soil.

Don’t wait! Get out in the garden and plant some peas today! Try one of our tried and true varieties such as Sugar Ann, Oregon Sugar Pod or Green Arrow.

Packet of Oregon Sugar Pod Pea seeds. Pea, Sugar Ann Pea, Green Arrow


DREAMING OF SPRING

Plan your vegetable garden. Rows of Vegetables in a Garden.

Plan your vegetable garden!

By Engrid Winslow

Yes, it is still very cold and very dark but nothing fills the heart in the dead of winter than planning for spring. What should you be doing now that will keep those spirits up? Plan your vegetable garden and herb garden!

1. First of all, take a look at those vegetable and herb beds and decide what and how many varieties you want to plant next year. Do you want to start those peppers a bit earlier this year? Did you plant tomatoes there last year – rotate tomatoes every 3 years if at all possible to avoid depleted soil and issues with many diseases. What do you want to grow more of this year? Anything you want to try that’s new? What did you and your family really love? Want more tomatoes or basil for pesto or tomato sauce? [4 Tips For Keeping Your Basil Productive and Pesto Secrets] Were there any epic fails? Maybe it’s time to move on to buy those at your local Farmer’s Market and devote the precious real estate to something else.

2. Speaking of soil, this is a great time to start adding mushroom compost in a nice thick layer that can work its way into the soil during late winter freeze and thaw cycles and heavy periods of moisture. You can also cover the compost with a layer of seed-free straw that was grown organically.

3. Peruse the seed catalogs and websites. It is so fun to read those descriptions and they all sound wonderful but be aware of your space and climate when choosing seeds. Take stock of any seed that you saved from last year and organize and assess any leftover seed packets. Seed viability goes down over time. Onions, corn, parsnips, parsley and leeks should be refreshed every year, but tomatoes and lettuce can go 4-6 years and still germinate. Check out these charts if you have questions: https://hortnews.extension.iastate.edu/1999/4-2-1999/veggielife.html/

and http://ottawahort.org/wp-content/uploads/2017/02/Seed-Viability-Times.pdf/

4. Gather up your seed starting supplies and order more if needed. Dust off those grow lights, check the heat mats and make sure they still work and clean any seed starting containers that you plan to re-use with a weak bleach solution. Again, assess what worked and what didn’t in prior years. Did lettuce seeds that were direct-sown in the garden elude you? Try starting them indoors under a plastic dome which helps retain moisture until they are fully germinated.

5. Did friends and neighbors share anything they learned with you? Maybe it’s time to get everyone together for a Happy Hour, swap saved seeds and talk about their gardening experiences.

6. Review past blogs, books and articles that you might have saved for ideas, tips and new information. Here’s a good place to start: Care and Planting of Seedlings, Rules You Can’t Break, and Two Ways To Guarantee Your Seeds Grow

Preserving Foods

Food Preservation

by Rebecca Hansen

Many of us have tried our hands at the new Victory Gardens and are getting back to our roots in our community’s Grow Local movements.  With the flow of garden produce increasing each minute, we have donated excess to the local Community Food Share programs and, we are beginning to be mildly panicked at the thought of all of that fresh produce going to waste solely because we can’t use it fast enough.

With our neighbors slamming their doors when they see us heading their way with an armload of our best organically grown zucchinis we find ourselves wishing the bounty could be spread out over the year and last well beyond the late summer flush.  More and more people are turning to home food preservation as a way to keep the bounty of their hard-earned, organic, heirloom, non-genetically modified gardens coming.

Now is the time to start your research, before the tidal wave of tomatoes sweeps you away. The number of food preservation methods is exciting and a bit daunting.  Drying foods is one of the oldest methods of preserving foods. Also, canning, freezing, pickling, curing and smoking, and fermenting are ways to keep your pantry full during the winter.

What could be more fulfilling than pulling out a sparkling jar of homemade salsa when the snowflakes are flying to bring back warm memories of those beautiful heirloom tomatoes growing on the vine?  CSU Extension has a couple of great publications on how to dry vegetables and fruits with all that you need to know about nutritional values, methods and safety precautions.

Also in the extension’s Nutrition, Health and Food Safety publications, are fact sheets on smoking and curing meats and making pickles and sauerkraut and preserving without sugar or salt for special diets.  Check out the one on safe practices for community gardens for tips on ensuring safe food for all gardeners.

With all of our efforts to ensure that we each have gotten the most nutritious value from our fresh produce, it would be prudent to search for the newest scientific research into home food preservation methods.  We want to eat healthy fruits and vegetables even when they are not in season.  The USDA encourages us to use safe canning methods. Scientific developments have changed recommendations over time. Always use up-to-date methods and do not just rely on the practices of past generations.  A great place to start is by exploring the National Center for Home Food Preservation website from the University of Georgia.

Publications and resources are available at the center’s website with useful tips for proper preservation techniques.  Also, not to be missed is an awesome, free, online self-study course called;

Preserving homegrown food can be an economical and fulfilling way to enjoy quality, nutritional food from your garden all year long.  So when your heirloom tomatoes, squash, onions, peppers, beans, garlic, beets, and turnips cover every surface in your home and garage and the refrigerator is brimming with more fragile produce, you will be fortified with the knowledge necessary to safely preserve the bounty for the time when the snowflakes will inevitably fly.


Radical Ratatouille

A plate of tomatoes and other vegetables used to make Ratatouille.

Photo courtesy of Dgraph88 / pixabay


Ratatouille Recipes

From the Kitchen of Engrid Winslow

Ratatouille screams to me of summer and there are dozens of ways to make it. The only real essentials are tomatoes, onion, eggplant and zucchini cooked down into a stew and seasoned with salt and pepper.  It is delicious as a vegetarian main dish and can be served hot, room temperature, or even cold. You can also top it with cheese, add chunks of chicken and serve it over rice, or roll it up in a lettuce leaves or a tortilla. It can be cooked in a crockpot, baked or stewed. Here is a “classic” preparation followed by a few variations for you to play with.  You can learn more about the history of this dish here.


Classic Ratatouille

Serves 5 to 6

3 TBL olive oil                                                             3 medium tomatoes, chopped or 14 oz. canned

2 medium onions, chopped                                        2 large crushed cloves of garlic

1 medium eggplant, cubed in 1” chunks                    1 medium green bell pepper, in 1” chunks

5-6 medium zucchini, sliced                                       1 medium red bell pepper, in 1” chunks

½ cup chopped fresh parsley                                      ¼ cup chopped fresh basil

½ tsp salt                                                                     2 TBL tomato paste

¼ tsp pepper                                                               1 cup shredded gruyere cheese (optional)

In a 4-5 Quart pot, heat olive oil and add garlic, eggplant, peppers and onions.  Cook over medium heat, stirring often until onions are crisp-tender (about 5 minutes). Stir in zucchini, tomatoes, parsley and basil.  Heat to boiling, then reduce to medium, cover and cook for 15 minutes.  Remove cover, season with salt and pepper and stir in tomato paste. Continue cooking, uncovered, for another 10 minutes. Serve as is or over hot cooked rice. Top with a sprinkling of cheese.

VARIATION #1

Make it Middle Eastern by omitting the basil and cheese and stirring in the following spices when you add the zucchini and tomatoes:

½ tsp ground cumin                ½ tsp turmeric                                    ¼ tsp coriander

VARIATION #2

Change up the vegetables in the classic recipe or just add more.  Some favorites are corn, peas and beans, or other summer squash such as patty pan.

VARIATION #3

Make it Italian: Melt a couple of anchovies into the oil along with the garlic and tomatoes.  This adds a layer of umami flavors that is quite good. Then add a sprinkle of toasted pine nuts and a drizzle of balsamic vinegar just before serving.

VARIATION #4

Consider serving it with a different grain besides rice. Quinoa, farro, couscous and others are a delicious and very healthy twist.


Pumpkins, They’re not just Decorations!

What You Need to Know About Cooking Pumpkins

by Sandy Swegel

I thought I had a great bargain when I found organic butternut squash at the grocery today for only $.99 per pound.  I was in definite sticker shock when the squash rang up over $4.75.  Well worth it for high-quality food of course, but suddenly, all those pumpkin and squash decorations I’m seeing around town look like they ought to be food for me and not just for the squirrels.  My neighbor starts cleaning up after holidays the minute the holiday is over…so on November 1st I loitered in her driveway and offered to carry off that large uncut pumpkin she had decorated the front porch.  At .99 cent/pound, it was at least a $25 value.

There are lots of ways to cook pumpkin, but like most winter vegetables I find roasting makes the flavor sublime.  I decided to cut the pumpkin in thick slices as I’ve heard they do in France, marinate the slices in olive oil and rosemary, garlic and oregano, and roast in the oven for 45 minutes or so.  Just as yummy as the butternut squash I cook that way. And free!

Once I started prowling the web for French recipes for pumpkin, I found what I will do with another big section of that pumpkin:  French fries. Well, officially they are called “Chips de Citrouille.”  A traditional French recipe has you them in milk, dredge them in flour seasoned with salt, and deep fry in a cup of oil for two minutes per side.  You can make lots of variations without gluten or even bake them instead. http://www.traditionalfrenchfood.com/fried-pumpkin-slices.html

Yum. Now what to do with a big pile of pumpkin seeds!

http://www.yumsugar.com/Fast-Easy-Pumpkin-Fries-Recipe-12010370

End of the Growing Season

How Our garden Holds it Own in the Snow

by Sandy Swegel

We had our first big snow…just six inches but very cold and wet followed by more snow and below freezing temperatures so one might easily assume the vegetable garden is done for the year.  It certainly looks forlorn outside my window.  But fortunately, Nature is kinder than that.  For reasons I can’t quite fathom, lettuce that freezes if it’s too far in the back of my refrigerator can handle quite a lot of extreme temperature especially when it’s well insulated by snow.  I expect that when the sun returns in a couple of days, I’ll be able to brush away any remaining snow and harvest excellent crispy sweet lettuce.  Hardier greens like spinach and chard can even be exposed to the air and frozen solid at 8 am but then be perfect and ready to eat by noon with a little mid-day thawing.

The warm season plants like basil and tomatoes have no chance in the cold.  Basil turns brown below about 35 degrees.  Tomatoes don’t taste nearly as good once night time temps dip into the 30s.  Squash leaves croak right at 32 although sometimes the ambient heat from the ground will keep the pumpkins and winter squash edible even though the air is freezing.  Still, the warm season plants are done. Corn on the cob is a memory held by the dried stalks turned into Halloween decorations.

The root crops are another story.  Carrots and beets improve with each freezing night.  As long as you can pry root crops from the freezing ground, you’ll be rewarded with intense flavor and sweetness that improves even more if you roast the vegetables with some olive oil. Many a picky eater who refused to eat turnips or rutabagas, finds November turnips roasted with rosemary and thyme to be irresistible.

It may be the end of the growing season….but the eating season has just begun!