CONTAINER GARDENING

Growing a Garden in a Container


Planning ahead-container-plants
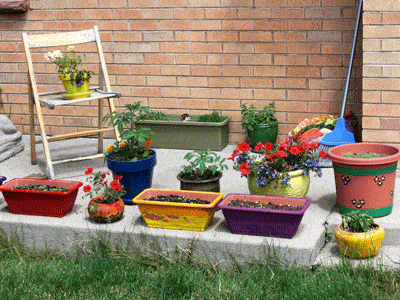
Take a moment to look at the locations where you want to place your containers.  Consider such things as sunlight (strength and time) and wind.  If you have pots with sun/heat-loving plants, arrange them to shade your pots with those plants that need less sun and heat.  Tall plants or plants that vine can be trellised to grow vertically and provide a natural barrier for tender plants.  Make sure to anchor trellises and containers with tall plants, to keep them from getting blown over.  If you plan to place your containers on a covered porch or balcony or any place that receives limited sunshine, you should select vegetables and flowers that don’t require as much.  Leafy greens, snap peas, Chinese mustards, and kale will do quite well in these conditions, but tomatoes, and peppers, probably not.
When growing your garden in containers rather than a garden plot, it is just as important to choose varieties that will be able to reach maturity in your growing season.  If you have a short growing season, check the maturity dates on the packages and plan to start some seedlings in the warmth of the indoors to get a jump on the growing season.

These varieties are not practical for container gardening due to their size or length of growing season (At the end is a list of vegetables/plants that will do well in containers.):

Watermelon and most cantaloupes (although there are some midget varieties that can do well)
Large Pumpkins and winter squash
Corn
Head cabbage (except as microgreens)
Mammoth sunflowers (except as sprouts or micro greens)
Beefsteak type tomatoes
Garlic bulbs/full sized Onions
Make sure to prepare your containers and pots properly, to give your veggies the best chance possible.  You will be surprised by how much those little seedlings will expand, and there is as much growth below the soil as there is above the soil, so don’t squeeze them into tiny containers.  Any type of vessel can be used, just keep in mind the size of the plants and the location.  Terra cotta pots are inexpensive but dry out more quickly than others, metal tends to get quite hot in the sun, and plastic is versatile and lightweight.

 ………………………………………………………………………………..

Getting started-
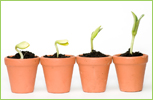
tips_seedstarting3For Container Gardening, start your long-season varieties, indoors, in good quality starting soil or soilless mixture.  Seedlings should be kept consistently moist (not wet) and exposed to fairly strong light, sunlight, or florescent, for at least 10 – 12 hours each day as soon as sprouts appear.  This will keep them from getting leggy and looking for light.  Seedlings that are sown more closely together can show more vigor as their roots symbiotically help each other extract nutrients from the soil.  As the first true leaves appear, choose the strongest seedling starts that you will need for your containers and clip off the remaining which gives the strong ones some space to expand.  Transplant to pots and containers shortly after the first true leaves appear. When transplanting to your containers and pots, make sure to space the seedlings according to the package directions for each type of vegetable.

Here are some plants that do not like to be transplanted.  Instead, start them in individual moss starter cubes or use homemade newspaper pots or toilet paper tubes that can just be set into your containers at the appropriate spacing.
Beans                                      Squash                        Burnet
Chinese Cabbage                    Borage                        Chervil
Cucumbers                              Caraway                      Pumpkins
Melons                                    Coriander                     Dill
Root crops (except beets, turnips, and celeriac)
Make sure that your container has drainage holes in the bottom.   Place a couple of layers of newspaper in the bottom of the pot to keep soil from falling through the holes, then place a 1-inch layer of moss on top of the newspaper.  If you don’t have a source for sphagnum moss, coarse gravel will work.  Fill the container with good, rich pre-moistened, potting soil, leaving room at the top.  Pat it down firmly to fill in the spaces but do not pack hard.  Take your young transplants (holding by the leaves or root ball, not the tender stem)  or degradable seedling pots, one at a time, placing each on the top of the soil.  Spread out the roots, and sprinkle more pre-moistened soil over the roots, covering them completely.  Use enough soil to bring the level up to just under the first leaves for most seedlings.  Do not cover the crown on plants such as lettuce.  The plant’s first leaves should be at the level of the top of the container.  Pat the soil gently, firming it over the roots and young stems.
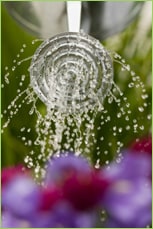
tips_seedstarting4 Water your containers when the soil feels dry in the top few inches.  Continuously wet soil suffocates the roots and encourages bacteria and fungi to grow.  Usually, we water when we have time or are home, but watering when needed instead of on a schedule is usually best.  Avoid wetting the leaves as much as possible.  Try to use tepid water and if you are using chlorinated tap water, allow it to sit overnight exposed to air to dissipate the chlorine which can damage plants and kill beneficial soil bacteria.
Fertilize with low doses of good quality organic fertilizer every 7-10 days.
Don’t be shy about removing plants that are past prime or are beginning to bolt.  Removing these will leave spaces where you can plant another round of short-season varieties and ones that prefer to mature in the cooler weather of fall.  Lettuces and other leafy greens are good for this, maybe another round of snap peas, beets or radishes, arugula, and bunching onions.  Mustards and kales and fennel love the cool days of fall
………………………………………………………………………………..
Design – Container Gardening can be beautiful
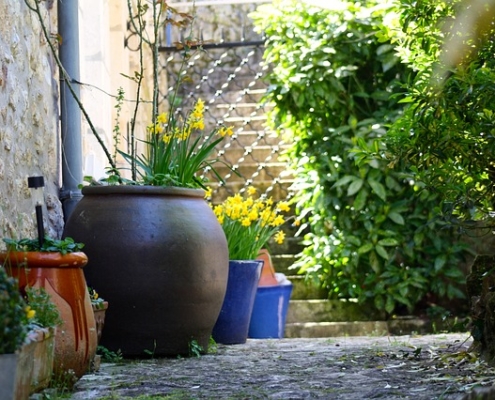
Create groupings with your pots and experiment with variations in height, by placing some containers on concrete blocks or other empty containers turned upside down. This adds visual appeal and at the same time maximizes the space available.  Groupings also help to make the job of watering a bit easier.  Pick a particularly spectacular container plant to be the visual focus and arrange other not-so-pretty container plants around.
Make your containers a bit more decorative by planting different varieties together in one pot.  Use the spaces under taller plants to place smaller herbs and leafy greens. Some vegetables live in harmony with one another, some are actually beneficial to each other and some hate each other.  Mix colors and textures and think about including edible flowers tucked in around the edges. See the article, Flavorful Flowers.  category-color Check each variety on our website to see if your combinations will work together.  Here are some examples:
• Lettuce does well with beets, bush beans, pole beans, cabbage, carrots, cucumbers, onions, radishes, and strawberries.  You can also plant your lettuce at the base of young sunflowers for a little shade.
•Celery, dill, onions, and potatoes are great companion plants for cabbage. Planting clover with your cabbage will keep insects away and chamomile will improve the flavor. Cabbage does not like strawberries, tomatoes, peppers, eggplant, rue, grapes, or pole beans.
Cauliflower is compatible with basil, beans, dill, garlic, hyssop, lettuce, mint, onion, rosemary, sage, and thyme. It does not like grapes and rue.
•Plant your peas with bush beans, pole beans, carrots, celery, cucumber, eggplant, parsley,  radish, spinach, strawberry, sweet pepper, tomatoes and turnips. Keep your peas away from chives,  and onions.
Tomatoes grow well with asparagus, basil, beans, carrots, celery, chives, cucumber, garlic, head lettuce, marigold, mint, nasturtium, onion, parsley, peas, peppers and marigold. Basil will repel flies and mosquitoes from your tomato plants while also improving their growth and flavor. Beebalm, chives, and mint will improve the health and flavor of your tomatoes. Keep potatoes, fennel, dill, cabbage, and cauliflower away from your tomato plants.
………………………………………………………………………………..

VEGETABLES/PLANTS THAT DO WELL FOR CONTAINER GARDENING:

Beans (Pole and Bush types)

Direct sow into containers when night temperatures reach 60 degrees F, 6“ minimum soil depth, full sun, and harvest in mid-late summer, Provide a trellis or climbing structure
Beets – Direct sow into containers in early spring and late summer, 6” minimum soil depth, full sun to partial shade, harvest early summer and again in fall
Carrots (Nantes, Round, or Finger-type are best for containers) –  Direct sow into containers when night temperatures reach 60 degrees F, 8” minimum soil depth, full sun, harvest in summer through fall.
Cucumbers (vine or bush-types) –  Direct sow into containers when the day temperatures reach 70 degrees F or start indoors and transplant, 10” minimum soil depth, full sun, harvest in summer, Provide a trellis or climbing structure for vine-types.
Eggplant –  Start inside 8 weeks before temperatures usually reach 80 degrees F for your area, then transplant to your container, 10” minimum soil depth, full sun, and harvest late summer.
 Leafy Greens (Swiss chards, Collards, Kales, Mustards, Asian Greens, Pak Choy) –  Direct sow into containers when the nighttime temperatures are above freezing, or, start indoors 3-4 weeks before and transplant, 8” minimum soil depth, full sun to partial shade, harvest late spring through winter.
Lettuces and Salad greens –  Direct sow into containers after Spring’s last frost date, or start indoors 4 weeks before and transplant after hardening off when about 2 “ tall,  sow seed again in early fall, 6” minimum soil depth, full sun to partial shade, harvest spring through early summer and again in fall.
Onions, Garlic, Leeks – Direct sow into containers after Spring’s last frost date, 6” minimum soil depth for bunching onions and young (green) garlic, 8” for Leeks, full sun, harvest summer to fall.  Mounding soil up around the base of bunching onions and leeks will encourage long white stalks.  Grow garlic in containers to use the green shoots and any small bulb growth.
Peas –  Direct sow into containers when the soil is no longer frozen, Soaking the seeds overnight will speed up germination, use an inoculant (a beneficial bacteria that enables the roots to use the nitrogen pulled from the atmosphere and stored in nodules on the roots), especially when planting into containers with new potting soil.  8” minimum soil depth, full sun, harvest in late spring to early summer with secondary fall crops possible, Provide trellising for vine-types or cages to support bush-types.
Peppers –  Plant seeds indoors, keeping at 80 degrees F for about 2 weeks, starting 10 weeks before nighttime temperatures remain above 55 degrees and daytime temps reach at least 70 degrees.  Transplant into containers after hardening off, 8” minimum soil depth, full sun, and harvest in late summer.
Potatoes –  Plant disease-free seed potatoes in a large container (30” deep, 20” across) filled 1/3 full of potting soil,  5-6 “ apart, and cover with 2 inches of soil, When plants are about 6” tall cover the bottom half with potting soil,  continue doing this as the plant grows until reaching the top of the pot. Full sun, harvest summer to fall.
Radishes –  Direct sow into containers when the soil is no longer frozen and every other week till late spring, 4” minimum soil depth, full sun to light shade, harvest all spring and second harvest in fall.
Spinach –  Direct sow into containers when the soil is no longer frozen, replant first of August for fall, 6” minimum soil depth, full sun to partial shade, harvest in spring, early summer, and fall.
Squash (zucchini, yellow summer, yellow crookneck, patty pan, mini pumpkins) – Plant seeds indoors 2-3 weeks before the spring last frost date, transplant into sunny, warm containers, and cover with a row cover for several days, 10” minimum soil depth, full sun, harvest summer to early fall, pick when young and small, provide trellis and support for vines.
Tomatoes –  Plant seeds indoors keeping them at 75 degrees F for about 2 weeks, starting 6-8 weeks before Spring’s last frost date, transplant at least once to another larger pot when they have 3 sets of true leaves burying them up to the first set of true leaves, keep in good light, 12” minimum soil depth, full sun, harvest late summer and fall.
Herbs –   Herbs are mostly perfect plants for container gardens, being small and not fussy.

Plant Your Cool Season Vegetables Now

Know Which Crops to Plant and When

by Heather Stone

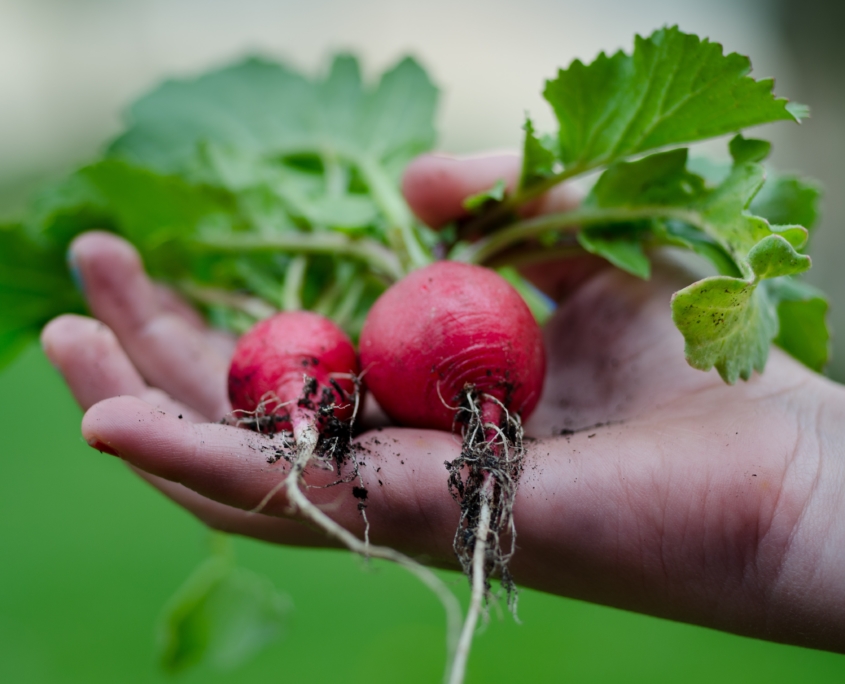
Photo of a hand holding two red radishes.

Photo courtesy of pexels – skitterphoto 9301 (1)

Mid- August to Mid- September is the prime time to start planning and planting your fall vegetable garden and your cool season vegetables. Even though it’s still hot outside, the nights are getting cooler and the days shorter. Now is the time to get those quick-growing, cool-season vegetables in the ground. For bountiful late-season harvests here are a few guidelines to follow.

-Know which crops to plant and when. Here’s a list of our favorite cool-season vegetables and their days to maturity.

  • Kale should be planted 85 – 90 days before the first frost. The leaves can handle a few light touches of frost and become sweeter each time.
  • Carrots can be planted 80-85 days before frost.  They can be harvested when young and tender.  Even after the cold temperatures shrivel the tops, they can be dug, sweet and juicy, from the ground throughout the fall.
  • Beets can do double duty with green tops for salads and tasty roots as well.  Plant seeds about 65-70 days before frost, depending on the type you choose.
  • Leafy greens such as spinach and leaf lettuces, arugula, mustard greens and Swiss chard all do best in the cooler temperatures of fall. Plant seeds about 50-60 days before frost depending on the type of green chosen. These can be harvested when young and immature for delicious baby greens.

    Photo of leafy green seedlings.

    Photo courtesy of pexels by kaboompics 5809

  • Radishes are always great to spice up salads. These are fast-growing and can be planted 30-35 days before the first frost. Pull them when young and tender.


-Keep moist. The garden will dry out more quickly in the warm days of late summer than it did in the spring. Keep a close eye on new plantings to make sure those seeds or seedlings stay well-watered. A light covering of grass clippings or straw can serve as mulch, helping to retain moisture. Using a light row cover over newly planted areas can also help retain moisture, provide shade and protect against light frosts further down the road.

Fertilize once a week with an organic fertilizer with nitrogen and enjoy delicious salads and veggies all fall long.

TOP 10 VEGETABLES FOR PART SHADE

Gardening Tips

by Heather StoneShady Gardens Plants

Do you have a garden that gets more shade than sun, but you still want to grow vegetables? No problem! There are plenty of vegetables that will grow well with partial sun. We’ve put together a list for you of vegetables that perform well with 6 hours or less of direct sunlight. Read on to find out how to keep yourself in fresh veggies all season by making the most of your shady spots.


Partial Shade Plants

  1. Mesclun Greens (Needs 3 hours of sun)

Mesclun is simply a “mix” of various greens. All of them doing well with just a few hours of sunlight. They germinate quick and reach maturity in a matter of weeks. Try our Mesclun Mix– a great combo of arugula, mustard greens and Chinese cabbage.

  1. Arugula 3-4 hours

This delicious peppery green is one of the easy-to-grow vegetables for shade and loves the cool weather. Plant in early spring about 1 month before the last frost and continue sowing every 20-30 days until mid-summer. Grows well in containers. Try our Wild Arugula!

  1. Lettuce 3-4 hours

Lettuce is a cool-season green that isn’t a big fan of direct sun. The varieties are endless and so easy to grow in the ground or in containers. Plant in early spring and again every two weeks for a continuous supply of lettuce. Make sure to provide shade for the late spring and summer plantings.

  1. Spinach 3-4 hours

The nutrient-packed leaves of spinach love cool weather and protection from the full sun. Spinach is an easy to grow and productive crop that every garden should find a spot for. Like lettuce and arugula plant in early spring and sow successively every 2 weeks for a continuous supply of spinach. Try our Bloomsdale or Nobel Giant varieties.

  1. Kale 3-4 hours

A powerhouse of nutrition, kale is easy to grow in the ground or in containers. The young tender leaves of kale are great in salads. The mature leaves are excellent sauteed or added to soups and stews. Start in early spring and continue you to sow for fresh greens all season long.

  1. Swiss Chard 4-5 hours

Easy to grow from seed and looks fabulous all season long Swiss Chard’s beautiful leaves are great shady gardens plants that are easily planted in the perennial garden as well as the vegetable patch.

  1. Radish 4-5 hours

There’s nothing like a fresh spring radish. They are quick to germinate, fast to mature and come in a rainbow of colors. We carry 5 different varieties! No garden should be without radishes.

  1. Peas 4-5 hours

Other partial shade plants are Peas, in either the garden or the container. They are pretty quick to germinate and prefer cool weather. So get them in the ground early and you’ll have peas to snack on in early summer.

  1. Beets 4-5 hours

Beets can thrive along the shady edge of the garden. The roots might not get quite as big, but if you keep them well watered they will produce excellent tasting greens and sweet, tender roots.

  1. Bok Choy 4 hours

This cool-season vegetable germinates in a few days and can be eaten raw or cooked.  Bok Choy is an excellent addition to the part shade garden.


Trapped by Nature

Noticing Nature

by Sandy Swegel

Traffic jams and Mother Nature conspired yesterday to make me notice. I had to get to work early and as I reached the top of a hill I could see the traffic on the single highway was at a dead stop for miles. In my hurry that day I had also let my cell phone battery run down and the car charger was suddenly broken. I decided I was too impatient to wait and tried a detour but soon it was obvious a thousand other people were trying this too. So I was driving about five miles per hour for 45 minutes with no smartphone, no music or news to listen to, and it was the best thing that happened to me all week.

Forced idleness tricked me into simply being and observing. My detour took me thru areas of small farms just after sunrise. So many wonders.

There was a hundred-year-old cottonwood tree with only the outer three feet of all the branches turned bright yellow. Every other leaf was dark green. It looked like a punk rocker hairstyle. Then traffic inched on and I saw fields of organic kale. Some frozen solid and white frosted. Others just an acre away but three feet or so upslope were dark green. Cold sinks into low areas and that morning the frost line ran right through the field of kale. Traffic inched forward and I saw flocks of chickens put out to free range surrounded by the flimsiest electric fence. I laughed out loud and remembered my first chickens where we installed one of those portable electric fences. We stood back proudly and watched as our chickens figured out right away that even with clipped wings they could fly up to the top of the short electric fence and not get shocked because they were birds and didn’t have a foot touching the ground to conduct electricity. They just jumped off into a neighboring field.


The rest of the slow ride gave me dozens more magical moments. A hay field already finished for the year had hot air ballooners just starting to inflate tiny collapsed balloons. Down the way, llamas stood at fierce guard between the big noisy cars and their sheep munching quietly in the background. Hawks and huge birds of prey were swooping as if on roller coasters on the winds coming off the mountain

I hope events conspire to give you a rest sometime. Life is so busy and full of thinking and doing that we grown-ups don’t get delighted so often. And much as we’d like, we can’t force the magic. I drove the same way home that day. The cottonwood tree had turned more normal yellow during the day. The chickens were locked away safely from coyotes and I forgot to look for the llamas because I was thinking about dinner. So if you have a moment today when the grandeur of Nature breaks through the mundane…be sure to notice and be happy.

Time to Reboot the Veggie Garden

Gardening Tips

by Sandy Swegel

We ate the last of the Spring Peas this week. They were gnarly and kinda tough, but I savored the sweet Spring memories. Even though the peas were planted in a little shade and watered regularly, a pea plant can only take so many blistering hot days. Pooped-out peas are a sure sign that it’s time to start thinking about the Fall Garden. It seems slightly absurd since we still don’t have a single red tomato here in zone 5, but if I want a lush fall and winter garden, the time to reboot the spent Spring garden is now.

But it is July and it’s hot, so let’s start the fall garden in nice easy baby steps. These week’s plan is simple:

1. Pull out the finished pea plants. Pull out the weeds. Scratch in some fresh compost and keep the area watered for a few days as the soil settles down.
2. Plant some seeds. Keep the patch well moistened (or throw some row cover over to keep the water from evaporating so fast.
3. Have something cold to drink and flip through your seed cache or favorite seed website to plan something new and different the next time a little patch of soil is ready for replanting.

Some excellent July planting choices:

Leafy greens: arugula, Asian greens, collards, more kale or chard
Cool-season herbs like cilantro and dill
Root crops you want to enjoy after frosts like carrots and beets
Rapini (Broccoli raab)

Don’t stress yourself in the heat….just plant that one little patch that’s just growing weeds now and reap the rewards in September.

Photos:
http://www.popsugar.com/fitness/Healthy-Recipes-Winter-Vegetables-Fruits-21357784#photo-21357809

Jumpstart your Lettuce Garden

Heirloom Vegetable Seeds

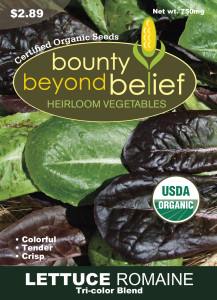
Our new tricolor blend of romaine lettuces has me itching to get my salad garden started. I like Romaines because they are especially nutritious, comparable to kale. And I like this blend because it’s shiny and colorful. There’s a lovely gloss to the colorful Romaines that looks beautiful in the garden and on the plate. I want my food pretty!

OrgLettuceRoamaineTri_BBB

It’s pretty easy to get lettuce ready to eat earlier than your standard growing season. If you’re either busy or lazy (or both as I often am) there are some almost no work ways to get your salad growing.

Almost No Extra Work: Row Cover

Direct seed as usual into your garden. Put a layer of row cover loosely over the area. Secure with anchors or with heavy rocks which will also capture a tiny bit of extra heat. The row cover alone will speed germinate the seeds if you have a spell of warmer weather. The row cover then will protect it if the warm weather is followed by frigid temps.

A Little Bit of Extra Work: Pots

Want to have lettuce even sooner? My friend Cathy seeds her lettuce in lightweight pots and brings them inside at night or when the weather is extreme. It’s easy for her because she has a south-facing sliding glass door and moving the pots in means sliding open the door and moving the pots two feet in or out. She has the extra satisfaction of going to the Farmer’s Market in April where market farmers are selling similar pots for $25.

Invest Work for the Future: Cold Frames

Cold frames are an awesome way of having more of your own fresh food. They do take some time and money….but you will quickly make up that investment with what you save on fresh greens.

Work like a Farmer for Lots of Lettuce: Plugs

Growing your own lettuce plugs is one way to get a garden of lettuce without thinning or empty spots. Start your seeds under lights in plug trays that you can plant out when it’s a bit warmer. Very satisfying to have a full evenly-space plot of lettuce plants in the hour or so it will take you to plant out the entire plug tray (100-200 plants).

http://wcfcourier.com/lifestyles/home-and-garden/gardening/lettuce-plant-some-frilly-fun-veggie-can-be-grown-in/article_2a856188-c725-5af2-960d-9fd1d89f4896.html

http://thefoxplot.com/tag/beekeeping/

Fall Equinox

What Fall Equinox Means for your Garden

by Sandy Swegel

Fall Equinox is upon us which suddenly spurs me to lament all the gardening I didn’t get done this year. In particular, I don’t have much of a winter garden growing. Am I going to have to start buying store-bought greens? I thought maybe I could outsmart Mother Nature by using row cover and soil heating cables to get some lettuces and kales going, but a farmer friend broke the bad news to me. Can’t be done. Sure I can get some growth. But lettuce and other greens are affected more by photoperiodism, than heat. Huh? I asked. She said Farmers know to get all their Fall and Winter plants going well before Fall Equinox because once the days start getting shorter, plants don’t grow as vigorously. (This, of course, doesn’t apply if you are further South where your days stay longer.) The farmer said I can get the lettuce to grow, but I won’t have the vigor and growth I need to provide myself with enough food for Fall into Winter. Lettuce is what they call a “long-day” plant. This is also the reason, more so than heat, that lettuce goes to seed in the middle of summer….because the days are long.

Who knew? Well, farmers and people who live off the land know. They start their winter lettuce in late summer.

Besides me, there’s another group of people who want to outsmart Mother Nature. Astronauts. One of the obstacles to living in space and inhabiting other planets is food. NASA has run food experiments on the Space Station for years, but now for the first time, astronauts are growing their own lettuces to eat instead of just to experiment on. What a treat for them instead of all those dried space foods.

Photo credit
http://collectspace.com/
http://gardenofeaden.blogspot.co.uk/2009/09/how-to-grow-winter-lettuce-from-seed.html


BBB Seed

Best organic heirloom vegetable seed

Wildflower Seed

Grass and Wildflower Mixes

Start your Seeds…Again.

Why You Need to Restart Your Seeds

by Sandy Swegel

This time it’s going to be a lot easier. You don’t need lights and cold frames. You don’t even have to use trays and little pots. You can start your seeds again and put the seeds directly into the earth.  You don’t need much time.  Seeds germinate in warm soil really fast. All you really do need this time of year is water.  Seeds you start mid-summer are at risk of germinating and then drying out, so you have to remember to sprinkle them daily and keep the soil moist.  But that’s about it.

  1. Why Start Seeds Now?

The least romantic reason is to Save Money.
The second least romantic reason is to Save Time.
The romantic reason is Beauty and Abundance.

Veggies


Lettuces. In most gardens, your lettuces and even spinach have bolted and gone to seed.  You’re probably trying to salvage individual leaves here and there, but they are pretty bitter because of the heat.  Seeding new beds will give you young sweet leaves and plants that will feed you well into Fall and even Early Winter.

Cold Hardy Greens.

The key to being able to eat out of the winter garden is to have big plants with enough leaves to feed you all winter.  Chards and Kale and Spinach seeded now will be big enough come to Fall that even in cold climates you can pile leaves on them and harvest from under the snow.  But you need big plants because come October and November the plants aren’t going to be re-growing much.

Peas.

Peas germinate and grow easily this time of year.  By the time they reach maturity, the chill of Fall nights will make them sweet and yummy.  In Colorado we kind of got cheated out of our peas this year because it became so hot so fast, the peas dried up.  But we have a second chance.

Root crops.

Carrots and beets planted in summer have time to grow to maturity and wait in the soil until cooling Fall weather turns them into sugar. As long as the ground isn’t frozen solid, you can continue to harvest delectable root veggies that taste much better than the spring and summer harvests.

Herbs.

Parsley and thyme are among the many herbs you can harvest all year.  Thyme can be frozen solid.  Even parsley that has frozen will plump and be bright green on warm sunny winter days.

Perennials

You know the adage about perennials. First, they sleep, then they creep, then they leap.  Perennials need their first year to establish roots and many don’t even make flowers until the second year.  Perennials that you seed now will still consider this their first year and then be ready to bloom next year.  If you wait until next Spring to plant perennial seed….you won’t get flowers until 2016.  Planting perennials is one of the most thrifty things you can do in your gardens.  Foxglove and lupines are both underused magnificent bloomers in gardens.  And they can easily cost $8 each in garden centers. You can have dozens and dozens of them blooming next year if you seed now.  All those flowers for cutting you’ve always wanted — daisies and echinacea and rudbeckia – they are simple from seed. One packet of seed will give you dozens and dozens of flowers next year.

So save an entire year of time by planting perennial seeds now. And save a bundle of money by growing your own perennials and by having greens you can pick from for the next six months.


Photo credit:  www.modernfarmer.com


Heirloom Vegetable Seeds

Wildflower Seed Mixes

Grass Seed Mixes


Five Perennial vegetables you only have to plant once.

Heirloom Vegetable Seeds

by Sandy Swegel

Two of my personal goals this year are Less Labor and Eat More Vegetables. Perennial vegetables are a great way to meet both these goals. Plant them once and year after year you can just meander out to the yard to harvesting whenever you are hungry.

Here are my must-have five Perennial Vegetables. They do best if you put them off somewhere in their own patch where they can spread. They also do well planted in a perennial flower garden where they are beautiful plants in their own right.

Asparagus. You know this one. Every Spring I wish I had planted more asparagus years ago. I could happily sit on the ground and just snap off all the tender growing tops and eat them raw. Asparagus is a gotta-have perennial vegetable.

Artichoke. Artichokes are such a winner. They are delicious and, if you let a few go to seed, they are beautiful. There are on the edge of perennial here in Zone 5 but a neighbor of mine throws a bag of leaves on hers in the Fall and they keep coming back.

Rhubarb. This is a standard in old-fashioned gardens. It’s very helpful if you also plant some strawberries so you can always have pie!


Greens.
There are so many perennial greens: Some of my favorites that are best in the coolers seasons of Spring and Fall are:
Arugula: These I cut to the ground in Fall and they come up on their own fresh and tender in Spring.
Sorrel: Put it in an out-of-the-way spot where it gets good moisture. Some shade is OK. Sorrel is pretty lemony, so not for everyone but it’s a lively addition to salads and soups. The red sorrels are great foliage in the flower garden.
Nettle: What? Touch those stinging plants? Young nettle leaves carefully picked with gloves on, are incredible in so many dishes. My current favorite is a Nettle Pesto served over angel hair pasta. Yum.
Almost-perennial greens include kales and chards that will keep coming back if you give them just a bit of protection in Zone 5.

Sunchokes, or Jerusalem artichokes. A perennial patch of sunchokes means you are never out of a potato substitute for dinner. You can harvest them all year round. If you are watching your carbs, sunchokes give you a vegetable with a substance that has a low glycemic index. Good for you if you have to watch your blood sugar. Sunchokes also grow into beautiful sunflowers! Food and flowers.
Want to know what perennial vegetables will do well no matter where you live in the world: This is an awesome “Global Inventory” of perennial vegetables created by permaculturist Eric Toensmeier


Photo credit artichoke: www.garden.org/plantguide/?q=show&id=3371

Photo credit sunchoke: www.motherearthnews.com/real-food/sunchokes-jerusalem-artichoke-tubers-zbcz1312.aspx

Ultimate kitchen recycling

Food Recycling Tips

by Sandy Swegel

Winter is going on and on. One day of sun and ice melt is followed by three days of cold and snow. I’ve been cooking a lot, trying to meet my need for gardening by preparing great food. One of the best things about cooking, from a gardener’s perspective, is that I’m making compost! But there is one more way to cheer up a snow-bound gardener and achieve kitchen recycling and that’s to regrow the vegetable scraps rather than just feeding them to the worms.

I first encountered the idea of re-growing food scraps from a children’s gardening book because it’s fun to do and a great way to teach kids about food and where it comes from. But this long winter, re-growing carrot tops and celery bottoms is also a great way to entertain the gardener yearning for Spring.

It’s super easy to regrow your scraps. You don’t even have to have soil, water works. Cute cups or plain bowls or recycled tin cans are good containers. And you just need the tiniest shaft of light to keep things green.

When you shop, choose:
Vegetables with roots (like green onions)
Roots with leaves (carrots, beets)
Whole plants (bok choy, celery or kale)
Fresh herbs (mint sometimes has little roots already growing)

When you’re making salad or soup:
Save inch stubs of carrots and onions. Carrots can go on a shallow bowl or plate of water. Onions can be put in a couple of inches of water in a juice glass.

Save two-inch ends celery or bok choy or an onion.


Growing your scraps is pretty easy
You want to put the roots in water and the top of the plant above water. Ideally, change the water every day so slime doesn’t happen.

As the food scraps grow, you can pot up the vigorous growers like celery and beet greens, and snip from the new growth all winter.

Remember, it’s your food. It should not only be yummy and nutritious and pretty. It should also be fun to play with.


Photo Credits
http://www.aboutone.com/kitchen-scrap-gardening/
http://www.theoldschool.com/motivate/tips/2013/propagating-beet-greens
http://www.missladybugsgarden.com/5/post/2013/02/regrowing-rather-than-throwing.html


Best Heirloom Vegetables

Wildflower seed mixes

Grass seed mixes