Cool Off Fast! – Agua Fresca

Agua Fresca Recipe

by Sandy Swegel

My basic remedy for hot July days is to bend over and run the hose over my head, but a more attractive and effective way to cool off is to make an Agua Fresca (refreshing water), the great fruit or vegetable drink of Mexico and other southern regions. I’ve been making Agua Frescas all weekend.

The Agua Fresca I first enjoyed from my friend Alfredo’s family was cucumber and lime juice.  Then one day we had watermelon Agua Fresca and I was in heaven.  Both were very cooling and refreshing.  What intrigued me most is that these were two of the foods my acupuncturist recommended to me.  TCM (Traditional Chinese Medicine) has diagnoses of “heat” in the body.  I often get this diagnosis and my doctor suggests three vegetables/fruits that are especially cooling to the body from a TCM energetic point of view…not just temperature:  Cucumber, celery and watermelon.  Turns out that ancient wisdom from TCM is the same as ancient wisdom from Mexican families. “Gotta love it” as a friend says.

There are lots of recipes on the web, but the concept is simple:

Blender 6 cups water 1 pound of Fruit or vegetable:  cucumber, watermelon are traditional. Also try melon, raspberries, strawberries, celery, herbs like lemon balm or basil or mint. Sugar (to taste) 1/4  to 1/2 cup.  Lime to taste. Run the blender to pulverize the vegetables or fruit and lime.  Strain if needed. Pour over ice cubes and add mint or cucumber slice or lime slice garnish.

Variations: Slushy:  Use only half the water. Run the blender a second time filled with ice cubes to get a slushy drink. Sorbet:  Make an agua fresca and put it in the ice cream maker for 20 minutes to make sorbet. Alcohol:  Rum, tequila or vodka added make excellent drinks or sorbets!

Stay Cool and Be Happy.

Photo credits:

http://www.williams-sonoma.com/recipe/raspberry-mint-agua-fresca.html

Going to Seed

by Sandy SwegelGoing to seed

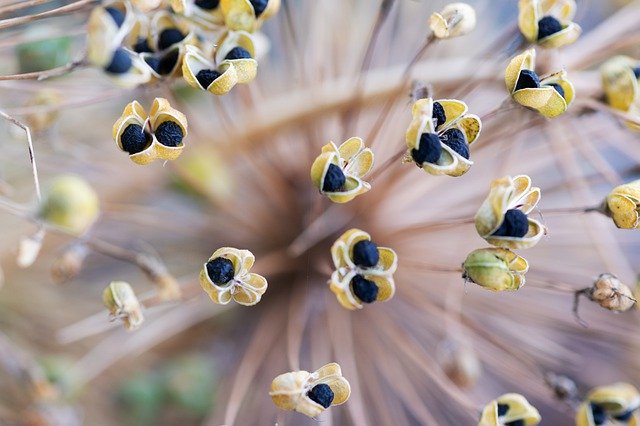
After weeks of rainy days, we were rewarded with a week of hot sunshine. This is great news for the tomatoes, but it means all those cool-season veggies started to bolt and are going to seed. When summer temperatures warm, all the cilantro and spinach, and lettuce put out lovely seed heads. That’s a sign there won’t be many more leafy greens growing but all the plants’ efforts will go into reproduction and making seeds.

Seed making in the leafy greens means the leaves are going to turn bitter. And once bitter, you never get the sweetness back on those spinaches and lettuces.

Now it is time to make some choices.  Gardening is always about choices.

There are early choices about what to plant.
Choices about whether to treat pests.
Choices about when to harvest.

You can yank the plants out and re-seed.

For us, that means big salads for dinner every night this week. We took out our harvesting knives and cut the lettuces and spinach to the ground. Lots of cilantro was done also…so an armload of cilantro greens will go into awesome pesto this week. Dozens of flat edible pea pods were plucked for salad and stir-fry. As the evening cooled, we sat around the outdoor table and watched the tomato plants put out more yellow flowers.

If you are growing your garden primarily to feed yourself, you need to harvest as the market farmers do.  When it’s time to cut kale, you don’t just take a few leaves.  You get your knife and cut that plant to within two inches of the soil.  That shocks the leafy greens and they immediately triple leaf production and you will get two more big harvests out of each plant.  Ruthless cutting produces more food.

Another choice is for beauty and generosity.  If you allow some of those plants to bolt and start going to seed, you end up with a garden that generously feeds the pollinators and butterflies and birds with flowers and seed heads.  The swallowtail butterflies ignored all the dill that I planted for them and instead congregated on one old parsley plant to lay their eggs.  Nature’s creatures have reasons for choosing that we don’t always understand.

With the rain this year, bolted lettuce is statuesque, four feet high, and visible across the yard.  Purple Merlot lettuce at this size is stunning next to the sweet peas.  The dill is taller than I am in the well-watered garden and surrounds all the tomatoes like protective warriors.  Yellow mustard flowers and white arugula flowers lean out across the walk begging to be nibbled.  Broccoli heads opening up into flowers are beguiling.

So once again you have a choice.  You can go out in the hot sun and tidy up your garden that’s going to seed and harvest the last of the good lettuces, or you can let Nature’s idea of Beauty run amok.

Tomato season is now on the way.  Life is good.

Why Cilantro will bolt

Why Broccoli will bolt


Ancient Wisdom from Women who Grew Vegetables

Buffalo Bird Woman

by Sandy Swegel 

I learned the story this week of Buffalo Bird Woman, a Hidatsa Indian born around 1839 in the Dakotas. She and the women of her tribe were the ones who did all the farming from breaking hard ground to heavy harvesting and transporting. Toward the end of her life, she gave interviews about how her people had farmed sunflowers and corn and beans, and how they preserved and even seasoned them. It was the work of women. Her stories always start with phrases like, “My two mothers and my sister and I went out to the field…” or “My grandmother Turtle would break the hard new ground with a stick.”

But Buffalo Bird Woman was also a scientist in her approach and gives detailed information about creating soil fertility (and softening the ground), about the timing and order of planting. Unlike the stories we hear of other tribes planting beans and corn and squash into single holes, the Hidatsas had an elaborate system that included sunflowers. They also planted in rows and pre-sprouted their corn and had a strict timing system.

Here was how you knew when to plant corn:
“We knew when corn planting time came by observing the leaves of the wild gooseberry bushes. This bush is the first of the woods to leaf in the spring. Old women of the village were going to the woods daily to gather firewood; and when they saw that the wild gooseberry bushes were almost in full leaf, they said, “It is time for you to begin planting corn!”

I think you’ll find it delightful to meet Buffalo Bird Woman. There is a children’s book based on her childhood called Buffalo Bird Girl.

There are even recipes for good warrior food like sunflower-seed balls.

Buffalo Bird Woman’s story of the practice of agriculture among her people is available free online at the Upenn digital library: http://digital.library.upenn.edu/women/buffalo/garden/garden.html

An interview with her was also included in the PBS series, The Sky Above Us.” http://www.pbs.org/weta/thewest/program/episodes/eight/tospeak.htm
At the end of her life, the practices of her people modernized into Western ways, she bragged:

I think our old way of raising corn is better than the new way taught us by white men. Last year, our agent held an agricultural fair… and we Indians competed for prizes for the best corn. The corn which I sent to the fair took the first prize… I cultivated the corn exactly as in the old times, with a hoe.
Buffalo Bird Woman


Five Perennial vegetables you only have to plant once.

Heirloom Vegetable Seeds

by Sandy Swegel

Two of my personal goals this year are Less Labor and Eat More Vegetables. Perennial vegetables are a great way to meet both these goals. Plant them once and year after year you can just meander out to the yard to harvesting whenever you are hungry.

Here are my must-have five Perennial Vegetables. They do best if you put them off somewhere in their own patch where they can spread. They also do well planted in a perennial flower garden where they are beautiful plants in their own right.

Asparagus. You know this one. Every Spring I wish I had planted more asparagus years ago. I could happily sit on the ground and just snap off all the tender growing tops and eat them raw. Asparagus is a gotta-have perennial vegetable.

Artichoke. Artichokes are such a winner. They are delicious and, if you let a few go to seed, they are beautiful. There are on the edge of perennial here in Zone 5 but a neighbor of mine throws a bag of leaves on hers in the Fall and they keep coming back.

Rhubarb. This is a standard in old-fashioned gardens. It’s very helpful if you also plant some strawberries so you can always have pie!


Greens.
There are so many perennial greens: Some of my favorites that are best in the coolers seasons of Spring and Fall are:
Arugula: These I cut to the ground in Fall and they come up on their own fresh and tender in Spring.
Sorrel: Put it in an out-of-the-way spot where it gets good moisture. Some shade is OK. Sorrel is pretty lemony, so not for everyone but it’s a lively addition to salads and soups. The red sorrels are great foliage in the flower garden.
Nettle: What? Touch those stinging plants? Young nettle leaves carefully picked with gloves on, are incredible in so many dishes. My current favorite is a Nettle Pesto served over angel hair pasta. Yum.
Almost-perennial greens include kales and chards that will keep coming back if you give them just a bit of protection in Zone 5.

Sunchokes, or Jerusalem artichokes. A perennial patch of sunchokes means you are never out of a potato substitute for dinner. You can harvest them all year round. If you are watching your carbs, sunchokes give you a vegetable with a substance that has a low glycemic index. Good for you if you have to watch your blood sugar. Sunchokes also grow into beautiful sunflowers! Food and flowers.
Want to know what perennial vegetables will do well no matter where you live in the world: This is an awesome “Global Inventory” of perennial vegetables created by permaculturist Eric Toensmeier


Photo credit artichoke: www.garden.org/plantguide/?q=show&id=3371

Photo credit sunchoke: www.motherearthnews.com/real-food/sunchokes-jerusalem-artichoke-tubers-zbcz1312.aspx

My Number One Secret for Growing Tomatoes

It’s All in the Soil

by Sandy Swegel

A local grower and I were chatting today about all the ways people grow tomatoes. My friend was laughing at somebody who had an elaborate setup with walls of water in the snow. I don’t necessarily use walls of water, but I understand our local Zone 5 competitions to have tomatoes by the 4th of July. The walls of water help warm the soil and of course, entertain the gardener.

There are many “secrets” to growing tomatoes. Some people put their hope in fertilizers and supplements like Epsom salt. Others do a lot of pruning of “suckers.” And there is no substitute for regular consistent water that doesn’t let the soil dry out.

But for me, the most important part of growing tomatoes is digging and preparing the hole you’re going to plant in. I generally plant little plants…2-1/4 inch pots…somewhere around May 15th. And I do believe in planting deep so roots can grow all along the stem. But back to the importance of preparing the hole you’re going to plant in.

My secret for growing tomatoes is a big humongous hole at least half full of compost.

Step One. Take a five-gallon pot (a bucket can work too) and dig the hole so big that the bucket fits completely in the hole. That usually means you have to keep going back and widening the hole to get the bucket all the way down. And it’s usually a pain digging into that subsoil. If the soil is very clay like, I loosen up the bottom and sides by slicing cuts in both for draining. I fill at least half the hole with finished compost. I put in some finished composted manure if I have it. I throw in some rather unfinished compost too. I mix in an organic fertilizer that includes phosphorus. I’ll also add any other goodies I have like kelp or alfalfa meal. Leaf mulch if I have some. I don’t mind if a worm or two ends up in there too. I then fill the rest of the hole with original soil and mix it well. I water it.

Only now is the hole ready for the tomato. I pluck off its lower leaves and plant the tomato up to its neck. I put the trellis or whatever support I’ll need now. And that’s it. I personally run a drip line with a timer since it’s so dry here and I don’t want my sporadic memory to sporadically water. I’ve done comparison tests year after year with people who dig holes only large enough to squeeze the plant in. They never get the number of tomatoes I get. My large composted planting hole means the tomato puts out a huge rootball that gobbles up all that good compost and fertilizer food produces a huge crop of tomatoes. If you only have a shovel-sized hole in the ground for your tomato, you only have little roots to feed the plant. If you don’t believe me, when winter comes this year, pull up your tomato and see how big your rootball is.

So if you want a lot of healthy tomatoes this year, take out your shovel and work up a sweat preparing that soil!

Photo credit:

World Tomato Society


Trellis like a Pro

Trellis Tips

by Sandy Swegel

My tomatoes are only a few inches tall and still indoors, but this is the ideal time to start thinking about how to trellis them.  For years I fiddled with the dinky round tomato cages sold everywhere that just fall over when faced with a large indeterminate tomato. One year I even tried tying two cages on top of one another and it still fell over.

Market Farmers don’t use wussy home-gardening-type trellises.  They bring out the T-Posts and plastic baling twine or string. (This is one time you can’t use natural twines like jute or cotton…they are too stretchy.) The most common technique is called the Florida Weave. Basically, you place tall (7 foot min)  T-posts at each end of your tomato row. Every two or three plants, add a stake (or another T post). You will then “weave” the twine around the T-posts and tomatoes in a basic figure-eight shape.  T-posts are super sturdy and stay put once you pound them into the ground.  Ideally, you can string the T-posts before the tomatoes are tall or perhaps even planted.  As the tomatoes grow you can tuck the growing edge into one of the rows of string. The beauty of the Florida Weave is that even if you are late getting your trellising in place, you can still do a pretty good job pulling up the overgrown tomatoes.

Photo Credits and More Info:

http://www.specialtycrops.colostate.edu/techniques/trellis.htm#tomatoes http://www.foogod.com/~torquill/barefoot/weave.html http://www.organicgardening.com/learn-and-grow/cat-s-cradle-tomatoes http://www.finegardening.com/how-to/articles/supporting-cast-for-tomatoes.aspx

Design Your Garden with Collages

Decorating Your Garden

by Sandy Swegel

The snow is still deep. Temperatures still below ten degrees. Seeds are ordered. Poppies and wildflowers were strewn on last week’s snow. Garden magazines are read. It’s starting to get hard to occupy the impatient gardener. My irritation with being bored is at about the same level as my neighbor’s 3-year old whose delightful need for attention and distraction sends her knocking on all the neighbor’s doors. Oh to be a pre-schooler again.

I’m past the age where I’m happy playing with crayons or Barbie. But as I watch the clever neighborhood moms coming up with a million games and projects to occupy snowbound children, I decided there was a way I could almost be a pre-schooler again. I could make a collage.

Only in the grown-up world, it’s not called a “collage.” It’s called a “visioning board.” The movie “The Secret” made visioning boards popular. I’m not too big on just having pictures of a perfect garden because, well, I know me. I’m never going to have a perfect garden. I’ll get too distracted by turning the compost pile or watching the bees or running off to do errands to get my garden perfect.


But a Garden Vision Board or Garden Collage is great for keeping track of new ideas and creating imaginary gardens. And all my pretty seed catalogs and magazines have perfect-sized pictures for cutting out small images of flowers and plants that I can paste on my board.

It’s easy to get started.
*Piece of paper, poster board or old cardboard. An old dry erase board and magnets work too
*Scissors (you’re grown up…you can have the pointy ones now)
*Gluestick or tape.
*magazines and catalogs.

So simple but the whole point of visioning is that the process does make your ideas happen. This year some of the favorite flowers or vegetable you collage with now will be growing for real in your yard or pots.

Collage Ideas:
Flowers. Everybody wants more flowers and more color in their yard. Gather pictures of your favorite flowers. Put pictures of flower arrangements so you can remember to grow those flowers.

Garden design. You can collect photos of designs you like. One day you’ll get around to it. My father collected pictures of gazebos for twenty years before he finally retired and had time to build one. I know I will make an herb knot garden one day.

Tweak your mature garden. If you’re ambitious with a printer you can print out a picture of your garden to use as the base of your collage and try out what flowers bring some added pizazz to the nice garden you already have.

Vegetable gardens. The preschooler next door has an electronic game that lets her plant carrots and tomatoes. She’s too young to know we used to design our vegetable gardens with pen and paper in the olden days. Gather pictures of your favorite foods.

Gardening Friends. Or you can just cut out pictures of bees and dragonflies and hummingbirds and all the other pollinators to remind you of your gardening companions.

Vacation Gardens. A collage of all the gardens I could have had if I hadn’t moved to Zone 5 Colorado. Bananas and tropical flowers.

Mostly, I’m collaging to have a little tactile fun and inspiration in the middle of a snowstorm. We have to remember that the reason we started gardening is that it’s fun and beautiful and creative. Not just work to be checked off a to-do list, but a place to nurture our spirit.

Photo credit: http://simplehomecraft.blogspot.com/2012/07/garden-collage.html
http://mamaslittlemuse.blogspot.com/2012/05/designing-garden-from-pictures.html

Cute food you gotta grow

Mini-Sweet Bell Peppers

by Sandy Swegel Oregano 952700-BBB

One of the new seeds we’re carrying this year ranks number one on my cute food meter and in my top three best and fastest cute appetizers. This wonder food? The little mini-sweet bell peppers sold in grocery stores in mixed bags of red, yellow and orange. They are wonderfully sweet and colorful. You can make an entire appetizer plate in less than five minutes if you stuff them with goat cheese or cream cheese.

Mini Sweet pepper appetizer recipe:
Slice peppers vertically. Fill with goat cheese, cream cheese or egg salad. Serve


Grilled Mini Sweet Pepper recipe.
Put peppers on a skewer. Coat with olive oil. 4 minutes each side of a preheated grill.

Are these easy and quick recipes or what?!

If you don’t have that much time, the mini-peppers are great for nibbling fresh just like cherry tomatoes or carrots. Chopped, they also make a plain lettuce salad beautifully colorful.

Fortunately, mini sweet peppers are also easy to grow. You need a warm growing season and you need to start the seeds indoors in most places, but peppers take up a very small footprint in the garden. They forgive you forgetting to water them. They love miserable hot sunny days. It’s easy to tell when they are ripe….you can see the bright red, yellow or orange colors from across the yard.

http://www.dadcooksdinner.com/2013/06/grilled-mini-sweet-peppers.html


Best Heirloom Vegetables

Grass and Wildflower Mixes


Best Free Seed Starting Container Ever

Seed Starting Tips

By Sandy Swegel

If truth be told, growing seeds and especially food is really just a hobby for me. I do it quite earnestly and often obsessively, but it’s not like I’m not going to eat if I don’t grow my own food. That has not always been true for my ancestors or for people around the world. If they don’t grow their own gardens, they don’t eat. And they don’t have extra money to buy fancy seed-germinating setups.

A great-grandmother I met described for me how she went about seed starting back in the Depression of the 1930s living on the plains in Colorado. It’s a method that she still uses because it works so well and costs nothing. In her retirement she lives in a city townhome and but she still gardens in big pots on her patio…and each Spring she has egg-carton trays full of eggs with seedlings on her windowsill.

We’ve often heard of putting potting soil right into egg cartons. But if you plant right into the eggshell, you don’t end up with broken soggy cartons…and you putting calcium right into the garden where you need it. People who keep earthworms know that earthworms need calcium for reproduction. Eggshells in compost and in the soil make for more earthworms and better soil.

It’s super simple to start your seeds in eggshells. Save some egg shells. You’ll want to rinse them out or you’ll get that nasty sulfur smell if you leave old egg inside. Use a pin to pierce a hole or two in the bottom. Fill with some clean potting or germinating soil. That’s it. Absolutely free. Put the eggs into an egg carton on a bright warm windowsill. The eggs keep moisture in much better than the carton would. When it’s time to plant just crumble the base of the eggshell right into the garden before planting.

I sometimes get the clear plastic egg cartons. Those are really useful because the closed plastic makes a great tiny greenhouse.

You already know how to save money if you’re growing seeds. Growing from seed means each plant costs you pennies instead of dollars when you buy plants. Now you don’t have to pay for the seed containers either.

And if you time it right, you can have super cute eggs full of tiny seedlings for table decorations.


Photo Credits

http://foodstorageandbeyond.com/2011/03/feature-friday-eggshell-seed-starting-pots/

Best Heirloom Vegetable Seed

Wildflower Seed

Wildflower Seed Mixes

Grass Mixes


Gratitude for a Holiday Feast

How to Be Grateful for Delicious Food

By Sandy Swegel

One cannot but be overwhelmed by gratitude at holiday tables made with so much scrumptious food. In this age of “spiritual, not religious,” it can be hard to say “Grace” in a way that includes everyone. Yet gratitude leaps from us as we stand before splendid banquets.

Speaking in praise of food or of the Earth which yields such bounty is a safe communal prayer that we all understand. We who garden know the hard work and miracles that have to happen to bring food to the hungry. We who cook know our gift is not just in making food edible but in making it sing with flavor and color. We who shop know food often comes from far-off fields, from people who may not speak our language but who know the language of plants. As you prepare for your holiday feasts, be ready to sing gratitude for the food, for the soil and rain, for the seed companies, for the growers, and for all the middle people–the truckers and stockers and cashiers–who worked together to make your table abundant.

My inspiration for a holiday “Grace” has started with a poem fragment from Stephen Levine.

The Salad. (Excerpt)

“There are truths among the frilly lettuce and the slick tomatoes; even the adzuki bean has its point of view. The truth apparently was born in the salad. Or maybe it was there before we started.”

— “The Salad” from Breaking the Drought by Stephen Levine


Photo credit:

www.abetterbagofgroceries.com/

www.crosscards.com