Herbs for the Bees
Feeding Bees
by Sam Doll
Bees are responsible for at least one-third of our diet! Since these busy little creatures are so important to the food we eat, we thought it would be nice to spice up their diet (as well as ours) with some ideas to make a bee-friendly pollinator garden!
Here are a few herbs that you and the bees will love to eat this summer
Sage:
Great for giving that classic flavor to meats and, if you are daring, can be a great addition to some classic adult beverages (check out this Sage Bee’s Knees Cocktail). Sage is a hardy perennial that loves well-drained soil and lots of sunshine, which means it does great in a container. This herb also preserves its flavor past flowering, which means it can feed you and the bees at the same time!
Lemon Balm:
A perennial herb native to the Mediterranean, with a wonderfully gentle lemon scent in the mint family. The fragrant, inconspicuous but nectar-rich white flowers will attract honey bees. Leave the blooms for the bees for a couple of days, then trim them off to prevent self-sowing. Lemon Balm is often used as a flavoring in ice cream and lemon balm pesto and in herbal teas. Use the fresh leaves in chicken or fish dishes as well as with fruit and fruit juices. The same goes for any member of the mint family (peppermint, spearmint, and catnip included). Basil: Sweet, Thai, cinnamon, lemon, lime, purple, and Christmas are just a few of the basil varieties available to you. Basil is a versatile and easy to grow herb that originated in tropical Asia and has been cultivated for thousands of years. This warm-weather annual has a refreshing, aromatic flavor that makes it a classic ingredient of many Italian and Southeast Asian dishes. Try using it in a classic Thai basil Soup. Make sure to trim the flowers before they go to seed to prevent the flavor from changing.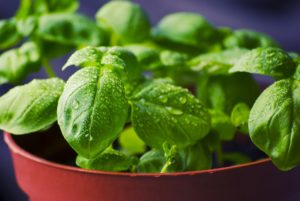
Thyme:
An easy-to-grow, drought-tolerant herb used to flavor food, as an antiseptic, and in essential oils. The leaves of this warm, pungent spice that can be used fresh or dried in many dishes, marinades, and sauces. For an easy dish, try this oven-roasted potatoes and carrots with thyme recipe. Thyme will attract both bees and butterflies!
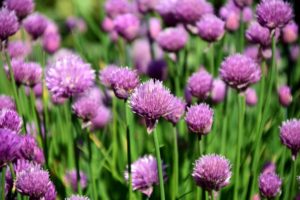
Chives:
The surprisingly beautiful chive blooms are as tasty to the bees as they are to us! The blossoms are oniony and spicy. They are often used to make chive blossom vinegar, which is often used in salad dressing, or just can be chopped up and added to any savory dish for some flavor and color!
Lavender:
The most timeless and versatile garden flower around, lavender flowers and leaves can be used in everything from homemade cosmetics to confections. It is especially nice to use in a simple, homemade sugar scrub. The blooms are perfect for attracting all the neighborhood honeybees.
Other great pollinator-friendly herbs are bee balm, chicory, dill, fennel, hyssop, and rosemary.
If you want to get your herb garden jump-started, check out our Essential Herb Garden Collection
