Tag Archive for: Vegetable Gardens

Don’t Pass On Peas

Tips for Successfully Growing Peas

by Heather Stone
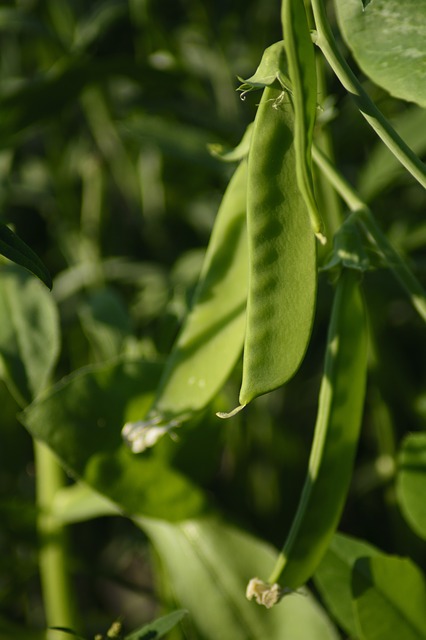
Green Sugar Snap peas on the vine.

Image by Reginal from Pixabay

Plant Green Peas for one of the first crops in the spring. As soon as you can stick your finger into the soil you can plant peas. Whether you plant shelling, snap or snow peas this early crop loves the cool weather of spring, producing tender pods that are hard to resist.  More often than not, they are eaten straight off the vine right there in the garden, very few making it to the kitchen. Every year I always wish I would have planted more.

Planting green peas should happen as soon as the soil can be worked, about 4-6 weeks before your average last frost date. For best germination, soil temperatures should be around 50 degrees F. Do be cautious of excess moisture. You don’t want your seeds sitting in wet soil.

Before planting, soak your seeds overnight. This will help speed germination. Plant seeds about 1” deep and 2-3” apart in well-loosened soil in a sunny spot in your garden. Peas will also do well in part shade. Give your peas a trellis, as most peas need something to climb on. Keep the area moist until the seeds germinate, on average between 7-14 days.

Green Peas are an easy crop to grow. Keep the plants moist, especially once they start producing. When they reach 8-12” tall mulch your vines well to keep the soil cool and help retain moisture. Peas grow best in temperatures below 70 degrees F, so plant your seeds early. Once temperatures reach 80 degrees the vines tend to stop producing.  

When the peas begin to ripen, harvest daily and be sure to use two hands to pick. Use one hand to hold the vine and the other to pick the peas. This way you will avoid damaging the tender vines. For the crispiest peas, pick in the morning after the dew has dried. Peas will last about 5 days in the refrigerator (if they make it there) and any extra freeze well.

Like all legumes, peas fix nitrogen in the soil that other plants can use. When your peas are done for the season, remove the vines but leave the roots in the ground. Plant a nitrogen-loving plant in the area that can benefit from the extra nitrogen in the soil.

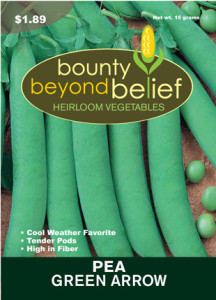
Don’t wait! Get out in the garden and plant some peas today! Try one of our tried and true varieties such as Sugar Ann, Oregon Sugar Pod or Green Arrow.
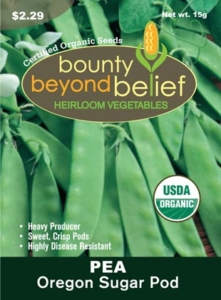
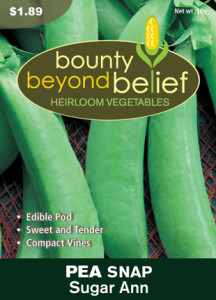
Packet of Oregon Sugar Pod Pea seeds. Pea, Sugar Ann Pea, Green Arrow


DREAMING OF SPRING

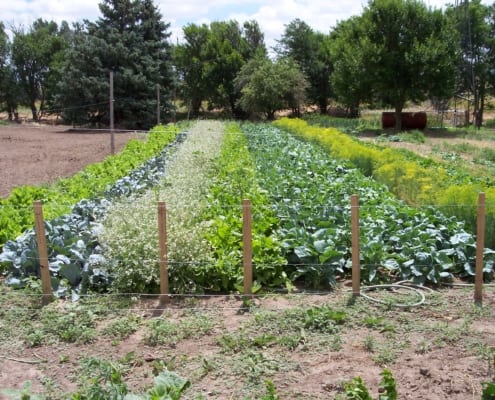
Plan your vegetable garden. Rows of Vegetables in a Garden.

Plan your vegetable garden!

By Engrid Winslow

Yes, it is still very cold and very dark but nothing fills the heart in the dead of winter than planning for spring. What should you be doing now that will keep those spirits up? Plan your vegetable garden and herb garden!

1. First of all, take a look at those vegetable and herb beds and decide what and how many varieties you want to plant next year. Do you want to start those peppers a bit earlier this year? Did you plant tomatoes there last year – rotate tomatoes every 3 years if at all possible to avoid depleted soil and issues with many diseases. What do you want to grow more of this year? Anything you want to try that’s new? What did you and your family really love? Want more tomatoes or basil for pesto or tomato sauce? [4 Tips For Keeping Your Basil Productive and Pesto Secrets] Were there any epic fails? Maybe it’s time to move on to buy those at your local Farmer’s Market and devote the precious real estate to something else.

2. Speaking of soil, this is a great time to start adding mushroom compost in a nice thick layer that can work its way into the soil during late winter freeze and thaw cycles and heavy periods of moisture. You can also cover the compost with a layer of seed-free straw that was grown organically.

3. Peruse the seed catalogs and websites. It is so fun to read those descriptions and they all sound wonderful but be aware of your space and climate when choosing seeds. Take stock of any seed that you saved from last year and organize and assess any leftover seed packets. Seed viability goes down over time. Onions, corn, parsnips, parsley and leeks should be refreshed every year, but tomatoes and lettuce can go 4-6 years and still germinate. Check out these charts if you have questions: https://hortnews.extension.iastate.edu/1999/4-2-1999/veggielife.html/

and http://ottawahort.org/wp-content/uploads/2017/02/Seed-Viability-Times.pdf/

4. Gather up your seed starting supplies and order more if needed. Dust off those grow lights, check the heat mats and make sure they still work and clean any seed starting containers that you plan to re-use with a weak bleach solution. Again, assess what worked and what didn’t in prior years. Did lettuce seeds that were direct-sown in the garden elude you? Try starting them indoors under a plastic dome which helps retain moisture until they are fully germinated.

5. Did friends and neighbors share anything they learned with you? Maybe it’s time to get everyone together for a Happy Hour, swap saved seeds and talk about their gardening experiences.

6. Review past blogs, books and articles that you might have saved for ideas, tips and new information. Here’s a good place to start: Care and Planting of Seedlings, Rules You Can’t Break, and Two Ways To Guarantee Your Seeds Grow

Preserving Foods

Food Preservation

by Rebecca Hansen

Many of us have tried our hands at the new Victory Gardens and are getting back to our roots in our community’s Grow Local movements.  With the flow of garden produce increasing each minute, we have donated excess to the local Community Food Share programs and, we are beginning to be mildly panicked at the thought of all of that fresh produce going to waste solely because we can’t use it fast enough.

With our neighbors slamming their doors when they see us heading their way with an armload of our best organically grown zucchinis we find ourselves wishing the bounty could be spread out over the year and last well beyond the late summer flush.  More and more people are turning to home food preservation as a way to keep the bounty of their hard-earned, organic, heirloom, non-genetically modified gardens coming.

Now is the time to start your research, before the tidal wave of tomatoes sweeps you away. The number of food preservation methods is exciting and a bit daunting.  Drying foods is one of the oldest methods of preserving foods. Also, canning, freezing, pickling, curing and smoking, and fermenting are ways to keep your pantry full during the winter.

What could be more fulfilling than pulling out a sparkling jar of homemade salsa when the snowflakes are flying to bring back warm memories of those beautiful heirloom tomatoes growing on the vine?  CSU Extension has a couple of great publications on how to dry vegetables and fruits with all that you need to know about nutritional values, methods and safety precautions.

Also in the extension’s Nutrition, Health and Food Safety publications, are fact sheets on smoking and curing meats and making pickles and sauerkraut and preserving without sugar or salt for special diets.  Check out the one on safe practices for community gardens for tips on ensuring safe food for all gardeners.

With all of our efforts to ensure that we each have gotten the most nutritious value from our fresh produce, it would be prudent to search for the newest scientific research into home food preservation methods.  We want to eat healthy fruits and vegetables even when they are not in season.  The USDA encourages us to use safe canning methods. Scientific developments have changed recommendations over time. Always use up-to-date methods and do not just rely on the practices of past generations.  A great place to start is by exploring the National Center for Home Food Preservation website from the University of Georgia.

Publications and resources are available at the center’s website with useful tips for proper preservation techniques.  Also, not to be missed is an awesome, free, online self-study course called;

  • Preserving Food at Home: A Self-Study
  • Principles of Home CanningIf you are new to canning you should definitely have this publication at hand.

Preserving homegrown food can be an economical and fulfilling way to enjoy quality, nutritional food from your garden all year long.  So when your heirloom tomatoes, squash, onions, peppers, beans, garlic, beets, and turnips cover every surface in your home and garage and the refrigerator is brimming with more fragile produce, you will be fortified with the knowledge necessary to safely preserve the bounty for the time when the snowflakes will inevitably fly.


Pumpkins, They’re not just Decorations!

What You Need to Know About Cooking Pumpkins

by Sandy Swegel

I thought I had a great bargain when I found organic butternut squash at the grocery today for only $.99 per pound.  I was in definite sticker shock when the squash rang up over $4.75.  Well worth it for high-quality food of course, but suddenly, all those pumpkin and squash decorations I’m seeing around town look like they ought to be food for me and not just for the squirrels.  My neighbor starts cleaning up after holidays the minute the holiday is over…so on November 1st I loitered in her driveway and offered to carry off that large uncut pumpkin she had decorated the front porch.  At .99 cent/pound, it was at least a $25 value.

There are lots of ways to cook pumpkin, but like most winter vegetables I find roasting makes the flavor sublime.  I decided to cut the pumpkin in thick slices as I’ve heard they do in France, marinate the slices in olive oil and rosemary, garlic and oregano, and roast in the oven for 45 minutes or so.  Just as yummy as the butternut squash I cook that way. And free!

Once I started prowling the web for French recipes for pumpkin, I found what I will do with another big section of that pumpkin:  French fries. Well, officially they are called “Chips de Citrouille.”  A traditional French recipe has you them in milk, dredge them in flour seasoned with salt, and deep fry in a cup of oil for two minutes per side.  You can make lots of variations without gluten or even bake them instead. http://www.traditionalfrenchfood.com/fried-pumpkin-slices.html

Yum. Now what to do with a big pile of pumpkin seeds!

http://www.yumsugar.com/Fast-Easy-Pumpkin-Fries-Recipe-12010370

End of the Growing Season

How Our garden Holds it Own in the Snow

by Sandy Swegel

We had our first big snow…just six inches but very cold and wet followed by more snow and below freezing temperatures so one might easily assume the vegetable garden is done for the year.  It certainly looks forlorn outside my window.  But fortunately, Nature is kinder than that.  For reasons I can’t quite fathom, lettuce that freezes if it’s too far in the back of my refrigerator can handle quite a lot of extreme temperature especially when it’s well insulated by snow.  I expect that when the sun returns in a couple of days, I’ll be able to brush away any remaining snow and harvest excellent crispy sweet lettuce.  Hardier greens like spinach and chard can even be exposed to the air and frozen solid at 8 am but then be perfect and ready to eat by noon with a little mid-day thawing.

The warm season plants like basil and tomatoes have no chance in the cold.  Basil turns brown below about 35 degrees.  Tomatoes don’t taste nearly as good once night time temps dip into the 30s.  Squash leaves croak right at 32 although sometimes the ambient heat from the ground will keep the pumpkins and winter squash edible even though the air is freezing.  Still, the warm season plants are done. Corn on the cob is a memory held by the dried stalks turned into Halloween decorations.

The root crops are another story.  Carrots and beets improve with each freezing night.  As long as you can pry root crops from the freezing ground, you’ll be rewarded with intense flavor and sweetness that improves even more if you roast the vegetables with some olive oil. Many a picky eater who refused to eat turnips or rutabagas, finds November turnips roasted with rosemary and thyme to be irresistible.

It may be the end of the growing season….but the eating season has just begun!

Heirloom Tomatoes 2012

Picking Your Favorite Tomatoes for the Year

by Sandy Swegel

What were your favorite tomatoes this year?  Or should I say who were your favorites since we do have relationships with our plants!

We had a killing frost so it is officially the end of the tomato season, although just the beginning of the “what to do with green tomatoes” season.  My neighbor, Leah Bradley, is a gifted local artist who works in oils and had an Open Studio yesterday. What a delight it was to walk into a room full of paintings of heirloom vegetables.  Tomatoes everywhere and vivid kales, eggplants and pears. Even gnarly tomatoes that had viruses and blights this year were remarkably beautiful seen through her eyes.

There were lots of tomato diseases this year, so be sure to clear all that diseased foliage out of your garden beds and into the garbage (not back into your compost).

Who were the garden award winners in your heirloom tomato category this year?  Some of my buddy gardeners have been voting for Juliet, Red Beefsteak Heirloom, Brandywine, and Sweet 100 Cherries.

It’s Always a New Beginning for Gardeners.

What To Start Now

Thinking about the beautiful creation stories explored in the services of the eve of Rosh Hashanah that our Jewish friends celebrated yesterday reminds me that for the gardener, things are never really at an end.  There’s always something new to begin in the endless cycles of life.  Whether it is Rosh Hashanah or the upcoming Autumn Equinox or any of the lunar celebrations, every culmination or harvest is also a time to begin something new.

The need to keep beginning is especially true for the food gardener, especially if you want to keep eating.  It’s always a new beginning for gardeners, so many foods are dependent on seasons – cool season, warm season.  It may seem with the great ripening of tomatoes that the vegetable garden is complete this year, but if you want to keep eating, you need to keep planting: cool season crops, lettuces, sturdy greens that you can eat on all winter.

Some of the things it is time to begin:

Begin a hoop house or cold frame.
If you haven’t already seeded fall greens or carrots and beets, make haste and do it right away.  They need to grow to a good size before winter, so you can harvest even through the snow.

Begin a leaf pile.
Are you ready for collecting fall leaves and beginning again (or adding to) your leaf mulch pile?  Leaves are going to fall….and if you’re ready, your neighbors will bring you all the leaves you want.  A simple sign in your driveway that says “Bagged Leaves Wanted”  will catch the attention of your neighbors who want an easy way to recycle.  Our neighborhood gets over 2000 bags a year that people drop off.  The first year was only about 300 bags….but each year it has grown till we quit counting after 1000 or so.

Begin to fertilize perennials.
If you fertilize with natural fertilizers like blood and bone meal, now is a good time to begin fertilizing perennials and shrubs.  Natural fertilizers break down slowly so Fall is the best time to put them (and compost) out around your plants so they have time to soak in all winter.  Synthetic fertilizers like Miracle-Gro should wait until Spring because they’d stimulate a growth spurt now when the plants should be shutting down.

Begin to clean up.
Start cleaning up diseased leaves and broken plant debris.  Your plants will be healthier next year.

One thing NOT to begin:  Don’t cut down green growing plants because you’re anxious to put the garden to bed.  Some minor experiments have proven to me, that plants that are allowed to die in place and get cut down in later winter or early spring have a better survival rate than plants that get cut down in Fall.  This is especially true for Agastache one gardener I know discovered.

Begin to plant a TREE!
A REALLY IMPORTANT THING TO BEGIN NOW:  Plant a tree.  There are often healthy trees on deep discounts at garden centers.  The best time to begin a tree in your garden is always RIGHT NOW.

Get Your Diseased and Gnarly Tomatoes OUT!

Saving Your Garden

It’s August and hot, not the most fun time in the garden, but you’ve got to get your diseased and gnarly tomatoes out and EVICT all the diseased and dying stuff out of your garden.  You’re not doing for this year’s produce…you’re doing to save your garden next year.

In Colorado with our warm winter and early hot Spring, we are inundated with pest problems.  Most on our minds today is the spotted wilt virus on tomatoes which makes pretty concentric circles on the tomatoes, but leaves the fruit tasteless and mealy…and kills the plant long before frost.  As depressing as it is to toss plants you’ve nurtured since they were just baby seeds, they’ve got to go. They aren’t going to get better and the virus will just get spread around your garden.

So get out there with your wheelbarrow and do some decluttering.

Tomato plants with spotted wilt virus or mosaic virus or even some nasty blight:  OUT! And not into your compost pile…they go right in the garbage.

Other plants with serious disease problems:  OUT!  You’re never going to eat those gone to flower broccoli covered with powdery mildew.

Weeds that have grown four feet tall when you weren’t looking are now going to seed.  Somehow huge prickly lettuce and thistles keep appearing out of nowhere with big seed heads.  OUT!

It won’t take long to clean up the big stuff….this is one of those 15-minute projects.  15 minutes now will make a huge difference later. 15 minutes now gives the good healthy tomatoes more light and space and water to make lots of fruit before frost.  15 minutes now means you pull all the diseased fruit and leaves out easily now instead of trying to retrieve dead rotting fruit and diseased leaves after frost has caused leaf drop.

And while you’re at it:  those big huge zucchini bats:  OUT.  Pull ’em off the plant so that nice tender young zucchinis can grow.  You’re just not likely to eat as much giant zucchini as you’re growing.  Let go of the guilt and send them to enrich the compost.

Ignoring what “they” say.

Keeping An Open Mind

by Sandy Swegel

I visited a garden yesterday tended by my friend Lou.  Lou has gardened for other people for many years and the heavy shade garden I visited has lots of color despite being in shade and the fact that we’ve been in high temperature, drought conditions.

As we walked around and she told me some of the secrets of the garden’s success, I found myself thinking, “But “they” say not to do that.”  Things like “they” say native plants don’t want rich soil and shouldn’t be fertilized like other garden plants.  Hah. Her well-fed natives were twice the size of mine.  Or “they” say dahlias don’t do well in shade and need full sun.  She had twenty magnificent blooming dahlias that begged to differ.  And she used all kinds of plants the opposite of what the labels say:  Euonymous species, sold as shrubs, were tough interesting reliable groundcovers when kept short by pruning.

My favorite gardeners have always been the ones ignoring what “they” say and think about what might actually work.  My first experience was an older gentleman who had grown tomatoes for 70 years by the time I met him.  He had tried all the tomato techniques I ever heard of.  “Epsom salts,” he guffawed…”don’t do a thing except make the tomatoes taste salty.”  “Water has to be consistent.”  He had watered every day with soaker hoses since they had been invented.  So as I watched him fertilize, I expected some down-home advice.  Instead, I watched in horror as he just spooned tablespoons of dry Miracle Grow crystals right next to the tomato stem.  “But, but…” I stammered, “Aren’t you going to burn the plants and kill them?”  Nope….they just got watered in slow-release-like with each soaker hose watering and he had the best tomatoes in town.

That still didn’t match the shock of watching my friend Barbara.  She definitely walks her own path and is agreed by all to be the best gardener we know.  She never fertilized with fertilizers. She composts and mulches and puts goat manure and earthworm compost on everything, but she has never bought a bottle of something and put it on her yard. Geraniums bloomed in containers for fifteen years with only compost and maybe grass clippings in the bottom of the pot for the earthworms to eat. The most startling part of watching her garden was that she never treated pests.  Sawflies came two years in a row and ate every single leaf on her six-foot-tall gooseberries. They looked terrible.  She made sure the plants were watered and had lots of compost, but said the plants needed to figure it out if they wanted to survive. It was up to them to figure out how to defend themselves.  She just made sure the garden environment was good.  To my amazement, the plants survived and put out new leaves, and the third year the beetles didn’t return.  Who knew?

I still do lots of things “they” say because much is based on someone’s research and experience.  But I keep an open mind. Every time somebody gives me a lecture about the right way to garden or what “they” say I should be doing, I ask myself, “Who is this ‘they’?” “And who gave them all the power?”


Squash Bees

Checkout These Wild Pollinators

by Sandy Swegel

My friend and local pollinator expert Niki fretted greatly this Spring because there weren’t any bees in her yard.  She grows her native plants and large vegetable gardens in her yard that is surrounded by typical perfect looking suburban lawns. Despite her pleas with neighbors, they maintain suburban perfection by pouring pesticides and synthetic fertilizers on their lawns, and over time, the bee count in her yard has dropped precipitously.

But there was no fretting during a recent tour of her garden.  There were still very few honeybees but the garden was abuzz with many native bees and native fly pollinators.

Niki eagerly led us over to her huge squash patch.  She did the usual humble gardener thing of apologizing for her garden and how poorly the plants were doing.  Naturally, her plants were double the size of anything in our yards. We walked right into the squash bed as she gently lifted a giant leaf so we could see…a “Squash Bee.”  With great animation, she described how one bee comes early in the morning and throws itself completely over the pollen…and then proceeds to eat all day long.  This bee seems oblivious to us and looked like it was lounging in its own little opium den, covered in pollen and eating as much as it could. Niki lowered her voice and said, “Sometimes there are two bees.”  The male comes first and then is joined by a female…and the two of them spend the day in a frenzy of mating and eating, mating and eating (she watched). Once they finish one blossom, they moved to the next one.

There are two genera of native squash bees, Peponapis and Xenoglossa, and they are specialist bees. Cucurbits are all they pollinate.  And they are very resourceful and start pollinating earlier in the morning before the honey bees are even awake.  So take a look under your leaves one morning and peer deep into squash blossoms.  In areas with healthy squash bee populations, there can be as many as one bee per every five blossoms.  Another marvel of the natural world….hidden in plain view before us.

Of course, while you are peeking under giant squash leaves, don’t forget to look for that pest of the squash kingdom…the squash bug…and pick it off and throw it away.

The International squash bee survey: http://www.ars.usda.gov/Research/docs.htm?docid=16595