Sharing plants is a simple joy in life. Sharing plants and making money, well that’s even better. Read on to learn how to share your plant starts for profit.
My happy group of gardening buddies first got to know each other because of our great avarice for more seeds. We had all joined a local gardening email list so we could talk more about plants and gardening, but the more we spoke with each other, the more seeds and plants we wanted. Every time someone mentioned a new variety of tomatoes or annual flowers or ground cover, we had to have one of those.
The first year, we decided to meet in person and share seed packets. Armed with dozens of recycled envelopes, we doled out tiny seeds to each other, taking home three Cherokee purple tomato seeds or six cosmos seeds. This quickly became confusing and chaotic and required so many tags in our seed trays. So the next year we decided to become more economical. We’d each buy a packet of seeds and grow out all the plants…and then swap our plant starts. We definitely got more plants than we would have grown on our own and we each had unusual varieties you can’t buy in stores.
But the third year of our avarice proved to be the year we figured out that we could get as many seeds as we wanted…and they practically paid for themselves. All we had to do was start our seeds and sell 2-month-old plant starts to each other and to the other greedy gardeners who envied our ever more diverse gardens. We learned that anyone can sell healthy organic heirloom tomato starts, especially if you have pictures of last year’s garden.
You can try your own mini plant exchange and sale. We price our seedlings cheap ($1 or $2 at most). I can afford all the heirloom tomato plants I want if I just sell three seedlings for $1 from each seed packet. Throw in some herbs and flowers and soon the plants barely fit in the car. Our little group now has a giant plant sale every May where everyone brings their plants to sell to each other, but thanks to free advertising on Craigslist and neighborhood electric poles, we also sell our humble little plants to the public.
Avarice never ends, of course, and now we have to grow more plants so we can make money so we can afford backyard greenhouses. Last year our small group of about 12 home gardeners sold some $4000 worth of plants that they started in closets and on top of refrigerators just two months before. Not enough to get rich, but enough to buy more seeds, build hoop houses and season extenders, and have a load of precious organic sheep manure delivered to our gardens.
So enjoy your seed shopping and think about swapping some of the plants you start with others. We learned that while there is no end to avarice among gardeners, there is also no end to generosity. It is a great joy to have an abundance of little plants to share with friends and strangers.
https://bbbseed.com/wp-content/uploads/2026/01/47710_BBB_Logo_HiRes_Transparent_1023-01-removebg-preview.png00konabirdhttps://bbbseed.com/wp-content/uploads/2026/01/47710_BBB_Logo_HiRes_Transparent_1023-01-removebg-preview.pngkonabird2022-11-18 18:14:002025-06-23 14:54:40How to Share Your Plant Starts for Profit
What are “heirloom” vegetables? An heirloom vegetable is a non-hybrid, open-pollinated variety that has been passed down from generation to generation and, in some cases, can be traced back hundreds of years. These seed lines have been carefully selected to maintain uniformity and consistency for germination.
Heirloom seeds become ‘heirloom’ because they exhibit exceptional traits desired by the gardener. Often this means the plants are more colorful, flavorful, and unique, or have great germination and vigor. Often the traits are location-dependent. Meaning, seeds planted in one garden will not produce in the same manner in another location. We encourage you to try heirloom seeds, see which have the qualities for your area to become your favorites and make them into your own very special seed line. Seed saving from heirloom vegetables is easy and fun.
Gardeners have found that as seeds are selected and saved over many years, production is increased and the quality is improved, creating plants that will produce best for that locale and will resist diseases and pests of that locale. Contributing to genetic diversity strengthens the ecosystem. Historically farmers and local gardeners have created and sustained this rich genetic heritage by learning to save their own seeds from varieties that perform best in their own mini-ecosystems. The current trend toward mono-crops where only one seed type is used to produce a crop worldwide is eliminating the ability to be able to find genetic variations that will withstand emerging pathogens and climate changes.
Planting your crop:
Start with good Heirloom Seed varieties. Keep in mind that to allow the plants to produce seed and to allow the seed to fully mature, you will have to allow for a longer growing season. This can be done by starting plants indoors and arranging for protection from frost in the late season. You will grow some for food or flower harvest and some for seed production. Fully mature seeds will be viable (able to germinate) and produce vigorous plants. You may want to do some research on the different flower types for proper pollination techniques and plant with row/species separation in mind, to prevent cross-pollination.
You also may look into caging procedures to isolate species that are in flower at the same time. By caging different plants on alternate days, you can take advantage of the pollinators to do the work without cross-pollinating your crop. Cage one plant or group on one day and early the next day, before the bees wake, transfer your cage to a different plant or group. Some crops are biennial and do not produce seed until the next year, so you will need to determine whether you should leave the roots in the ground over the winter or dig and store them.
There are many publications with detailed information on seed-saving and growing techniques for each species. “Seed to Seed” by Suzanne Ashworth, 2002 by Seed Savers Exchange, Inc. is a good way to get started. Also, check out these easy instructions for seed saving, written by the International Seed Saving Institute, a non-profit established to teach seed saving.
Why save seeds:
When you grow crops using your own saved seeds from your best plants for next year’s crops, the seeds begin to adapt to the growing conditions (temperature, moisture levels, pests, diseases, and so forth) that exist in your garden. This adaptation makes your garden stronger over time. Seeds that are used to grow crops year after year have the opportunity to adapt to incremental climate changes. As global temperatures change, these plants will have a better chance at survival and productivity. A single plant from a single seed can produce dozens or hundreds of seeds, increasing your seed stock exponentially. Sharing and exchanging seeds with other gardeners, community gardens or seed libraries helps to increase the diversity of everyone’s collections.
Harvesting and collecting seeds:
When saving seeds from heirloom vegetables, look for favorable characteristics such as; freeze and cold tolerance, heat tolerance, adaptability, winter hardiness, early maturation, vigor (strong germination, and growth), flavor, color, size, texture, etc. Also, look for desirable traits such as; vine or plant type, seed type, and specific disease resistance. Plan to be ready to harvest the seed as they mature.
– Collecting dry seed:
It’s easy to save seeds from plants that produce pods, husks, and other dry casings such as peas, beans, and flowers. The technique is called “dry processing” and is faster than collecting seed from fleshy, pulpy fruits such as tomatoes and cucumbers. Seeds that are dry-processed can be allowed to dry right on the plants unless there is wet weather in the forecast. Seeds often fall where they may, naturally, little by little. Often the pods will pop open when you are not around to collect the seed and it will be lost. Allow the seed pods to remain on the plant in the ground for as long as possible. Usually, the seed will not continue to mature after the pods are cut from the plant. To collect the seeds easily as the seeds begin to mature, secure paper bags over the seed heads and attach them to the stems of the plants. As they mature they will drop into the bags.
Separating the seeds from the chaff (dried pods and stems) is called threshing. Commercial threshing is done by multitasking machines that can harvest, thresh, and winnow the seeds all at once. For the home gardener, a bag, pillowcase, or small sack is all that’s necessary. Put the seeds into the bag, secure the ends, and roll it around, lightly crushing and breaking up the pods a bit. Be gentle so you don’t damage the seeds, but just loosen the chaff. For tinier seeds, you can just put them on a board and crush them with your fingers.
Then you will need to winnow the chaff from the seeds. Place the seeds in a bowl and gently blow on them to remove the lighter-weight chaff. Swirl the seeds around and continue blowing gently until most of the chaff is removed. Another option is to use a screen or sifter where the holes are smaller than the chaff to simply sift them apart.
– Collecting seeds from pulpy fruits:
Pick the best, most ripe (even to the point of over-ripe) tomato, pepper, cucumber, etc. Choosing an over-ripe veggie will ensure the seed has fully developed. If you wait for a frost or freeze before you pick the fruit or veggie, most of the seed will not be developed enough to be viable next year.
Cut open the fruit and scoop out the seeds or for small fruits like cherry tomatoes, simply squeeze the seeds out into a glass jar. Add a little water and label the jar with the seed variety. The seeds usually are surrounded by a gel that inhibits germination. Leave for two to five days to begin fermenting. This will break down the seed coat while killing off many of the harmful bacteria and fungi lurking on the seeds. Swirl the contents in the jar every day.
When the pulp floats to the top, the seeds are ready for cleaning. Most of the seeds will have sunk to the bottom. Carefully skim off the pulp then tip the liquid and seeds into a strainer. Wash the seeds under running water, using the back of a wooden spoon to carefully remove any remaining material stuck to the seeds. Spread the seeds onto a paper towel to remove most of the water, then transfer them to a non-stick surface such as a dinner plate. Dry the seeds in a warm place out of direct sunlight. It will take two to three weeks for the seeds to completely dry out.
Make sure you label the seeds with their name and the date they were collected immediately after you have finished harvesting each variety. Excellent record-keeping is your best friend when it comes to seed-saving. It’s amazing how easy it is to mix up seed varieties!
How long do seeds last?
If you keep your seeds in a cool dry place, your seeds can last for years. These things are seed killers: excess moisture, excess heat, light, and rodents. Some seeds last easily for years. Others only last one year before the germination rate goes down.
Here is a chart from the Chicago Botanic Gardens on longevity in vegetable seeds as well as one from Iowa State University extension.
Seeds that have passed their prime for producing viable plants can be used to scatter as a cover crop, for bird seed, for eating, or for cooking (as in herb seeds).
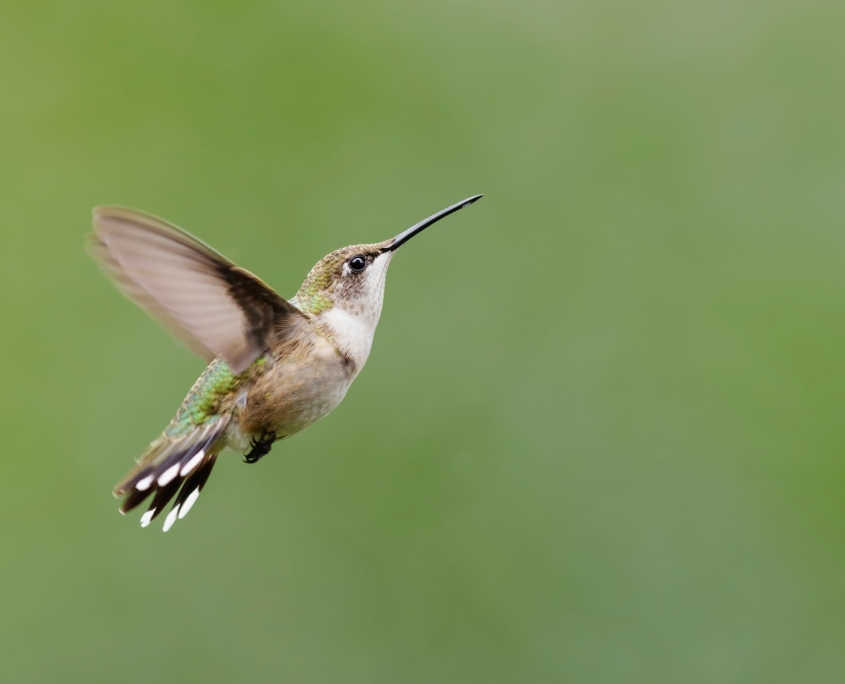
The Ruby-throated Hummingbird is one of the most commonly recognized hummingbirds in North America, especially in the eastern half of the country where they spend their summers. They are the only hummingbird to breed east of the Great Plains. Commonly found in open woods, forest edges, parks, gardens and yards, their familiar green and red plumage make them easy to identify.
Ruby-throated Hummingbirds are 3-3.75 inches in length and weigh around 10-13 ounces with a life span of about 4-6 years. These speedy little birds flap their wings 53 times per second, can hover in mid-air and fly upside down and backward. The males have a striking bright red or red-orange iridescent throat. The males’ upperparts and head are bright green. The female’s underparts are plain white and upperparts green, but they lack the brilliant red throat of the male.
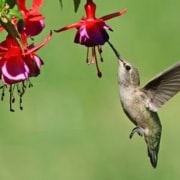
Ruby-throated Hummingbirds feed mostly on nectar and insects. They are strongly attracted to red and orange flowers, like those of trumpet vine, red columbine, bee balm, scarlet sage and many Penstemon varieties. They happily feed from nectar feeders too.
Ruby-throated Hummingbirds are solitary birds that only come together to mate. The female builds her cup-shaped nest about 10-20 feet above ground in a well-camouflaged area of a shrub or tree. Here she will commonly produce 1-2 broods of 2 white eggs per year. The incubation period is 10-16 days. The female, alone, will care for the young for 2-3 weeks before they are mature enough to leave the nest.
In early fall, the Ruby-throated Hummingbird will begin its migration to Mexico & Central America crossing over 500 miles of water in their nonstop journey across the Gulf of Mexico. They can become a little more aggressive near food sources in late summer as they begin preparing for the journey.
To attract more of these lovely birds to your yard keep a clean and full nectar feeder, plant more nectar-rich flowers in their favorite colors of orange and red, limit insecticide use and provide a water source such as a mister or shallow fountain for these birds to bathe and preen in.
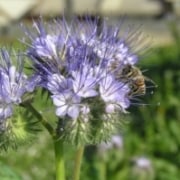
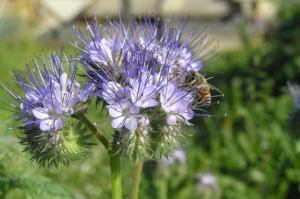
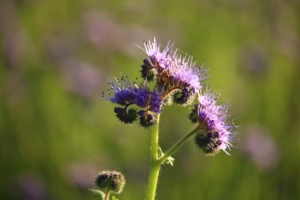
One of my favorite plants began blooming this week, Lacy phacelia, Phacelia tanacetifolia, so I wanted to take a moment to tell you all about Lacy Phacelia. It has many common names including lacy scorpionweed, tansy leaf phacelia, blue tansy, purple tansy and my favorite, bee’s friend. Clusters of light blue-violet flowers that unfurl in a fiddlehead shape sit atop attractive fern-like foliage. Reaching heights of 1-3 feet and blooming for 6-8 weeks this fast-growing wildflower is an excellent addition to any garden. It also makes an excellent cut flower.
Native to the southwestern United States, this easy to grow annual does well in hot, dry conditions but easily adapts to a variety of site conditions. Lacy phacelia seeds germinate readily in 15-30 days. Sow seeds early in the spring while there is still a possibility of frost. Ideal soil temperatures for best germination are between 37-68 degrees F. Press seeds gently into the soil at a depth of ⅛-¼”.
It’s not only the lovely blue-violet flowers that make lacy phacelia one of my favorite plants. Lacy Phacelia is well known for its ability to attract bees and butterflies to an area. It is a heavy nectar producer and is listed in the top 20 pollen-producing flowers for honeybees. Having this source of high-quality nectar and pollen means you’ll be attracting many native bees, bumblebees, honey bees and butterflies to your garden. I have these flowers growing near my front porch and just this week I counted 4 different varieties of bees on the few flowers that just started blooming.
Image by rihaij from Pixabay
Trying growing lacy phacelia near your vegetable garden to increase your yields.
Lacy phacelia also does well in containers. These containers can then be moved to different areas of the garden that need pollination. The benefits of Lacy phacelia as a cover crop are becoming more popular. It is widely used in Europe as it aggressively outcompetes weeds and absorbs excess nitrates and calcium from the soil. But it’s most important contribution is its pollinator-attracting power.
Lacy phacelia readily self sows so removing flower heads before they set seed helps limit any unwanted volunteers. Though when you see these beautiful flowers and how many pollinators they attract to the garden you might want to let a few of these wildflowers go to seed.
What is a wildflower? Well, a wildflower is any flowering plant that has not been altered from its wild state. These plants have had no selective breeding, no genetic modification, and are all natural! These little beauties can be found in nearly any environment; from mountains to prairies, swamps to deserts! Wildflowers provide vital habitats and forage for wildlife, like our favorite butterflies and bees, and beautiful sights and scents for us lucky gardeners.
We take our favorite wildflower seeds and blend them into these mixes specially formulated for unique regions, conditions, and uses. We make sure to use fresh, high quality, open-pollinated, GMO-free seeds because you deserve to have a successful, healthy, and fun planting experience. Our mixes are all seed with none of the fillers that you might find in other mixes because we believe you should get what you’re paying for.
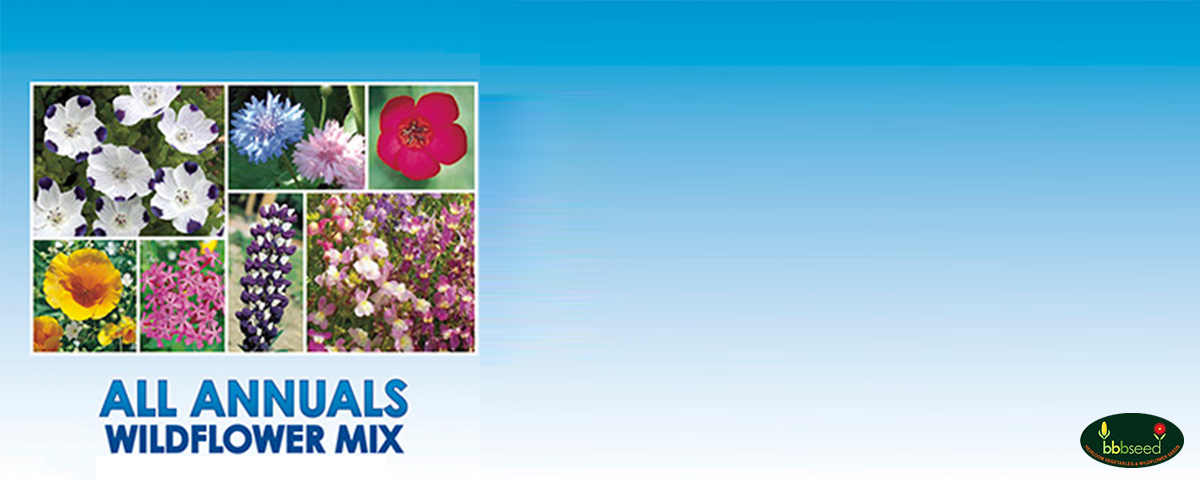
We love Annuals! This mix brings vibrant and long-lasting color to any site. This mix includes great wildflowers including Scarlet Flax, California Poppy, and Desert Bluebells that will add immediately to any drab or “worn out” spots on your property. This mix also reseeds well, so you can enjoy these annuals year after year!
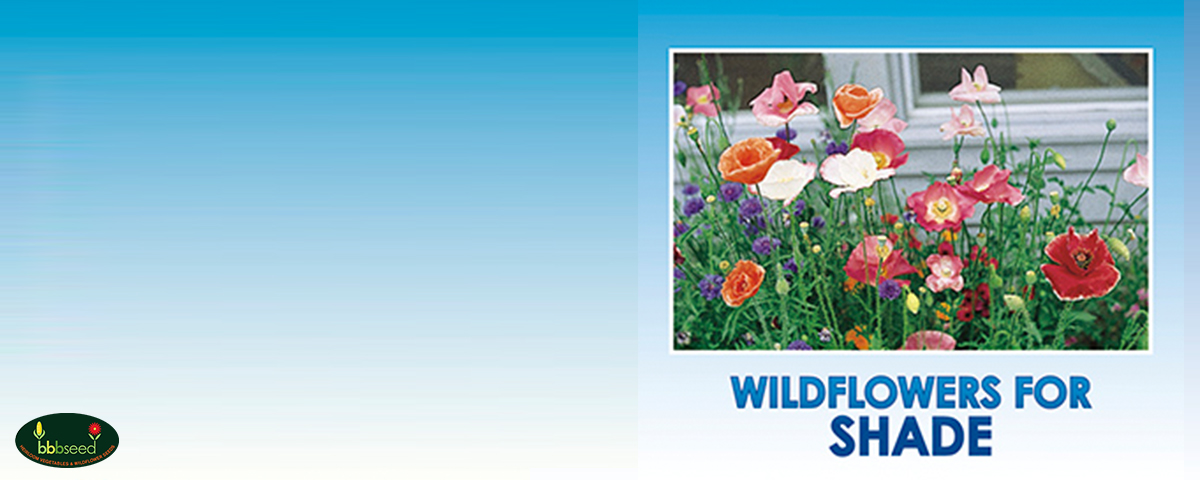
Not every spot in your garden is going to replicate the open, sunny meadows most wildflowers are adapted to. We understand and think that every inch of your space deserves to be colorful and wild! That’s why we came up with our Wildflowers for Shade Mix! This mix is a blend of annuals and perennials that are tolerant to partial shade. This mix has over twenty annual and perennial seeds to ensure that you get great color and varied blooms for years after you first planted.
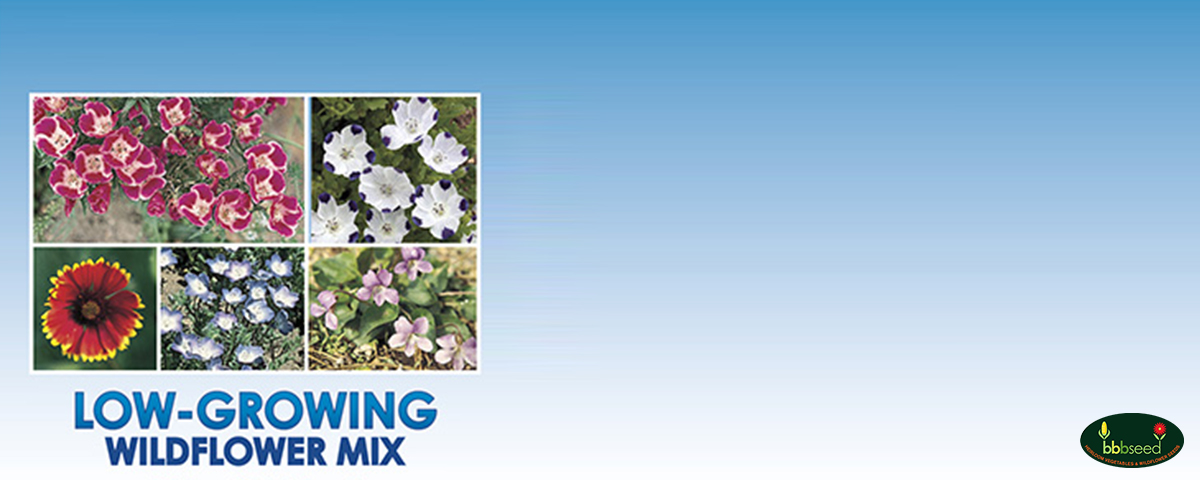
The Low-growing Wildflower Mix is the perfect mix for people who want the wildflowers but not the wild height! While some wildflowers can get up to three feet tall, this mix is designed to grow low and compact (6-12 inches). We really dig (pun intended) how manageable and controlled this mix grows. It includes poppies, clover, and flax for a great mix of color and shapes that will make your garden the talk of the town (in a good way)!
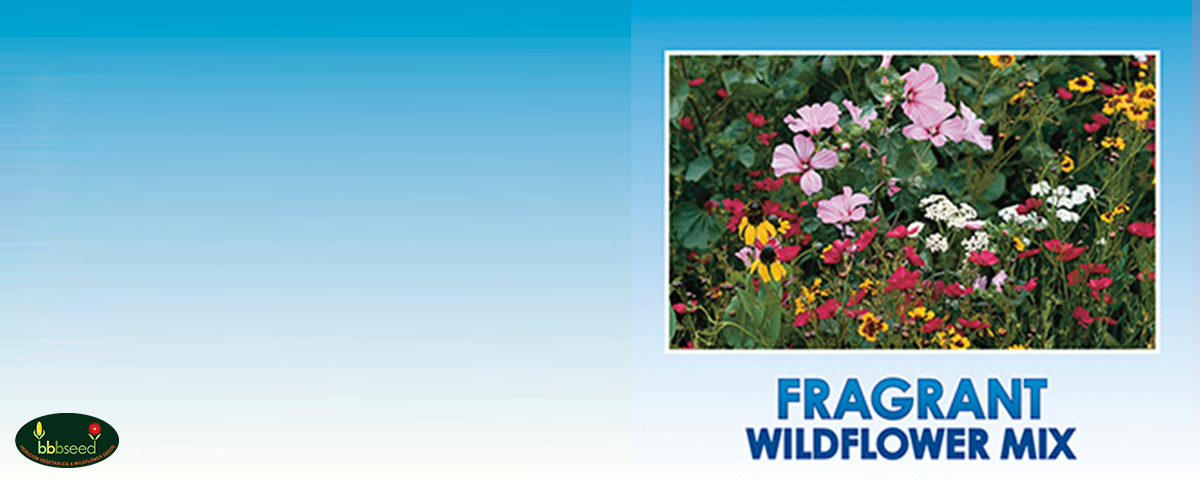
What’s better than waking up on a cool summer morning, walking outside, and being greeted by the smell of a field of beautiful wildflowers? How about a field of wildflower that you planted yourself! Sounds perfect to us! Our Fragrant Wildflower Mix is one of our personal favorites. We hand selected the flowers this mix of annuals, perennials, native and introduced wildflowers to grow well in many geographical regions and to smell wonderfully aromatic! Plant this mix around your patio and walkway and be greeted by its wonderful scent every time you stroll by.
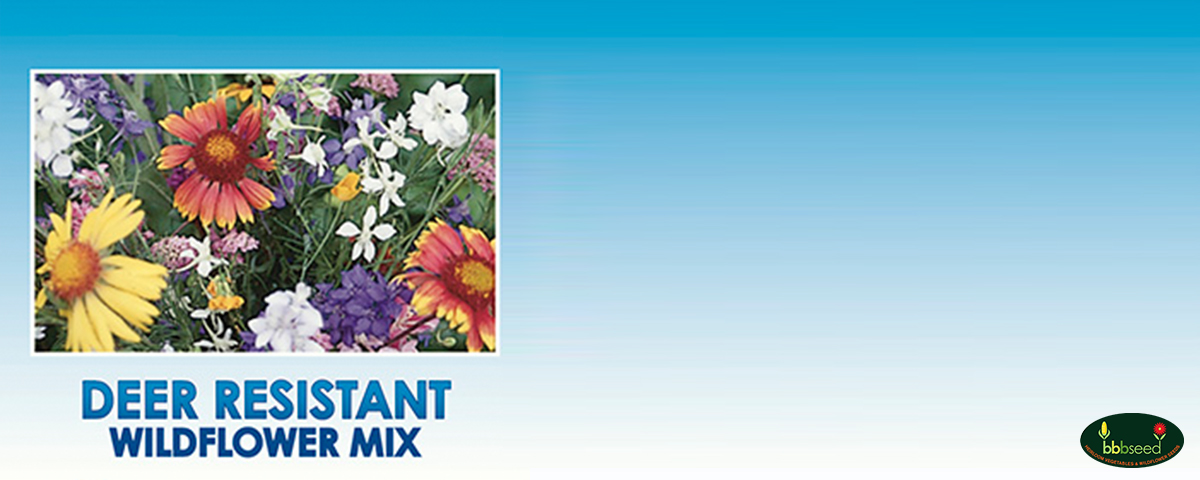
Nothing is more frustrating than toiling in the garden, planting seeds and starts, caring for them, and proudly watching them grow than to come out one morning to see a family of deer happily munching away at your precious plants! We get it. That’s we created the Deer-Resistant Wildflower Mix to include species that deer and elk will usually avoid if another preferred forage is available. This mix includes perennials that will begin blooming during their second year. Now you can enjoy the beautiful deer (and elk) in your area without stressing out about your garden!
At BBB Seed, we are deeply committed to providing the highest quality grass, wildflower, and grass seeds to empower our customers to get out and grow! This list of our Most Popular Wildflower Seeds is intended to be a useful resource for you to see what products our customers and we are enjoying right now!
We also are incredibly concerned about providing sustainable and environmentally conscious products to you. We source seeds that are non-genetically engineered, tested, and grown sustainably. We hope these products will help you enjoy nature and learn about this wonderful world in the garden. We also strongly encourage you to visit our Pollinator Action Page to learn about the pollinators that make our natural world possible and learn more about what you can do to help them. Thank you!
Grow. Enjoy. Share…the beauty and the bounty!
https://bbbseed.com/wp-content/uploads/2026/01/47710_BBB_Logo_HiRes_Transparent_1023-01-removebg-preview.png00Sam Dollhttps://bbbseed.com/wp-content/uploads/2026/01/47710_BBB_Logo_HiRes_Transparent_1023-01-removebg-preview.pngSam Doll2019-04-23 12:25:332025-06-23 15:01:42Our Most Popular Wildflower Seed Mixes May 2019
Honey bees are not native to the United States but were imported in the 1600s by colonists from Europe. Already here when honey bees arrived were 50 species of bumblebees and over 4,400 species of native bees. Bumblebees are especially efficient at buzz pollination. (Check out this blog for more information on bumblebees: www.bbbseed.com/its-bumblebee-bonanza-time). Native bees specialize in pollinating native species of plants – including food – while honey bees are best described as generalists. . Native bees do not have pollen bags on their legs but are often covered with a lot of bushy hairs on their bodies which gather and distribute pollen in the most excellent way. Also, native bees (bumblebees are the exception) live only about 6 weeks and their lives coincide with the bloom time of certain plants that they are specialists in pollinating. They are extremely docile and non-aggressive with some of them having a stinger that doesn’t even penetrate the skin. Their sting also contains a different type of toxin which will not cause anaphylaxis in people who are allergic to honey bee stings.
Alkali bees are essential for pollinating alfalfa. Alfalfa is a member of the pea family and the flowers have a lower lip which will snap closed and whack honeybees on the butt but Alkali bees have figured out how to get in and out of the flowers quickly and efficiently. Sunflower bees hatch late in the season to coincide with the bloom of sunflowers as do Long Horned bees which love asters as well as sunflowers. Mason bees are also commonly referred to as ‘orchard bees’ because they are so good at pollinating apples and stone fruits such as cherries. Sunflower bees hatch late in the season to coincide with the bloom of sunflowers as do Long Horned bees which love asters as well as sunflowers. The tiny Mining bees which nest in bare spots in lawns are the first to wake up and pollinate maples and willows which bloom in spring.
How do you know if a plant is a native? Well, if it’s a color (like bluish hybrid tea roses) or shape (lots of petals on the rose) that is unusual it is most likely a hybrid. Look for old-thyme classics like native roses (rosa woodsii or rosa glaucahttps://en.wikipedia.org/wiki/Rosa_woodsii) to support the natives in your garden.
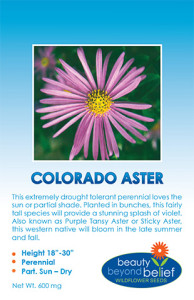
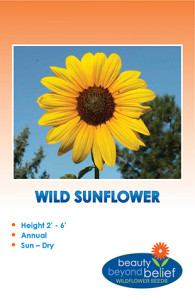
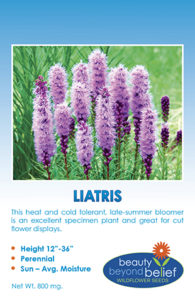
Also remember to plant such natives as liatris, asters, sunflowers, penstemons, rabbitbrush and native bee plant. Anything with tubular flowers is always a good choice for the native bees and many of them bloom in should seasons when nothing else is available.
https://bbbseed.com/wp-content/uploads/2026/01/47710_BBB_Logo_HiRes_Transparent_1023-01-removebg-preview.png00Mike Wadehttps://bbbseed.com/wp-content/uploads/2026/01/47710_BBB_Logo_HiRes_Transparent_1023-01-removebg-preview.pngMike Wade2019-03-27 10:38:482025-06-23 15:01:42Why Are Native Plants Important?
Summer is upon us and the wildflowers you planted are in full bloom and you have enough to spare, maybe, for a bouquet for your table!
Wildflowers are great candidates for cut flower arrangements. Blooms can be freely cut without fear of ruining the manicured look of the typical flower bed and arrangements can be just as free and wild as the components. Make a big multicolored arrangement with a relaxed informal design that will really light up your room and give the feel of walking through a meadow. The components of your design will necessarily reflect the seasonal bloom times. Try arranging flowers along with interesting textures of grasses, ferns or branches from bushes or trees. Seed pods and even bird’s nests make great accents. The small delicate size of most wildflowers allows for groupings of similar flowers together with open spaces. Look for colors that complement each other and a variety of textures.
Favorite flowers for bouquets are Bachelor’s Buttons in shades of pink and blue, spikey Purple Coneflower, fluffy towers of lavender Lupine, tall stalks of blue Larkspur, and the striking yellows of Black-eyed Susan and Gloriosa Daisy. Think about including the multicolored warm hues of the Firewheel Gaillardia, native annual Sunflowers, and Plains Coreopsis. Tall stalks of the brilliant white Shasta Daisy, the fuzzy spikes of Liatris or tall stalks of ferny-leafed Cosmos add eye-catching interest. Poppies, although brilliantly tempting, don’t have a very long vase life. Their delicate petals tend to fall off with just a touch. Use the bobbing, white clusters of annual Baby’s Breath to fill in the spaces and unite all components. Lastly, add a few tall grass tassels reminiscent of meadows and forest glens.
When decorating with wildflowers, plan to cut your flowers for arranging in the morning hours. This is when the plants have taken up the most water and are not in the work mode of photosynthesis. Choose the freshest flowers, even choosing some that are just beginning to open up, to ensure that your arrangements will last as long as possible. Take a clean bucket, filled with 6” or so of warm water, out to the wildflower patch and cut the stems as long as possible on an angle with very sharp scissors or knife. This will ensure that the flower stem will be able to take up water and nutrients for the longest time possible. Any vessel can serve as a vase or container for displaying your bouquet. Be creative, even a basket will work with a smaller cup or bowl inside that can hold water. Keep in mind the scent of your flowers. Some of those beautiful flowers in the wild may have a very strong or unpleasant scent when in a closed room. Wildflowers with milky sap, such as poppies, release the sap into the water and stop the water uptake of the other flowers. The stems can be sealed shut by holding a lit match to the cut end of each stem until the stem turns black.
Even a ‘wild’ flower arrangement starts with some basic arranging steps.
First, start with the base layer. This can be some general greenery or the flowers that will provide the bulk of the contents. Make sure to remove all vegetation that will be below the water level which would rot and increase the bacteria in the water and decrease the life of the arrangement.
Next, add the other flower choices to your display, working with one flower species at a time, placing them at differing angles and directions. Add the larger focal flowers in odd numbers, such as 1 very tall central flower or 3 or 5 large eye-catchers.
Then, balance and fill holes with baby’s breath or greenery and last, add in odd numbers, the tall textural grasses or seed pods. Check the water level and add water daily with 1 tsp of household bleach per quart to inhibit bacteria growth. You can revive wilted flowers by re-cutting the stem end and placing in hot water.
Create an arrangement for any room of the house or porch or even your favorite reading nook. Remember to balance the size of the arrangement with the room and use, putting low arrangements on the dining table. Don’t be afraid to bring the bounty of your own wildflower meadow into your home and feel free to upload a picture of your arrangement to our website!
https://bbbseed.com/wp-content/uploads/2026/01/47710_BBB_Logo_HiRes_Transparent_1023-01-removebg-preview.png00Mike Wadehttps://bbbseed.com/wp-content/uploads/2026/01/47710_BBB_Logo_HiRes_Transparent_1023-01-removebg-preview.pngMike Wade2019-01-01 10:25:032025-06-23 15:01:28Decorating with Wildflowers
Those pesky critters that buzz by, causing us to dance and flap our arms when we are outside, are far more than a mere annoyance. We don’t give these tiny powerhouses the credit they are due.
Native pollinators such as bees, butterflies, flies, moths, beetles, and bats are essential for human survival but their populations are in a serious decline. Our fuel, food, drugs, and fiber are directly and indirectly taken from plants that depend on pollinators for their existence. Some have estimated that one out of every three to four mouthfuls of food we eat results from the actions of pollinators. Pollinated crops contribute an estimated $20 billion to our economy each year. Native pollinators control the healthy function of our natural ecosystem. The documented decline of native pollinators, as well as that of the introduced European honeybee, concerns the scientific community. This decline results from the fragmentation and destruction of native habitats which has reduced the food sources for many native pollinators. The traditional corridors of nectar- and pollen-rich plant sources have been destroyed by development and changes in land use. Isolated habitats are further degraded by non-native and invasive species. Misuse of pesticides and the introduction of non-native pollinators have contributed to the extinction of many of our native species.
The bright side of this issue is that we can help our native essential pollinator populations by choosing to plant nectar- and pollen-rich vegetation species that are native to a specific area that will provide nutrition and cover. Remember to include plants that provide food for the larval stage and also to provide a water source. The flowering plants that are native to your area have co-evolved along with their pollinators to provide the perfect combination of petal shapes, fragrances, and colors for their mutual benefit. Make sure to plant a variety of native plant species of mostly perennials to ensure an appropriate and dependable supply of nectar and pollen for the bees, butterflies, and other pollinators throughout the spring, summer and fall. Select nectar-rich species with clusters of brightly colored tubular florets and plant them in groupings rather than as individual plants. Avoid cultivars of plants grown mainly to produce larger flowers as these often do not have the pollen or nectar that the pollinators require. Bees are attracted to purple, blue, and yellow flowers and hummingbirds prefer red and orange flowers. Try to include night-blooming varieties to attract bats and nocturnal moths. Use pesticides sparingly or not at all. Have patience, most perennials will take one or two seasons, with good care, to bloom. Read more here>https://bbbseed.com/pollinators/about-pollinators/
Thoughtful plantings, whether in pots and containers or backyard gardens and a conservative, integrated pest management system, can create and establish a stable ecosystem that is pollinator-friendly.