When mid-summer brings a bounty of produce from your garden and you are enjoying the fruits of your labor, it is time to start planting again. The prime planting time for late-season harvests is late summer. Success with fall vegetables requires proper timing. In the spring gardeners wait to plant outside until after the last spring frost, well, in the fall the race is against the season’s first frost. Many of the cool season crops can withstand a few light touches of frost and even become sweeter. Check with your local county extension service to find your area’s first expected frost date. Check the back of the seed packet to find the days to maturity. Take your frost date and count backward to find the best time to start your next round of seeds. Cooler fall growing temperatures may require an extra week or two for the plants to reach maturity. Many of your fall crops can be harvested when young and immature, too.
Which crops to plant for the Cool Season Planting?
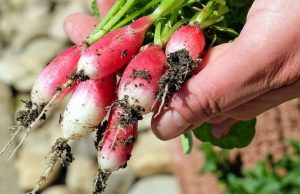
Plants that do well in the early spring work for the cool fall temperatures. These will do well right up to the frost date and even beyond. Cabbage takes a long season to mature and many gardeners don’t even plant cabbage in the spring because it doesn’t have enough time to mature before the mid-summer’s heat stops growth. Start these seeds mid-summer, a good 3 months before the first frost date. Kale should be planted 85 – 90 days before the first frost. The leaves can handle a few light touches of frost and become sweeter each time. Carrots can be planted 80-85 days before frost. They can be harvested when young and tender. Even after the cold temperatures shrivel the tops, they can be dug, sweet and juicy, from the ground throughout the fall. Broccoli has the same problem as cabbage with a long time to mature as cabbages, so planting for a fall harvest is often best. Plant broccoli seed directly in the soil about 80-85 days before frost. Beets can do double duty with green tops for salads and tasty roots as well. Plant seeds about 65-70 days before frost, depending on the type you choose. Leafy greens such as spinach and leaf lettuces, rocket, and Swiss chard all do best in the cooler temperatures of fall. Plant seed about 50-60 days before frost depending on the type chosen. These can be harvested when young and immature for delicious baby greens. Radishes are always great to spice up salads. These are fast-growing and can be planted 30-35 days before the first frost. Pull them when young and tender.
If you have any questions at all about how to start your BBB Seed please do not hesitate to email us at info@bbbseed.com. We look forward to answering any questions you might have!
Download our E-Book here:
Planning ahead-
Take a moment to look at the locations where you want to place your containers. Consider such things as sunlight (strength and time) and wind. If you have pots with sun/heat-loving plants, arrange them to shade your pots with those plants that need less sun and heat. Tall plants or plants that vine can be trellised to grow vertically and provide a natural barrier for tender plants. Make sure to anchor trellises and containers with tall plants, to keep them from getting blown over. If you plan to place your containers on a covered porch or balcony or any place that receives limited sunshine, you should select vegetables and flowers that don’t require as much. Leafy greens, snap peas, Chinese mustards, and kale will do quite well in these conditions, but tomatoes, and peppers, probably not.
When growing your garden in containers rather than a garden plot, it is just as important to choose varieties that will be able to reach maturity in your growing season. If you have a short growing season, check the maturity dates on the packages and plan to start some seedlings in the warmth of the indoors to get a jump on the growing season.
These varieties are not practical for container gardening due to their size or length of growing season (At the end is a list of vegetables/plants that will do well in containers.):
Watermelon and most cantaloupes (although there are some midget varieties that can do well)
Large Pumpkins and winter squash
Corn
Head cabbage (except as microgreens)
Mammoth sunflowers (except as sprouts or micro greens)
Beefsteak type tomatoes
Garlic bulbs/full sized Onions
Make sure to prepare your containers and pots properly, to give your veggies the best chance possible. You will be surprised by how much those little seedlings will expand, and there is as much growth below the soil as there is above the soil, so don’t squeeze them into tiny containers. Any type of vessel can be used, just keep in mind the size of the plants and the location. Terra cotta pots are inexpensive but dry out more quickly than others, metal tends to get quite hot in the sun, and plastic is versatile and lightweight.
………………………………………………………………………………..
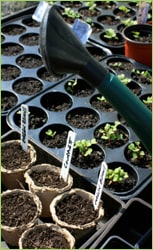
Getting started-
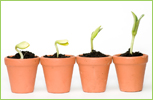
For Container Gardening, start your long-season varieties, indoors, in good quality starting soil or soilless mixture. Seedlings should be kept consistently moist (not wet) and exposed to fairly strong light, sunlight, or florescent, for at least 10 – 12 hours each day as soon as sprouts appear. This will keep them from getting leggy and looking for light. Seedlings that are sown more closely together can show more vigor as their roots symbiotically help each other extract nutrients from the soil. As the first true leaves appear, choose the strongest seedling starts that you will need for your containers and clip off the remaining which gives the strong ones some space to expand. Transplant to pots and containers shortly after the first true leaves appear. When transplanting to your containers and pots, make sure to space the seedlings according to the package directions for each type of vegetable.
Here are some plants that do not like to be transplanted. Instead, start them in individual moss starter cubes or use homemade newspaper pots or toilet paper tubes that can just be set into your containers at the appropriate spacing.
Beans Squash Burnet
Chinese Cabbage Borage Chervil
Cucumbers Caraway Pumpkins
Melons Coriander Dill
Root crops (except beets, turnips, and celeriac)
Make sure that your container has drainage holes in the bottom. Place a couple of layers of newspaper in the bottom of the pot to keep soil from falling through the holes, then place a 1-inch layer of moss on top of the newspaper. If you don’t have a source for sphagnum moss, coarse gravel will work. Fill the container with good, rich pre-moistened, potting soil, leaving room at the top. Pat it down firmly to fill in the spaces but do not pack hard. Take your young transplants (holding by the leaves or root ball, not the tender stem) or degradable seedling pots, one at a time, placing each on the top of the soil. Spread out the roots, and sprinkle more pre-moistened soil over the roots, covering them completely. Use enough soil to bring the level up to just under the first leaves for most seedlings. Do not cover the crown on plants such as lettuce. The plant’s first leaves should be at the level of the top of the container. Pat the soil gently, firming it over the roots and young stems. Water your containers when the soil feels dry in the top few inches. Continuously wet soil suffocates the roots and encourages bacteria and fungi to grow. Usually, we water when we have time or are home, but watering when needed instead of on a schedule is usually best. Avoid wetting the leaves as much as possible. Try to use tepid water and if you are using chlorinated tap water, allow it to sit overnight exposed to air to dissipate the chlorine which can damage plants and kill beneficial soil bacteria.
Fertilize with low doses of good quality organic fertilizer every 7-10 days.
Don’t be shy about removing plants that are past prime or are beginning to bolt. Removing these will leave spaces where you can plant another round of short-season varieties and ones that prefer to mature in the cooler weather of fall. Lettuces and other leafy greens are good for this, maybe another round of snap peas, beets or radishes, arugula, and bunching onions. Mustards and kales and fennel love the cool days of fall
……………………………………………………………………………….. Design – Container Gardening can be beautiful
Create groupings with your pots and experiment with variations in height, by placing some containers on concrete blocks or other empty containers turned upside down. This adds visual appeal and at the same time maximizes the space available. Groupings also help to make the job of watering a bit easier. Pick a particularly spectacular container plant to be the visual focus and arrange other not-so-pretty container plants around.
Make your containers a bit more decorative by planting different varieties together in one pot. Use the spaces under taller plants to place smaller herbs and leafy greens. Some vegetables live in harmony with one another, some are actually beneficial to each other and some hate each other. Mix colors and textures and think about including edible flowers tucked in around the edges. See the article, Flavorful Flowers. Check each variety on our website to see if your combinations will work together. Here are some examples:
• Lettuce does well with beets, bush beans, pole beans, cabbage, carrots, cucumbers, onions, radishes, and strawberries. You can also plant your lettuce at the base of young sunflowers for a little shade.
•Celery, dill, onions, and potatoes are great companion plants for cabbage. Planting clover with your cabbage will keep insects away and chamomile will improve the flavor. Cabbage does not like strawberries, tomatoes, peppers, eggplant, rue, grapes, or pole beans.
•Cauliflower is compatible with basil, beans, dill, garlic, hyssop, lettuce, mint, onion, rosemary, sage, and thyme. It does not like grapes and rue.
•Plant your peas with bush beans, pole beans, carrots, celery, cucumber, eggplant, parsley, radish, spinach, strawberry, sweet pepper, tomatoes and turnips. Keep your peas away from chives, and onions.
•Tomatoes grow well with asparagus, basil, beans, carrots, celery, chives, cucumber, garlic, head lettuce, marigold, mint, nasturtium, onion, parsley, peas, peppers and marigold. Basil will repel flies and mosquitoes from your tomato plants while also improving their growth and flavor. Beebalm, chives, and mint will improve the health and flavor of your tomatoes. Keep potatoes, fennel, dill, cabbage, and cauliflower away from your tomato plants.
………………………………………………………………………………..
VEGETABLES/PLANTS THAT DO WELL FOR CONTAINER GARDENING:
Beans (Pole and Bush types)
Direct sow into containers when night temperatures reach 60 degrees F, 6“ minimum soil depth, full sun, and harvest in mid-late summer, Provide a trellis or climbing structure Beets – Direct sow into containers in early spring and late summer, 6” minimum soil depth, full sun to partial shade, harvest early summer and again in fall Carrots (Nantes, Round, or Finger-type are best for containers) – Direct sow into containers when night temperatures reach 60 degrees F, 8” minimum soil depth, full sun, harvest in summer through fall. Cucumbers (vine or bush-types) – Direct sow into containers when the day temperatures reach 70 degrees F or start indoors and transplant, 10” minimum soil depth, full sun, harvest in summer, Provide a trellis or climbing structure for vine-types. Eggplant – Start inside 8 weeks before temperatures usually reach 80 degrees F for your area, then transplant to your container, 10” minimum soil depth, full sun, and harvest late summer. Leafy Greens (Swiss chards, Collards, Kales, Mustards, Asian Greens, Pak Choy) – Direct sow into containers when the nighttime temperatures are above freezing, or, start indoors 3-4 weeks before and transplant, 8” minimum soil depth, full sun to partial shade, harvest late spring through winter. Lettuces and Salad greens – Direct sow into containers after Spring’s last frost date, or start indoors 4 weeks before and transplant after hardening off when about 2 “ tall, sow seed again in early fall, 6” minimum soil depth, full sun to partial shade, harvest spring through early summer and again in fall. Onions, Garlic, Leeks – Direct sow into containers after Spring’s last frost date, 6” minimum soil depth for bunching onions and young (green) garlic, 8” for Leeks, full sun, harvest summer to fall. Mounding soil up around the base of bunching onions and leeks will encourage long white stalks. Grow garlic in containers to use the green shoots and any small bulb growth. Peas – Direct sow into containers when the soil is no longer frozen, Soaking the seeds overnight will speed up germination, use an inoculant (a beneficial bacteria that enables the roots to use the nitrogen pulled from the atmosphere and stored in nodules on the roots), especially when planting into containers with new potting soil. 8” minimum soil depth, full sun, harvest in late spring to early summer with secondary fall crops possible, Provide trellising for vine-types or cages to support bush-types. Peppers – Plant seeds indoors, keeping at 80 degrees F for about 2 weeks, starting 10 weeks before nighttime temperatures remain above 55 degrees and daytime temps reach at least 70 degrees. Transplant into containers after hardening off, 8” minimum soil depth, full sun, and harvest in late summer. Potatoes – Plant disease-free seed potatoes in a large container (30” deep, 20” across) filled 1/3 full of potting soil, 5-6 “ apart, and cover with 2 inches of soil, When plants are about 6” tall cover the bottom half with potting soil, continue doing this as the plant grows until reaching the top of the pot. Full sun, harvest summer to fall. Radishes – Direct sow into containers when the soil is no longer frozen and every other week till late spring, 4” minimum soil depth, full sun to light shade, harvest all spring and second harvest in fall. Spinach – Direct sow into containers when the soil is no longer frozen, replant first of August for fall, 6” minimum soil depth, full sun to partial shade, harvest in spring, early summer, and fall. Squash (zucchini, yellow summer, yellow crookneck, patty pan, mini pumpkins) – Plant seeds indoors 2-3 weeks before the spring last frost date, transplant into sunny, warm containers, and cover with a row cover for several days, 10” minimum soil depth, full sun, harvest summer to early fall, pick when young and small, provide trellis and support for vines. Tomatoes – Plant seeds indoors keeping them at 75 degrees F for about 2 weeks, starting 6-8 weeks before Spring’s last frost date, transplant at least once to another larger pot when they have 3 sets of true leaves burying them up to the first set of true leaves, keep in good light, 12” minimum soil depth, full sun, harvest late summer and fall. Herbs – Herbs are mostly perfect plants for container gardens, being small and not fussy.
https://bbbseed.com/wp-content/uploads/2023/11/BBB-Seed-logo-with-tagline-2023.png00Danielle Deweyhttps://bbbseed.com/wp-content/uploads/2023/11/BBB-Seed-logo-with-tagline-2023.pngDanielle Dewey2023-11-03 19:22:462023-11-03 19:22:46Low Growing Fescue: 3 Beautiful and Easy to Maintain Options for Your Lawn
https://bbbseed.com/wp-content/uploads/2023/11/BBB-Seed-logo-with-tagline-2023.png00Danielle Deweyhttps://bbbseed.com/wp-content/uploads/2023/11/BBB-Seed-logo-with-tagline-2023.pngDanielle Dewey2023-09-27 16:32:592023-09-27 16:32:5910 Best Types of Grass Seed for Direct Sun, Compared
https://bbbseed.com/wp-content/uploads/2023/11/BBB-Seed-logo-with-tagline-2023.png00Danielle Deweyhttps://bbbseed.com/wp-content/uploads/2023/11/BBB-Seed-logo-with-tagline-2023.pngDanielle Dewey2023-09-19 21:16:152023-09-27 16:33:19Exposed! #1 Grass Seed for Shade and Sun
Sharing plants is a simple joy in life. Sharing plants and making money, well that’s even better. Read on to learn how to share your plant starts for profit.
My happy group of gardening buddies first got to know each other because of our great avarice for more seeds. We had all joined a local gardening email list so we could talk more about plants and gardening, but the more we spoke with each other, the more seeds and plants we wanted. Every time someone mentioned a new variety of tomatoes or annual flowers or ground cover, we had to have one of those.
The first year, we decided to meet in person and share seed packets. Armed with dozens of recycled envelopes, we doled out tiny seeds to each other, taking home three Cherokee purple tomato seeds or six cosmos seeds. This quickly became confusing and chaotic and required so many tags in our seed trays. So the next year we decided to become more economical. We’d each buy a packet of seeds and grow out all the plants…and then swap our plant starts. We definitely got more plants than we would have grown on our own and we each had unusual varieties you can’t buy in stores.
But the third year of our avarice proved to be the year we figured out that we could get as many seeds as we wanted…and they practically paid for themselves. All we had to do was start our seeds and sell 2-month-old plant starts to each other and to the other greedy gardeners who envied our ever more diverse gardens. We learned that anyone can sell healthy organic heirloom tomato starts, especially if you have pictures of last year’s garden.
You can try your own mini plant exchange and sale. We price our seedlings cheap ($1 or $2 at most). I can afford all the heirloom tomato plants I want if I just sell three seedlings for $1 from each seed packet. Throw in some herbs and flowers and soon the plants barely fit in the car. Our little group now has a giant plant sale every May where everyone brings their plants to sell to each other, but thanks to free advertising on Craigslist and neighborhood electric poles, we also sell our humble little plants to the public.
Avarice never ends, of course, and now we have to grow more plants so we can make money so we can afford backyard greenhouses. Last year our small group of about 12 home gardeners sold some $4000 worth of plants that they started in closets and on top of refrigerators just two months before. Not enough to get rich, but enough to buy more seeds, build hoop houses and season extenders, and have a load of precious organic sheep manure delivered to our gardens.
So enjoy your seed shopping and think about swapping some of the plants you start with others. We learned that while there is no end to avarice among gardeners, there is also no end to generosity. It is a great joy to have an abundance of little plants to share with friends and strangers.
https://bbbseed.com/wp-content/uploads/2023/11/BBB-Seed-logo-with-tagline-2023.png00konabirdhttps://bbbseed.com/wp-content/uploads/2023/11/BBB-Seed-logo-with-tagline-2023.pngkonabird2022-11-18 18:14:002024-05-02 15:33:29How to Share Your Plant Starts for Profit
What are “heirloom” vegetables? An heirloom vegetable is a non-hybrid, open-pollinated variety that has been passed down from generation to generation and, in some cases, can be traced back hundreds of years. These seed lines have been carefully selected to maintain uniformity and consistency for germination.
Heirloom seeds become ‘heirloom’ because they exhibit exceptional traits desired by the gardener. Often this means the plants are more colorful, flavorful, and unique, or have great germination and vigor. Often the traits are location-dependent. Meaning, seeds planted in one garden will not produce in the same manner in another location. We encourage you to try heirloom seeds, see which have the qualities for your area to become your favorites and make them into your own very special seed line. Seed saving from heirloom vegetables is easy and fun.
Gardeners have found that as seeds are selected and saved over many years, production is increased and the quality is improved, creating plants that will produce best for that locale and will resist diseases and pests of that locale. Contributing to genetic diversity strengthens the ecosystem. Historically farmers and local gardeners have created and sustained this rich genetic heritage by learning to save their own seeds from varieties that perform best in their own mini-ecosystems. The current trend toward mono-crops where only one seed type is used to produce a crop worldwide is eliminating the ability to be able to find genetic variations that will withstand emerging pathogens and climate changes.
Planting your crop:
Start with good Heirloom Seed varieties. Keep in mind that to allow the plants to produce seed and to allow the seed to fully mature, you will have to allow for a longer growing season. This can be done by starting plants indoors and arranging for protection from frost in the late season. You will grow some for food or flower harvest and some for seed production. Fully mature seeds will be viable (able to germinate) and produce vigorous plants. You may want to do some research on the different flower types for proper pollination techniques and plant with row/species separation in mind, to prevent cross-pollination.
You also may look into caging procedures to isolate species that are in flower at the same time. By caging different plants on alternate days, you can take advantage of the pollinators to do the work without cross-pollinating your crop. Cage one plant or group on one day and early the next day, before the bees wake, transfer your cage to a different plant or group. Some crops are biennial and do not produce seed until the next year, so you will need to determine whether you should leave the roots in the ground over the winter or dig and store them.
There are many publications with detailed information on seed-saving and growing techniques for each species. “Seed to Seed” by Suzanne Ashworth, 2002 by Seed Savers Exchange, Inc. is a good way to get started. Also, check out these easy instructions for seed saving, written by the International Seed Saving Institute, a non-profit established to teach seed saving.
Why save seeds:
When you grow crops using your own saved seeds from your best plants for next year’s crops, the seeds begin to adapt to the growing conditions (temperature, moisture levels, pests, diseases, and so forth) that exist in your garden. This adaptation makes your garden stronger over time. Seeds that are used to grow crops year after year have the opportunity to adapt to incremental climate changes. As global temperatures change, these plants will have a better chance at survival and productivity. A single plant from a single seed can produce dozens or hundreds of seeds, increasing your seed stock exponentially. Sharing and exchanging seeds with other gardeners, community gardens or seed libraries helps to increase the diversity of everyone’s collections.
Harvesting and collecting seeds:
When saving seeds from heirloom vegetables, look for favorable characteristics such as; freeze and cold tolerance, heat tolerance, adaptability, winter hardiness, early maturation, vigor (strong germination, and growth), flavor, color, size, texture, etc. Also, look for desirable traits such as; vine or plant type, seed type, and specific disease resistance. Plan to be ready to harvest the seed as they mature.
– Collecting dry seed:
It’s easy to save seeds from plants that produce pods, husks, and other dry casings such as peas, beans, and flowers. The technique is called “dry processing” and is faster than collecting seed from fleshy, pulpy fruits such as tomatoes and cucumbers. Seeds that are dry-processed can be allowed to dry right on the plants unless there is wet weather in the forecast. Seeds often fall where they may, naturally, little by little. Often the pods will pop open when you are not around to collect the seed and it will be lost. Allow the seed pods to remain on the plant in the ground for as long as possible. Usually, the seed will not continue to mature after the pods are cut from the plant. To collect the seeds easily as the seeds begin to mature, secure paper bags over the seed heads and attach them to the stems of the plants. As they mature they will drop into the bags.
Separating the seeds from the chaff (dried pods and stems) is called threshing. Commercial threshing is done by multitasking machines that can harvest, thresh, and winnow the seeds all at once. For the home gardener, a bag, pillowcase, or small sack is all that’s necessary. Put the seeds into the bag, secure the ends, and roll it around, lightly crushing and breaking up the pods a bit. Be gentle so you don’t damage the seeds, but just loosen the chaff. For tinier seeds, you can just put them on a board and crush them with your fingers.
Then you will need to winnow the chaff from the seeds. Place the seeds in a bowl and gently blow on them to remove the lighter-weight chaff. Swirl the seeds around and continue blowing gently until most of the chaff is removed. Another option is to use a screen or sifter where the holes are smaller than the chaff to simply sift them apart.
– Collecting seeds from pulpy fruits:
Pick the best, most ripe (even to the point of over-ripe) tomato, pepper, cucumber, etc. Choosing an over-ripe veggie will ensure the seed has fully developed. If you wait for a frost or freeze before you pick the fruit or veggie, most of the seed will not be developed enough to be viable next year.
Cut open the fruit and scoop out the seeds or for small fruits like cherry tomatoes, simply squeeze the seeds out into a glass jar. Add a little water and label the jar with the seed variety. The seeds usually are surrounded by a gel that inhibits germination. Leave for two to five days to begin fermenting. This will break down the seed coat while killing off many of the harmful bacteria and fungi lurking on the seeds. Swirl the contents in the jar every day.
When the pulp floats to the top, the seeds are ready for cleaning. Most of the seeds will have sunk to the bottom. Carefully skim off the pulp then tip the liquid and seeds into a strainer. Wash the seeds under running water, using the back of a wooden spoon to carefully remove any remaining material stuck to the seeds. Spread the seeds onto a paper towel to remove most of the water, then transfer them to a non-stick surface such as a dinner plate. Dry the seeds in a warm place out of direct sunlight. It will take two to three weeks for the seeds to completely dry out.
Make sure you label the seeds with their name and the date they were collected immediately after you have finished harvesting each variety. Excellent record-keeping is your best friend when it comes to seed-saving. It’s amazing how easy it is to mix up seed varieties!
How long do seeds last?
If you keep your seeds in a cool dry place, your seeds can last for years. These things are seed killers: excess moisture, excess heat, light, and rodents. Some seeds last easily for years. Others only last one year before the germination rate goes down.
Seeds that have passed their prime for producing viable plants can be used to scatter as a cover crop, for bird seed, for eating, or for cooking (as in herb seeds).
It snowed yesterday. It’s going to snow again today. This makes me so happy because it means I get a vacation from work. My gardening business is a lot like a teacher’s schedule. Work like crazy most of the year then I get a wonderful interlude to catch up on the rest of my life. Working in the garden may come to an end during Colorado winters, but eating usually continues and we continue to make lots of food scraps that any gardener would hate to waste.
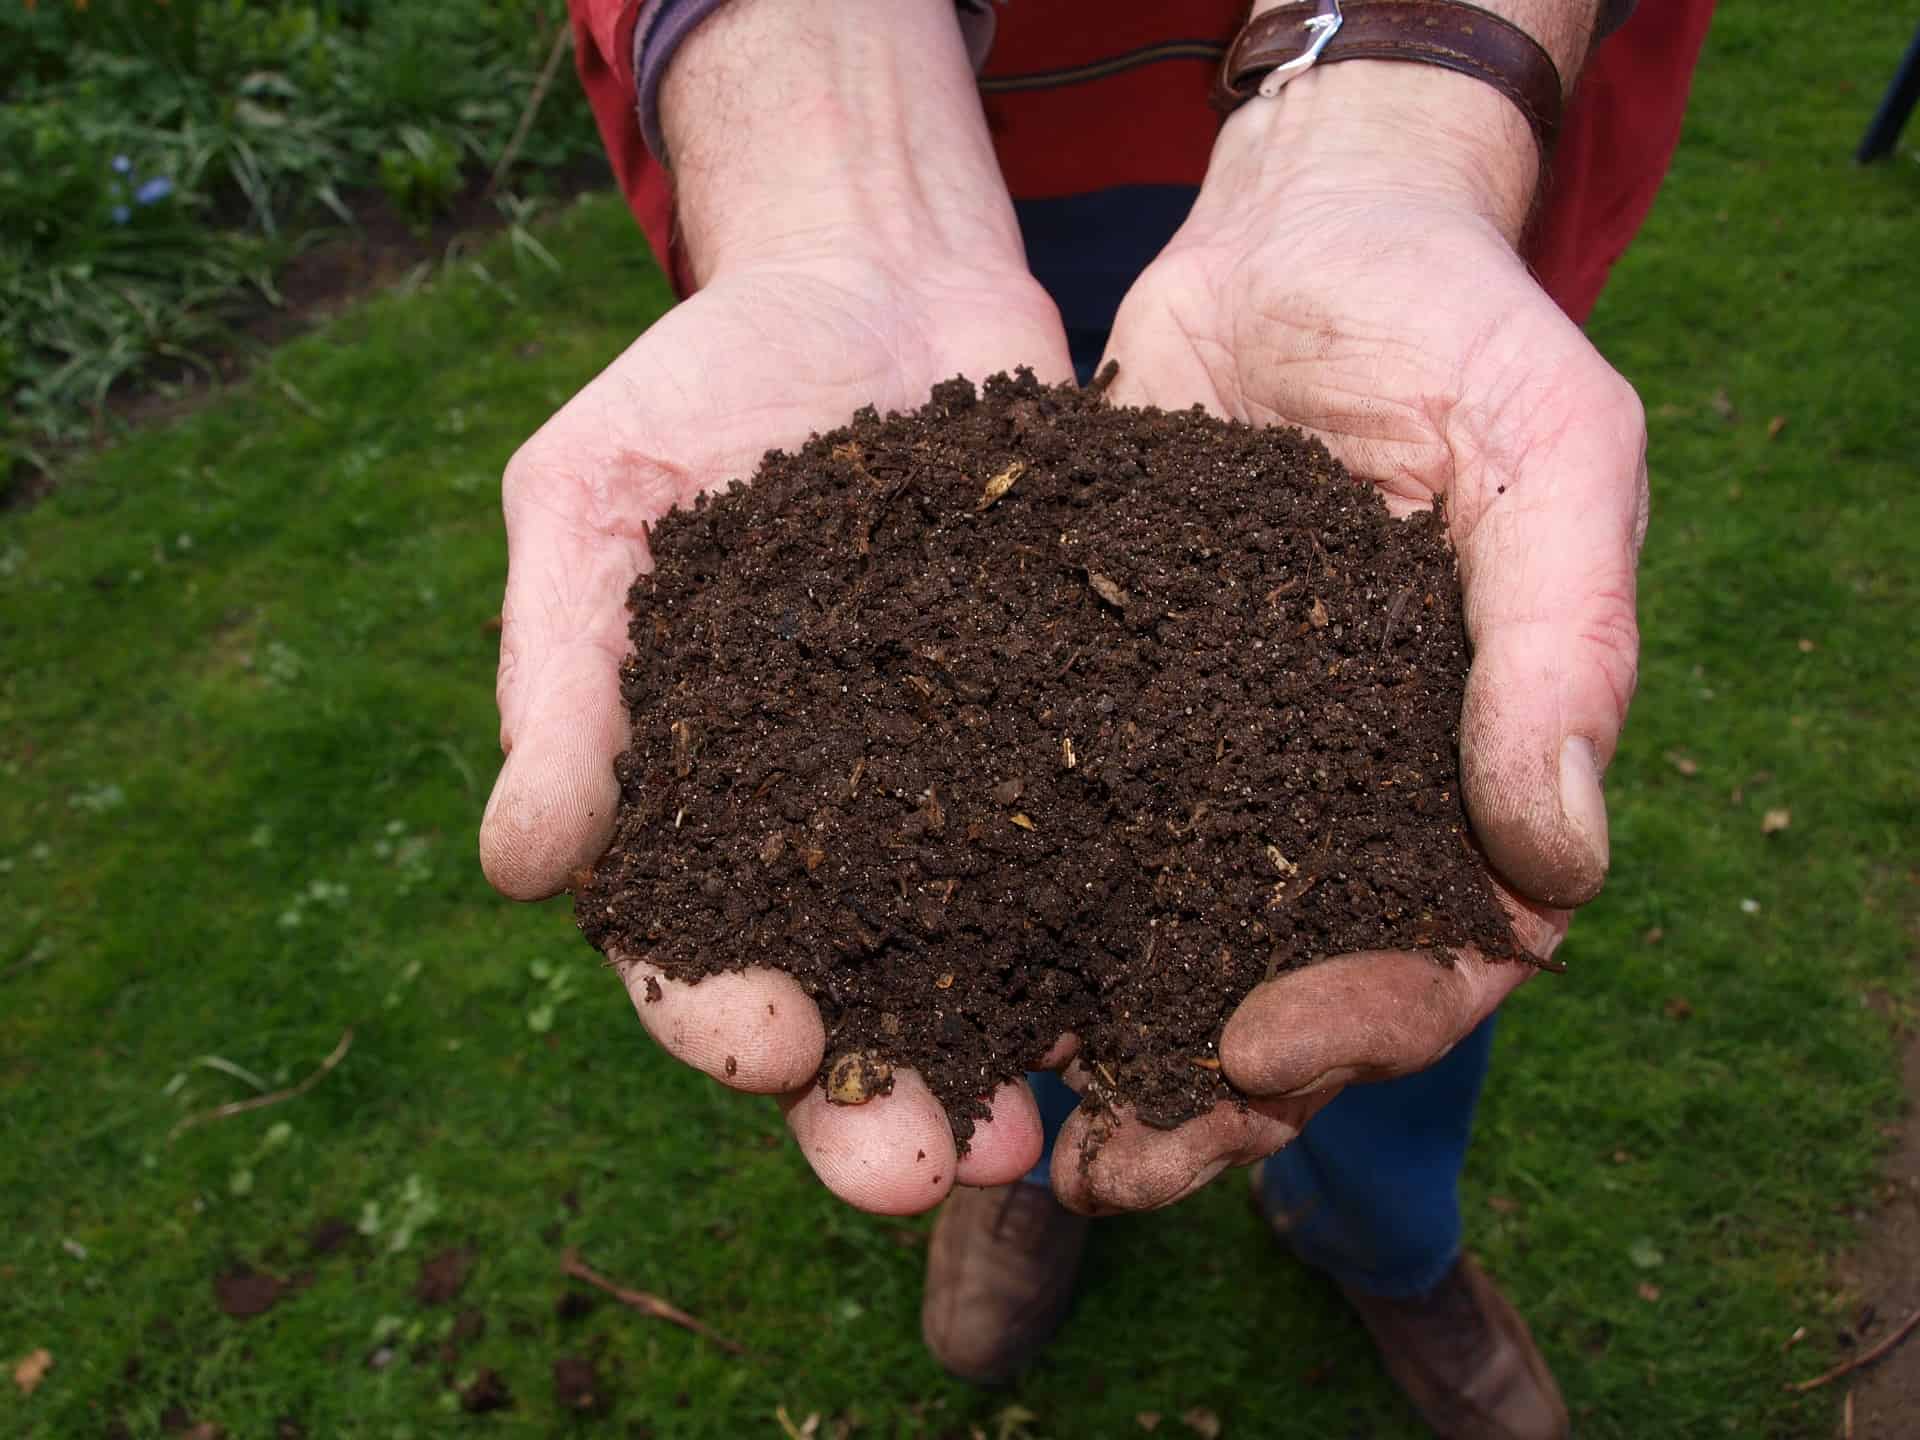
When I lived on acreage, I did all my food composting by sending it through the chickens. The backyard chickens loved food scraps and eagerly ran around when I brought the compost bucket. Even if it was just onion scraps and things they didn’t like to eat, they relished scratching it around and mixing it with the coop bedding and poop. Spring compost in the making.
Without chickens, there are still ways that you can compost in winter and capture your kitchen scraps:
1. Use your regular compost bin
I empty mine to about ¼ full of compost in progress with lots of worms. I fill it all the way to the top with dry leaves and sort of hollow out the center. The leaves don’t freeze solid and all winter I drop the scraps down the middle of the leaves. The leaves provide some insulation and the food scraps and leaves at the bottom of the pile are warmed enough by the earth that a tiny bit of composting keeps happening even when temps get well below freezing. The earthworms are slow but still keep working and reproducing.
2. Compost in a protected sunny spot
Keep a plastic (black if possible) bin against the house on a sunny side. I started with the bin half full of partially finished compost that hopefully has some worms already busy in it. The center, next to the ground, will stay unfrozen so the worms will stay alive. The compost probably won’t process much over the winter except on sunny days. You may need to secure it against raccoons or other varmints.
3. Make a trench
This takes a bit of planning before the cold weather arrives, but produces amazing results and saves time and labor. Dig a long trench right in the garden…about a foot deep and a foot wide. Leave the soil heaped right next to the trench with a rake nearby. I left the excavated dirt on the side of the trench. Every time the indoor compost bin was full, I just took it out to the garden and dumped it into the trench. If things weren’t too frozen, I pulled some of the excavated dirt on top of the food scraps. If there was snow on the ground, I just put the scraps on top, and eventually, it fell into the trench.
This process attracts all the worms to the trench. Some composting takes place in the Fall but most decomposition happens in early Spring. By early May, when it’s time to plant tomatoes, the compost is broken down enough that I can transplant my tomatoes directly into the filled trench that is crawling with decomposers and happy earthworms. If it was a very cold winter and the compost isn’t finished, just plant right next to the trench. Some people like to compost in trenches all year. They set up a three-year rotating system where they compost one year, plant the next and use the area as a walkway the third year. Pretty clever!
4. Make a windrow
John, the Worm Man, Anderson in northern Colorado keeps his worms happy all winter by setting up short windrows of compost, food scraps, and worms. He throws old carpet or tarps over the top. Periodically, he lifts the carpet and puts new scraps on top of the piles. The worms slow down in winter but keep working and reproducing. For small households, just make a pile on the ground and cover it with a tarp. The tarp keeps moisture and some heat in. Just slip the food under the tarp. Worms show up. This doesn’t work so well if you have raccoon or mice and rat issues.
https://bbbseed.com/wp-content/uploads/2023/11/BBB-Seed-logo-with-tagline-2023.png00Sandy Swegelhttps://bbbseed.com/wp-content/uploads/2023/11/BBB-Seed-logo-with-tagline-2023.pngSandy Swegel2022-10-28 03:57:142022-11-21 21:09:254 Ways to Compost in Winter
We may request cookies to be set on your device. We use cookies to let us know when you visit our websites, how you interact with us, to enrich your user experience, and to customize your relationship with our website.
Click on the different category headings to find out more. You can also change some of your preferences. Note that blocking some types of cookies may impact your experience on our websites and the services we are able to offer.
Essential Website Cookies
These cookies are strictly necessary to provide you with services available through our website and to use some of its features.
Because these cookies are strictly necessary to deliver the website, refusing them will have impact how our site functions. You always can block or delete cookies by changing your browser settings and force blocking all cookies on this website. But this will always prompt you to accept/refuse cookies when revisiting our site.
We fully respect if you want to refuse cookies but to avoid asking you again and again kindly allow us to store a cookie for that. You are free to opt out any time or opt in for other cookies to get a better experience. If you refuse cookies we will remove all set cookies in our domain.
We provide you with a list of stored cookies on your computer in our domain so you can check what we stored. Due to security reasons we are not able to show or modify cookies from other domains. You can check these in your browser security settings.
Google Analytics Cookies
These cookies collect information that is used either in aggregate form to help us understand how our website is being used or how effective our marketing campaigns are, or to help us customize our website and application for you in order to enhance your experience.
If you do not want that we track your visit to our site you can disable tracking in your browser here:
Other external services
We also use different external services like Google Webfonts, Google Maps, and external Video providers. Since these providers may collect personal data like your IP address we allow you to block them here. Please be aware that this might heavily reduce the functionality and appearance of our site. Changes will take effect once you reload the page.
Google Webfont Settings:
Google Map Settings:
Google reCaptcha Settings:
Vimeo and Youtube video embeds:
Other cookies
The following cookies are also needed - You can choose if you want to allow them:
Privacy Policy
You can read about our cookies and privacy settings in detail on our Privacy Policy Page.