What to Unplant

How to Help Your Plants Stay Productive

by Sandy Swegel

I’ve been watching my neighbor Tory’s vegetable garden with great interest this year. She worked as a farm intern (ie. Full-time farming, almost no money) the last couple of years and has brought farm techniques to her home garden. Yesterday as we enjoyed the latest harvest of arugula she announced it was time to dig these up and plant something else.  I was surprised since she just seeded these arugula in early March.

From a market farming perspective, you grow greens to harvest a lot of food quickly.  She seeded the arugula early and when they are big enough to harvest she cuts them to just an inch or so above the soil level.  Then she lets them grow again and the cycle repeats.  Plants grown like this produce a lot of food, but they also get tired and worn out.  The plant itself is depleted.  Tory made her decision to dig under the arugula because the plants weren’t growing as vigorously as before and, the biggest factor, they didn’t taste as good. Whether it was the hard fast growth or a recent week of warm weather, the arugula was getting a little too spicy.  It seems harsh, but if you want to keep eating from your garden, you have to unplant the less productive plants and know what to unplant.

Things I’ve unplanted this week:
Arugula that has been harvested three times and is losing vigor.HERB, Organic Arugula, Wild
Kale that had overwintered. It was great to have kale from last year’s plants, but the old woody stems are no longer producing as well as the new plants.
Radishes that got bitter.  A week of rain followed by a week of heat made huge bitter radishes. They look great but we crave sweet young vegetables.

Garden more productive and more beautiful.

In the perennial garden, I’ve been unplanting too.
Poppies that have spread everywhere.  They are at risk of becoming a weed.
Plants that have grown too big for where they are planted.
Plants that are blocking sprinkler heads.
Plants that I’ve never liked.

Gardeners are often loathe getting rid of plants. They feel sorry for them.  They’ve come to know them as friends.  But there is a time and season for every plant and a good gardener learns to be a little ruthless. If you want to have succession gardening, you have to create the empty space for the next plant. It may seem harsh, but you have to declutter and make space for new growth!


Tackling Weeds

What to do When You Are Overwhelmed by Weeds

by Sandy Swegel

Our friend and blog reader CJ recently sent us some great suggestions about tackling weeds when you are absolutely overwhelmed by weeds on your property.  She has a large hilly country property that is atop a mesa so weed seeds fly in from miles around.  Her gardens are xeriscaped and mulched which helps discourage weeds, but last Fall’s flooding here in Colorado has created a bumper crop of tall lush weeds that threaten to take over everything.

If you have more weeds on your property than you have hours in the day to pull, here are her suggestions.

First, I tackle any weed that is threatening the life of a plant I care about.
I weed an area around the plant perimeter. This doesn’t take too long, and often is the first weeding I do in the spring.

Second, I must give priority to any weed that is going to seed.
Especially if it is upwind from my beds.   Downwind, given our terrain, I don’t care too much.   I just weeded cheatgrass and that thin sticky thing with tiny yellow flowers along the driveway berm.  Got the whole thing weeded in a little over an hour.

Third, I weed where the weeds bother me…as in, if something is getting ready to bloom, I don’t want to stare through a bunch of weeds to see it.  So I try to be aware of focal points, and where the eye is naturally drawn to.

Finally, with noxious weeds, my rule is just to get rid of them before they release seeds, at all costs, but not necessarily as a first priority if they are still flowering.   (and yes, I left the donkey tail this year until now because it is the first thing in my garden for the pollinators, along with the dandelions.)

Of course, sometimes when I just need a rush, I go out and pull the biggest weeds I can find, so after 30 minutes I have this pile twelve feet high and feel like I’ve really accomplished something.   :  )

Thanks to CJ for sharing her wisdom of many years of living on the windblown high plains.  I love the idea of the adrenaline rush from a frenzy of pulling big weeds.  I do love doing that too!


Photo credit http://bikesandbirds.blogspot.com/2010/07/weeds.html
http://www.suburbanprairiehomemaker.com/2012/08/garden-party-our-lasagna-garden.html



Spring Tune-up for your Drip Irrigation

Irrigation Checklist

by Sandy Swegel

For gardeners in dry climates, irrigation is a necessary evil.  Irrigation makes growing possible, but it can be a

royal pain trying to keep it intact and actually watering the plants it is intended to water.  You will have fewer problems with your irrigation (and thus fewer dying plants) if you take the time in Spring to tune-up your drip system.

To tune-up your drip system, wait for a fine day in Spring after there has been a dry period, and manually turn your drip system on and run it for about 15 minutes.

Here’s your check list:

 Obvious leaks and holes.  This is easy….a big spray of water up in the air is the surest sign an emitter has popped out of its hole or a line has been accidentally cut.  I use the little flags on sticks to mark places that will need repair.

 Dislocated or broken lines. The reason you run the drip system for 15 minutes before you start to check individual plants is so you will easily be able to see the spreading moisture in the soil under each dripper.  If you can physically see a little drip line but no water, then the line is clogged or has been dislocated from the main supply line.  How does this happen?  Squirrels and dogs disconnect lines when they run through the garden.  Little creatures like mice have figured out that water runs through these lines and a little nibbling on the tubing provides a water supply from the water left in the line.  Most of the time you just reconnect the tubing and are done.

 Clogged emitters.  Sometimes emitters just break but most of the time an emitter that’s not emitting is just clogged.  Tiny insects have figured out this water source too….and sometimes lay eggs right in the emitter tip, which from their perspective is probably a nice moist cave. Usually just taking the emitter and blowing into it is enough to clear the line.  I’ve also seen plant roots grow up a tube looking for water.

 Sliced lines.  This is from human error.  A garden full of tiny drip lines and sprinkler supply lines shallowly buried means the gardener accidentally slices through the irrigation system, sometimes not realizing it.  A big puddle of water instead of the small moist area around an emitter is your clue.  Just fix it and resolve not to dig in the garden without checking for the location of the irrigation line.

Spring tuning your irrigation can be tedious, but well worth it in terms of keeping your plants alive.  While you’re at the task, this is a good time to check the times on your controller.  Sometimes in August and September when it’s hot and dry, we crank up the length of time the irrigation runs….Plants don’t usually need so much water in Spring, so you can save water and money by having different run times in Spring and Summer.

Drip irrigation is still my favorite way to water frugally.  You get water to the roots without having the waste of high pressure sprayers over spraying and watering the street.  Sprayers also encourage fungus from the moisture sitting on the leaves.  Installing a drip system requires us to get in touch with our Inner Engineer, but it’s a very successfully way to water if you just do a Spring Tune-up.


Photo: http://www.dripirrigation.com/drip_irrigation_tutorial

http:///http://home.howstuffworks.com/irrigation3.htm


Aphids on your Kale – Ewwww

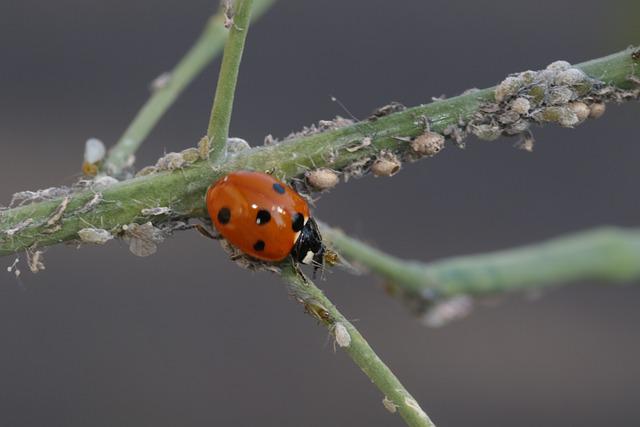
All About Handling AphidsImage by <a href="https://pixabay.com/users/melanimarfeld-7353531/?utm_source=link-attribution&utm_medium=referral&utm_campaign=image&utm_content=5224572">Melani Marfeld</a> from <a href="https://pixabay.com/?utm_source=link-attribution&utm_medium=referral&utm_campaign=image&utm_content=5224572">Pixabay</a>

by Sandy Swegel

A gardener I know recently went out to his cold frame to harvest some beautiful kale he could see pushing against the top of the frame.  Instead of an ecstatic reaction of joy to this spring treat, he quickly retreated with a big “Ewww.”  His kale was absolutely coated in aphids.  He had nursed it and even given it extra organic nitrogen fertilizer recently and this was the thanks he got.

Aphids are irritating pests.  They are very prolific and can have twenty generations in a season. And it could take a long time to rinse each one off a leaf of kale, so what’s a gardener to do if they are not ready to become an insectivore?

You Can Prevent Aphids

Our gardener probably got aphids for a couple of reasons: 

His cold frame was sealed pretty tight, so predators like birds and ladybugs couldn’t get in to control the aphids. Also, recent warm temperatures stressed the plants in the closed frame. Opening the cold frame on warmer days will help.

They are everywhere.  They overwinter on mustard weeds which are prolific in the spring garden. There’s no avoiding the aphids altogether on cole plants, but cleaning up the debris in the garden and weeding out the mustard weeds will remove many of the eggs from last year.

They adore nitrogen. The soluble nitrogen he had just added just enticed even more aphids to come eat over here!

Plant chard and spinach. Aphids don’t bother them as much.

You Can Treat Aphids

Aphids are super easy to treat:  a blast from a garden hose washes them to the ground and they don’t easily crawl back.

Soapy water (a drop or two of dish soap or Dr. Bronner’s in your watering can or spray bottle) kills them easily.

Check the plants frequently: the aphids are often under the leaves or along the stems…hard places to reach.

You Can Clean the Kale

A sink full of water, most people agreed, was the best way to clean the aphids off so you don’t disgust your dinner guests.  Submerge the kale completely and squish it around a lot.  The aphids float to the surface. Repeat.

Someone else suggested dissolving some salt in hot water and then adding it to the sink of cold water, letting the kale sit for 30 minutes.  The salty water helps dislodge the aphids.

Don’t give up. Kale is incredibly nutritious not to mention tasty and easy to grow.


Read more about aphids here

For complete information on managing cabbage aphids, http://www.ipm.ucdavis.edu/PMG/r108300811.html


First Things: Start More Seeds

Seed Starting

by Sandy Swegel

I had the good fortune to go backstage, so to speak, at a CSA farm this week.  Lara’s farm is amazingly

small. On just over an acre she almost single-handedly feeds 35 families.  She has an unheated greenhouse and a rototiller, but otherwise, that’s as high-tech as she goes.  Trying to fathom how one person can feed so many people, I kept asking questions and observing what she did.  One thing was obvious.  Farmers don’t stand around with their arms folded gabbing, at least not at the beginning of the day.  We had a running conversation, but her hands were busy, filling planting trays or picking off dead foliage, watering here and there.  But her primary motto, that she learned from a mentor farmer, was to keep starting seeds.  Every day, every time you go into the garden, “she said” you should ask if seeds need to be started.  Weeding, composting, deadheading and even watering can wait till later but if your seeds aren’t started and going, you aren’t going to have plants which means you won’t have enough food or enough flowers.  Watering is second on the list.  It doesn’t do much good to have started seeds last week if you let them dehydrate this week.

Growing a garden from seed is both miraculous and frustrating.  Miraculous is obvious:  you take this tiny seed and it becomes something magnificent: a pumpkin or a breathtaking flower.  But the frustrating part is that there’s no catching up if you procrastinate getting your seeds started.  You can fiddle with heat mats and lots of extra plant food, but there’s really no way to do last minute cramming to get plants growing.  They need time to grow. 

So let that be the first question in your garden today. Are there some new seeds I need to get started?

Here’s my answer of seeds I should start today:


 Spent daffodils and tulips have left an empty spot in the flower garden.  I should plant some cosmos seeds there to have flowers for the rest of the year.

 We harvested the radishes in the square foot garden.  I need to fill that square so I put a few kale seeds in.

 Last year I learned how to roast butternut squash with olive oil and rosemary so I need to make sure I have lots of butternut squash saved up. I need to start six seeds on the window sill (the soil is still cold at my house.)

 I visited a friend’s garden that was full of foxglove which often doesn’t bloom until the second year.  I need to start those seeds so I have a beautiful flower garden like she does next year.

What seeds should you start today?


Dowsing The Garden

Communicating With Your Garden

by Sandy Swegel

OK so this might seem a little weird.  And it’s not something I talk about with my clients. But some years ago, I realized I had studied everything there was to learn about plants.  I took the Master Gardener class, read all the best books, worked with the experts.  But despite this great expertise, I had to admit, that I would never be the amazing gardener my friend Barbara was.  True, she spent many hours working in her garden, but still she seemed to have an intuitive knowledge of what her plants wanted. She tolerated my asking a million questions about why she did this or that in her garden, as if I could somehow write the plant care protocol that would recreate her artistry.  Alas, I was no plant psychic. I didn’t know how to talk to the plant spirits or fairies.  She didn’t talk about those things, but she’d say things like ‘I just planted it where the plant seemed to want to be.

About this time, I took a class in biodynamics and part of the class talked about dowsing.  This is super simple beginners’ dowsing:  a homemade pendulum – needle and thread, a necklace with a stone, even my car keys. All I learned was how to ask the pendulum what meant “yes” (clockwise for most people) and what meant “no.” (counterclockwise).  I myself use north-south movement for yes and east-west for no.

So off to the races I went…asking lots of yes and no questions.  I’d hold a plant at a place in the garden and ask “Is this a good place for this plant.”  If I had two kinds of fertilizer, I’d hold one of the plants and ask “is this the right fertilizer right now?”  One fertilizer would always give a much more positive response. I’d ask a plant, ‘Do you want to live next to this plant?”   It was amazing….and I wondered if it was real or just in my imagination.


So I secretly started testing plants with Barbara.  We were planting together at my house one day and I had dug holes where the new plants went.  When my friend wasn’t looking (because I was embarrassed at being silly), I’d hold my pendulum over the plant and ask it what direction it wanted to face. I’d actually ask? “Is this the right direction?” as I rotated the plant 360 degrees. I made a note of my dowsing results.  Then I asked Barbara to plant all the plants for me.  I was delighted to see that the directions she chose were exactly the same ones my pendulum told me.

I spent this weekend at a dowsing workshop and am learning so much about Earth Acupuncture and the many forces that influence our land.  I’d encourage you to give dowsing the garden a try.  Use it for plant location or type of plant or method of treating pests.  I even get out the pendulum when I can’t decide what seeds to buy.  I hope my pendulum over each seed picture as ask “Is this the right plant for my garden this year.”  I use this especially for things like tomatoes when there are too many choices.

There are lots of beginner books on dowsing or you can just play with your car keys sometimes. I’ve been experimenting with my pendulum long enough now to know it’s helping me make better choices.  Maybe it’s the plant talking or maybe I’m just tapping into my inner knowledge. But it sure is fun.

For more information, http://www.motherearthliving.com/gardening/garden-tools.aspx#axzz2zUObAKCy

Photo credit http://www.amazon.com/Dowsing-your-garden-gardening-houseplants/dp/1490326146; http://planbperformance.net/dan/blog/?p=693


The Indecisive Gardener

How to Make Decisions in Your Garden

by Sandy Swegel

Making decisions about where to plant things in the garden is one of my biggest challenges.  Hard to imagine when I spend most of my time in other people’s gardens. But because I rent, my own garden is a blank slate.  And that makes it really hard for me to know what to plant where. I know what the plants need but I can’t decide who should live next to whom or even make simple decisions about succession planting.

If you’re an indecisive gardener, whether you’re a new gardener and aren’t sure where things go, or because like me there are so many possibilities you just can’t decide, here are a couple strategies I use:

Vegetables
Square Foot Gardening is the friend of new and indecisive gardeners.  You can just make the garden squares and plant whatever happens to be in your hand at the moment.  Mel Bartholomew who invented the idea of square foot gardening has simplified plant spacing in his latest refinements of the process.  Each square is still a 12-inch square.  Little plants go 16 to a square, medium plants 9 to a square. Large plants 4 to a square and really large plants 1 to a square.  I can just fill a square and move on to the next square.  Hardly any decisions except to remember to put the tomatoes to the back of the garden where they don’t block the sun.
http://www.squarefootgardening.org/#!__top10faqs/vstc20=page-4/vstc100=gardening

 Herbs
I love herbs but worry about where to put them so they are in the right conditions and so that the perennials ones survive without taking over. In my mind, I divide the herbs into categories: Mediterranean herbs (thyme, rosemary, oregano), invasive herbs (mint, lemon balm), and tender herbs (basil).

 Mediterranean herbs go in the hottest driest part of the garden with more sun and not so much water because the flavors of these herbs are best if they aren’t pampered with too much good water and soil.  Invasive herbs go next to concrete…either a wall or a sidewalk….somewhere there is a natural limit to how far they can spread. Tender herbs go in the vegetable garden.

 Perennials
These are the most difficult ones to decide on. Many a perennial has languished in its tight pot waiting for me to decide where to put it.  I learned from another indecisive gardener that the perfect place is a “Nursery Bed.”  The nursery bed is for the plants that are young and need extra attention and for the ones that don’t yet have a home in a permanent bed.  They’ll eventually graduate to the grown-up garden, but now they at least have a home in the ground in the nursery bed where they get some extra attention too.

 Don’t let the desire to have a perfect garden or the fear of making a mistake keep you from having a great garden.  Set some simple rules like these. And if that doesn’t work…then the whole yard can be the “nursery bed!” 


Photo Credits:
http://en.wikipedia.org/wiki/Square_foot_gardening

http://www.mamamia.com.au/social/what-can%E2%80%99t-you-decide/attachment/indecisive/


A Wild Thicket

Keeping a Little Wild in Your Garden

by Sandy Swegel

When it comes to our gardens, we Americans are of a divided heart. Deep in our ancestral memories are the manicured gardens of Europe.  We swoon over the groomed roses and delphiniums of England, We admire the orderliness of rows of Tuscan poplars. We see the almost mathematical grid of Versailles echoed in Jefferson’s Monticello. We use raised beds to confine our vegetables just as the medieval cloister gardens were enclosed.


 At the same time, we Americans are a frontier people, dazzled by the wildness and grandeur of raw untamed nature.  Grassy plains and dense woodlands and mountains majesty tug at our hearts even as we tend our suburban plots.


To fill the needs of our wild nature souls, I think it’s always good to have a wild area in our yard. One that manages to thrive only on what nature provides and provides a haven for small wildlife.  Generally, there is some place in your yard that already refuses to be tamed. Someplace wild plums keep sprouting and sumacs come unbidden.   This is the area to encourage in your yard – your secret garden, if you’d like – or just the area you see from your kitchen window reminding you that beneath the dishes and chores and children and jobs, you have a wild spirit too.

My favorite thicket started with the wild plums that kept coming back. Over time, a couple of chokecherries worked their way in, and the patch of lemon balm appeared all on its own.  Birds planted wild roses. Squirrels brought in nuts. I decided to play along with nature and seeded an unruly pollinators’ hedge filled with the nectar and pollen-rich flowering plants that bees and butterflies crave. I let the wild queen anne’s lace have some space in the back and I didn’t pull the dandelions. I did plant one of those tall dark purple butterfly bushes for structure and I seeded a buffer zone of grasses and wildflowers to create a neutral zone of sorts between “The Lawn” and “The Thicket.” 

 I don’t really “garden” the thicket but over time I’ve planted some naturalizing crocus and daffodils and a handful of seeds a decade ago that keep the spring display stunning.  About the only care I give the area is water during really dry spells and a birdbath of water because butterflies and birds and bees need something to drink.

 I am proudest of my tended garden…the showy beds of vegetables and annual flowers, the elegant stretches of roses and flowering shrubs and tulips in Spring. But deep down, it is my thicket that I love the most.

Two Tips for Starting Seeds in the Ground in Spring

Seed Starting

by Sandy Swegel


Two weeks ago during a warm spell I had a little seeding frenzy and made tiny rows of lettuces and Micro Greens in a community garden plot along with the usual St. Patrick’s Day peas.  Every thing is coming up now (OK with their weed friends too).  There are two things I do whenever I put seeds directly into the ground to make sure I’m successful.

Here’s my basic process for starting seeds that works for me.

Weed and smooth soil out.
Water soil with a soft sprayer if the soil is dry.
Sprinkle seed over the soil
Pat the seed lightly with my hands so there is contact between the seed and the soil.

TIP #1
ROW COVER
I lay a sheet of row cover loosely over the seedbed.  You want it loosely so the plants can grow and the row covers lifts with them. I use some heavy rocks (of which there are many in our soil) to hold down the row cover so it doesn’t blow away.  The row cover helps the seeds stay moist enough to germinate and raises the soil temperature a few degrees so the seeds germinate faster.

Water with the soft sprayer. Note…I water right on top of the row cover.  It’s permeable so the water makes its way through.

Sometimes there are seeds that are slow to germinate.  That’s when I use

Tip #2
PRE-SOAK AND PRE-GERMINATE the difficult seeds.
Seeds like peas or carrots respond well if you soak them overnight, drain them, let them sprout in a baggie with a damp paper towel for a day, then put them in the ground.  The peas get cute sprouts.


I get a high germination rate even from difficult seeds when I use these two tips.  Which means I get more plants per packet of seeds and save a little money.

It’s Spring!  Enjoy playing in the Dirt!

Photo credit: http://frontrangefoodgardener.blogspot.com/
http://www.organicgardening.com/learn-and-grow/row-covers?page=0,1

Plant more peas!

All About Planting Peas

by Sandy Swegel

Rev your garden engines folks.  Today is St. Patrick’s Day and the official start of pea season and there’s no need to wait.  You have jobs to do today — it’s time to plant more peas!

Make sure beds are weeded. Those mallows from last year are easy to spot….they’re the only green thing in parts of the beds.  But they weed easily this time of year. I lightly cultivate the top inch of the soil if I see lots of annual seeds starting. In my garden, every last larkspur seed that fell last year has germinated.  Cute…but not in the pea bed, please.

Put the Peas to Soak.  If your climate is high humidity, you may not need this step, but here in the arid foothills, I soak my peas overnight, rinse them tomorrow and then plant them.  Sometimes I even pre-sprout them (just like making mung bean sprouts) and plant them with the big white root already fattening up.

Put your trellis in place if you’re growing the kind of peas that need support.

Think about row cover. Decide if you want to use it to warm the peas and speed their growth.

Think about inoculant.  I’ve written about this before. Gardens that have grown happy peas before may not need inoculant but new raw beds with less than optimal soil would probably benefit.  If you forgot to buy it, you can always plant anyway and sprinkle the inoculant over the soil and water it in later.

Remember the flowers.  I’m so fond of peas for eating whether they are oriental peas  or snap peas or plain old shelling peas, that I forget about how beautiful and fragrant sweet peas are.  My neighbor plants sweet peas on trellises along the fence, at the base of vines, in a circle in the middle of the lettuce garden.  Her garden is so beautiful and fragrant come June that I get very jealous.  Time for me to plant more peas!