How to Share Your Plant Starts for Profit
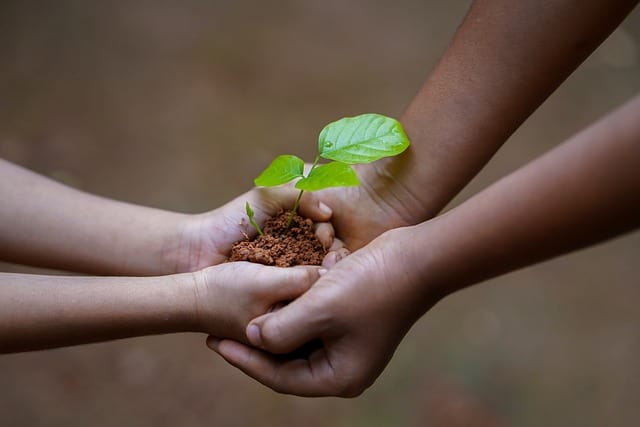
Image by Shameer Pk from Pixabay
by Sandy Swegel
Sharing plants is a simple joy in life. Sharing plants and making money, well that’s even better. Read on to learn how to share your plant starts for profit.
My happy group of gardening buddies first got to know each other because of our great avarice for more seeds. We had all joined a local gardening email list so we could talk more about plants and gardening, but the more we spoke with each other, the more seeds and plants we wanted. Every time someone mentioned a new variety of tomatoes or annual flowers or ground cover, we had to have one of those.
The first year, we decided to meet in person and share seed packets. Armed with dozens of recycled envelopes, we doled out tiny seeds to each other, taking home three Cherokee purple tomato seeds or six cosmos seeds. This quickly became confusing and chaotic and required so many tags in our seed trays. So the next year we decided to become more economical. We’d each buy a packet of seeds and grow out all the plants…and then swap our plant starts. We definitely got more plants than we would have grown on our own and we each had unusual varieties you can’t buy in stores.
But the third year of our avarice proved to be the year we figured out that we could get as many seeds as we wanted…and they practically paid for themselves. All we had to do was start our seeds and sell 2-month-old plant starts to each other and to the other greedy gardeners who envied our ever more diverse gardens. We learned that anyone can sell healthy organic heirloom tomato starts, especially if you have pictures of last year’s garden.
You can try your own mini plant exchange and sale. We price our seedlings cheap ($1 or $2 at most). I can afford all the heirloom tomato plants I want if I just sell three seedlings for $1 from each seed packet. Throw in some herbs and flowers and soon the plants barely fit in the car. Our little group now has a giant plant sale every May where everyone brings their plants to sell to each other, but thanks to free advertising on Craigslist and neighborhood electric poles, we also sell our humble little plants to the public.
Avarice never ends, of course, and now we have to grow more plants so we can make money so we can afford backyard greenhouses. Last year our small group of about 12 home gardeners sold some $4000 worth of plants that they started in closets and on top of refrigerators just two months before. Not enough to get rich, but enough to buy more seeds, build hoop houses and season extenders, and have a load of precious organic sheep manure delivered to our gardens.
So enjoy your seed shopping and think about swapping some of the plants you start with others. We learned that while there is no end to avarice among gardeners, there is also no end to generosity. It is a great joy to have an abundance of little plants to share with friends and strangers.
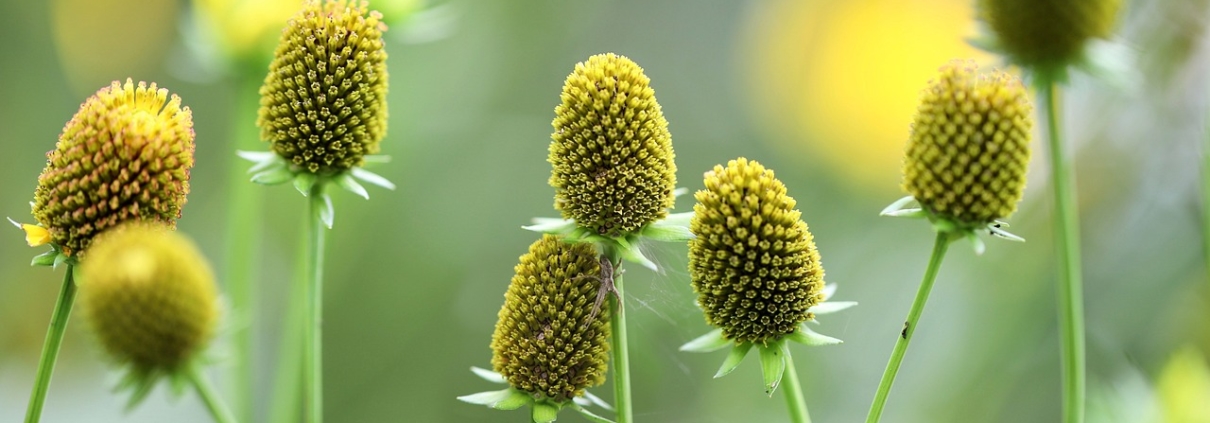
Saving Seeds
Saving Seeds from Heirloom Vegetables
What are “heirloom” vegetables? An heirloom vegetable is a non-hybrid, open-pollinated variety that has been passed down from generation to generation and, in some cases, can be traced back hundreds of years. These seed lines have been carefully selected to maintain uniformity and consistency for germination.
Heirloom seeds become ‘heirloom’ because they exhibit exceptional traits desired by the gardener. Often this means the plants are more colorful, flavorful, and unique, or have great germination and vigor. Often the traits are location-dependent. Meaning, seeds planted in one garden will not produce in the same manner in another location. We encourage you to try heirloom seeds, see which have the qualities for your area to become your favorites and make them into your own very special seed line. Seed saving from heirloom vegetables is easy and fun.
Gardeners have found that as seeds are selected and saved over many years, production is increased and the quality is improved, creating plants that will produce best for that locale and will resist diseases and pests of that locale. Contributing to genetic diversity strengthens the ecosystem. Historically farmers and local gardeners have created and sustained this rich genetic heritage by learning to save their own seeds from varieties that perform best in their own mini-ecosystems. The current trend toward mono-crops where only one seed type is used to produce a crop worldwide is eliminating the ability to be able to find genetic variations that will withstand emerging pathogens and climate changes.
Planting your crop:
Start with good Heirloom Seed varieties. Keep in mind that to allow the plants to produce seed and to allow the seed to fully mature, you will have to allow for a longer growing season. This can be done by starting plants indoors and arranging for protection from frost in the late season. You will grow some for food or flower harvest and some for seed production. Fully mature seeds will be viable (able to germinate) and produce vigorous plants. You may want to do some research on the different flower types for proper pollination techniques and plant with row/species separation in mind, to prevent cross-pollination.
You also may look into caging procedures to isolate species that are in flower at the same time. By caging different plants on alternate days, you can take advantage of the pollinators to do the work without cross-pollinating your crop. Cage one plant or group on one day and early the next day, before the bees wake, transfer your cage to a different plant or group. Some crops are biennial and do not produce seed until the next year, so you will need to determine whether you should leave the roots in the ground over the winter or dig and store them.
There are many publications with detailed information on seed-saving and growing techniques for each species. “Seed to Seed” by Suzanne Ashworth, 2002 by Seed Savers Exchange, Inc. is a good way to get started. Also, check out these easy instructions for seed saving, written by the International Seed Saving Institute, a non-profit established to teach seed saving.
Why save seeds:
When you grow crops using your own saved seeds from your best plants for next year’s crops, the seeds begin to adapt to the growing conditions (temperature, moisture levels, pests, diseases, and so forth) that exist in your garden. This adaptation makes your garden stronger over time. Seeds that are used to grow crops year after year have the opportunity to adapt to incremental climate changes. As global temperatures change, these plants will have a better chance at survival and productivity. A single plant from a single seed can produce dozens or hundreds of seeds, increasing your seed stock exponentially. Sharing and exchanging seeds with other gardeners, community gardens or seed libraries helps to increase the diversity of everyone’s collections.
Harvesting and collecting seeds:
When saving seeds from heirloom vegetables, look for favorable characteristics such as; freeze and cold tolerance, heat tolerance, adaptability, winter hardiness, early maturation, vigor (strong germination, and growth), flavor, color, size, texture, etc. Also, look for desirable traits such as; vine or plant type, seed type, and specific disease resistance. Plan to be ready to harvest the seed as they mature.
– Collecting dry seed:
It’s easy to save seeds from plants that produce pods, husks, and other dry casings such as peas, beans, and flowers. The technique is called “dry processing” and is faster than collecting seed from fleshy, pulpy fruits such as tomatoes and cucumbers. Seeds that are dry-processed can be allowed to dry right on the plants unless there is wet weather in the forecast. Seeds often fall where they may, naturally, little by little. Often the pods will pop open when you are not around to collect the seed and it will be lost. Allow the seed pods to remain on the plant in the ground for as long as possible. Usually, the seed will not continue to mature after the pods are cut from the plant. To collect the seeds easily as the seeds begin to mature, secure paper bags over the seed heads and attach them to the stems of the plants. As they mature they will drop into the bags.
Separating the seeds from the chaff (dried pods and stems) is called threshing. Commercial threshing is done by multitasking machines that can harvest, thresh, and winnow the seeds all at once. For the home gardener, a bag, pillowcase, or small sack is all that’s necessary. Put the seeds into the bag, secure the ends, and roll it around, lightly crushing and breaking up the pods a bit. Be gentle so you don’t damage the seeds, but just loosen the chaff. For tinier seeds, you can just put them on a board and crush them with your fingers.
Then you will need to winnow the chaff from the seeds. Place the seeds in a bowl and gently blow on them to remove the lighter-weight chaff. Swirl the seeds around and continue blowing gently until most of the chaff is removed. Another option is to use a screen or sifter where the holes are smaller than the chaff to simply sift them apart.
– Collecting seeds from pulpy fruits:
Pick the best, most ripe (even to the point of over-ripe) tomato, pepper, cucumber, etc. Choosing an over-ripe veggie will ensure the seed has fully developed. If you wait for a frost or freeze before you pick the fruit or veggie, most of the seed will not be developed enough to be viable next year.
Cut open the fruit and scoop out the seeds or for small fruits like cherry tomatoes, simply squeeze the seeds out into a glass jar. Add a little water and label the jar with the seed variety. The seeds usually are surrounded by a gel that inhibits germination. Leave for two to five days to begin fermenting. This will break down the seed coat while killing off many of the harmful bacteria and fungi lurking on the seeds. Swirl the contents in the jar every day.
When the pulp floats to the top, the seeds are ready for cleaning. Most of the seeds will have sunk to the bottom. Carefully skim off the pulp then tip the liquid and seeds into a strainer. Wash the seeds under running water, using the back of a wooden spoon to carefully remove any remaining material stuck to the seeds. Spread the seeds onto a paper towel to remove most of the water, then transfer them to a non-stick surface such as a dinner plate. Dry the seeds in a warm place out of direct sunlight. It will take two to three weeks for the seeds to completely dry out.
Make sure you label the seeds with their name and the date they were collected immediately after you have finished harvesting each variety. Excellent record-keeping is your best friend when it comes to seed-saving. It’s amazing how easy it is to mix up seed varieties!
How long do seeds last?
If you keep your seeds in a cool dry place, your seeds can last for years. These things are seed killers: excess moisture, excess heat, light, and rodents. Some seeds last easily for years. Others only last one year before the germination rate goes down.
Here is a chart from the Chicago Botanic Gardens on longevity in vegetable seeds as well as one from Iowa State University extension.
Seeds that have passed their prime for producing viable plants can be used to scatter as a cover crop, for bird seed, for eating, or for cooking (as in herb seeds).
2 Easy Ways to Have More Flowers Next Year
A fun guide on how to grow more flowers, easily!
The two methods include:
1. Sowing mature seeds
– Remove seed pods from spent and dried flowers.
– Break apart seed pod to release mature seeds.
– Scatter seeds and stir them into the soil surface.
2. Replanting new starts
– Locate new seedlings starting from established perennials.
– Carefully dig out these seedlings.
– Replant in a new location and water thoroughly.
How to make plants grow more flowers?
Someone somewhere has certainly declared “The more flowers, the better”. This is a sentiment I share with that “someone, somewhere”. I have two assignments for you if you’d like to set yourself up quickly and easily to have more flowers in your garden next year.
Your first assignment is to go stand in the part of your garden that has wildflower-y plants. You’ll notice two things. The first thing is that there are lots of spent flowers and seed heads that need to be deadheaded. Everything from rudbeckia to dill to penstemon has mature seed heads. You can always collect these seeds and put them in little envelopes to save for spring or you can take my lazy way out and snip off the seed head and fling it in the general direction you’d like it to grow next year.
The second thing you will see is that flowering plants always seem to migrate to the edge of the garden bed and need some encouragement to move to the middle and back of the bed. Keep flinging seeds knowing that some of them will germinate right where they fall…so fling them merrily for…
More flowers!
Your second assignment is to find a spring or early summer bloomer and stand in front of it. A Columbine or Penstemon, Agastache, and Echinacea are good possibilities. Often right at the feet of these now-finished beauties are dozens of little plants or even seedlings that have germinated in the past month and are growing next year’s plants. I take my hori-hori knife and gently dig or carve out (we have lots of clay soil) a nice plug of soil that keeps the baby plant’s roots intact and put it where I’d like more plants. If the plant is young and you didn’t disturb the roots much, there won’t be transplant shock…just a new perennial that will bloom next year.
In conclusion, whether you are flinging seeds or digging up plant plugs, you’ve saved yourself a lot of time and fussing with seed starting trays under lights and you’ve tricked Mother Nature into letting those perennials bloom next year. New plants, more flowers – easy, quick, and free. That’s my kind of gardening.
People also ask:
- What are some tips for digging up and re-establishing plants in my garden?
Make sure that the plant that you are going to dig up is well-watered and healthy. Dig the new hole twice the width of the transplant and not any deeper than the rootball. Dig around the base of the plant outside of the roots area. Keep the root ball intact. - How and when do I transplant seedlings?
Anytime after the seedlings have developed their second set of true leaves. - How do I save and store flower seeds?
Wait until the flowers have finished blooming and the seed pods have turned brown and dry. Lay seed pods on paper towels to make sure they are thoroughly dry. You can store the pods whole or remove the seeds from the pods. Store harvested seeds that are well-dried in a cool place in a sealed glass jar. A small desiccant packet can help eliminate any moisture in the jar. Individual seed species can be stored in envelopes. Label and date the envelopes holding the seeds. Plan to use within 1-2 years. - What are the dos and don’ts of deadheading flowers?
Deadheading is the process of removing spent or faded flowers from the plant. The plant begins putting its energy into producing seeds after the blooms fade. To keep the plant’s energy directed towards blooming more flowers, remove the faded ones. Don’t just remove the flower top, remove the entire stem back to the live stem.
5 Easy Tips for Successfully Planting Grass Seed
by Sam Doll
Now that fall is nearly upon us, it’s time to start thinking about planting grass seed! Don’t know what you are doing? Don’t worry. We are here to help.
Here are our 5 tips for successfully planting grass seed this season:
1. The Season Matters
While some warm-weather grasses, like bermudagrass, should be planted in early summer, most grasses need mild weather to successfully germinate and survive. Freezes and harsh heat can kill off your baby grass before it has a chance to become established. Late Spring and early Fall, when the soil temperature is between 50 to 80 degrees, is the best time to plant most grass seeds.
2. Find the Right Seed
Find the grass that will suit your lifestyle and location. Some mixes, like our Green Manure and Cool Season Cover Crop, are great for restoring the soil nutrients in your soil. Some, like our Colorado Supreme Turf Grass Mix, are better for heavy foot traffic. Native and drought-tolerant grasses are great for creating a sustainable and low-maintenance landscape. Make sure to consider your soil type, climate, amount of sun, and intended use when picking a grass mix.
We have a wide variety of grass mixes that will suit all your needs.
3. Prepare Your Soil
Once you’ve chosen your site, use a shovel or a sod cutter to remove the existing plants and grass from the area. Remove any debris and rocks you see, till the soil, and fill in any low spots. You want your soil to be broken into pebble-sized particles.
Rake the site to even out the soil and remove small debris. Be careful when bringing in new topsoil to make sure it doesn’t contain unwanted weed seeds.
Optional: You can send a soil sample to your local extension office to have it tested to see if you need any soil amendments. You can find extension offices near you with the help of this tool from GardeningKnowHow.com.
As for pH, you generally want to keep the soil between 6.0 and 7.0.
4. Seed and Fertilize
Once your site is prepped, it’s time for planting your grass seed! Using a drop spreader or a broadcast spreader, spread half the seed lengthwise over your site, then use the other half and spread crosswise over your site. A recommended seeding rate will be listed on the seed tag.
Feeding with starter (weak) fertilizer the same day as you spread seed will provide proper nutrients for early growth and establishment. Make sure the site stays moist, but not soggy, through germination.
5. Maintenance
Different mixes require different maintenance. Generally, once grass reaches 5-6 inches (for turf type), it is recommended to cut it to encourage even growth. Water and fertilize as needed.
We hope these tips will make planting grass seed a breeze for you! If you still have questions or need any other advice, please don’t hesitate to contact us.
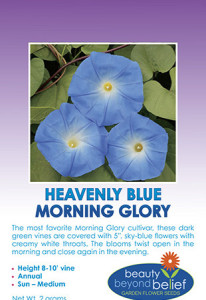
A Trio of Morning Glories to Welcome Spring
The Morning Glory
By Engrid Winslow
Morning Glories are one of the easiest annuals to start from seed. In some areas, they will re-seed from last year’s dropped seed and some varieties may even be perennial in mild climates. After an overnight soak in water, plant the seeds about 1/2 inch deep and then stand back and watch!
Best started in fertile soil with adequate moisture during germination and early growth, morning glories can produce vines up to 15 feet long and will clamber over gazebos, fences and trellises with their twining limbs. Some gardeners even grow them up a downspout and along a roofline or up into the limbs of a tall tree. They can be so vigorous as to choke out other plants nearby and can be vigorous re-seeders which grow best in average soil and full sun.
They are called “morning glory” because they bloom early in the day and the petals deflate and fall off in the evening. The Morning Glory was first cultivated in China for its medicinal uses, due to the laxative properties of its seeds. It was introduced to the Japanese in the 9th century, and they were the first to cultivate it as an ornamental flower. The Japanese have led the world in developing varieties and the colors range from blue and pink to red, purple, lavender, white and even brown. The flowers are attractive to hummingbirds, butterflies, and bees.
Here is a trio of Morning Glories:
Heavenly Blue Morning Glory
(also called Clarke’s Heavenly Blue) blooms with 5-inch flowers all summer and is an heirloom variety dating back to the 1920s. It is a lovely blue with a white center. These are one of the most easily recognized and popular of all morning glory varieties and can be up to 12 feet long. The foliage is an attractive heart shape.
Grandpa Ott’s Morning Glory
bears velvety deep-purple flowers with red stars at their center. This self-sowing annual was originally grown by Grandpa Ott, a Bavarian immigrant, who lived on a 40-acre farm in St. Lucas, Iowa and was preserved by the family in conjunction with the Seed Savers Exchange. This one can climb to 15 feet tall if given support to grow on. Grandpa Ott’s grows very quickly, spreads easily and looks stunning. It will also adapt to part shade.

Moonflower
Although also called “morning glory” start to bloom in the late afternoon and close in the morning light. If the day is overcast or cool and cloudy they may stay open for a longer period. Moonflower is fragrant enough to perfume the air within 6 feet of the blossoms and loved by hummingbirds and night moths, including the large Sphinx Moth. The blooms are 5-6 inches across and the vines can grow up to 20 feet. They are native to tropical and subtropical regions of the New World, from northern Argentina north to Mexico and Florida.
Our 5 Most Popular Pollinator Seed Mixes
Save the Pollinators
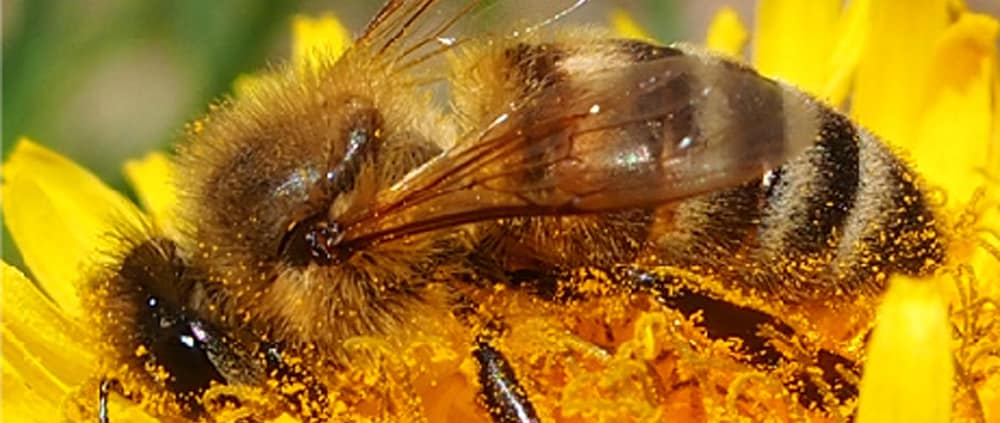
Pollinators are the magic ingredient that makes our natural world work. They fuel lifecycles of entire ecosystems and are found everywhere flowering plants are. Humans are also incredibly dependent on pollinators. Pollinators come in all shapes and sizes. Honeybees, native bees, bumblebees, butterflies, birds, bats, and other wild critters are all incredibly important pollinators!
Unfortunately, we are losing our pollinators at an alarming rate. Insect pollinators are being hit especially hard. Habitat loss, exposure to pesticides, lack of food, and diseases are all leading factors in the decline of these species. We should all be concerned. One-third of our food, from coffee to strawberries, are dependent on pollinators to produce. We need these animals just as much as they need us.
We take our favorite wildflower seeds and blend them into pollinator seed mixes specially formulated to help create habitat and forage for the pollinators in your backyard. We make sure to use fresh, high quality, open-pollinated, GMO-free seeds because you deserve to have a successful, healthy, and fun planting experience. Our mixes are all seed with none of the fillers that you might find in other mixes because we believe you should get what you’re paying for.
Here are our 5 most popular pollinator seed mixes:
1. Monarch Rescue Mix
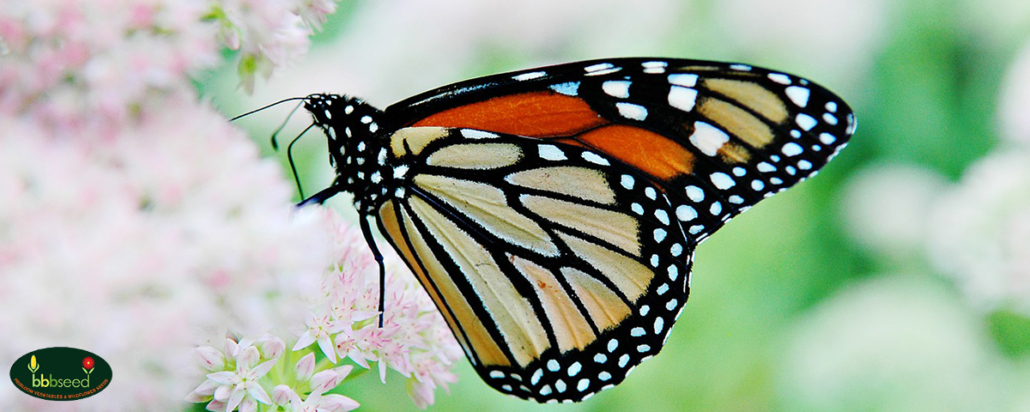
Monarch Butterflies are some of the most wonderful and strange animals on Earth. Every year, they migrate between the high mountains of Mexico through most of North America. This migration takes four separate generations of butterflies to complete and covers a massive amount of territory. To complete this migration, the Monarchs need plenty of forage and nesting sites along the way.
However, habitat and forage loss has been devastating for the Monarch Butterfly. Milkweed plants are the only plants that Monarch Butterflies will lay their eggs on. These plants have been wiped out of large portions of the United States due to concerns about allergies and their designation as a “weed”. Habitat loss and pesticide use have also reduced the amount of good forage for Monarchs, weakening them too much to complete their journey.
This is why we created our Monarch Rescue Wildflower Mix. This mix of Milkweeds and wildflowers is a Monarch Butterfly booster shot. This mix is full of nutrition and habitat for the butterflies passing through your area. Make your garden a Monarch paradise with this mix.
Find it here.
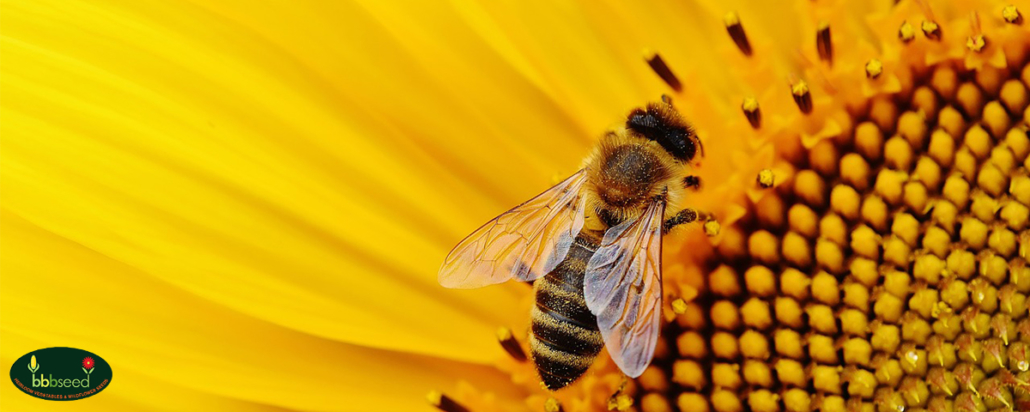
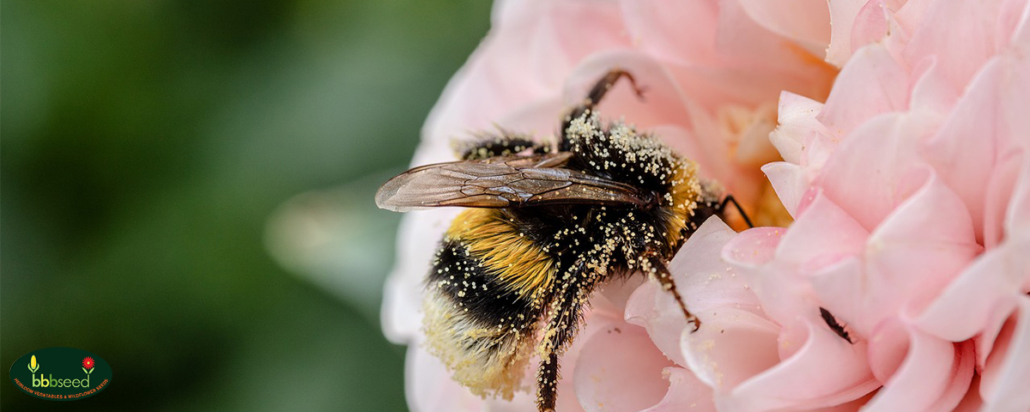
2. Bee Rescue Mix
Bees have had a rough time of late. The incredible loss of honey bees in recent years has been well documented and reported on. However, the crisis is much deeper than just honey bees. North America has over 4,000 species of native bees. Most native bees are solitary and are extremely effective pollinators. However, these little bees are little understood and are in even more danger than honey bees because they don’t have beekeepers watching out for them!
This colorful combination of wildflowers will provide nectar and pollen for full season support of native and introduced bee species. Our “Bee Rescue” Wildflower mix has been designed to include the absolute best species to support the health and vitality for a wide range of native pollinators as well and the honey bee. This is one of our best selling pollinator seed mixes! These are the flowers that attract the most pollinators and will do well over the most growing zones.
Get our Bee Rescue Wildflower Mix here!
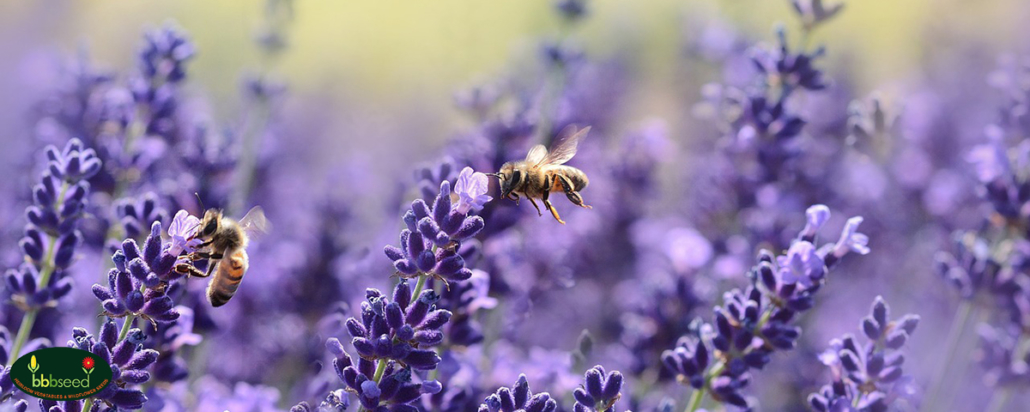
3. Bumblebee Bonanza Mix
Bumblebee Bonanza Mix is a colorful mix that includes specially selected species of nectar and pollen-rich, annual and perennial flowers that are known to attract bumblebees and other pollinators and will provide quality forage from early spring until late fall.
This mixture of annuals and perennials is designed to provide early, mid and late season blooms to support the life cycle of the bumblebee as well as other pollinators. These flower species will do well in a variety of growing conditions and are recommended for a maintained, home-garden planting or commercial landscape. The best time for planting this mix is in the early spring, early summer and late fall.
Buy the Bumblebee Bonanza Mix Here!
4. Hummingbird Mix
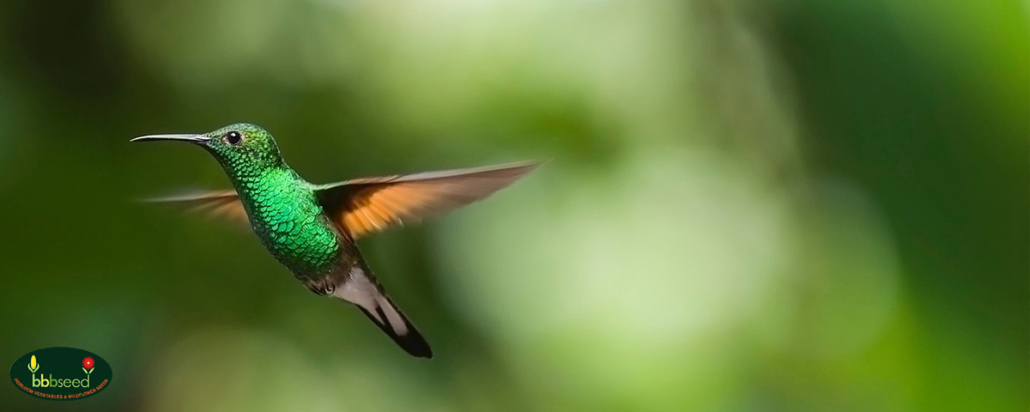
This mix has been created with the vibrantly colored, nectar-rich species that hummingbirds love. Consisting of mostly perennials, this mix will continue to provide support to hummingbirds and other important pollinators. A few annuals are included to provide color the first year while the perennials become established and will bloom the second year.
Get it here and start enjoying your hummingbird garden!
5. Honey Source Mix
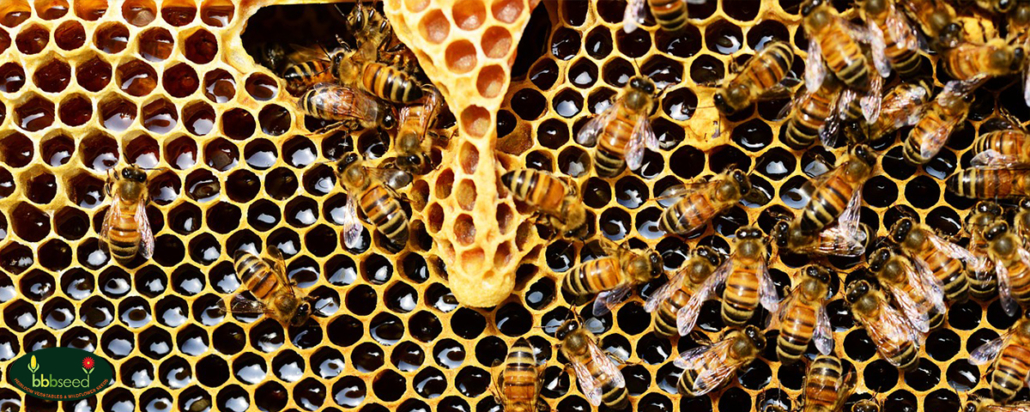
A long blooming mix of beautiful, nectar and pollen-rich annuals and perennials put together just for our Honey Bee friends. Plant this mix to provide vital nutrition for the European Honey Bees. These hard-working pollinators are necessary for our agricultural production and are a major contributor to our food supply. Lack of native nectar and pollen sources between crop rotations can cause stress and starvation that contribute to colony collapse.
Our Honey Source Wildflower Mix can be found here!
One Last Thing
At BBB Seed, we are deeply committed to providing the highest quality grass, wildflower, and grass seeds to empower our customers to get out and grow! This list of our 5 most popular pollinator seed mixes is intended to be a useful resource for you to see what products our customers and we are enjoying right now!
We also are incredibly concerned about providing sustainable and environmentally conscious products to you. We source seeds that are non-genetically engineered, tested, and grown sustainably. We hope these products will help you enjoy nature and learn about this wonderful world in the garden. We strongly encourage you to visit our Pollinator Action Page or The Bee Conservancy to learn about the pollinators that make our natural world possible and learn more about what you can do to help them. Thank you!
Grow. Enjoy. Share…the beauty and the bounty!
