Don’t Pass On Peas

Tips for Successfully Growing Peas

by Heather Stone
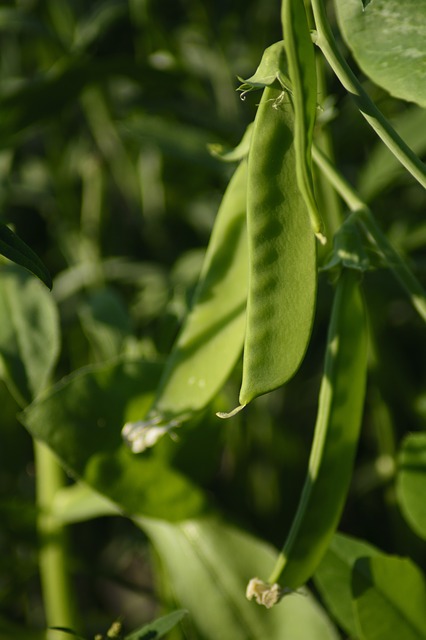
Green Sugar Snap peas on the vine.

Image by Reginal from Pixabay

Plant Green Peas for one of the first crops in the spring. As soon as you can stick your finger into the soil you can plant peas. Whether you plant shelling, snap or snow peas this early crop loves the cool weather of spring, producing tender pods that are hard to resist.  More often than not, they are eaten straight off the vine right there in the garden, very few making it to the kitchen. Every year I always wish I would have planted more.

Planting green peas should happen as soon as the soil can be worked, about 4-6 weeks before your average last frost date. For best germination, soil temperatures should be around 50 degrees F. Do be cautious of excess moisture. You don’t want your seeds sitting in wet soil.

Before planting, soak your seeds overnight. This will help speed germination. Plant seeds about 1” deep and 2-3” apart in well-loosened soil in a sunny spot in your garden. Peas will also do well in part shade. Give your peas a trellis, as most peas need something to climb on. Keep the area moist until the seeds germinate, on average between 7-14 days.

Green Peas are an easy crop to grow. Keep the plants moist, especially once they start producing. When they reach 8-12” tall mulch your vines well to keep the soil cool and help retain moisture. Peas grow best in temperatures below 70 degrees F, so plant your seeds early. Once temperatures reach 80 degrees the vines tend to stop producing.  

When the peas begin to ripen, harvest daily and be sure to use two hands to pick. Use one hand to hold the vine and the other to pick the peas. This way you will avoid damaging the tender vines. For the crispiest peas, pick in the morning after the dew has dried. Peas will last about 5 days in the refrigerator (if they make it there) and any extra freeze well.

Like all legumes, peas fix nitrogen in the soil that other plants can use. When your peas are done for the season, remove the vines but leave the roots in the ground. Plant a nitrogen-loving plant in the area that can benefit from the extra nitrogen in the soil.

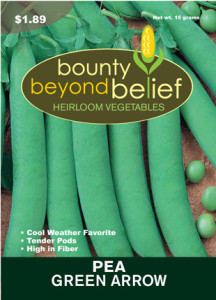
Don’t wait! Get out in the garden and plant some peas today! Try one of our tried and true varieties such as Sugar Ann, Oregon Sugar Pod or Green Arrow.
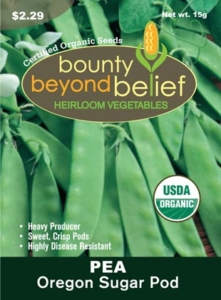
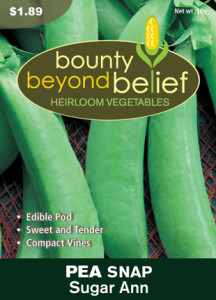
Packet of Oregon Sugar Pod Pea seeds. Pea, Sugar Ann Pea, Green Arrow


Go Beyond Iceberg Lettuce

Different Types of Lettuce and How to Use Them

By Engrid Winslow

There are many different types of lettuce and perhaps you were wondering how to use these various types. Here’s a general description of some different lettuce varieties which will take you beyond the traditional iceberg lettuce followed by a quick tutorial on growing them.

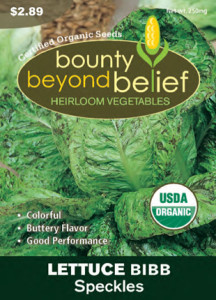
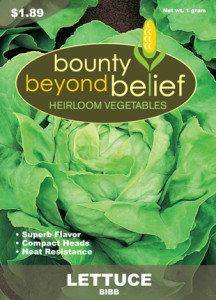
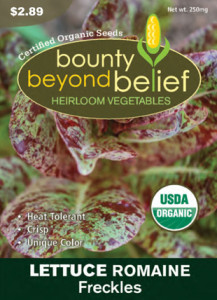
Lettuce, Organic Bibb, Speckles Lettuce, Summer Bibb

  • Butterhead

    /Buttercrunch/Bibb/Boston – Any of the “B” lettuces form loose heads of large, softly ruffled leaves that range in color from bright yellow-green to magenta-tipped emerald. They have a slight crunch when you bite in, followed by a melt-in-your-mouth silkiness. The leaves are buttery and slightly sweet. They are perfect for use in sandwiches or salads and the largest outer leaves are great as a wrap for various fillings because of their pliability.


  • Romaine

    forms a long, straight head of crisp leaves with a prominent center stem. They come in the familiar crisp, tall, green heads to shorter and fluffier versions that range from dark red to lime green with red speckles. They can be harvested when young for a tender and delicate salad. They have a mild crunch from the center stem when mature and are the classic lettuce for a traditional Caesar salad since it’s a perfect contrast to the creamy, cheesy dressing. It can also be used as a scoop for dips and holds up on a burger.

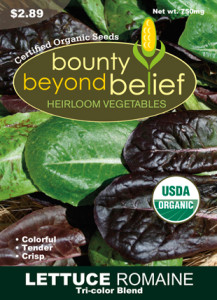
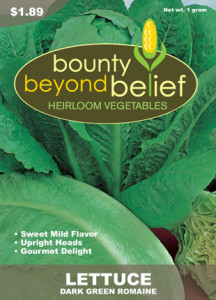
Picture of the Tri-color Romaine lettuce package. Lettuce, Organic Romaine, Freckles Lettuce, Dark Green Romaine


  • Oakleaf

    lettuce has unusually shaped leaves that form a loose cluster with tender, crunchy stems. The flavors can range from sweet when young to slightly bitter if left longer to mature. They come in gorgeous colors of green but the dark red is a version high in anthocyanin

with a powerful punch of antioxidants. They are great in salads and when mixed with other lettuce types or on a sandwich.


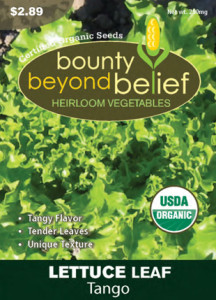
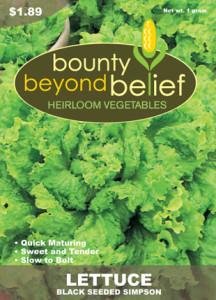
  • With loose bunches of leaves connected at the base, the loose-leaf lettuces are known as bunching or cutting lettuces. They are typically mild, savory to sweet and crisp-tender. They are generally more heat-tolerant and some, such as Black Seeded Simpson, are slower to bolt than other types of lettuces.

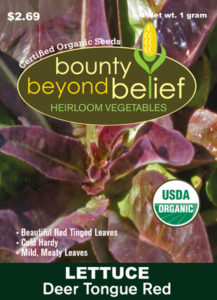
Front of the Red Deer Tongue Lettuce seed packet.

Lettuce, Organic Leaf, Tango


Lettuce, Black Seeded Simpson


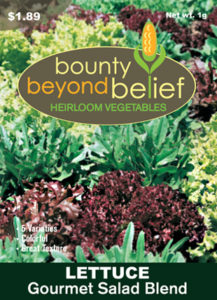
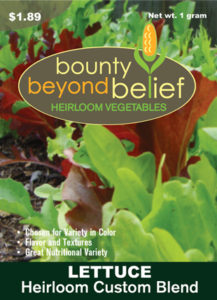
One of the best ways to use these lettuces is to combine them with other greens, such as arugula or baby kale in a salad and, lucky you, we have two blends that will do that for you.
Picture of a packet of Gourmet Salad Lettuce seeds.Picture of a packet of Heirloom Lettuce Blend seeds.

All lettuce varieties are very easily started from seed, both indoors and out in your vegetable beds. They take about one week to germinate, depending on temperatures. If starting indoors, be sure the seeds stay moist by spraying them gently from a spray bottle or bottom-watering until they germinate and the seedlings are strong enough to handle overhead watering. A plastic dome over the tray really helps with this.

The seeds are tiny and should be planted with a very light (no more than ¼ inch) layer of soil.  If planted outdoors in cooler temperatures and cold soil they may take longer to germinate. Thin the seedlings to 3 inches apart and pull every other one for early salads leaving the rest (now 6” apart) to reach full size. Successive sowings every 3 weeks in short rows provide these tasty plants throughout the season. All lettuces will bolt and then become bitter in the heat and long days of summer, but you can delay this by mulching to keep the soil cool.

So go beyond iceberg lettuce and let us know how you like these other varieties!

FIVE REASONS TO RELISH THE RADISH

Different Types of Radishes and How to Use Them

By Engrid Winslow

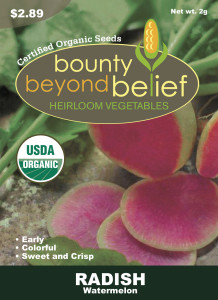
  1. There are two primary types of radish – one hails from Asia (the most common ones are daikon which is large and white) but there is also the large sweet and remarkably pink Watermelon Radish.Photo of Watermelon Radish packet.

Watermelon radishes are delicious raw and can be substituted for a cracker in crudités and they also make a crunchy addition to stir-fries. They are often used in Chinese cuisines with fish dishes because it adds sweetness and counteracts fishy tastes.

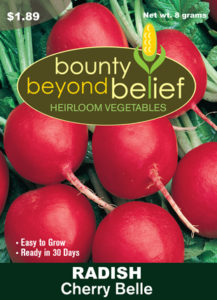
2. Radishes are very easy to grow and can be sown in the garden as soon as the ground can be worked. Cover the seeds with about 2 inches of soil and thin them out once they sprout. They germinate quickly and all at once so, to keep them from getting overly large and fibrous, they should be sown multiple times throughout the season.  They grow well in cooler temperatures which makes them a good spring and fall crop. One that is delicious cooked or raw is Cherry Bell.

Front of the Cherry Belle Radish seed packet.


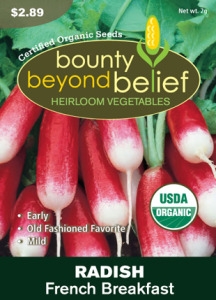
3. Do you want a taste of France in your radish? French Breakfast Radish is an heirloom variety dating back to the 1800s. It gets its name from a popular and delicious breakfast enjoyed throughout France. Want to give it a try? Just thinly slice the radishes lengthwise, grab a hunk of baguette and smear it with some sweet butter, top with radish slices and a sprinkle of salt. Close your eyes, take a bite and then say “Ooh, La, La!”Relish the radish with this french breakfast type.


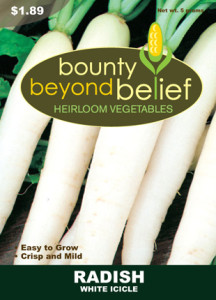
4. The White Icicle radish resembles small Japanese daikon but is sweet and tender. It is another heirloom variety that is easy to grow but is very versatile because it can tolerate warmer temperatures and grow well into summer weather.

Relish the radish with this White Icicle Radish.


Relish the radish in this recipe:

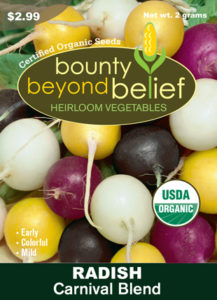
APPLE RADISH SALADRelish the radish with the Carnival Radish Blend.

2 Granny Smith Apples

1 bunch sliced or julienned White Icicle radishes

Dressing:

Juice from one orange (lemon is also good here)

2 tsp honey

1 tsp Dijon mustard

1 tsp fresh thyme leaves

¼ cup olive oil

Salt and ground black pepper to taste


5. Want to really add some color to your fish or other tacos? Shred this colorful blend from the Carnival Blend radishes and pile it on with a squeeze of lime and some chipotle mayo. All radishes are good in slaw but this one gets bonus points for the interesting colors.


Or relish the radish in this version of a vegetarian radish taco where the radish is the star of the dish. This version is modified from superstar chef Anita Lo’s book Solo.

ROASTED AND PICKLED RADISH TACOS                

Serves 4

3-4 bunches of radishes washed (reserve the tops and 10 of the smallest radishes for later)

1/3 cup olive oil

4 smallish tomatillos, husk removed, cut in half

3-4 small jalapenos, cut lengthwise with stems and seeds removed

1 tsp cumin

One small onion, sliced thinly

3 garlic cloves, smashed (reserve 1 for later use)

6 Tbs cider vinegar

2/3 cup water, divided in half

¼ tsp cinnamon

Juice of one lime

1 Tbs chopped cilantro

8-12 corn or flour tortillas

¾ cup queso fresco, crumbled

Extra lime wedges for serving with tacos

Preheat oven to 400 degrees. Place all but the reserved radishes, their tops, the olive oil, the tomatillo and half the jalapeno in a bowl and toss with salt and pepper. Remove the tomatillo and jalapeno and place them on one side of a roasting pan. Add the cumin and cinnamon to the bowl of radishes and toss again. Place radish mixture (except for the tops) on the other side of the roasting pan. Bake until softened, about 12-15 minutes.

Make radish pickles: Cut the reserved radishes in thin rounds and place them in a bowl with the rest of the jalapenos and the onion. In a small sauté pan bring the vinegar, 1/3 cup water and two of the smashed garlic cloves to a boil and pour over radish rounds. Set aside to cool to room temperature and drain.

When the roasting vegetables are soft, remove the tomatillo and jalapeno and blend with an immersion blender. Add tops of radishes to roasting pan and roast until wilted. Place the remaining third garlic clove in with the tomatillo, cilantro, lime juice, 1/3 cup water and blend to make a salsa.

Serve roasted radishes in warm tortillas garnished with salsa, pickled radishes and queso fresco. Serve with lime wedg1es.

https://bbbseed.com/product-category/store/heirloom-vegetable-seeds/


TOP 10 VEGETABLES FOR PART SHADE

Gardening Tips

by Heather StoneShady Gardens Plants

Do you have a garden that gets more shade than sun, but you still want to grow vegetables? No problem! There are plenty of vegetables that will grow well with partial sun. We’ve put together a list for you of vegetables that perform well with 6 hours or less of direct sunlight. Read on to find out how to keep yourself in fresh veggies all season by making the most of your shady spots.


Partial Shade Plants

  1. Mesclun Greens (Needs 3 hours of sun)

Mesclun is simply a “mix” of various greens. All of them doing well with just a few hours of sunlight. They germinate quick and reach maturity in a matter of weeks. Try our Mesclun Mix– a great combo of arugula, mustard greens and Chinese cabbage.

  1. Arugula 3-4 hours

This delicious peppery green is one of the easy-to-grow vegetables for shade and loves the cool weather. Plant in early spring about 1 month before the last frost and continue sowing every 20-30 days until mid-summer. Grows well in containers. Try our Wild Arugula!

  1. Lettuce 3-4 hours

Lettuce is a cool-season green that isn’t a big fan of direct sun. The varieties are endless and so easy to grow in the ground or in containers. Plant in early spring and again every two weeks for a continuous supply of lettuce. Make sure to provide shade for the late spring and summer plantings.

  1. Spinach 3-4 hours

The nutrient-packed leaves of spinach love cool weather and protection from the full sun. Spinach is an easy to grow and productive crop that every garden should find a spot for. Like lettuce and arugula plant in early spring and sow successively every 2 weeks for a continuous supply of spinach. Try our Bloomsdale or Nobel Giant varieties.

  1. Kale 3-4 hours

A powerhouse of nutrition, kale is easy to grow in the ground or in containers. The young tender leaves of kale are great in salads. The mature leaves are excellent sauteed or added to soups and stews. Start in early spring and continue you to sow for fresh greens all season long.

  1. Swiss Chard 4-5 hours

Easy to grow from seed and looks fabulous all season long Swiss Chard’s beautiful leaves are great shady gardens plants that are easily planted in the perennial garden as well as the vegetable patch.

  1. Radish 4-5 hours

There’s nothing like a fresh spring radish. They are quick to germinate, fast to mature and come in a rainbow of colors. We carry 5 different varieties! No garden should be without radishes.

  1. Peas 4-5 hours

Other partial shade plants are Peas, in either the garden or the container. They are pretty quick to germinate and prefer cool weather. So get them in the ground early and you’ll have peas to snack on in early summer.

  1. Beets 4-5 hours

Beets can thrive along the shady edge of the garden. The roots might not get quite as big, but if you keep them well watered they will produce excellent tasting greens and sweet, tender roots.

  1. Bok Choy 4 hours

This cool-season vegetable germinates in a few days and can be eaten raw or cooked.  Bok Choy is an excellent addition to the part shade garden.


Let’s Celebrate Pumpkins!

Year of the Pumpkin

by Heather Stone

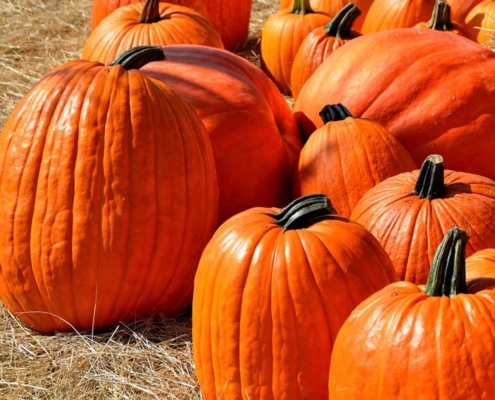
Year of the Pumpkin. Fall orange pumpkins sitting on straw.

photo courtesy of Pexels – 160662

When you hear the word pumpkin what comes to mind first? Is it autumn, Halloween, jack-o-lanterns, pumpkin pie or pumpkin spice latte perhaps. There are so many things to love about pumpkins. They are fun to grow and fun to eat. This year the National Garden Bureau named 2019 The Year of the Pumpkin, so let’s celebrate the pumpkin. https://ngb.org/year-of-the-Pumpkin/

Pumpkins are part of the Cucurbitaceae family along with squash, cucumbers and melons. There are a wide selection of pumpkin varieties ranging in size from as little as 4 oz to some weighing over several thousand pounds. Just this past fall a New Hampshire man grew the largest pumpkin on record weighing in at 2,528 lbs. Now, that would make a lot of pumpkin pie.

Pumpkins are easy to grow. They can be started indoors or directly sown into warm (70 degrees), rich, fertile soil when all danger of frost has passed. Sow the seed into “hills” of 4-6 seeds and thin to the 2 strongest plants per hill. Make sure to give your pumpkins plenty of room to grow to get the best fruit. Depending on the variety you are growing, pumpkins need anywhere from 12 sq.ft. to 48 sq.ft. of growing space. Water your pumpkin seedlings regularly and fertilize throughout the growing season. When it comes time to harvest make sure to cut the pumpkins from the vine when the skin is hard and leave a 3” piece of the stem attached to decrease the chances of decay.
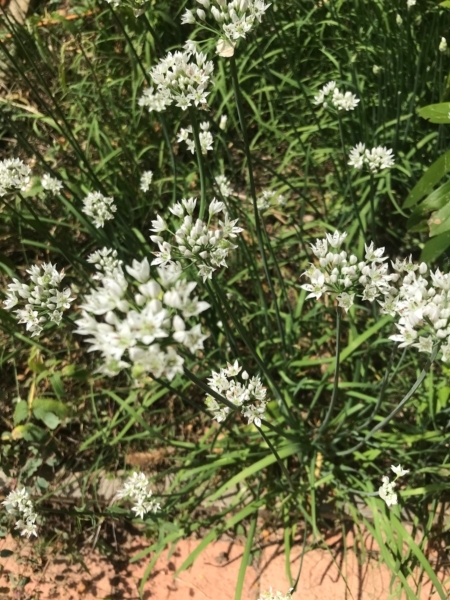
Photo of a jar of pumpkin soup on a green placemat with wooden spoon.

Photo courtesy of Pixabay -congerdesign


Pumpkins aren’t just fun to grow. They are fun to eat too! We use pumpkins to make soups, breads and pies. We put pumpkin in smoothies, yogurt and even pancakes. Check out some of these great pumpkin recipes. But the flesh of the pumpkin isn’t the only tasty part. Roasted pumpkin seeds make a great snack too. Pumpkin flesh is rich in vitamin A, potassium and beta carotene. The seeds are a good source of protein and are rich in minerals such as manganese, phosphorous, magnesium and zinc. Not all pumpkins are created equal. There are pumpkins for carving and decorating and there are pumpkins for eating.  Look for pie pumpkins and cooking pumpkins for the best taste. Two of my favorites are Cinderella and Long Island Cheese, but there are countless choices.
So what kind of pumpkin will you grow this year?


Decorating with Wildflowers

Wildflower Seeds

Summer is upon us and the wildflowers you planted are in full bloom and you have enough to spare, maybe, for a bouquet for your table!

Wildflowers are great candidates for cut flower arrangements.  Blooms can be freely cut without fear of ruining the manicured look of the typical flower bed and arrangements can be just as free and wild as the components.  Make a big multicolored arrangement with a relaxed informal design that will really light up your room and give the feel of walking through a meadow.  The components of your design will necessarily reflect the seasonal bloom times.  Try arranging flowers along with interesting textures of grasses, ferns or branches from bushes or trees.  Seed pods and even bird’s nests make great accents.  The small delicate size of most wildflowers allows for groupings of similar flowers together with open spaces.  Look for colors that complement each other and a variety of textures.
 

Favorite flowers for bouquets are Bachelor’s Buttons in shades of pink and blue, spikey Purple Coneflower, fluffy towers of lavender Lupine, tall stalks of blue Larkspur, and the striking yellows of Black-eyed Susan and Gloriosa Daisy.  Think about including the multicolored warm hues of the Firewheel Gaillardia, native annual Sunflowers, and Plains Coreopsis.  Tall stalks of the brilliant white Shasta Daisy, the fuzzy spikes of Liatris or tall stalks of ferny-leafed Cosmos add eye-catching interest. Poppies, although brilliantly tempting, don’t have a very long vase life.  Their delicate petals tend to fall off with just a touch. Use the bobbing, white clusters of annual Baby’s Breath to fill in the spaces and unite all components.  Lastly, add a few tall grass tassels reminiscent of meadows and forest glens.

When decorating with wildflowers, plan to cut your flowers for arranging in the morning hours.  This is when the plants have taken up the most water and are not in the work mode of photosynthesis.  Choose the freshest flowers, even choosing some that are just beginning to open up, to ensure that your arrangements will last as long as possible.  Take a clean bucket, filled with 6” or so of warm water, out to the wildflower patch and cut the stems as long as possible on an angle with very sharp scissors or knife.  This will ensure that the flower stem will be able to take up water and nutrients for the longest time possible.  Any vessel can serve as a vase or container for displaying your bouquet.  Be creative, even a basket will work with a smaller cup or bowl inside that can hold water.  Keep in mind the scent of your flowers.  Some of those beautiful flowers in the wild may have a very strong or unpleasant scent when in a closed room.  Wildflowers with milky sap, such as poppies, release the sap into the water and stop the water uptake of the other flowers.  The stems can be sealed shut by holding a lit match to the cut end of each stem until the stem turns black.

Even a ‘wild’ flower arrangement starts with some basic arranging steps.

First, start with the base layer.  This can be some general greenery or the flowers that will provide the bulk of the contents.  Make sure to remove all vegetation that will be below the water level which would rot and increase the bacteria in the water and decrease the life of the arrangement.

Next, add the other flower choices to your display, working with one flower species at a time, placing them at differing angles and directions. Add the larger focal flowers in odd numbers, such as 1 very tall central flower or 3 or 5 large eye-catchers.

Then, balance and fill holes with baby’s breath or greenery and last, add in odd numbers, the tall textural grasses or seed pods. Check the water level and add water daily with 1 tsp of household bleach per quart to inhibit bacteria growth.  You can revive wilted flowers by re-cutting the stem end and placing in hot water.

Create an arrangement for any room of the house or porch or even your favorite reading nook.  Remember to balance the size of the arrangement with the room and use, putting low arrangements on the dining table.  Don’t be afraid to bring the bounty of your own wildflower meadow into your home and feel free to upload a picture of your arrangement to our website!


7 Stocking Stuffers Under $25 for Gardeners

Gifts for Gardners

by Sam Doll

Here are 7 must-have tools to keep in mind if you are looking for great gardening gifts for your favorite gardener.

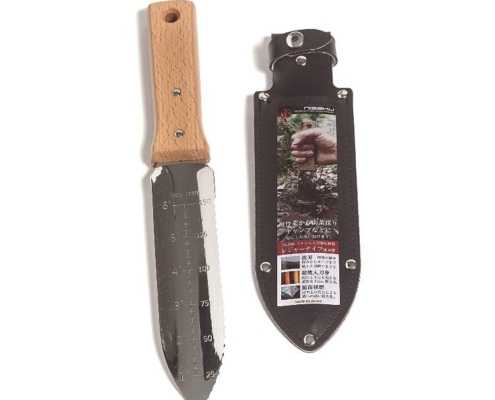
–Nisaku Japanese Hori Hori Garden Knife for 24.95 on amazon.com

Photo of a garden knife and sheath to give as a garden gift.

photo courtesy of Nisaku


These compact garden tools feature serrated and straight edges that are perfect for a variety of garden needs, including cutting back weeds at the root. They also feature handy measuring marks, so you know the exact depth when planting and sowing. Get this handy little tool for the gardener who can appreciate a tool that can get the job done!


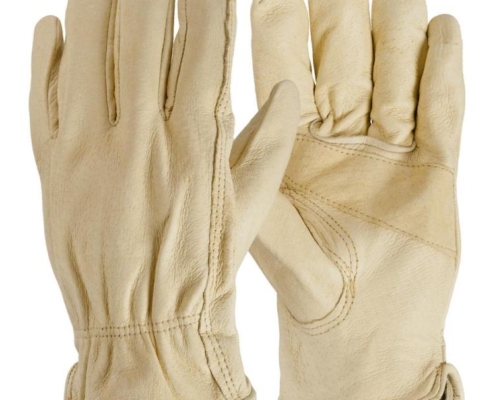
Photo of tan leather gardening gloves.

Photo courtesy of Home Depot

–Leather Gardening Gloves for $10.98 at homedepot.com


Upgrade your favorite gardener’s glove game with some stylish and comfortable leather gloves. The more your green thumb works in these, the better they’ll fit! These pigskin gloves from Home Depot will last for years.


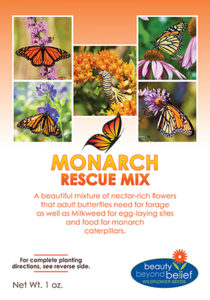
–Wildflower Seed Mixes from $5.79 at bbbseed.com

The front of the Monarch Rescue seed mix.

Wildflower mixes can provide season-long color and important forage for bees and butterflies. BBB Seed has a variety of regional and specialty wildflower seed mixes that will make any gardener, novice or expert, smile all season long!


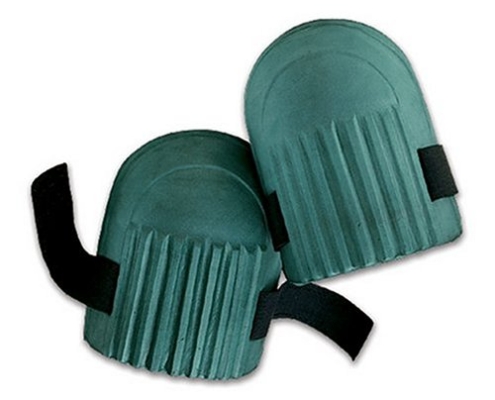
–Gardening Knee Pads for $8.49 at amazon.com

Photo of green strap-on gardeners knee pads.

Photo courtesy of Fiskar’s


Save your friends knees with these waterproof and forgiving knee pads. These knee pads are designed specifically for getting your hands dirty in the backyard.


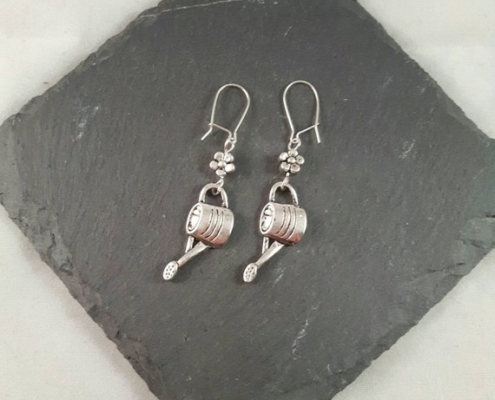
–Garden-Themed Jewelry from Etsy

Silver watering can earrings.

Photo courtesy of Glitterartijewellry.


A little costume jewelry can show a personal touch for someone you care about! We love how many cute, garden themed charms, pendants and earrings you can find on Etsy.


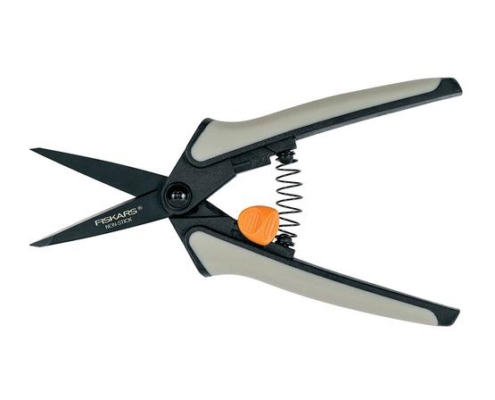
Garden Snips from $11.99 at Fiskars

Photo of gardener's snips.

Photo Courtesy of Fiskar’s

You can always use new snips. Especially nice ones from Fiskars.


–A BBB Seed Gift Card

Gift Card from BBB Seed.


Still don’t know what to get someone? Don’t worry about it. Just get them a gift card to bbbseed.com and they can get whatever they want!

Tools to be a Better Gardener

Garden Tools

by Sandy Swegel Photo of the bbbseed $25 gift card.

Today I’ve been thinking about how the garden tools I use have made me a better gardener. I have spent a lot of money over the years on tools that break or tools that seemed clever but end up unused. I garden at least twenty hours a week for other people, so my tools need to be effective and efficient as well as durable. 

(Keep these in mind if you are trying to figure out a good holiday or birthday gift for a gardener friend or relative!  One of these and a great gift card for seeds is sure to be useful and welcome!)

My Must-Have Garden Tools include:


Good Hand Pruners naturally. Felco pruners are great if you can afford them. A sharp edge is the more important feature of hand pruners and you need a high-end pruner that does have cheapo soft metal that dulls the first time you use it. I like Felcos, but Corona and Fiskars both have high-end pruners that are good. For my use, I need a replaceable blade because no matter how much you sharpen, at some point you need a fresh blade. I have hand pruners in two sizes…a smaller pair for perennial maintenance because they are lighter weight and a larger pair for shrubs, roses and trees. Last year Costco had a great deal on a generic version of Felcos in a two-pack.

A Soil Knife. The original name of this tool was a hori-hori knife and my first one came right from Japan. Now I like the bright orange soil knife from AM Leonard. The plastic resin handle holds up better than wood and the bright orange is easier to find when I lose it. You have to be careful of the extremely sharp edges (one side serrated and one side flat) but this is my combo trowel, weed digger, shovel, a garden tool for dividing perennials, etc.
Fiskars Power Gear Bypass Lopper 15 or 18 inches. I love the Fiskars PowerGear line. They really do give you more power per effort than any other lopper. I use the smaller loppers the most because they are lightweight and because they fit more easily between dense branches.

Black and Decker cordless (18V) sweeper. They don’t call this a vac because it’s not strong enough for big piles of leaves…but it’s the perfect quick cleanup at the end of working in the garden whether you’re “sweeping” a path or blowing debris lightly off of rock mulch. I also use it to sweep my kitchen floor.

Milwaukee Sawzall pruning blade. This vicious jagged blade is one of the secret weapons that let me do the work of your average 20-year-old male landscaper. Perfect for cutting trees or cutting right in the soil through old roots.

Mini Shovel and Mini Mattock Pickaxe. OK, laugh if you want, my friends do….but then they go out and get these mini tools when they see how much work they let me do. They are the same tools the aforementioned 20-year olds use in full-sized versions, but lightweight enough for me to use without ruining my rotator cuff, a common gardening injury. I use both while kneeling in the soil up close and personal to my job. Don’t get a wimpy camping pick or a garden pick made of thin metal…get the real thing in the hardware store.

Those tools and a colorful TubTrug or two, (those bendable colorful garden buckets that are worth every nickel) and you’ll find yourself able to work faster and stronger in the garden without trying too hard.

Fall Blooming Plants for Pollinators

Fall Blooming Plants for Pollinators

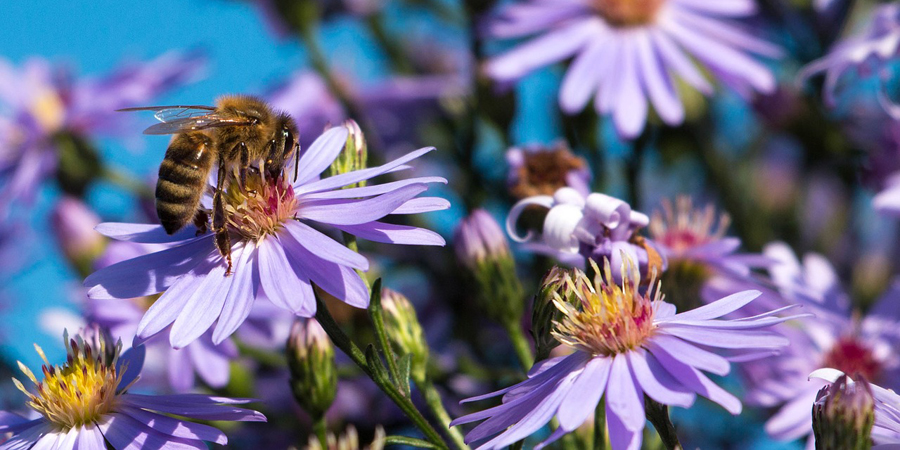
Photo of a honey bee on a purple aster bloom.

photo courtesy of pixabay – 1735564

Wildflower Seeds

by Heather Stone

As the days become shorter and the nights cooler and the season shifts from summer to fall many of us can find our gardens to be a little lackluster. Not much is blooming after the abundance of color throughout the spring and summer.

This is where fall blooming plants come in. There are many native and non-native plants that bloom in late summer and fall that can keep your garden filled with color.

But, autumn-blooming plants don’t just benefit the gardener. As the bountiful blossoms of spring and summer decrease, it is important to provide pollinators with plenty of food sources as they begin to prepare for winter. Hummingbirds and butterflies will need plenty to eat before heading south and the honeybees and native bees need to gather as much pollen and nectar as possible to create winter food stores.

Here is a list of fall blooming plants that make great additions to the garden.

Fall Blooming Perennials:

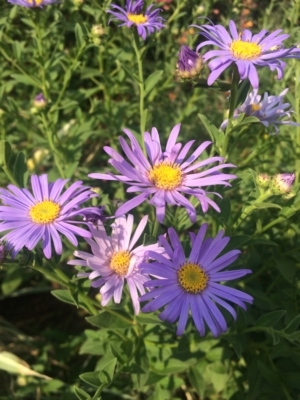
  1. Asters-there are various species of asters native to different parts of North America. Most plants have flowers in shades of white, blue, purple and pink. They are drought tolerant, grow to around 2-3’ and do best in full sun to part shade. Attractive to various species of bees, including bumblebees and leafcutter bees. Some species help fuel monarch butterfly migration.Photo of purple aster blooms.
  2. Black-Eyed Susan-the brilliant yellow flowers of Black-eyed Susan are long blooming and loved by both bees and birds.
  3. Blanket Flower– this tough plant needs little water, blooms a long time and it’s orange, red and yellow flowers are beautiful. Of course, the pollinators love it too!

Want to know more about the pollinators that visit blanket flower? Check out this link: https://bit.ly/2BvEmj4

  1. Liatris-the tall pinkish-purple flower spikes bloom late summer and attract a plethora of bees and butterflies.
  2. Goldenrod– when the goldenrod starts to bloom I know fall is just around the corner. There are a variety of native goldenrods all being easy to grow, drought tolerant and excellent bee plants.
  3. Purple Coneflower– this long-lived perennial comes to life in late summer with a striking display of large purple flowers and attracts a variety of bees and butterflies.Photo of honey bee on purple coneflower bloom.
  4. Garlic Chives- when the white star-shaped flowers of garlic chives start to bloom they are abuzz with so many bees you won’t believe your eyes. They are a late season nectar source for butterflies too.

Photo of the white blooms of garlic chive.

Fall Blooming Annuals:

These flowers have been working hard in the garden all summer and will continue to bloom until the first frost strikes.

  1. Cosmos– these drought-tolerant flowers come in shades of pink, white and red and will begin to bloom in late summer and last well into fall.
  2. Cleome-with ample nectar stores, the pink to lavender flowers of this western native are loved by bees and butterflies.
  3. Calendula-this long-time garden favorite loves the cooler weather of fall and its flowers of yellow, orange and gold add a great splash of color to the garden.
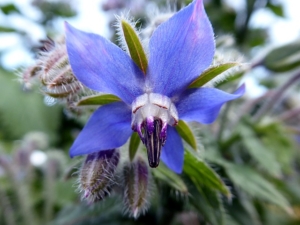
  4. Borage– the long-blooming, blue, star-shaped flowers are adored by the bees.

    Single blue Borage bloom.

    Photo courtesy of Pixabay virginie-I

Check out this blog post about borage- https://bit.ly/2MtXMKv

  1. Mexican Sunflower– loved by bees, butterflies and hummingbirds the vibrant orange blooms will last until frost.
  2. Marigolds– this garden staple will add a blast of color to your border and looks great in pots.
  3. Sunflowers-nothing is more cheerful than a sunflower and the bees, butterflies and birds adore them.
  4. Zinnias– with blooms in every color of the rainbow these long-lasting flowers are a great addition to the garden and the bees love them.
  5. Pincushion Flower– both the perennial and annual varieties of the pincushion flower produce a sweet fragrance that attracts butterflies, bees and hummingbirds. Regular deadheading of the spent blossoms will keep these beauties blooming all season long.

My 10 Favorite Drought Tolerant Plants

Plants For a Tight Water Budget

By Heather Stone

 Here in Colorado, our summers are often hot and dry and there’s often some sort of “watering restrictions” in place. Those two words can bring just about any gardener to their knees.  But, you can still have a garden filled with beautiful flowers even if you’re on a tight water budget.  In my Zone 5 garden, these plants perform well whether we have a temporary or longer-term drought situation.


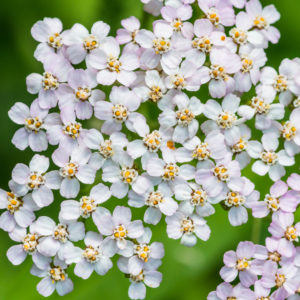
Yarrow- Achillea

This long-blooming perennial comes in a rainbow of colors (pink, white, red, orange and yellow).  The colorful blossoms are attractive to butterflies and make a good cut flower. Yarrow is hardy in Zones 3-9 and is best planted in full sun.


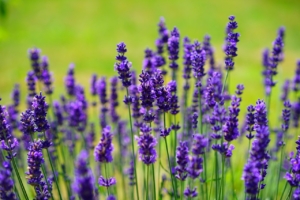
Lavender- Lavandula

Purple Lavender blossoms.

Photo courtesy of Hans / pixabay

This native Mediterranean plant is accustomed to dry, sunny conditions.  The beautiful purple flower spikes look great on their own or in the border.  Lavender is prized for its fragrance and medicinal properties and is attractive to many pollinators. Hardy in Zones 5-10.


Sedum –Sedum spp.

There are many varieties of sedum from upright to low growing groundcovers.  They are sure to fit in just about any garden design from the back of the border to the rock garden. These easy to grow plants need little care once established.  Hardy in Zones 3-9.

Coneflower –Echinacea spp.

These beautiful, long blooming perennials are not only drought tolerant but will thrive in almost any soil and often self-sow. The blossoms are attractive to both butterflies and birds. The goldfinches love to eat the seed. There are several species and many varieties of this rugged plant with flowers in many shapes, sizes and colors. Don’t leave this trusty plant out of the drought-tolerant garden.Purple Coneflower bloom with bumble bee.

Soapwort- Saponaria spp.

A profusion of pink blooms covers this low growing plant for weeks in the spring attracting many bees and butterflies. This hardy evergreen plant grows best in Zones 3-8.  Soapwort was used by the early settlers to make soap.

Mexican Hat- Ratibida columnifera

This sun-loving wildflower is both long-lived and long blooming and thrives in dry conditions.  The dark red blossoms look great planted in masses, attracting many bees and butterflies. Mexican hat is both a great cut and dried flower. Hardy in Zones 4-8.

Veronica spp.

Covered in blue, purple, white or pink flowers for weeks in spring or mid-summer this long blooming perennial comes in a variety of sizes. Clump forming varieties look great along the edge of the garden or the groundcovers really make a statement in the spring when covered in a mass of blue flowers. Plant in full sun. Hardy to Zones 3-9.

Beardtongues- Penstemon spp.

Native to most parts of North America Penstemons are a great choice for the dry garden. Their flowers are attractive to many pollinators and come in a variety of colors, sizes, shapes and bloom times. Some excellent choices for the dry garden include Penstemon Mexicali, P. pinifolius, P. eatonii,  P. strictus.

Catmint- Nepeta spp.

Catmint is a show stopper, blooming from early spring to early fall. The fragrant blue-purple flowers are attractive to many pollinators. This nearly indestructible plant is both deer and rabbit resistant and thrives in full sun in Zones 4-9.